

Mutter
-
Posts
439 -
Joined
-
Last visited
Content Type
Profiles
Forums
Gallery
Articles
Everything posted by Mutter
-
 Nice job, Tyler! The armor looks great. I'm not sure if you're going for Centurion but if you are, you'll need to remove the paint from your crotch snaps and rivet and to paint the TD screws black. Good luck!
 -
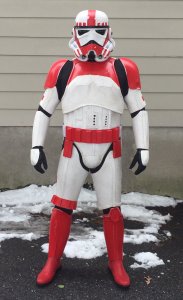
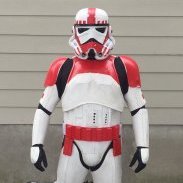
Nice looking boots. Unfortunately, there should be no seams on the front. This has seems going down the front center and across the inside toe
-
You're off to a good start! I'd suggest trimming/sanding the edge of the cover strip near your elbow end otherwise it may snag on something.
-
TK-51878 Requesting ANH Hero Centurion Status [RT][154]
Mutter replied to Dark CMF's topic in Request Centurion Status
Wow, very nice build! This should be an easy one! -
TK-21215 Requesting ANH Stunt Centurion Status [TM][153]
Mutter replied to StarWarsTom's topic in Request Centurion Status
Great job! Good luck! -
Nice!
-
ChicagoMP's NE Build or "Here Goes Nothing"
Mutter replied to ChicagoMP's topic in Build Threads Requireing Maintenance
Smart move on using E6000! It saved my on numerous occasions too. Bone is correct on cover strip sizes. The back of the legs can be 20mm if you don't need the extra width, they just need to be consistent. -
ChicagoMP's NE Build or "Here Goes Nothing"
Mutter replied to ChicagoMP's topic in Build Threads Requireing Maintenance
Hi Chris, I had the same issue with certain parts of my NE kit. Some pieces were thick as hell, other pieces were really thin. For the cover strips, score the line 3-4 times and then snap it. Use a pair of lexan scissors to cut the armor that will be covered by cover strips and then sand/file the edge, it's easier. And the first few cuts are ALWAYS the hardest! The cover strips should go to the edge of the raised ridge. I'm not too sure why you did it this way. Look at other build threads to see how others have done it. Hope this helps, Greg -
I used Chicago screws. You can get them in a hardware store or online -----------
-
TK 72627 Requesting HWT EIB Status (FX) [APPROVED] 2nd
Mutter replied to Templar726's topic in Request Expert Infantry Status
Great job on the pack! -
TK-61972 Requesting ANH Hero EIB [NE] Status[445]
Mutter replied to Haribon72's topic in Request Expert Infantry Status
Congrats! -
Congratulations! Those side shims look frickin' great! I'm looking forward to congratulate you again on your Centurion achievement.
-
Greg Babon 13058 Centurion Letter
-
TK-13058 Requesting ANH Stunt Centurion Status [NE][151]
Mutter replied to Mutter's topic in Request Centurion Status
Thanks, guys and thank you, Steve! I'm really excited to be here! Damn, Steve, you have good eyes. I thought that was 1/4" elastic but I just remeasured it and it's 3/8" or 9 mm. It will be replaced this weekend. With regards to the rivets, knowing that they weren't correct has been gnawing at me all day. After a few troops and my second costume is finished, I'll move them to their correct position. Thank you, Germain, for pointing that out to me. It's these little details that make the difference. -
TK-13058 Requesting ANH Stunt Centurion Status [NE][151]
Mutter replied to Mutter's topic in Request Centurion Status
Wow, I really appreciate the compliments! Thank you! I probably will make that pic a trading card. When I went into my action shot, my photographer friend started laughing. That was me going, "Wha? What are you laughing at". Germain, I see what you're pointing out. The top rivets could be moved up about 10-15mm. If need be, I can move the rivets and fill in the holes but I'd like to wait and see what the powers that be say first. -
That is so cool!
-
TK-13058 Requesting ANH Stunt EIB Status [NE][443]
Mutter replied to Mutter's topic in Request Expert Infantry Status
Thanks, everyone! It was fun getting the armor to this level. Just one more to go........ -
Name: Greg Babon TKID: 13058 Forum Name: Mutter Garrison: Empire City Garrison, Hudson Valley Squad Mandatory Information • Armor = NE • Helmet= NE • Blaster= DoopyDoos Optional • Height = 5’ 10†• Weight = 205 lbs. • Boots = Imperial • Canvas belt = Tkittel • Hand Plates = TK Bondservnt 2392 • Neck Seal = Darman • Holster = Darman EIB Request Thread: http://www.whitearmor.net/forum/topic/30232-tk-13058-requesting-anh-stunt-eib-status-ne443/ Full Body Front Back Left Right Action Armor Details Ab/Kidney Attachment Right Detail Left Detail Ab Plate Hand Plates Shoulder Bridges Thigh Pack Placement Knee Plate Drop Box Back Cod and Butt Plate Attachment Interior Strapping Kidney Plate Notch Wrist Side of Forearms Helmet Details Front Side - Left/Right Back Hovi Mic Tip Detail Lens Color S-trim Blaster Details Blaster - Right Blaster - Left Blaster - Rear Accessories Details Neck Seal Thermal Detonator - Back Holster Attachment
-
TK-61972 Requesting ANH Hero EIB [NE] Status[445]
Mutter replied to Haribon72's topic in Request Expert Infantry Status
Wow! Looks great! -
Hi John. This happens. Here's a thread someone asked about the same issue. http://www.whitearmor.net/forum/topic/29750-narrow-shoulder-bells-issue/ if you already haven't, create a build thread so we can watch your progress. Good luck with your build!
-
Congrats, Walter! As Germain says, Centurion or bust!
-
TK-13058 Requesting ANH Stunt EIB Status [NE][443]
Mutter replied to Mutter's topic in Request Expert Infantry Status
Thanks for the feedback, Steve! I appreciate the compliments and critiques. Yes, the center Ab button plate was trimmed a little too close Got distracted by the Superbowl. I've replaced it with a more appropriately trimmed plate. I've already moved the connections between the forearm and biceps so that should resolve that issue. I actually had no problems moving my arms. Go figure. I had trimmed the top shin return edges a little since the pics were taken. Mostly because the plastic was thin and snapped off, but they weren't stabbing me. I'll trim the thigh pack and forearms tonight as suggested. Regarding the return edge on the forearm, I assume there should not be any curve left on the outside edge, it should be a straight 90 degree transition? I planned on retaking all of the pictures for my Centurion application. Granted, I won't have the beautiful Florida sunshine as I did for my EIB pictures. -
Line up the pieces near the elbow. Trim the excess at the wrists. Do NOT cut the excess off at the elbows. This is a common uncertainty when building for the first time. I'd also recommend creating a build thread to post your progress. Just my 2 cents
-
TK-13058 Requesting ANH Stunt EIB Status [NE][443]
Mutter replied to Mutter's topic in Request Expert Infantry Status
Thanks for the input, guys. I'll wait for Steve before making any changes. -
TK-13058 Requesting ANH Stunt EIB Status [NE][443]
Mutter replied to Mutter's topic in Request Expert Infantry Status
Hey Tony. I appreciate your feedback. I'll be painting the center of the Hovi Mic tips tonight. As far as the left TD clip, I copied its placement based on the RS suit in the General Stormtrooper Reference gallery I can easily move it.
