gmrhodes13
-
Posts
31,206 -
Joined
-
Last visited
-
Days Won
1,069
Content Type
Profiles
Forums
Gallery
Articles
Everything posted by gmrhodes13
-

Ben Stoddard, 3D Printed ROTK Build Thread
gmrhodes13 replied to Benjamin Stoddard's topic in Rogue One Build Threads
Not sure if you have heard of this trick or not but if you go over with a very, very light mist coat before sanding it can show high and low spots. -
It's all in the prep work
-
Ben Stoddard, 3D Printed ROTK Build Thread
gmrhodes13 replied to Benjamin Stoddard's topic in Rogue One Build Threads
Hello and welcome aboard, looking forward to following your build, good luck. Make sure you check out the costume reference library "CRL" https://databank.501st.com/databank/Costuming:TK_rogue_one Also photo references can be found here https://www.whitearmor.net/forum/gallery/category/28-r1-tk-reference/ -
TK ANH Stunt by CloseTheBlastDoor
gmrhodes13 replied to CloseTheBlastDoor's topic in ANH Build Threads
Either is fine for biceps, albeit it's screen accurate to remove It's just the front of the forearms you have to remove that area and all return edge -
SublimeBW's Armor Master's (AM) ANH Stunt Kit - Build Thread
gmrhodes13 replied to SublimeBW's topic in ANH Build Threads
Looks good to me. DO's references -
SublimeBW's Armor Master's (AM) ANH Stunt Kit - Build Thread
gmrhodes13 replied to SublimeBW's topic in ANH Build Threads
Ear is a little thick at the top. Some great ear trimming threads: -
You have 501st TK access on the forum, for your legion profile detachment status you will need to contact your GML More info in this thread
-
TK-12953 - A Dave's Darkside Depot EIB AHN Stunt build
gmrhodes13 replied to jsilvius's topic in ANH Build Threads
Some reference material -
TK ANH Stunt by CloseTheBlastDoor
gmrhodes13 replied to CloseTheBlastDoor's topic in ANH Build Threads
I use 3 rotary tools, I hate changing the bits when I'm on a roll, I use a quick change cutting disc, debur/drill tool and sanding drum,. -
Tim’s first time build (RS Prop Masters ESB TK)
gmrhodes13 replied to TrickyT81's topic in ESB Build Threads
Normally I will double over the elastic and make the length 5mm shorter than what is needed, just so it has a little bit of pull, the further out your attachment points are the longer the elastic can stretch more. It's a bit of trial and error, I actually made some straps with several snaps attached in different places to use as a guide when doing commission builds, a bit easier to see what will work and you don't waste as many snaps. -
Tim’s first time build (RS Prop Masters ESB TK)
gmrhodes13 replied to TrickyT81's topic in ESB Build Threads
1. Just the right side 2. Strapping depends how much your sides overlap, you only want the sides to touch each other. 3. There are various different ways to make the tab/locking system, with the tabs tight against the insides of the armor it shouldn't allow any overlap. Here is "crickets" version. There have been numerous different ways to add some kind of locking system. -
TK ANH Stunt by CloseTheBlastDoor
gmrhodes13 replied to CloseTheBlastDoor's topic in ANH Build Threads
I think you may have the outter upside down, looks wider at the bottom, may just be your image though, and the curve seems to go outwards. Other side looks ok A small block of wood with sandpaper wrapped around can give a nice flat surface to straighten trim lines. I love using a dremel for trimming, much more control -
Legacy Fem, Version A Build
gmrhodes13 replied to Tilheyra's topic in Legacy Stormtrooper Build Threads
Looking good Brian, one thing when you glue your fillers is to try to keep the joins flat and as little a gap as possible, this will make using the ABS paste a lot easier, the less you have to apply the better the finish will be. Also in case I've not said it before, thin coats, allow to dry before adding another coat, if you add too thick you can get a lot of tiny air bubbles when it's drying which makes sanding and polishing a bit of a pain. Also if using scraps try to make sure there are no pen/pencil/marker marks on them as they can discolor the paste which makes life a little more difficult as you would have to try and paint to match. I'ts not impossible, I used waterbased arcylics on my TFU TK to get my U trim to match. -
Tim’s first time build (RS Prop Masters ESB TK)
gmrhodes13 replied to TrickyT81's topic in ESB Build Threads
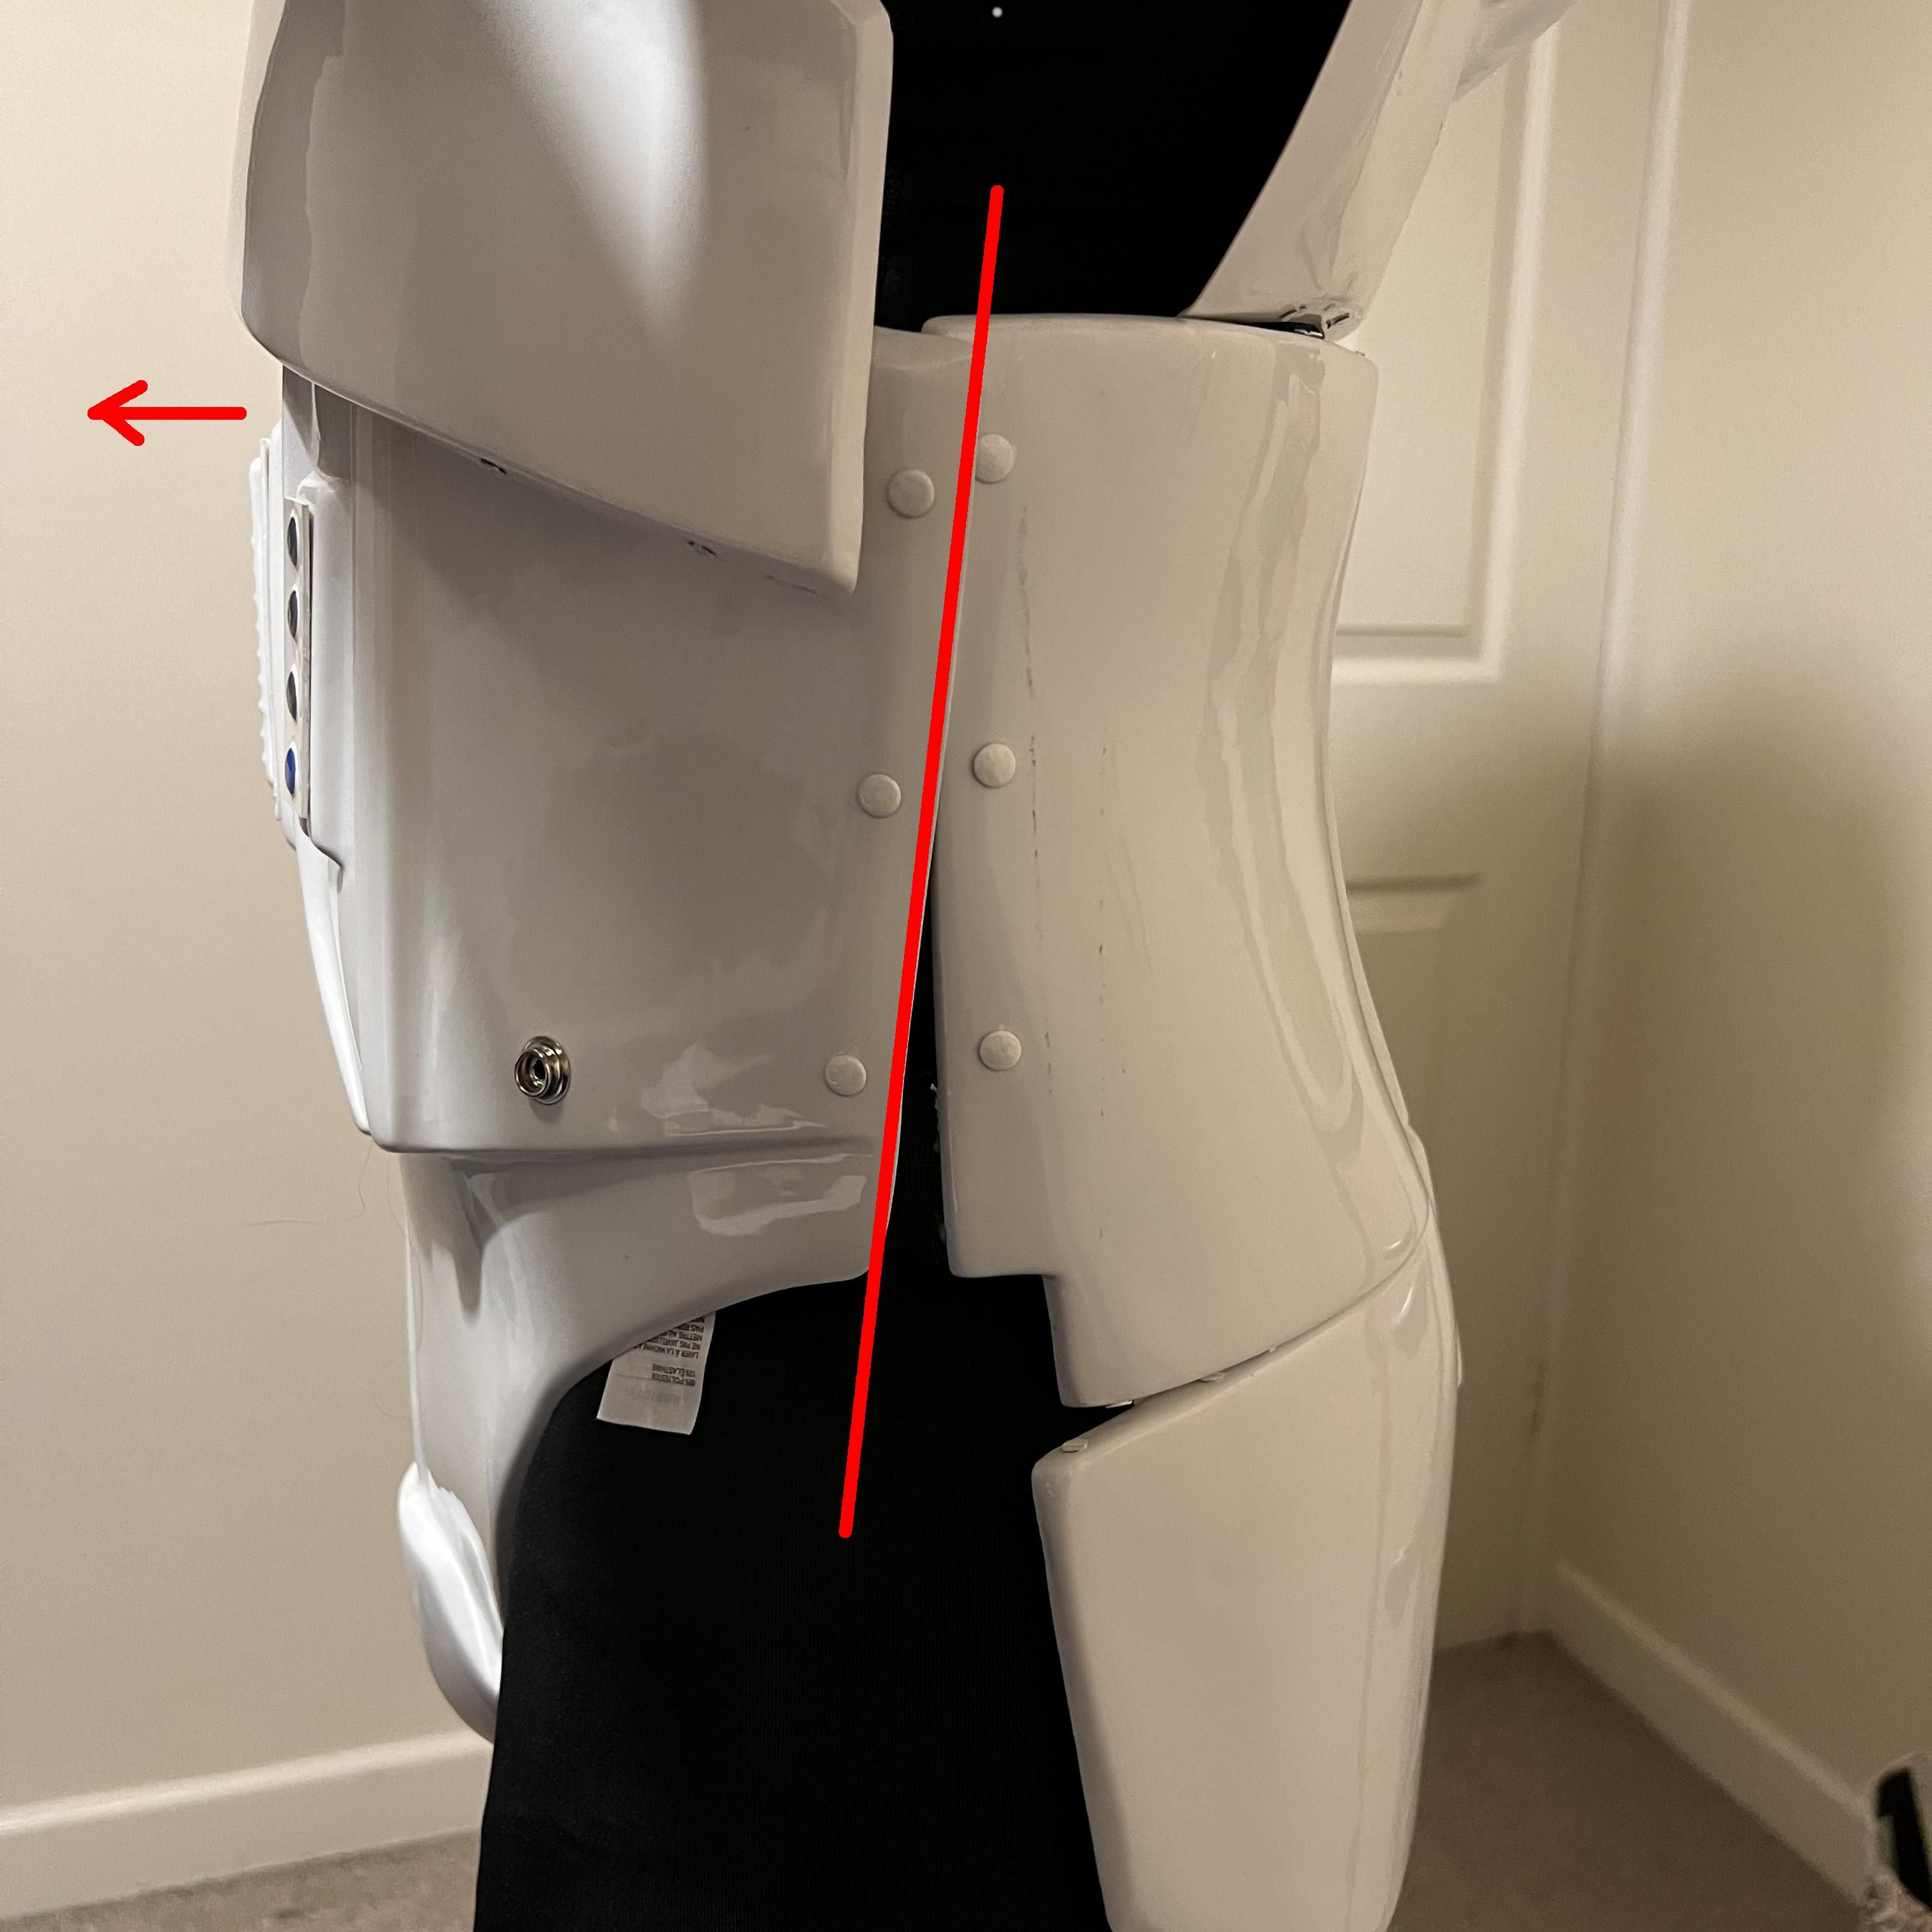
You really need it at the top of your ab plate, note on the side the angle of the abdomen compared to the kindey plate, hopefully with foam the sides will no longer be on an angle
-
Tim’s first time build (RS Prop Masters ESB TK)
gmrhodes13 replied to TrickyT81's topic in ESB Build Threads
I added a 2 inch piece of foam behind my ab, you either need something to push the ab forward or use a locking setup on the sides so the kidney can't go any further. Reference of a locking system, personally I would have it locking closer to the ends of the Ab/Kidney so the strips don't bend -
With permanent glue you could try a couple of tricks, soak in warm salty water, it's a bit like when you get glue on your hands the sweat can help to loosen the glue, or place the part in the freezer (if you have one larger enough) you can then bend slightly and the glue may crack and let go.
-
TK ANH Stunt by CloseTheBlastDoor
gmrhodes13 replied to CloseTheBlastDoor's topic in ANH Build Threads
FYI if you need to make any ABS paste acetone is used for that (some add between the bottom ridge on the thighs) -
TK ANH Stunt by CloseTheBlastDoor
gmrhodes13 replied to CloseTheBlastDoor's topic in ANH Build Threads
I left some return edges as I have pretty skinny arms and it helps to give the full appearance. I have noticed on the WTK kits there are a few more bumps and lumps in places, normally where they aren't really seen so I wouldn't worry too much. Scratches may be because of transport and not individually wrapped. Wait until you see the underneath of your forearms after a few years trooping, you'll see lots of scratches, you tend to rub on other armor or even your blaster (and younglings heads ) -
No acetone in mineral spirits.
-
TK ANH Stunt by CloseTheBlastDoor
gmrhodes13 replied to CloseTheBlastDoor's topic in ANH Build Threads
Or if you have a portable heater, I've used one of those in the past. Some makes of armor have their own way of matching pieces. Thumbprint is worn on the left, FYI some makes don't have a thumbprint, others have one on either side Try to keep to standard sizing of coverstrips: 15mm Forearms, biceps 20mm thighs front & back and front of shins 25mm rear of shins A nice WTF build to follow and here -
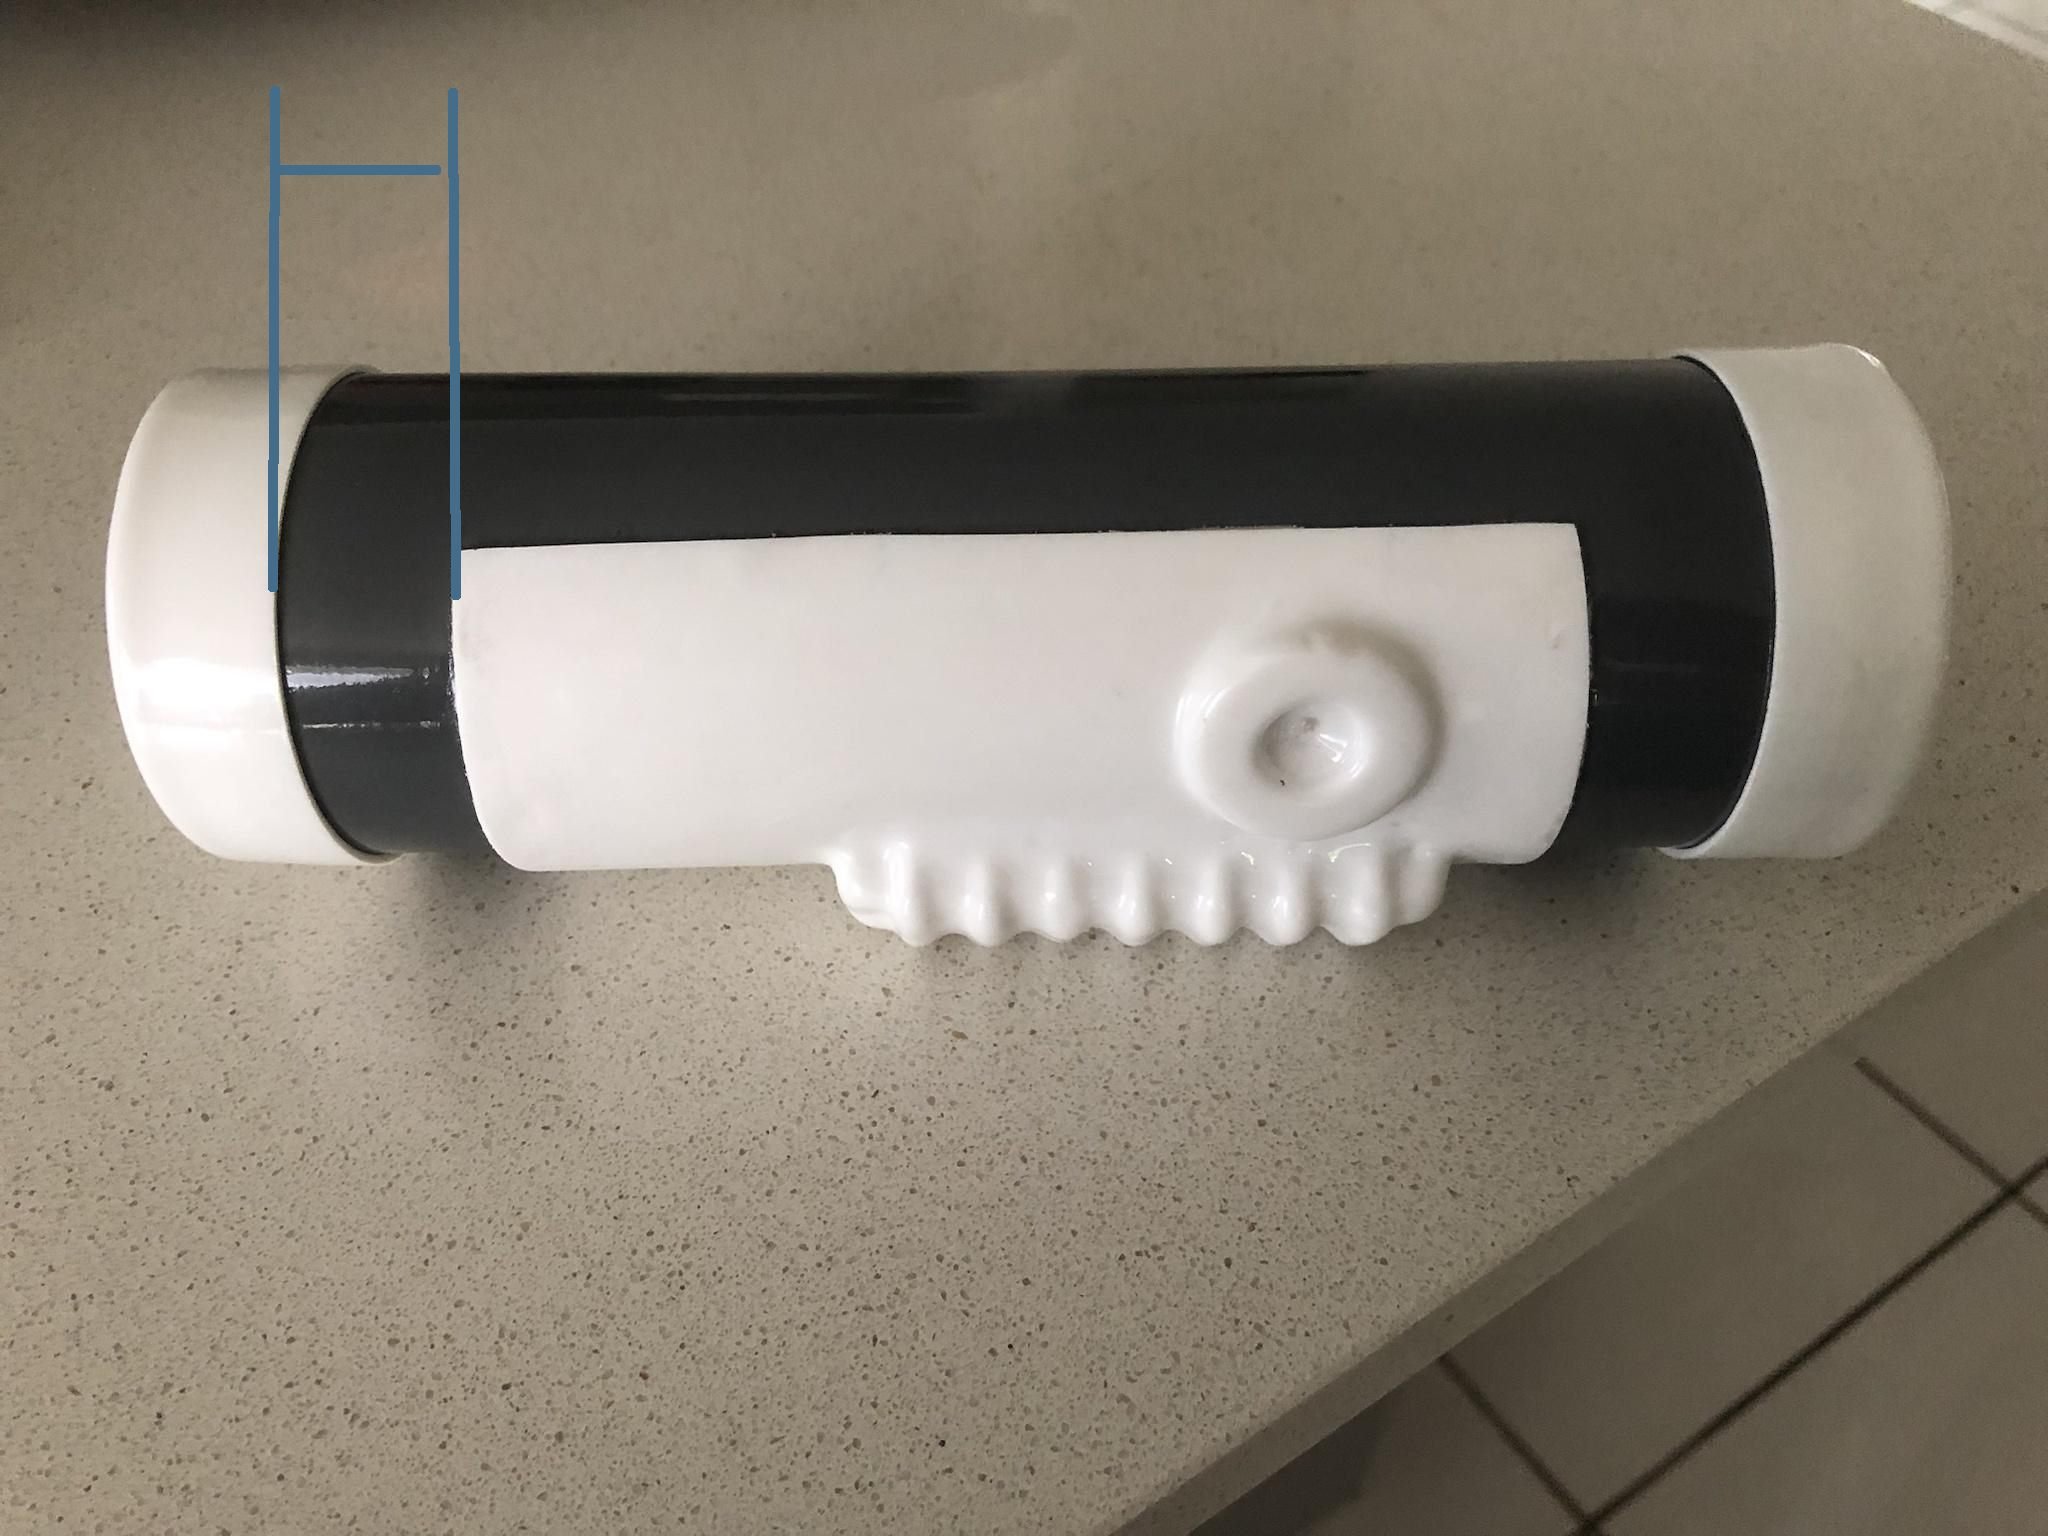
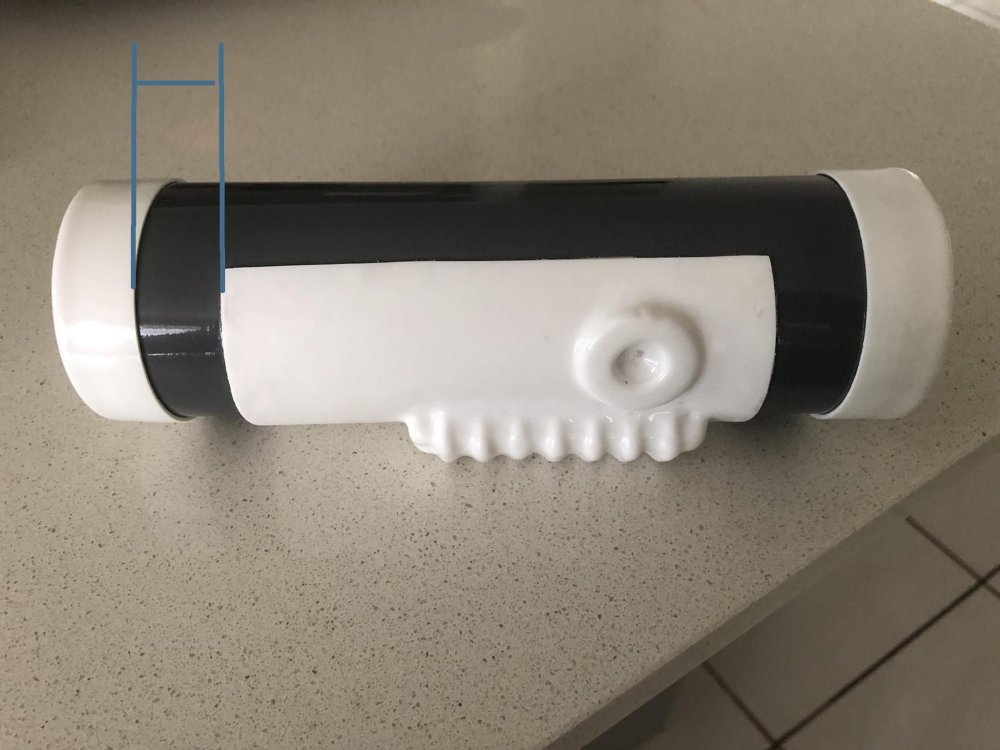
Looks like a slightly bigger gap between the end plates and control panel. A few of the makers use a smaller pipe than others which can make this gap appear larger. Note the 12mm gap mentioned in this reference

-
Tim’s first time build (RS Prop Masters ESB TK)
gmrhodes13 replied to TrickyT81's topic in ESB Build Threads
Good luck, hopefully you hear back soon -
Lidocaine's Captain Enoch Build Thread
gmrhodes13 replied to Lidocaine's topic in CPT Enoch Build Threads
I have not heard of any others.