gmrhodes13
-
Posts
31,206 -
Joined
-
Last visited
-
Days Won
1,069
Content Type
Profiles
Forums
Gallery
Articles
Everything posted by gmrhodes13
-
Some very nice metal weathering there
-
Looks like some of your image links aren't working, I'm only seeing one image
-
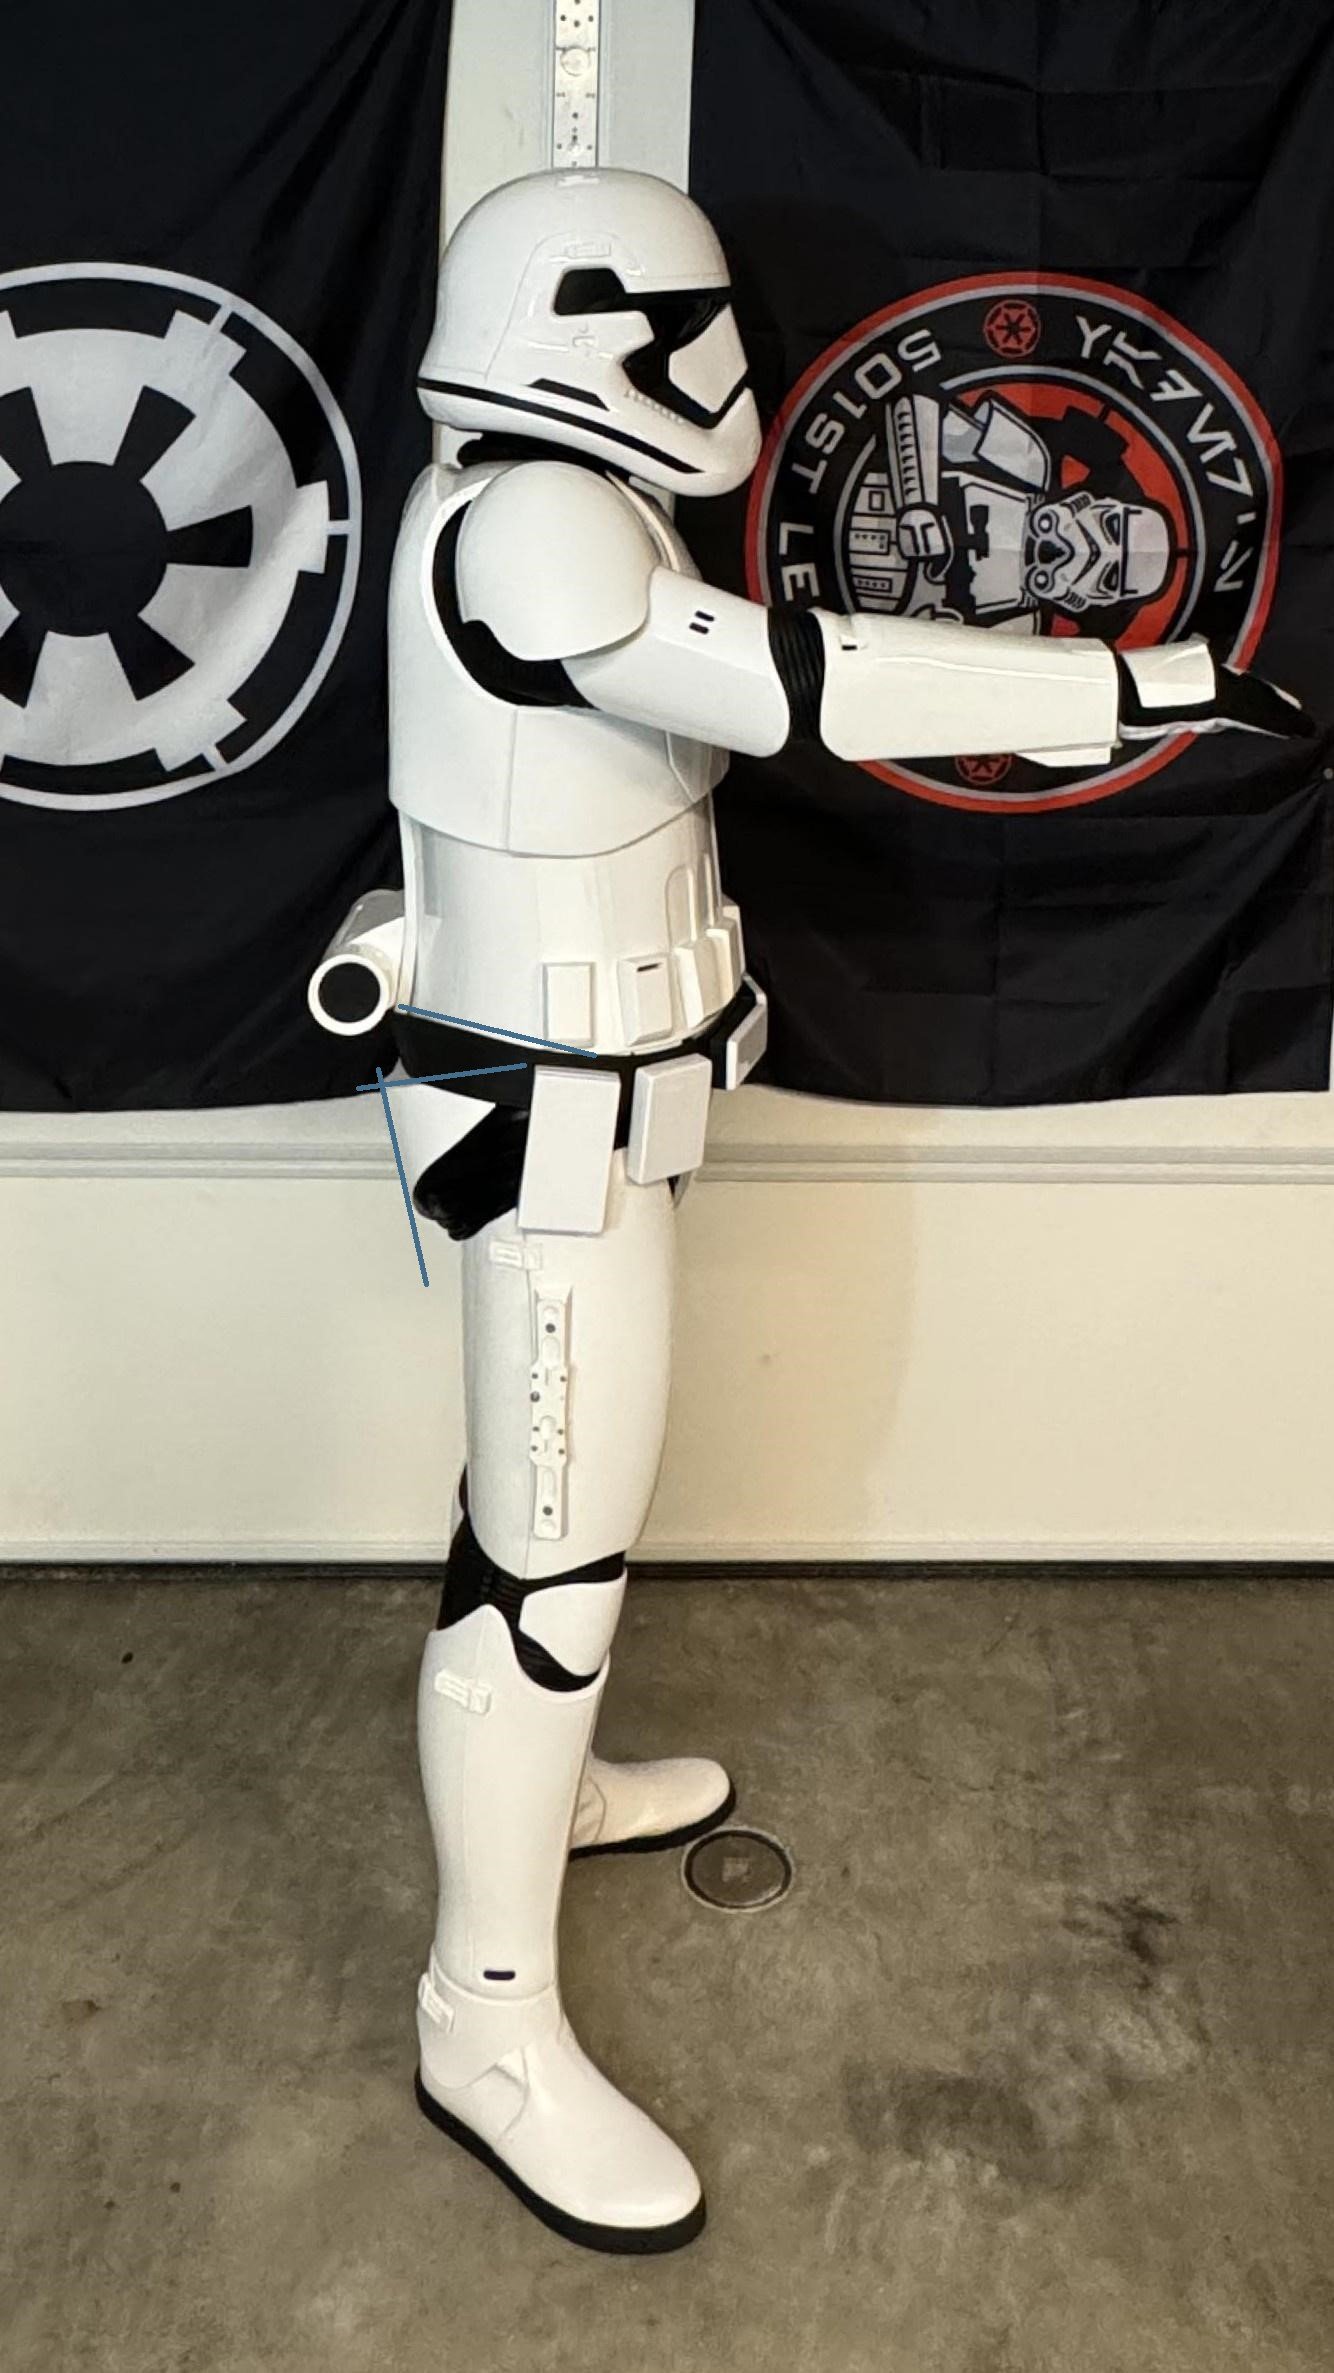
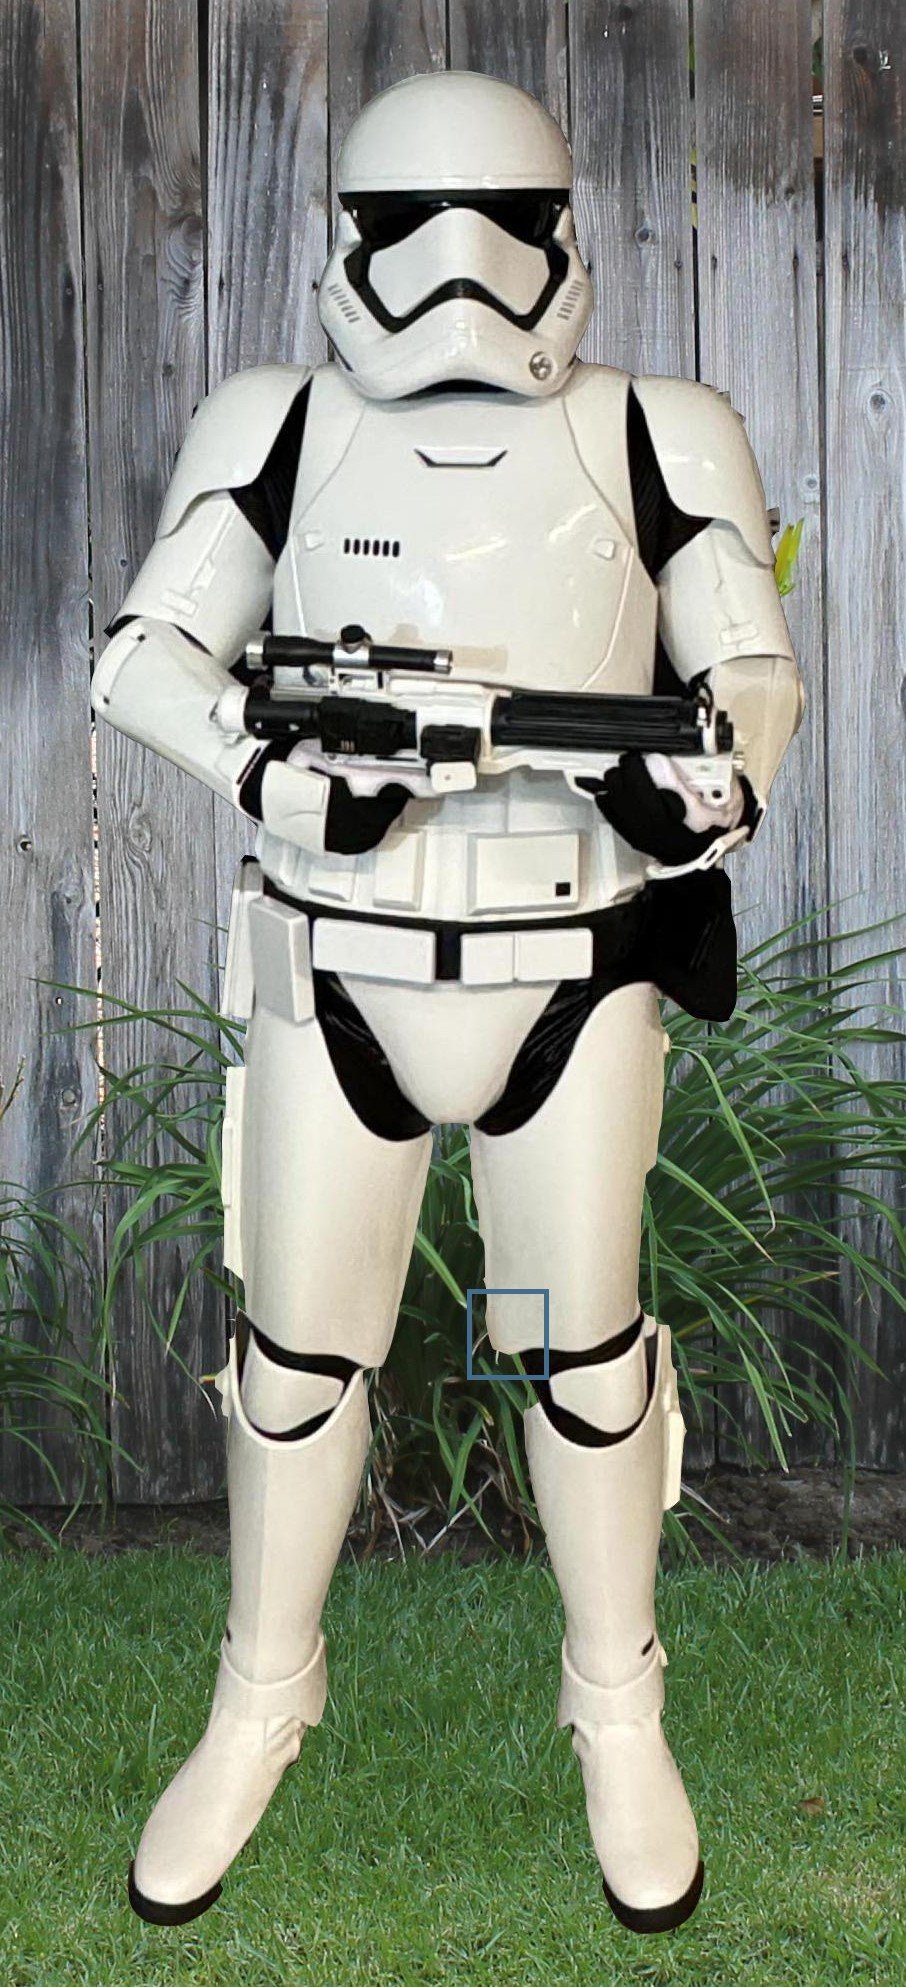
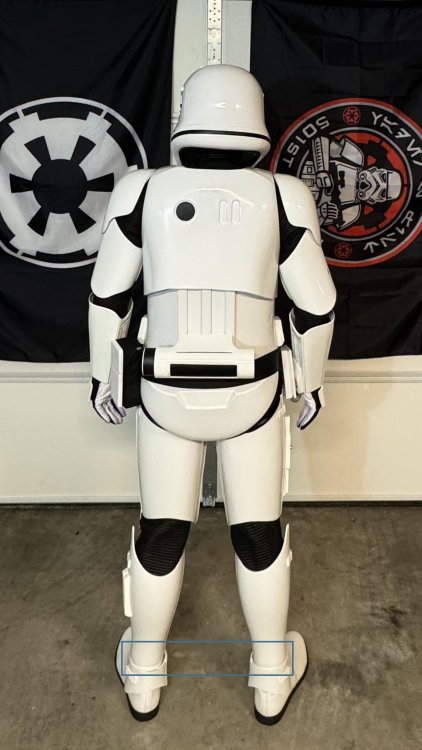
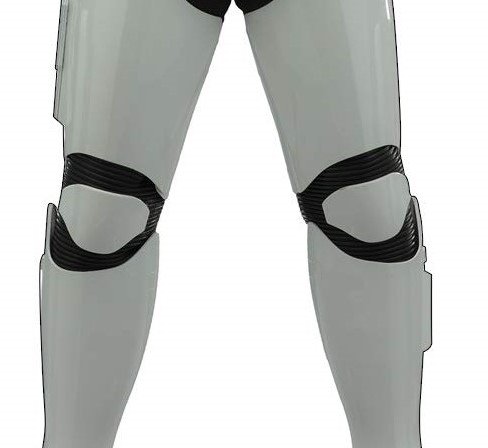
 If I could suggest a couple of things you could tweak for EI, (or disregard, after all I'm no DO). You could centralise your thighs at the knees, I had similar issues when using fabric gaskets, I finally ended up adding a stiffening piece of foam inside the gaskets which takes up the slack and keeps thighs and shins better aligned. Even a small block of foam on the outer sides of the thighs would pull them over. You can see on the rear image how the thighs pull the fabric gaskets to the insides. Not sure if you can reduce the circumference of your spats as there is an opening on the rear and you can see the grooves. I know the DO's have mentioned wrinkling around the shorts on an EI application previously. Also you could adjust forearm to glove spacing to match. I also noticed the angle of you posterior, front corners appear to be under the belt and pushing the belt upwards at the back


-
Perhaps Alan Harris Alan Harris (born May 28, 1938 in Enfield, Middlesex, London, England; died January 25, 2020) was a British actor who played several roles in the Star Wars movies. Starting out as a model, Harris moved onto stage productions, and later motion pictures. For Star Wars, Harris' work was mainly behind the scenes; however, he has occasionally stepped in as an actor, notably portraying Bossk in The Empire Strikes Back. Harris has the rare distinction of appearing as different characters in all three films of the original Star Wars trilogy (as well as the first prequel, The Phantom Menace), as well as playing a Stormtrooper in all three films. https://starwars.fandom.com/wiki/Alan_Harris
-
Hello and welcome board, good luck with your research
-
Hello and welcome aboard, a great thread full of helpful links
-
Seems to have the job. Just take care mixing coats of different paints I've seen some real horror stories when the paints have reacted with each other, you look to be safe
-
Correct, you can go larger if required, many add to the rear to leave the front standard sized. It's entirely up to your GML what they consider approvable so best check with them before going too big. You'd be amazed how many threads there are looking for cover strip sizes but using the search function can help https://www.whitearmor.net/forum/search/?q=cover strips&quick=1 You can even find measurements in the RS photo gallery A helpful video on cutting cover strips
-
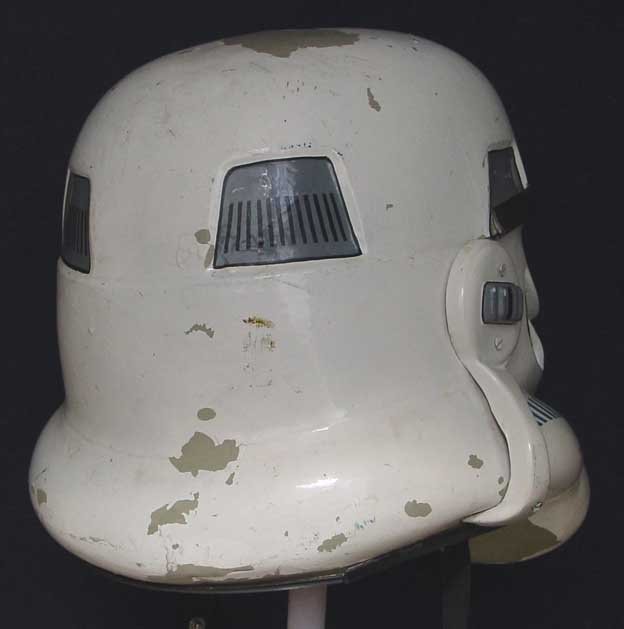
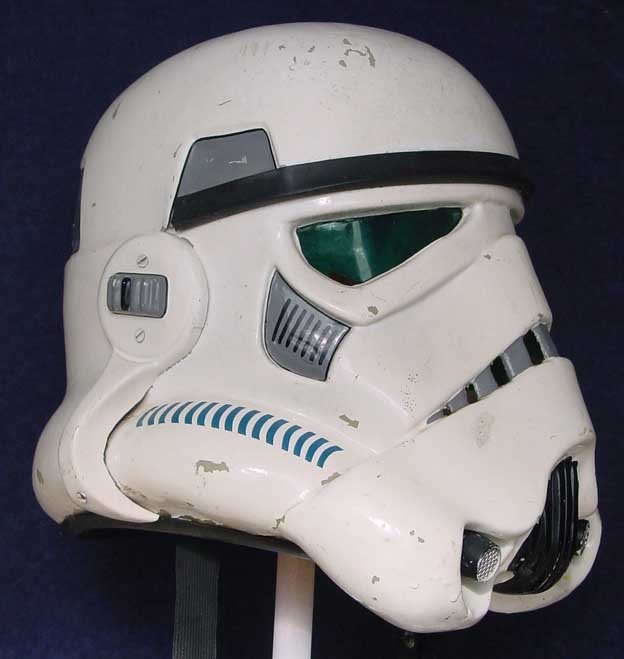
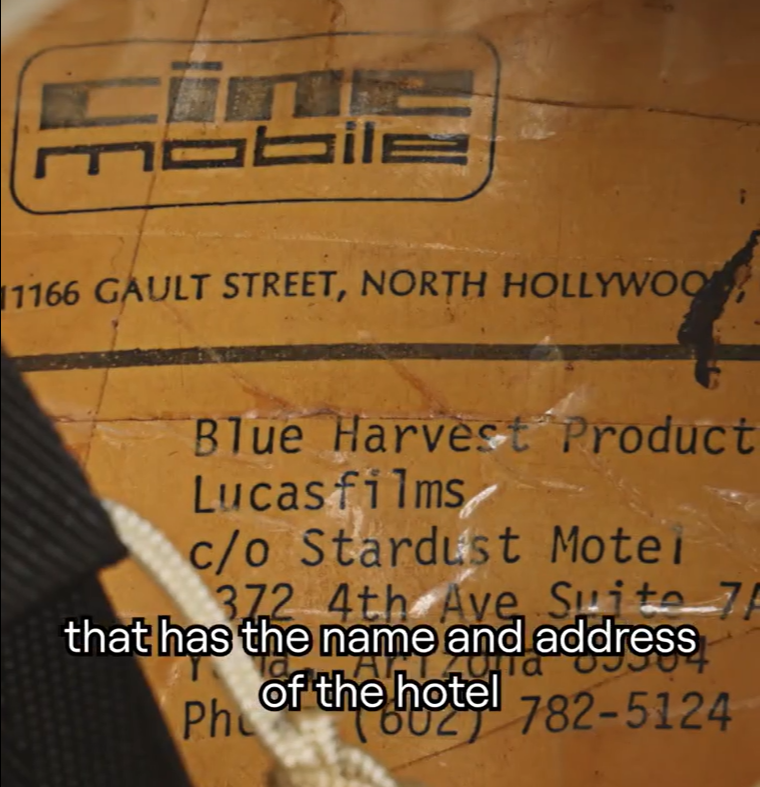
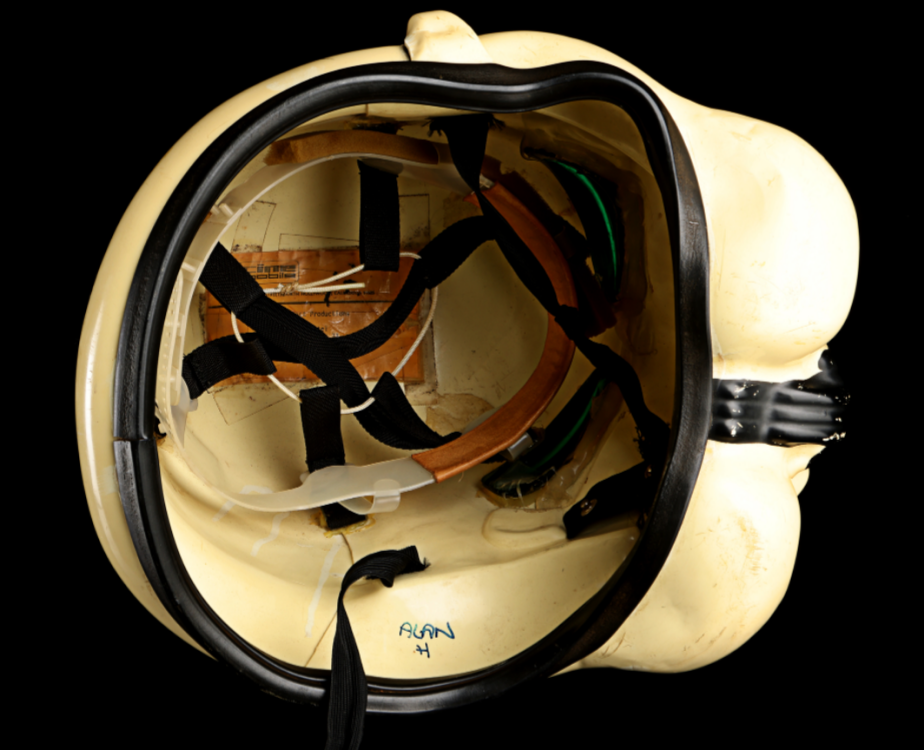
A nice detail of the helmet "A unique item inside, a piece of paper mounted in the helmets interior that has the name and address of the hotel where productions were staying when they shot on location in Yuma, Arizona."

-
I do that too, amazing how fast the email gets there, I wonder if it does a short cut
-
WIP 3D print PLA TLJ Phasma Build!
gmrhodes13 replied to MikeWazowski's topic in Captain Phasma Build Threads
Nice work, may be a reflection but can see a few print lines still? Be very careful applying paint and make sure the part is completely dry, thinners in paint can soften filler/primer and allow lines to be more noticeable. Rather say something now than see you apply a top coat -
Nice work, should be an easy walk through
-
Great work trooper, congratulations, you can keep a record of your troops here (and there are some nice awards ) Instructions here
-
I try to edit images before uploading them, just a little quicker I find
-
TK-12953 - A Dave's Darkside Depot EIB AHN Stunt build
gmrhodes13 replied to jsilvius's topic in ANH Build Threads
-
Tim’s first time build (RS Prop Masters ESB TK)
gmrhodes13 replied to TrickyT81's topic in ESB Build Threads
You are most welcome, that's what we are here for. Congratulations trooper and well done -
A very nice update indeed
-
TK-12953 - A Dave's Darkside Depot EIB AHN Stunt build
gmrhodes13 replied to jsilvius's topic in ANH Build Threads
There are no requirements to remove rear return edges on the forearms or biceps, really depends how they sit on their arms, many of us with smaller frames keep them so there are not big gaps seen when wearing them. Screen suits had little to no return edges -
It's been this way for a while now for Edge users and mobile, I switch to desktop version if I need to add any images.
-
Tim’s first time build (RS Prop Masters ESB TK)
gmrhodes13 replied to TrickyT81's topic in ESB Build Threads
-
I usually use remote control servo plug extension wires, very small and a bit easier to fit.
-
I used reticulation threaded bar and threaded union/nut. Also used rubber washer to take up any slack when screwing the pieces together. You do have to make sure you get the thread in the right position before glue dries.
-
Hello and welcome aboard, looking forward to seeing some Big Brown Box photos soon Make sure you get rid of all the 3D print lines For higher levels of approval EIB and Centurion: For costumes with only blasters. 3D printed blasters cannot contain visible print lines and must be sanded smooth for a more realistic appearance. For costumes with both blasters and accessories. 3D printed blasters and any approvable accessories cannot contain visible print lines and must be sanded smooth for a more realistic appearance. E-11 Blaster OPTIONAL L2 3-D printed blasters can not contain visible print lines, and must be sanded smooth for a more realistic appearance.
-
Ben Stoddard, 3D Printed ROTK Build Thread
gmrhodes13 replied to Benjamin Stoddard's topic in Rogue One Build Threads
It's all about the prep work
-
Nice work trooper A couple of tweaks before the DO's get here, they may be mentioned: Appears your shoulder straps aren't affixed on the chest and the elastic has moved forward. Shoulder Straps OPTIONAL Level three certification (if applicable): These shall be glued in front. \ Normally the position of shoulder straps on the front is 1 large tab and 4 1/2 to 5 small tabs BUT ATA won't allow this due to the chest angle, I manage to only get 1 large tab and 2 1/2 small tabs to sit flush. You have some overlapping on the sides, kidney to abdomen, perhaps add some tabs behind the kidney Something which may have been missed at EI are the tube stripes, they should fall forward from the top at the front HELMET OPTIONAL Level two certification (if applicable): Fall of tube stripe tops ideally lean toward the front. You have a bit of a dip in the brow trim, you may want to straighten Rear helmet stripes are a little high Abdomen Armor OPTIONAL Level two certification (if applicable): Any gap between the abdomen and kidney armor is no more than 1/2" (12.5mm) wide. " For Level 3, the top of the ABS belt shall sit at or just above the bottom of the central and vertical ab button panels. A slight overlap is suggested, but not required" Also your full body images are quite small in resolution 435 x 580, makes it hard to magnify to see some details Photo Guidelines Size: Photo size larger than 800x600 (preferably 1280 x 960) to allow the DO to see your armor's details. 1024x768 These are just suggestions as the DO's may or may not require any of these items addressed Good luck with approval trooper