gmrhodes13
-
Posts
31,204 -
Joined
-
Last visited
-
Days Won
1,068
Content Type
Profiles
Forums
Gallery
Articles
Everything posted by gmrhodes13
-

FOTK WIP
gmrhodes13 replied to TK32945 Waynocerous's topic in TK Pre-Approval Questions & Discussion
Hello and welcome back you are more than welcome to post photos here, it's a great way to get feedback and find any issues you have before applying to your GML, it is however not mandatory to do so. You can also receive feedback for higher level approval and entirely up to you if you wish to do so. Same images you would send to your GML, front, side, back, side, action and helmet off. -
TK ANH Stunt by CloseTheBlastDoor
gmrhodes13 replied to CloseTheBlastDoor's topic in ANH Build Threads
You can post in that thread for feedback, a good idea before the next step to iron out any bugs, but entirely up to you its not mandatory. Approval process is through you GML (garrison membership liaison) there are normally instructions on your local garrison forum, normally you se b d him/her/them full length photos, front, back, side, side, action and helmet off. You also need to fill in a legion membership application and pick 5 available TKID's (numbers) and the first available is issued once your costume is approved, this number is with you for life. You can find legion membership application here https://www.501st.com/members/join_form.php Available ID numbers here https://www.501st.com/members/search_avail_ids.php Once your costume is approved and you are issued with you legion ID you can request higher TK access here -
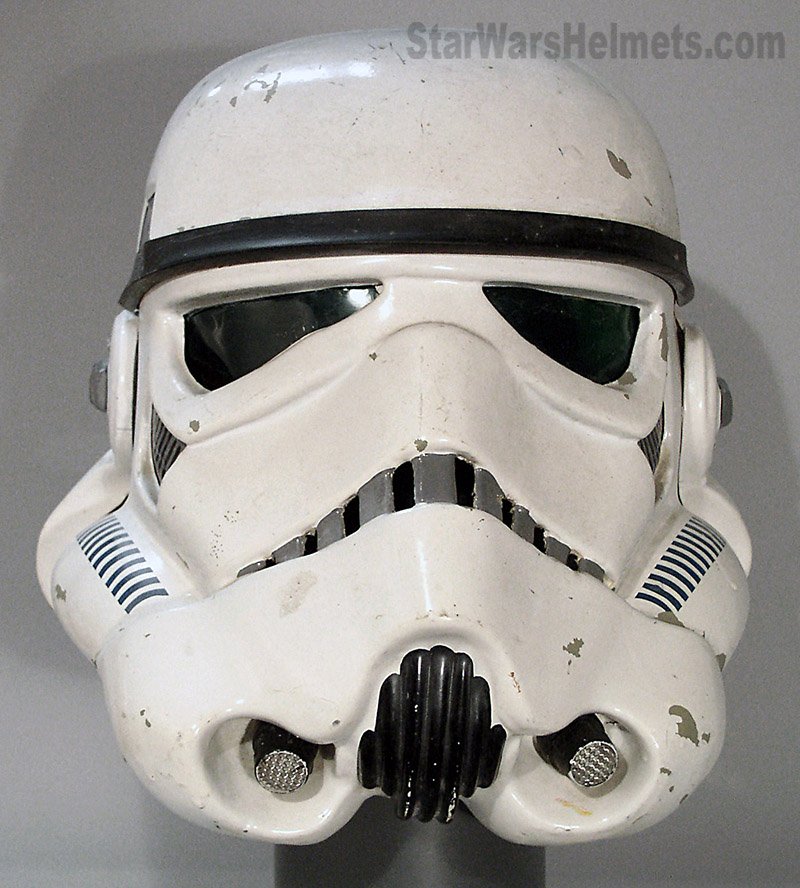
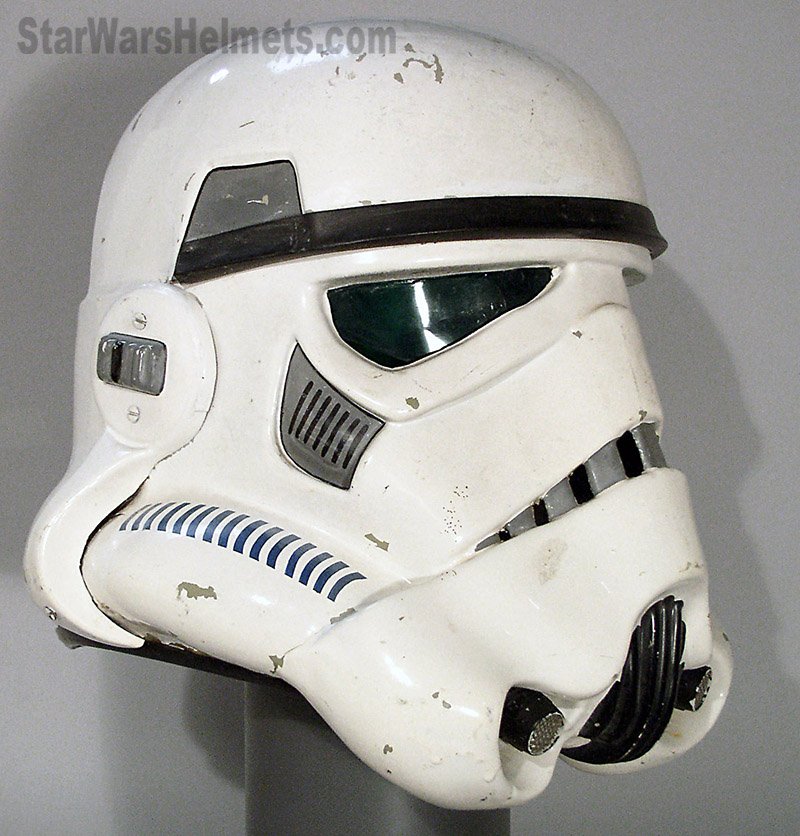
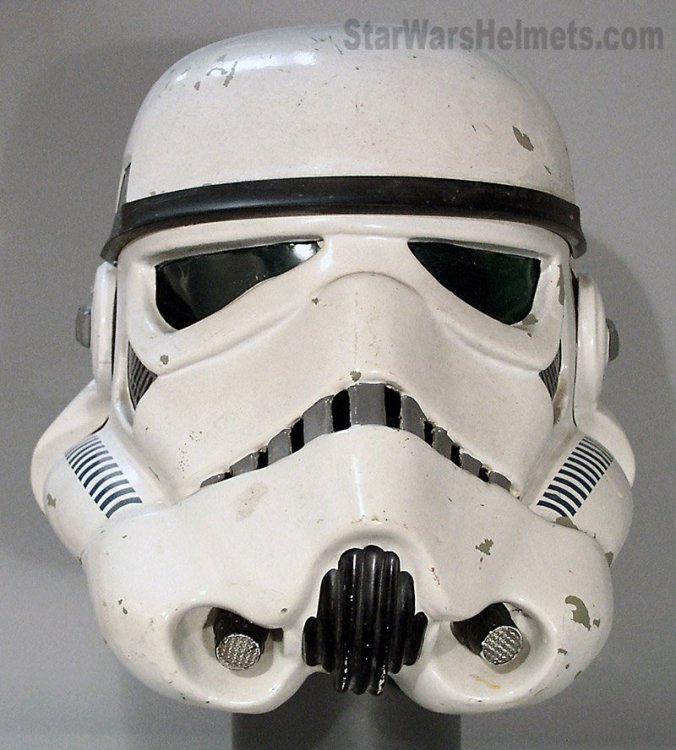
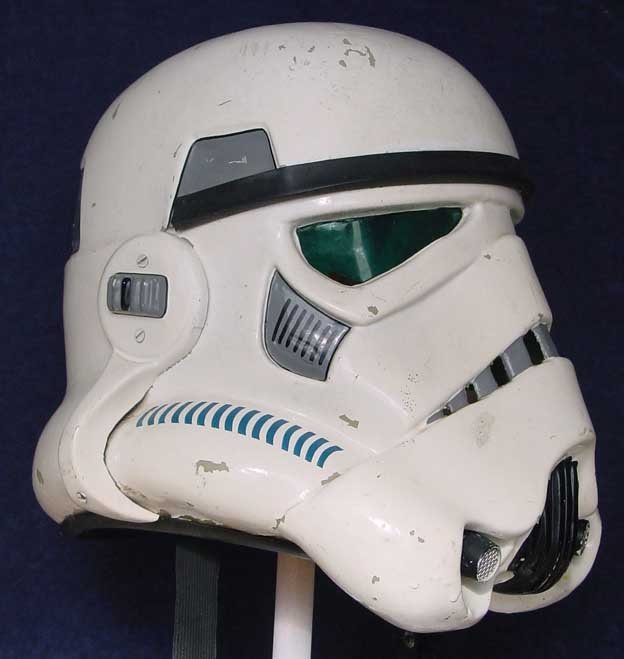
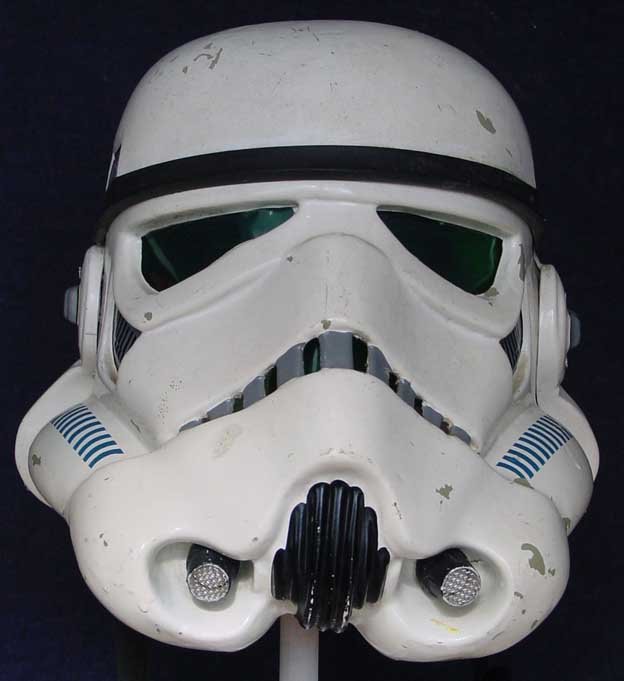
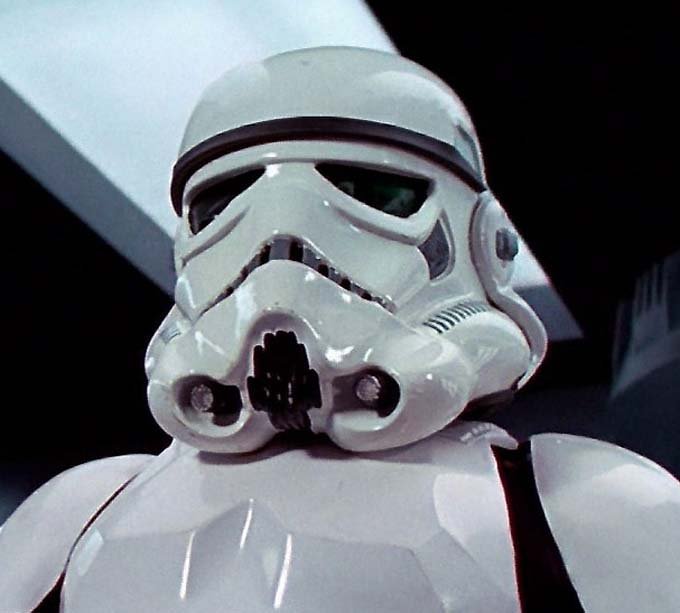
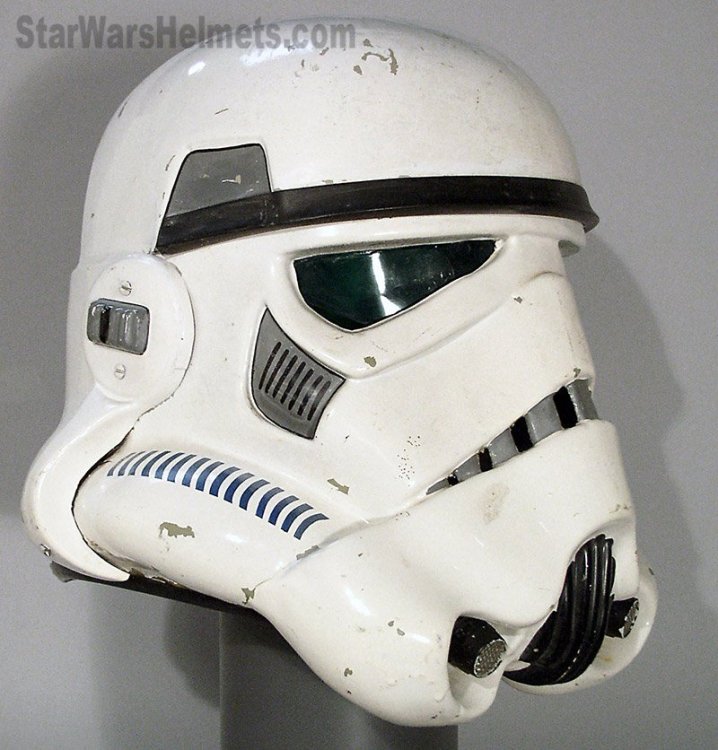
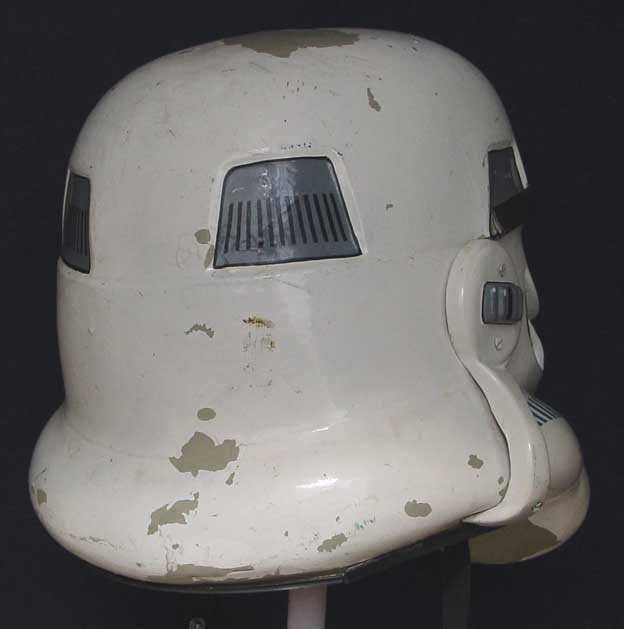
Some info for helmet assembly and some references ears For higher levels clearance: In regards to the teeth don't leave any paint on the gums: Frown is painted gray and does not leave the teeth area. And don't forget this for higher levels: Fall of tube stripe tops ideally lean toward the front. The "ideal" ear placement is as seen below, where the screws line up with the rear angle of the trap right above it. Because some armorers design their helmets differently or send them pre-assembled this is not always possible to achieve, but it is suggested that you try to get as close as you can. Note: Top ear screws should ideally be located directly below the rear of the trap. Some references of screen helmets, many had gaps

-
I normally paint after everything is adjusted and fitted but you can paint at any stage. In regards to the teeth don't leave any paint on the gums: Frown is painted gray and does not leave the teeth area. And don't forget this for higher levels: Fall of tube stripe tops ideally lean toward the front. The "ideal" ear placement is as seen below, where the screws line up with the rear angle of the trap right above it. Because some armorers design their helmets differently or send them pre-assembled this is not always possible to achieve, but it is suggested that you try to get as close as you can. Note: Top ear screws should ideally be located directly below the rear of the trap.
-
TK ANH Stunt by CloseTheBlastDoor
gmrhodes13 replied to CloseTheBlastDoor's topic in ANH Build Threads
This one is great This one the second stripe is a touch high but you should be ok Nice work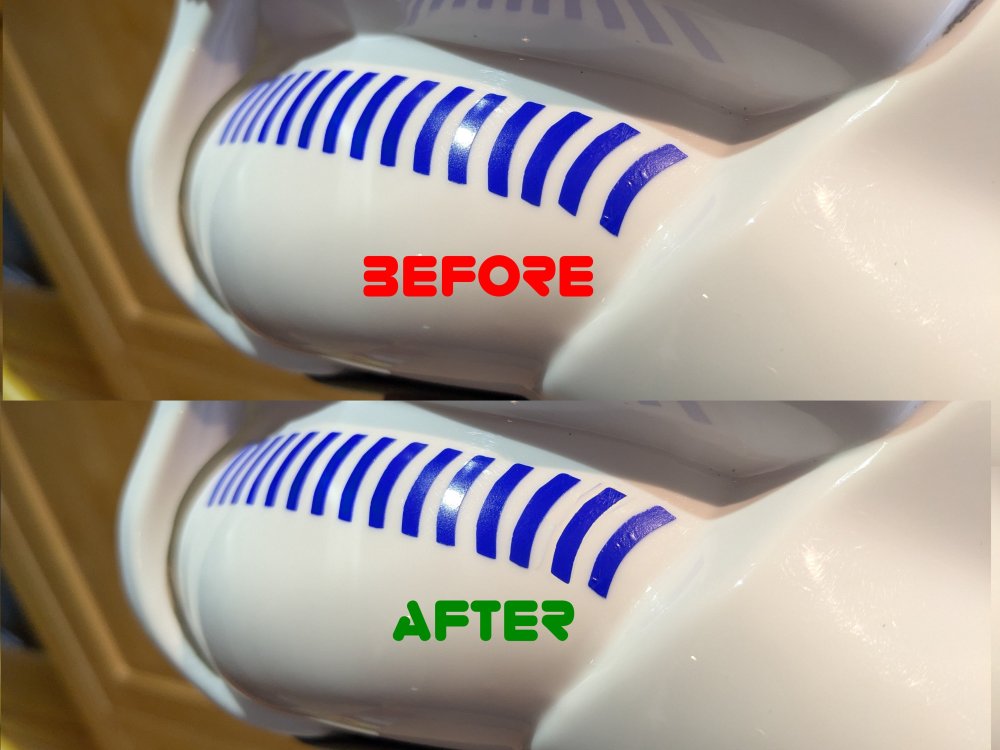
-
Congratulations trooper and welcome to Expert Infantry and the EI Honor Gallery
-
TK ANH Stunt by CloseTheBlastDoor
gmrhodes13 replied to CloseTheBlastDoor's topic in ANH Build Threads
Apply some painters tape on top, carefully lift a corner, may need to run a knife just under it to get it started, then carefully peel backwards. I've done this to a few helmets in the past and it's worked quite well, you only really need to adjust a couple of the stripes to make it look right. -
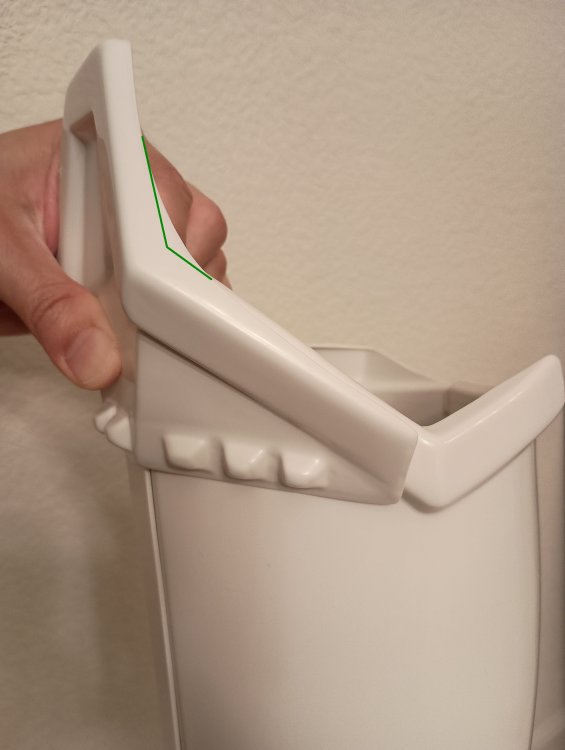
Some makers do need some twist to get them to sit right, you can also trim if too long. I used a combination of clamps, magnets and lots of tape to pull the sniper plate so it sat straighter and left it like that for 72 hours You can also trim the inner curve on the sides Not the best of references but you can see the sharp inner
-
Before the DO's get here you may want to look through this guide as you seem to be missing a few photos, especially an "action" photo You may also want to clean up some of your black lines, they are a little thick and wobbly in places Only 7 lines in cheek traps and should be all the same length References Good luck with approval
-
TK ANH Stunt by CloseTheBlastDoor
gmrhodes13 replied to CloseTheBlastDoor's topic in ANH Build Threads
Nice work, you may want to adjust the front tube stripes a little: Level 2 Fall of tube stripe tops ideally lean toward the front. Comparison -
Please read the instructions in the first post, you need to add a link to your 501st membership profile
-
Link is incorrect, it's going to another members profile TK73773, please read the instructions in first post and try again Also appears you already have TK access, or you may be trying to access an area you no longer have permissions for. To remain an active member of this forum you need to log into the forums at least once per census year.
-
You need to align the top ridges and trim the bottoms of the shins to match Wearing boots will also make a difference so don't do a final trim until you can try with boots. Gallery sections can be a great help while building https://www.whitearmor.net/forum/gallery/category/24-anh-tk-reference/ If in doubt you can also check out the build areas, Expert Infantry or Centurion as these are built to the higher levels of accuracy. Many titles have the makers name in them ie: TK-91213 Requesting ANH Stunt EIB Status (WTF) (1075)
-
Need to use the "direct link" option or link with the file extension ie: .jpg, .png, .gif. If on computer you can right click on the image, select copy and past directly into your post Great thread for the first timer, lots of links to help with your build
-
Which version Stormtrooper are you looking at making? Approval is given by your GML (garrison membership liaison) so you may want to contact them. I've not seen any original trilogy 3D files which have been approved. There are also so many vac form plastic kits available for original trilogy that there really has not been a lot of work into 3D files. Rogue one and New Era costumes there are some files but again it really depends on what version you want to build. I have not seen anyone with the GA files approved as yet For Rogue One take a look at this build thread which was approved with some work As many find with 3D printing the down sides is there is no flex and you have to stay out of direct sunlight. Also think you need to make sure 3D files have no visible lines and because they need painting can require a lot of upkeep.
-
Google apps images won't show in the forum, many of us use a free image host Imgur, here's a great tutorial We also try to use E6000 glue, this is in case you make a mistake or need go resize any pieces, CA glue is pretty permanent. FYI Top knee TD Sandtrooper Bottom knee TK Stormtrooper
-
Have you been through this how to I normally right click on the image, select copy and paste into the post. You can also use the "direct link" (has the file extension on the end of the link ie: .jpg, .png, .gif
-
You will find with some pressure they should easily come off. If you have any ABS plastic left over you could add a stiffener pieces under the shoulder strap, either heat with a heat gun or on a tray in the oven, then form to the shape of the shoulder, this extra piece helps to prevent cracks. Just remember to rough up both pieces with coarse sandpaper before gluing
-
TK ANH Stunt by CloseTheBlastDoor
gmrhodes13 replied to CloseTheBlastDoor's topic in ANH Build Threads
I trim the lens just larger than the eye openings so there is an edge to grip too. My first helmet I glued plastic tabs around the lens to hold in place, held them with magnets until they dried. Last few helmets I just added some silicone in places around the lip of the lenses, holding the lenses in with tape until the silicon dried. Original helmets had one piece which was held by the side ear screws. Frown screen I use the metal flyscreen mesh, it can be folded and stays that way and also can bend to match the frown, no sharp edges to snag on facial hair , glue with E6000 in a few places. Some other examples of interiors -
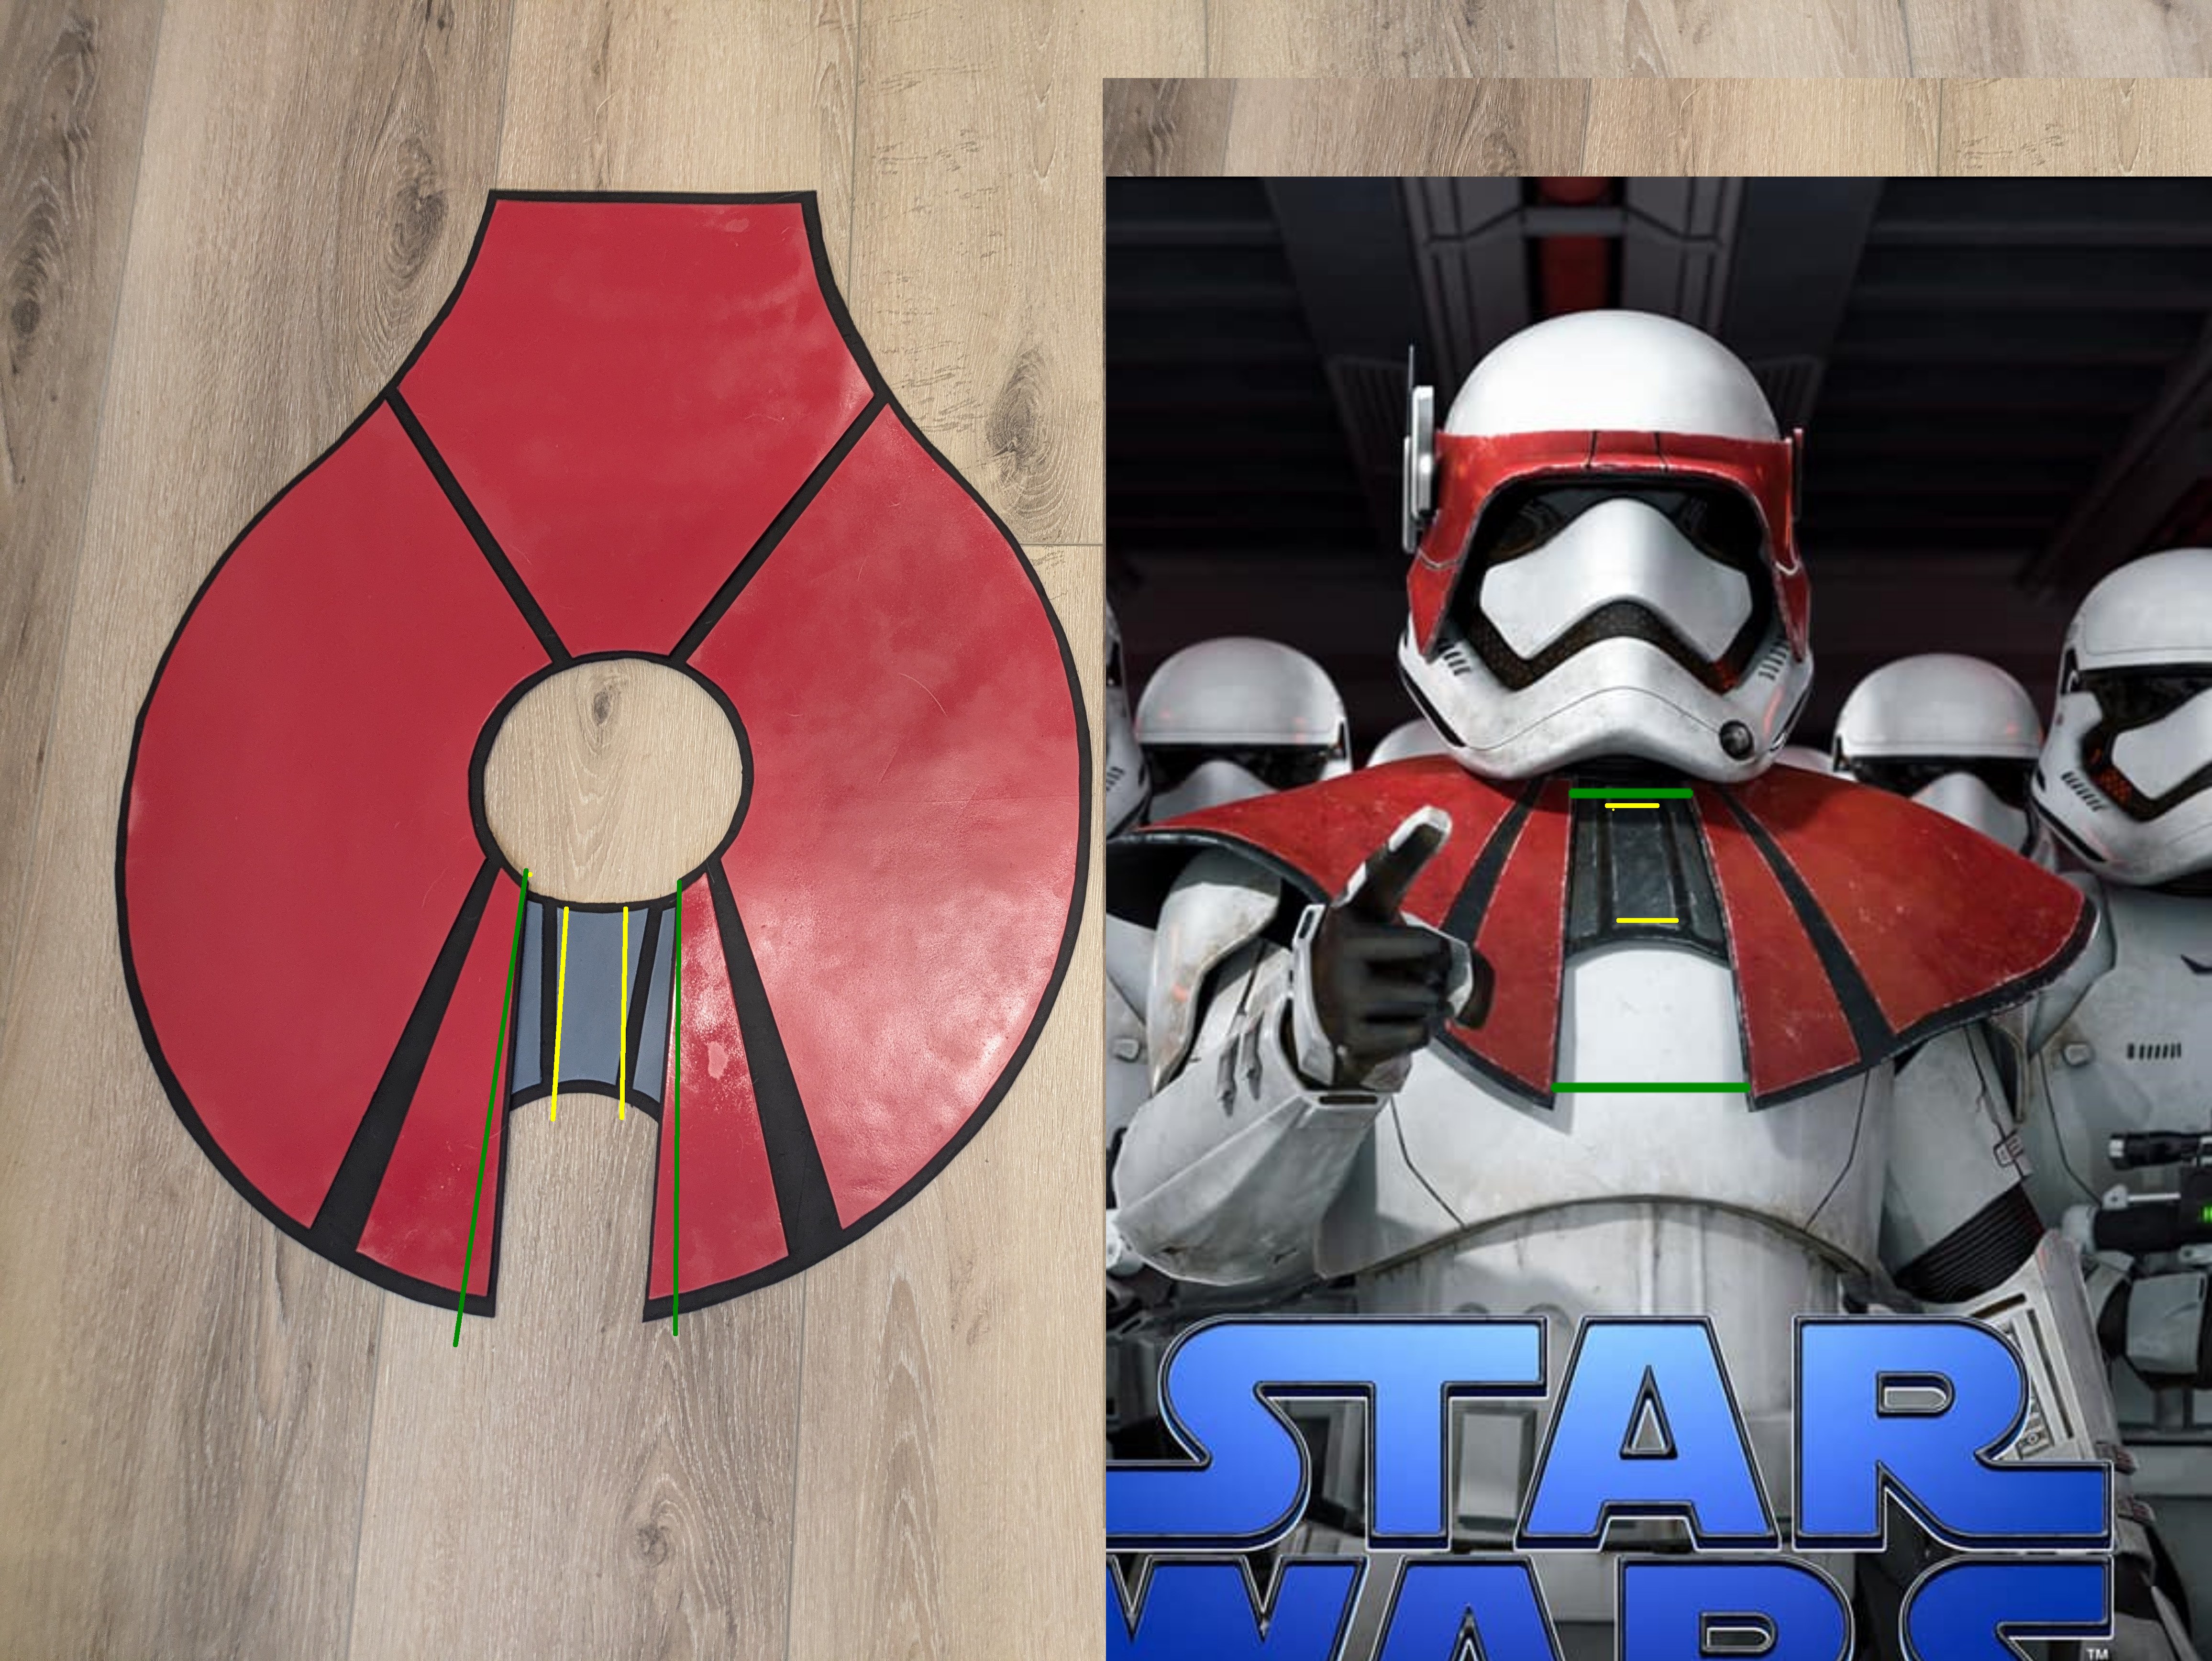
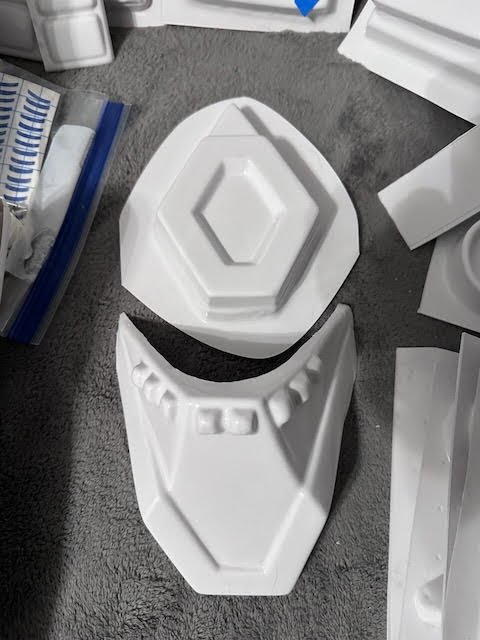
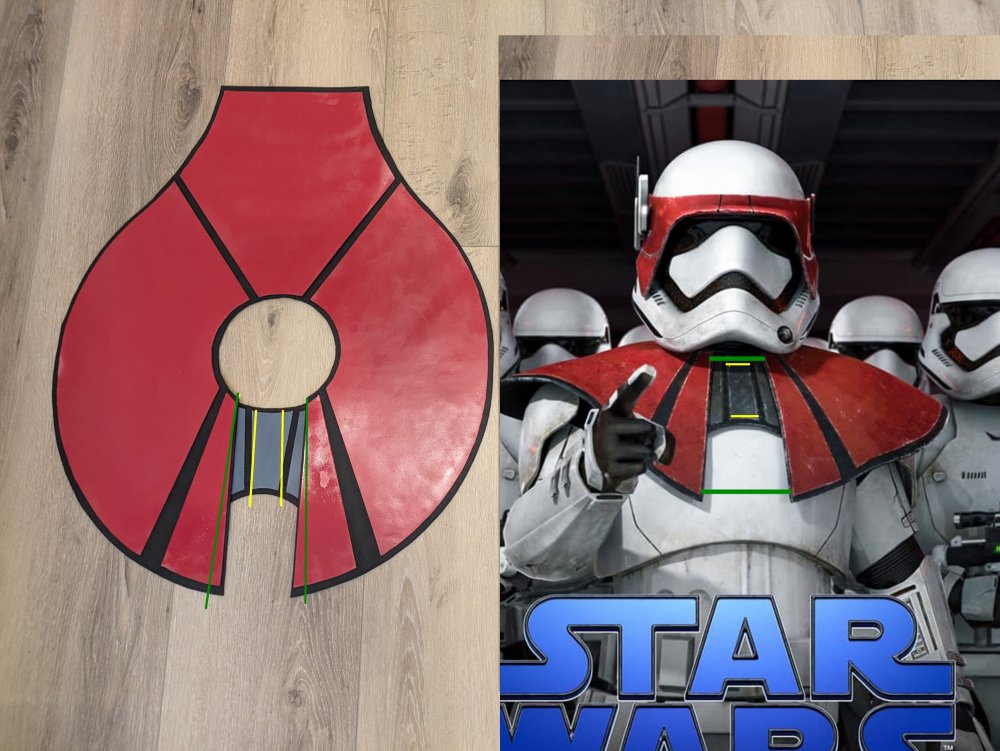
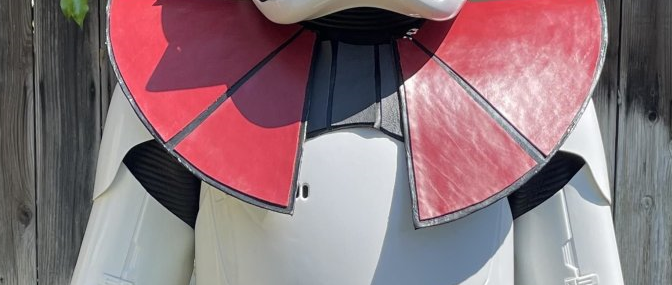
Chris is currently away on holiday and may not comment until next week Just in the middle the grey area looks like it could be swapped, smaller at top and larger on the bottom, the red area is also open more towards the bottom on the reference Looks better in your earlier version
-
TK ANH Stunt by CloseTheBlastDoor
gmrhodes13 replied to CloseTheBlastDoor's topic in ANH Build Threads
Nice work -
Great to hear you have been doing your research, it is the key to this hobby, it will be much easier once the CRL is finished which hopefully won't be too far away, good luck
-
I noticed over the last couple of days Sheev's been posting across social media once again. I think you will find like many makers they take on far too much and wait times become unrealistic, most appear to be @12 months these days.
-
TK ANH Stunt by CloseTheBlastDoor
gmrhodes13 replied to CloseTheBlastDoor's topic in ANH Build Threads
Correct, semi gloss or satin black, you can see in these references it's not fully gloss Vocoder should ideally be painted black using a satin finish, but gloss is acceptable. Lines should be crisp, clean, not extend beyond the ridges and symmetrical on both sides . -
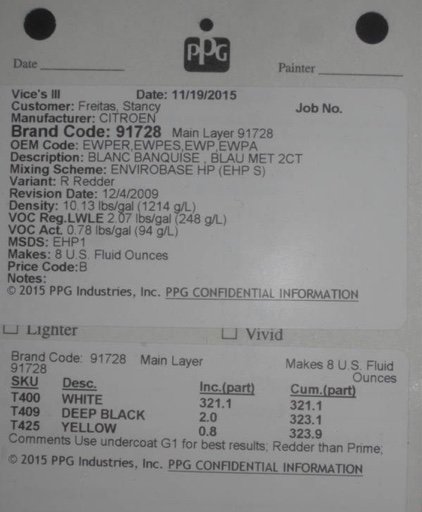
Good types of black /white paint to use on armor
gmrhodes13 replied to Colin's topic in Hard Armor (General Discussion)
Really depends on your budget and what can be sourced in your area. Personally I use automotive acrylic paints, dries very quickly and the clear can be sanded and polished for a deep shine. Can also have automotive paint made at some auto shops, here is the color code to match the Anovos/DN helmet shade of white Another paint some used was Rust-Oleum 2X Painter's Touch Gloss White a cheaper alternative to automotive paint. Lots of threads on paint the in the FOBG area, here are just a few As for the black I have always used decals/stickers but I would recommend using a satin black