gmrhodes13
-
Posts
31,206 -
Joined
-
Last visited
-
Days Won
1,069
Content Type
Profiles
Forums
Gallery
Articles
Everything posted by gmrhodes13
-

BlueBantha's Tall (6'2") MTK Kit Build
gmrhodes13 replied to bluebantha's topic in ANH Build Threads
Nice work, you've done well with most of your gaps, just a couple of thigs to watch, your ab plate is just popping out under your chest, you may need some tighter strapping there You can also see in the back image that your biceps are just starting to pop out under your shoulder bells Get those few things and the neck seal and I don't think you will have any issues for base approval, great job, hope to see you with some ID numbers soon -
TK ANH Stunt by CloseTheBlastDoor
gmrhodes13 replied to CloseTheBlastDoor's topic in ANH Build Threads
Don't stress too much, should be ok as is for basic approval, higher levels would need some adjustment -
Pyro's Imperial Armored Commando WIP
gmrhodes13 replied to Pyro's topic in Imperial Commando Build Threads
Appears so There has not been a conversation as yet to work out if this will be a version from the current CRL or a new CRL on it's own.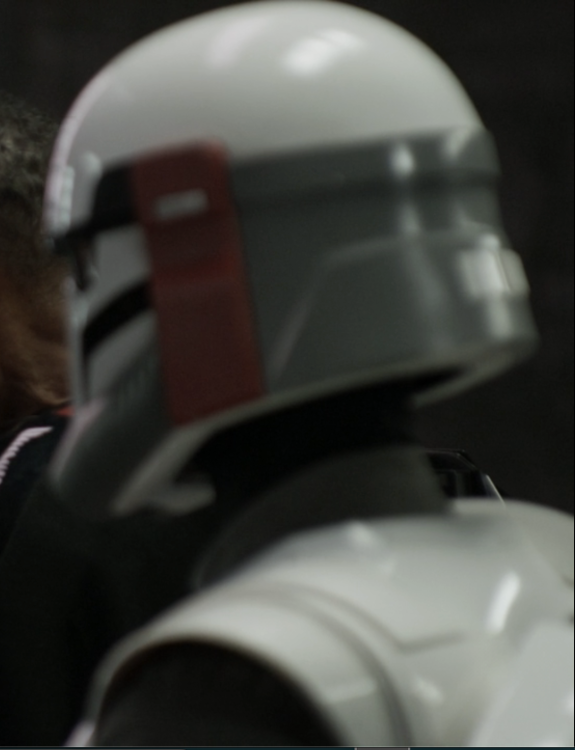

-
Rivets can be a pain to remove, try to grip from behind and slowly drill into the rivet head, stopping if it gets too hot Entirely up to you if you want to leave any return edge, I have some as I have skinny legs and it looks better but either way is approvable.
-
Personally I like to leave a fingers room around, thighs will want to come up when bending and stretch the legs, a little extra room won't help as the strapping will do all the work. Easer to leave some extra material on than trying to add some later.
-
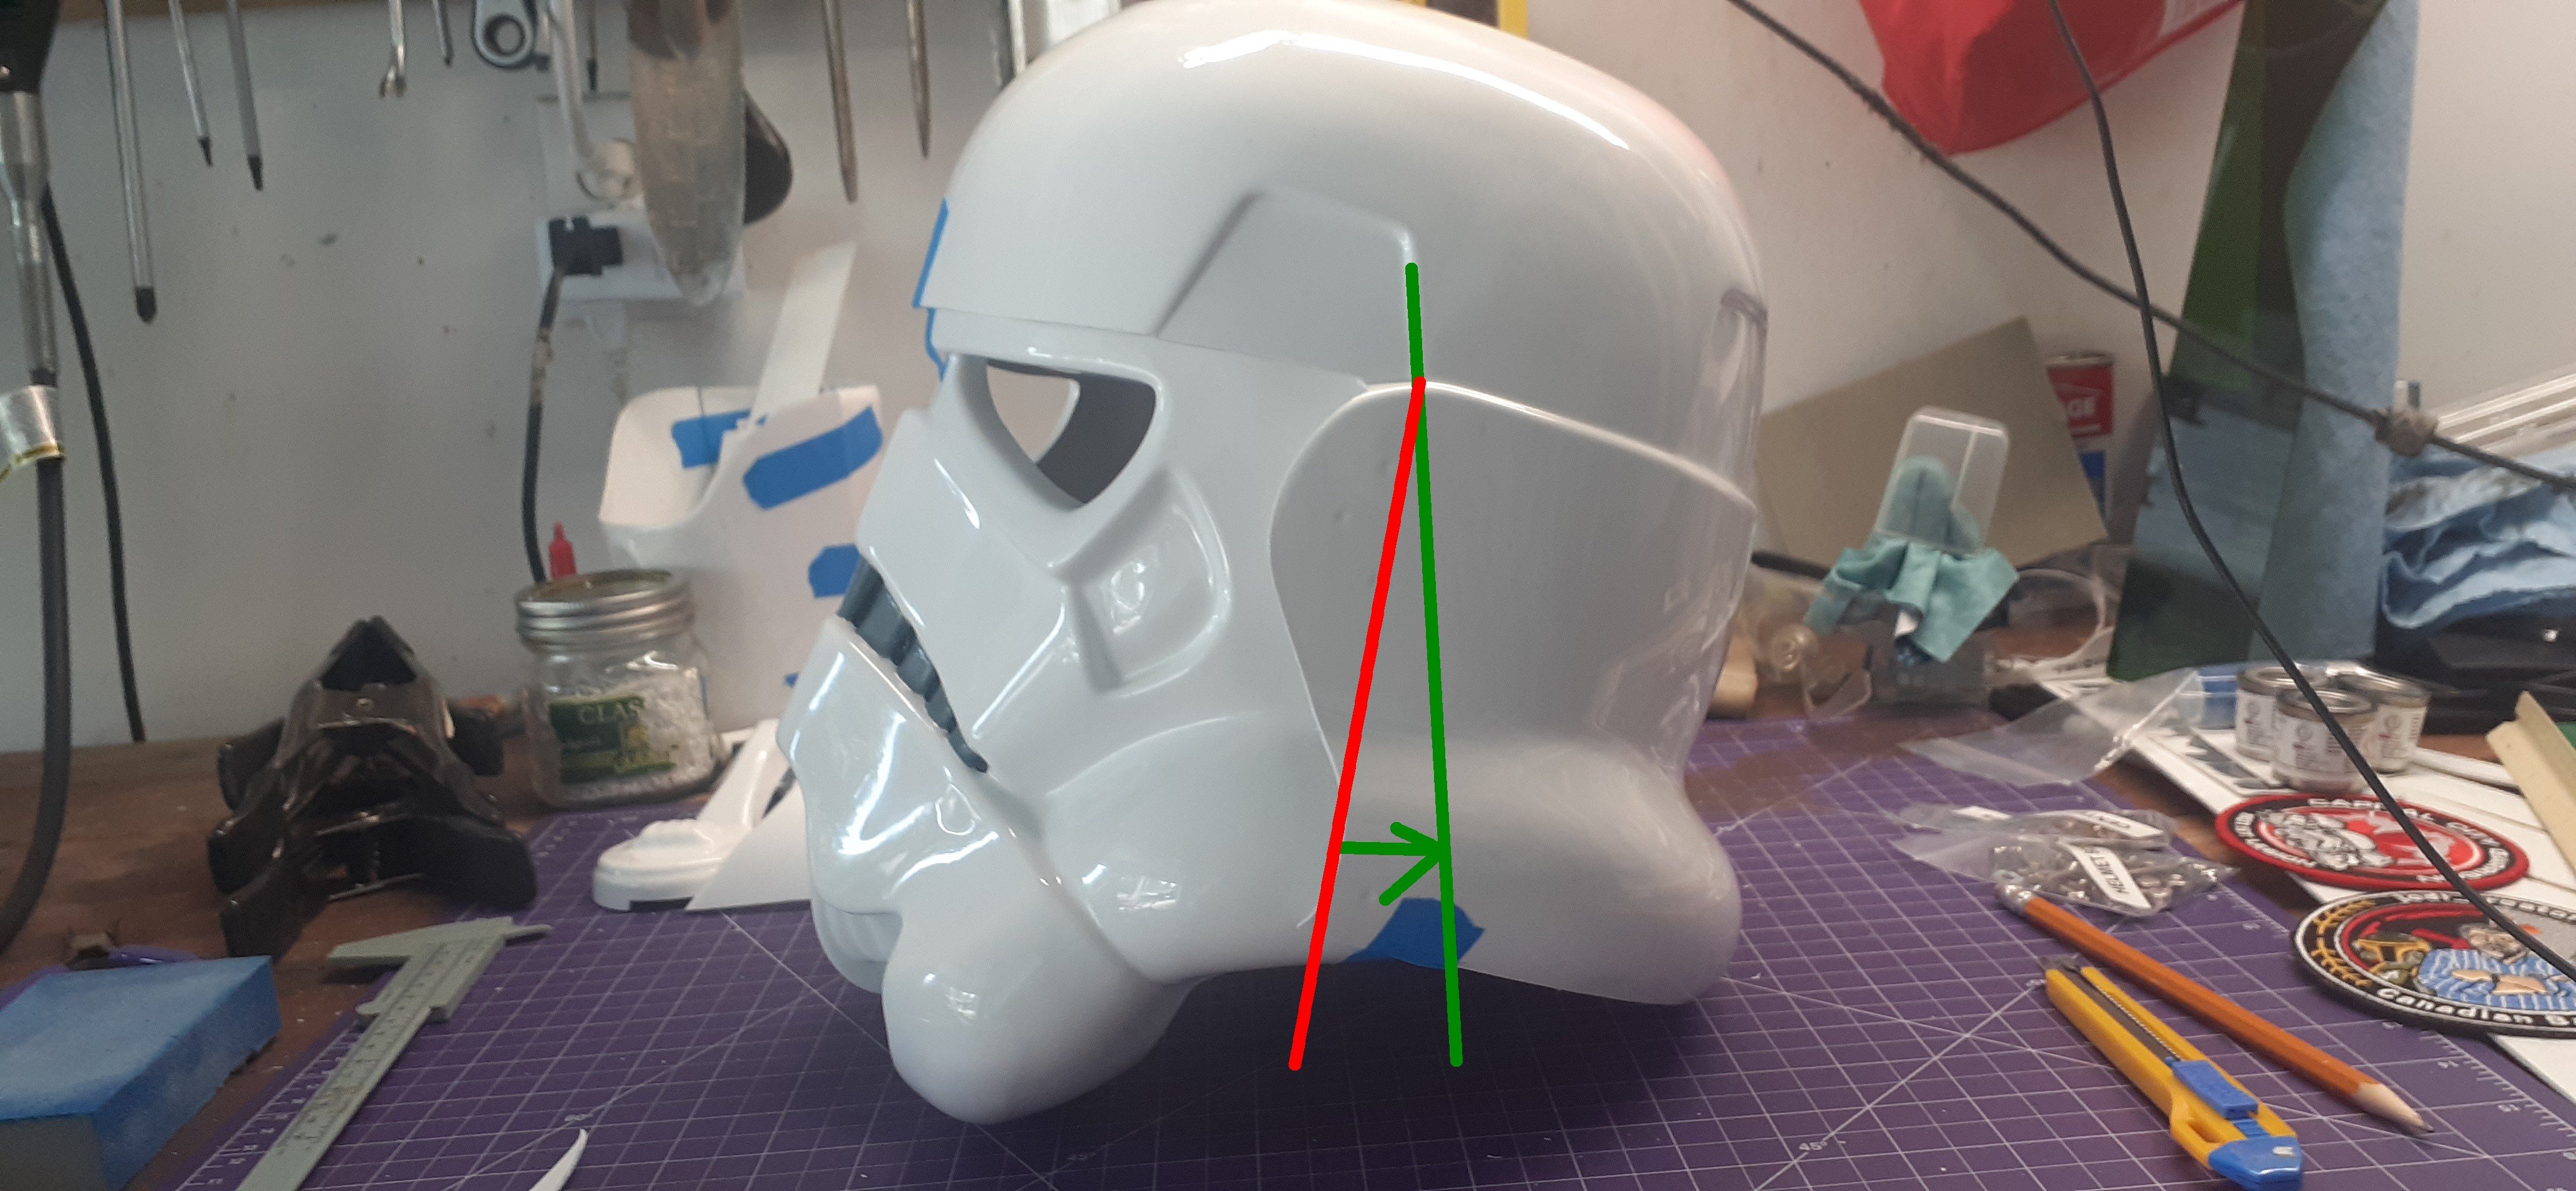
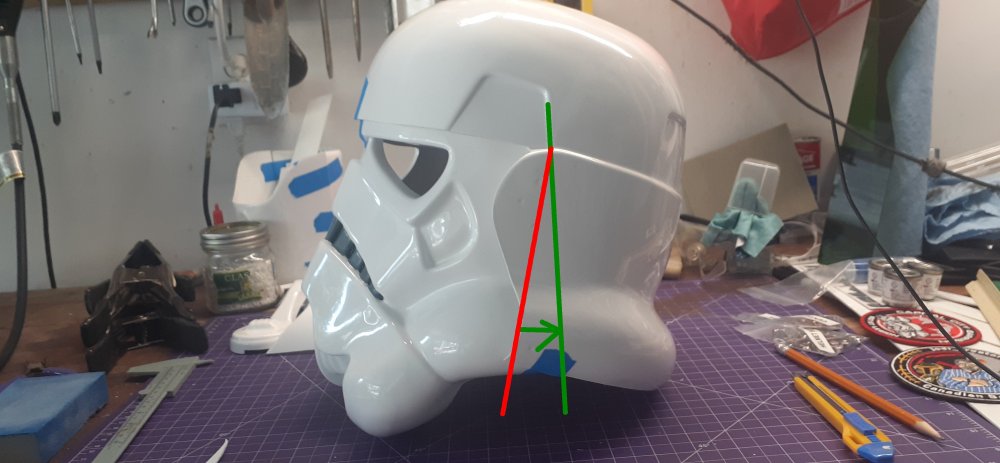
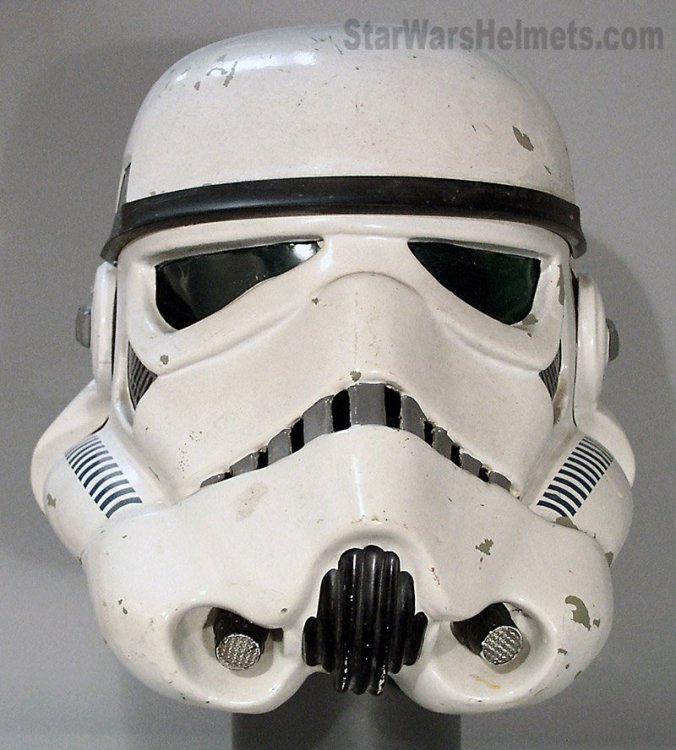
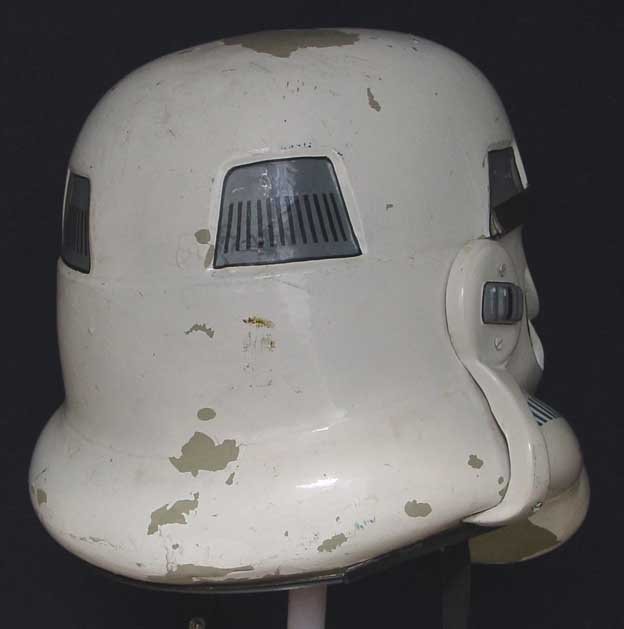
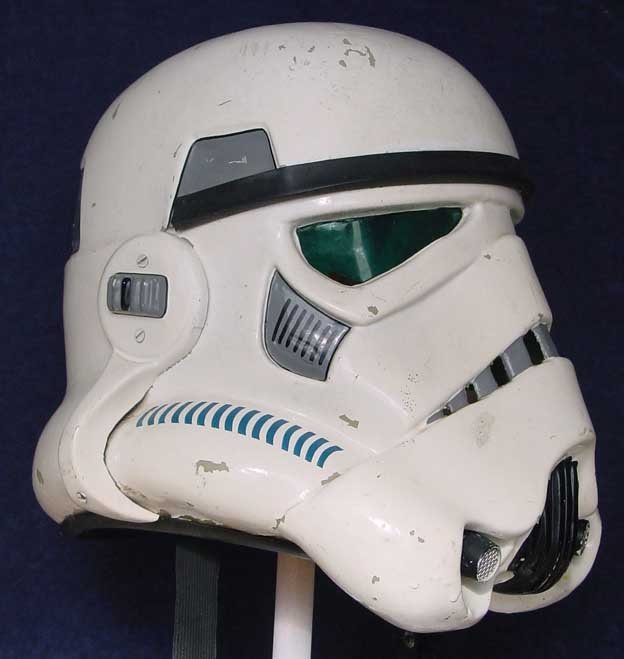
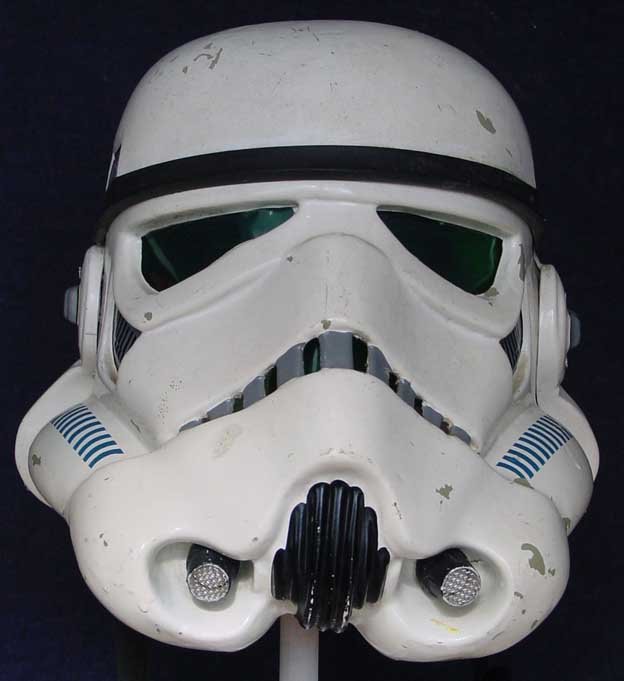
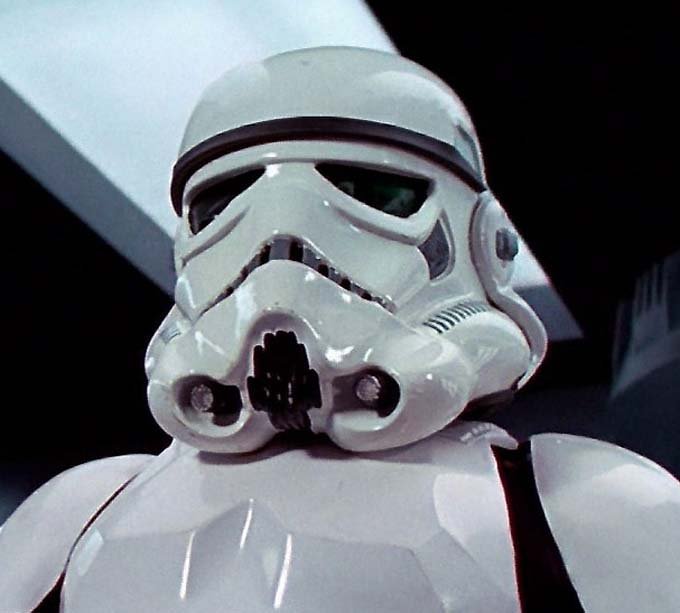
How and were you attach the sides of the backplate can change the angle of the ears but also open and close the neck opening. As you have it now your backplate needs to go back, a good indication is position of ears to trap. The "ideal" ear placement is as seen below, where the screws line up with the rear angle of the trap right above it. Because some armorers design their helmets differently or send them pre-assembled this is not always possible to achieve, but it is suggested that you try to get as close as you can. Note: Top ear screws should ideally be located directly below the rear of the trap.
-
Are you logging in with a username and password or email address and password? I see you had not posted since 2013 and the forum software has changed a few times since then, a security update was made to use your email address to login rather than a username, please try that and see if it works.
-
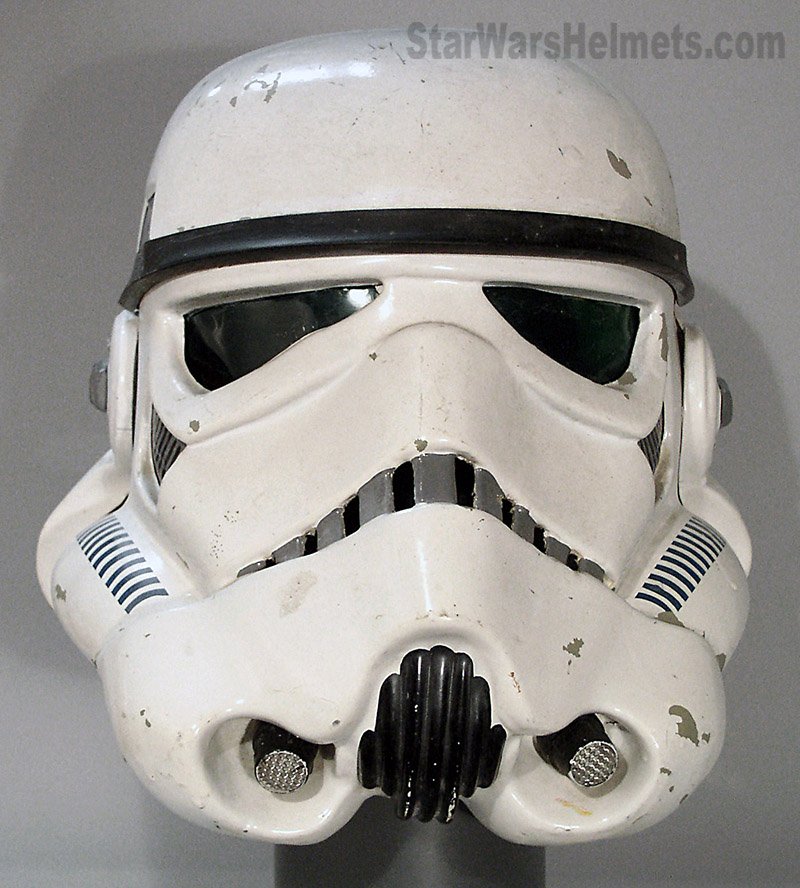
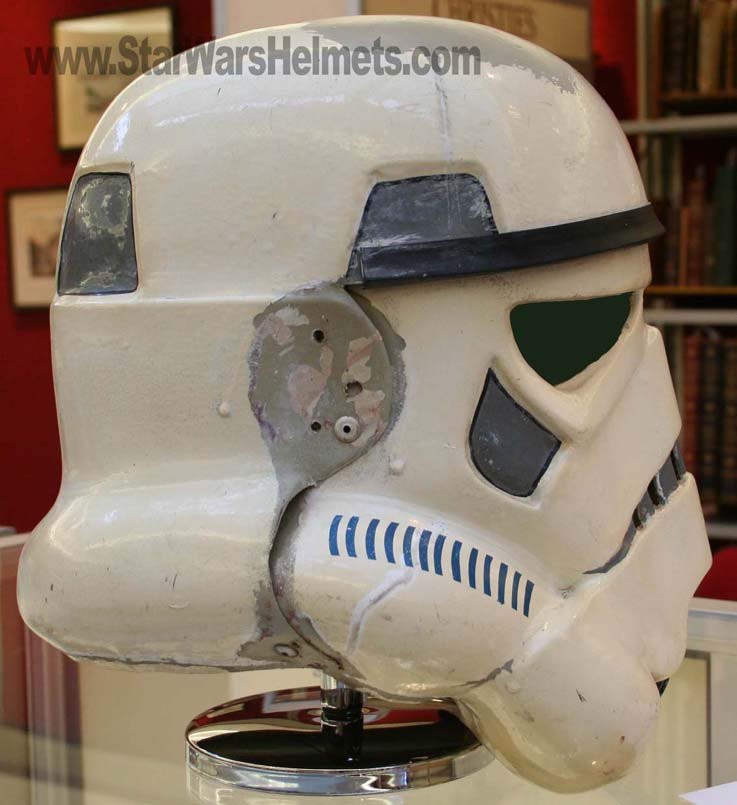
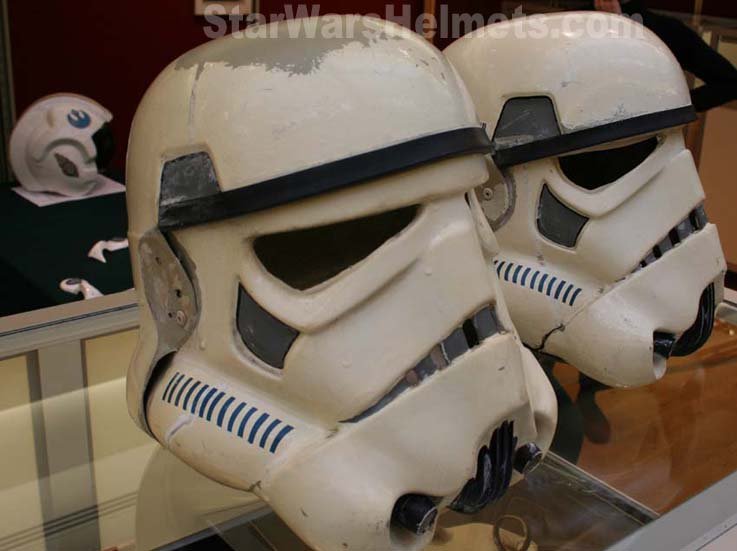
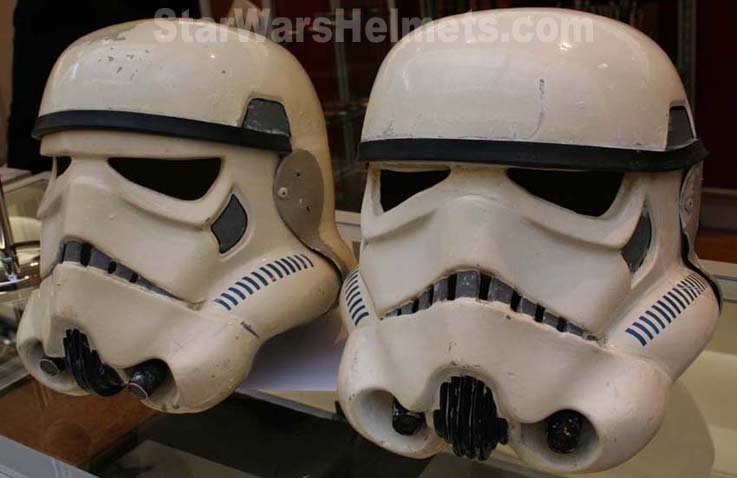
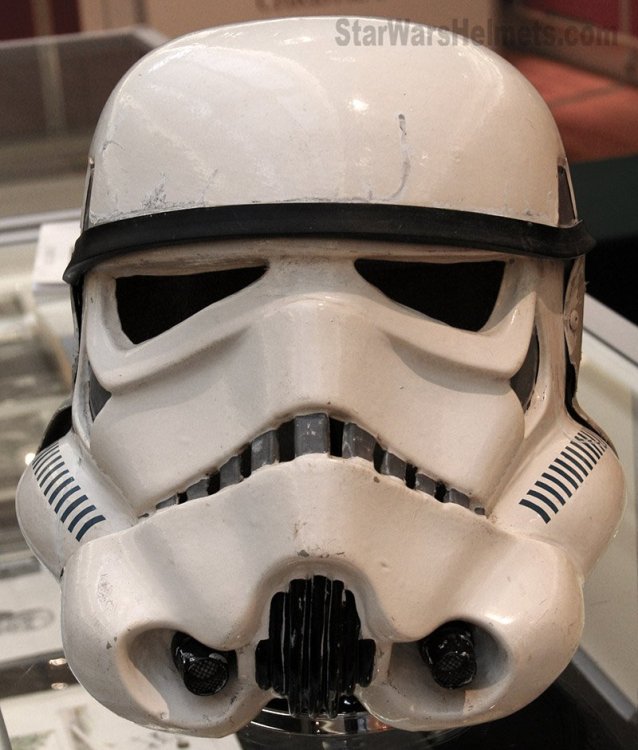
These should help you: Some references of screen helmets, many had gaps
-
TK ANH Stunt by CloseTheBlastDoor
gmrhodes13 replied to CloseTheBlastDoor's topic in ANH Build Threads
I also have a big gap, long legs too, shouldn't be an issue. The only real obvious thing is the gaps at your wrists, right glove is caught at the front. I would bring down your forearms a little, this will give you more room to move at your elbows, you could even bring your biceps down a touch also. Compare with CRL: Here the gaps look great at your wrists as your elbows are bent FYI use a "contrasting background" helps your GWL edit your photos (also helps me when you submit your Expert Infantry application and action photo ) Good luck -
Here is a thread with some pretty large fillers added And another
-
A consistent color is really what is needed but it really depends how much difference the shade of white is. There can be a huge difference from one maker to another, and even differences in white between manufacture of the plastic from the same factory.
-
Those few adjustments have made all the difference
-
Looking good, prep work does take the time to get just right, make use you get rid of any print lines, CRL's have the following requirements: 3D printed components must have no visible print lines and must be smooth for a realistic appearance.
-
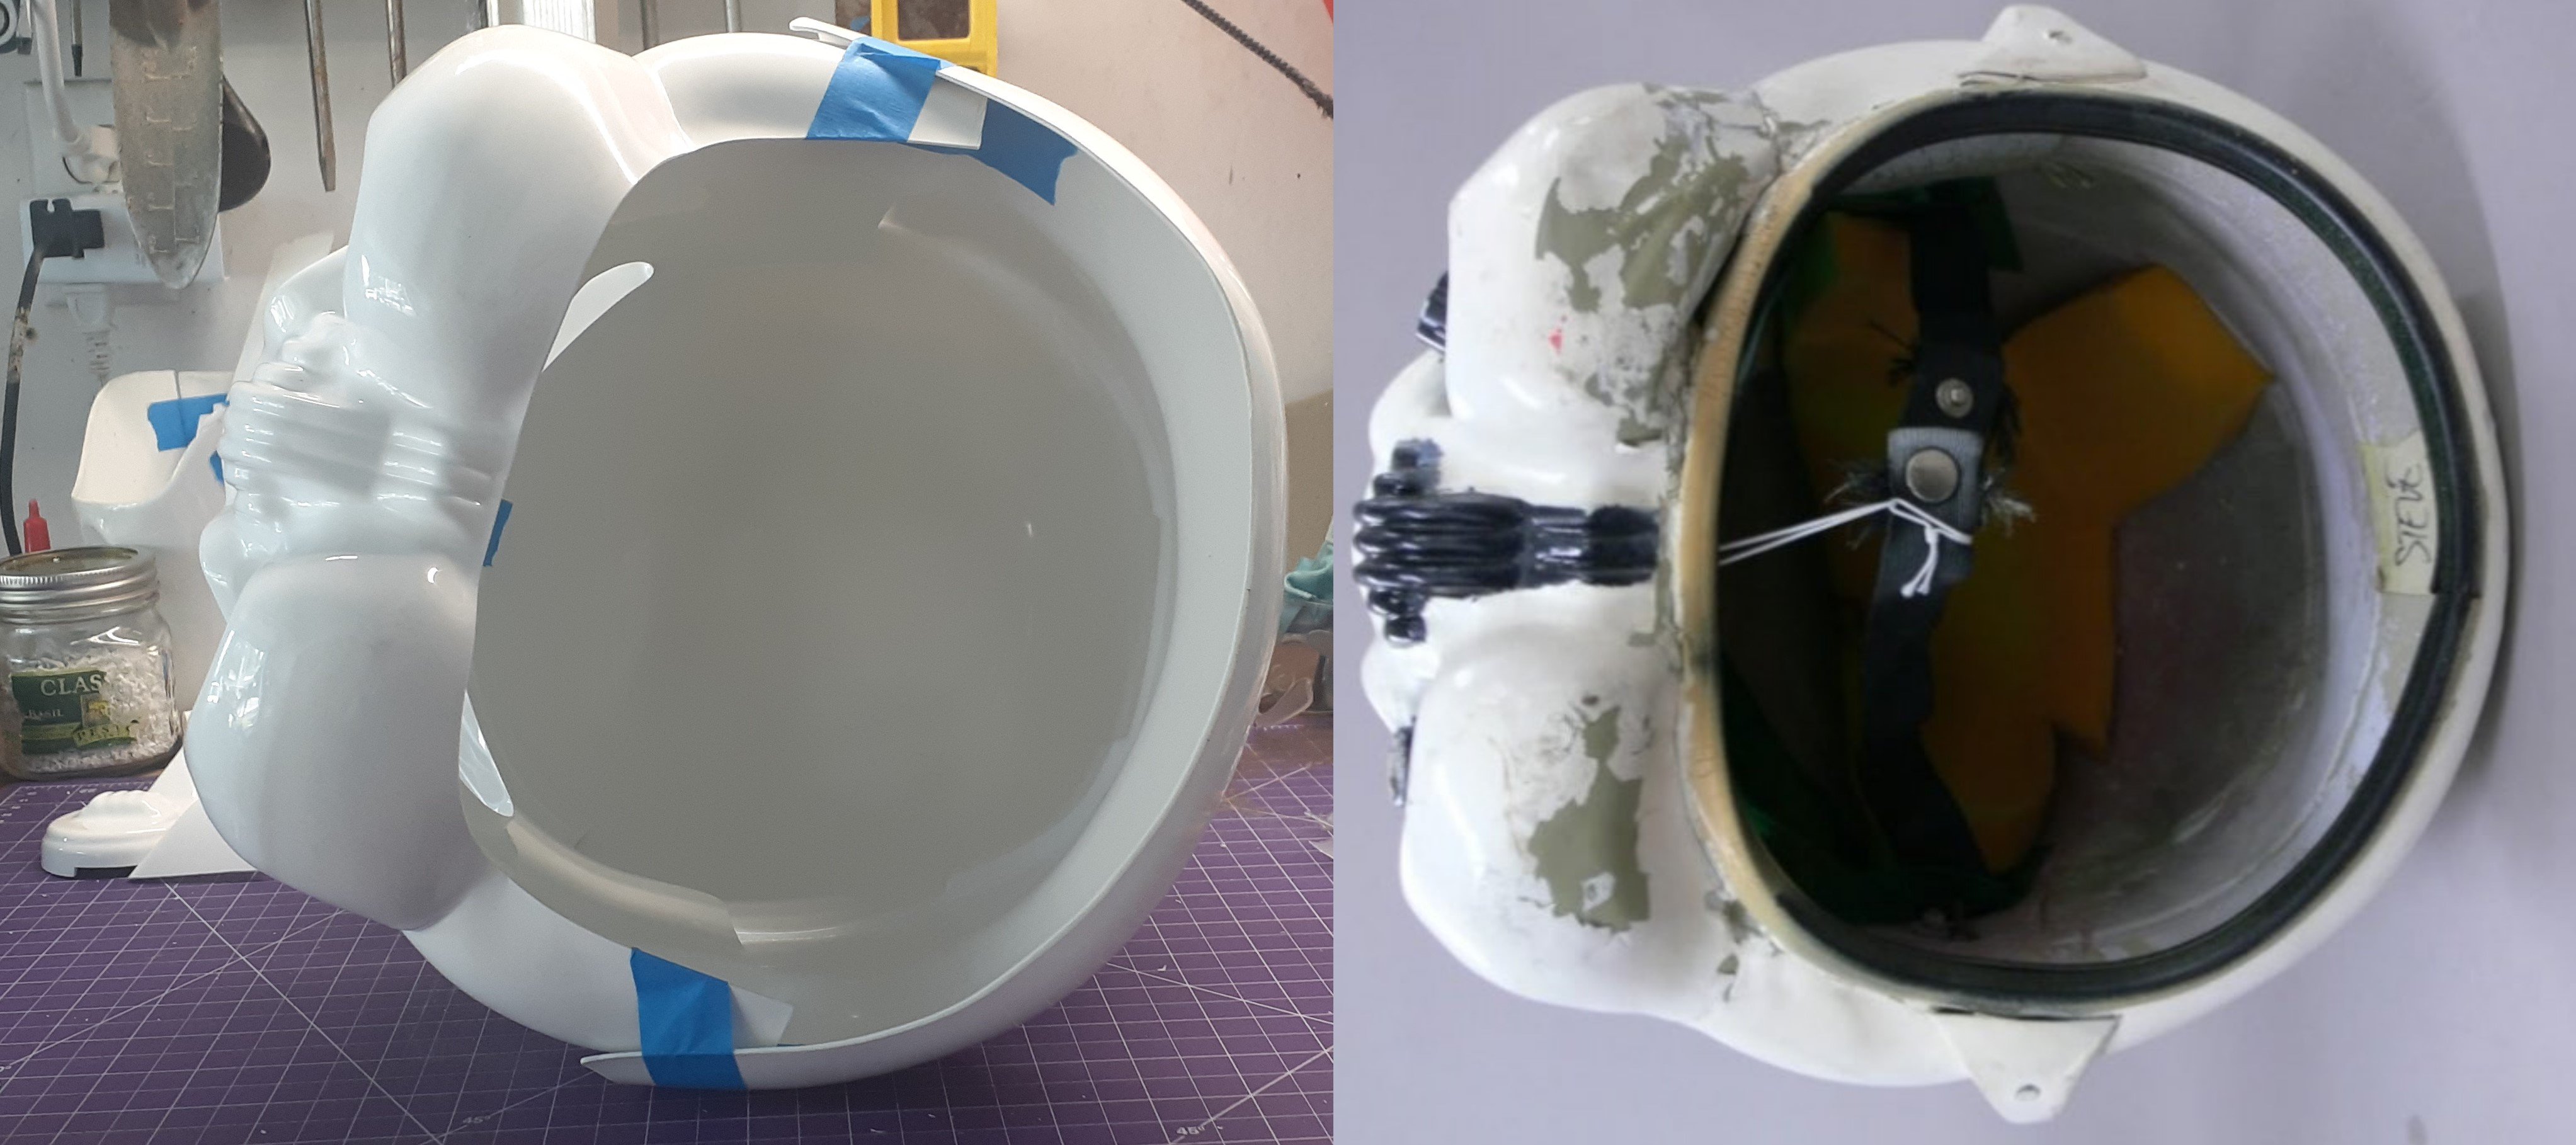
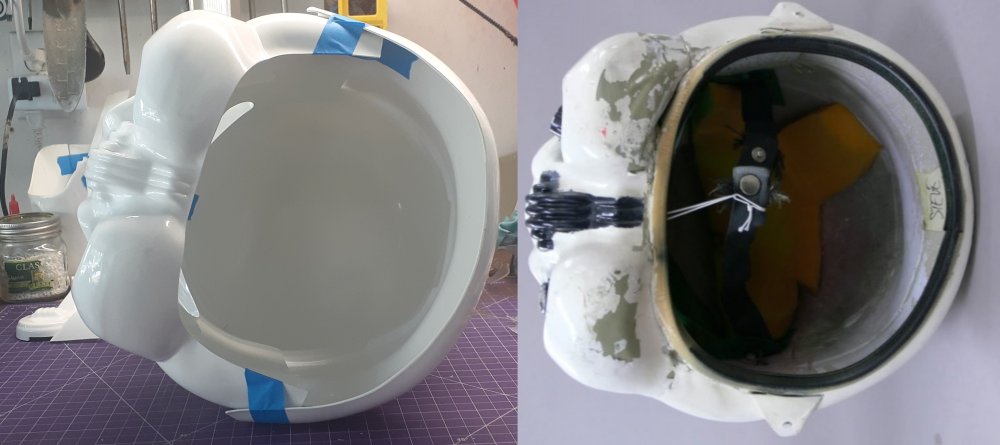
Normally you can add the bolt holes a little further back, this will push the lens forward when you add the sides to the ear bolts. I only used one on each side of my helmet. You will also need to trim your ear bolts after everything is fitted as they are normally quite long and will interfere when putting the helmet on and off. A little gap between the lens and helmet can be good to circulate the air. Fans are a much better source of air circulation though
-
Adding some photos would best so we can see the issues. How to here
-
TK ANH Stunt by CloseTheBlastDoor
gmrhodes13 replied to CloseTheBlastDoor's topic in ANH Build Threads
Just watch your gaps and placement of pieces, a full standing mirror is great to have on hand. Good luck, hope you receive some good news in the not too distant future -
How to here
-
You may want to fill the gap between the ab plate and backing piece with some ABS paste, most do who have to make this modification. Corners are not generally rounded off too.
-
Pyro's Imperial Armored Commando WIP
gmrhodes13 replied to Pyro's topic in Imperial Commando Build Threads
Info here for CRL model "we are rushing to get all the parts on Esty with CRL release. You can find the rifle and shin already. For now, what I’ll do is place all modified parts required (the ones I used ) and designed for 501st approval. These will be compatible with Big Fred’s basic armor. None of the current armor vendor can be approved without a lot of modifications and Big Fred was the closest I could find to start from. we will have the full armor package available sometime soon." -
You may want to remove a little of the paint touching the gums, toothpicks work well. Note the gap between the teeth and the gums in these references. It's more for higher level acceptance, basic should be ok
-
I need to whiten my kit to match new shoulder straps
gmrhodes13 replied to hesnojedi's topic in Assembly, Mods, and Painting
Some info here -
Hopeful but Intimidated
gmrhodes13 replied to Trooper Nez's topic in Getting Started - Read this First!
Hello and welcome, some belt info for you: Tony has an in depth build: Belt Assembly by ukswrath Bending the ABS Belt by gazmosis, Boba_Skywalker3 Attaching Belt to Abs by GnrlGrievous Holster Placement on Belt by CableGuy Current (2021) Holster Placement by gmrhodes13 (follow-up to previous thread above) Removable Holster with Snaps by Harbinger Belt, Holster, & Drop Boxes video tutorial by RWA (youtube) -
FOTK WIP
gmrhodes13 replied to TK32945 Waynocerous's topic in TK Pre-Approval Questions & Discussion
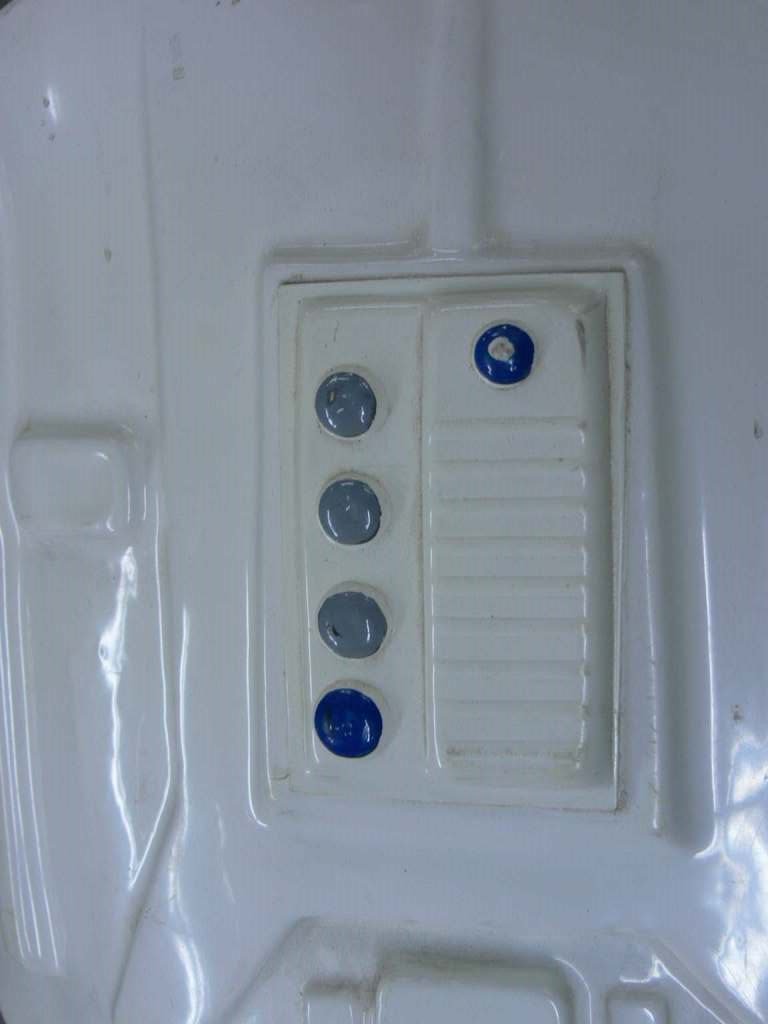
Lots of different ways to add electronics, I used LED's, red acrylic and electronics from a toy blaster Some build threads, more can be found here Chris has added some electronics in his blaster -
So many different ways to attach the lens, I make mine a little bigger than the eye holes, hold in place with tape and magnets and use silicon to hold them, leave for a couple of days to dry. Using Sugru is another option Original helmets had a one piece lens held in with the ear side bolts
-
Being on the skinnier side I added some foam behind the abdomen to help push it forward a little so the sides lined up. Some add a locking tab system to the sides so they don't overlap. Here is "crickets" version. There have been numerous different ways to add some kind of locking system. A good idea to add some V tabs between the kidney and posterior to stop them coming apart With a heat gun or oven you bend strips of ABS plastic into the shape of a V, only glue one side and the other remains free to allow movement when you bend. Just helps stop the butt plate from pushing back from the back plate.