gmrhodes13
-
Posts
31,198 -
Joined
-
Last visited
-
Days Won
1,067
Content Type
Profiles
Forums
Gallery
Articles
Everything posted by gmrhodes13
-

IG-41985 ANH Stunt TK Build Thread! (AM Armor)
gmrhodes13 replied to Artooritoo's topic in ANH Build Threads
Hopefully the first photo is prior to setting the snaps I use a guide made out of plastic for hole position, it's great to keep them a common size then you can swap out with others if any stretch over time. Try to attach your snap plates closer to the ends of the armor, you won't need as much elastic then and also it will keep the pieces together better, with large gaps they can push backwards. Or this can happen You can leave some return edges on most of your armor pieces. -
Sha Sha's (Slow) KB FOTK Build for Short Troopers
gmrhodes13 replied to shashachu's topic in TFA Build Threads
Issue is the piece is already a wedge shape so too thin at one end Here are some free 3D holster files which you may be able to modify https://www.thingiverse.com/thing:4057796 https://www.thingiverse.com/thing:1474100 -
Sha Sha's (Slow) KB FOTK Build for Short Troopers
gmrhodes13 replied to shashachu's topic in TFA Build Threads
Here's a front view of that particular display armor, no addition wedge but has the curved mount The R2 Dan holster wedge is only to change the angle of the mounting This display trooper has both which it was based on The main mount is curved and follows the thigh, I doubt you would be able to get the wedge to do the same. -
TK ANH Stunt by CloseTheBlastDoor
gmrhodes13 replied to CloseTheBlastDoor's topic in ANH Build Threads
Plastic welder from Devon should be fine, very similar to the JB weld -
File Name: Tissue Box | That's no moon Designer: MonsieurCaron Last Update: 27/07/2025 File-URL: https://makerworld.com/en/models/1644939-tissue-box-that-s-no-moon?from=search#profileId-1738501 Description: This tissue box is so powerful, it could mak your nose blow up like Alderaan. - Snot Tarkin My desk is a geek haven, and my tissue box needed to fit in. So, I designed a Death Star-inspired tissue box cover that looks like it came straight from the Galactic Empire! It's held together with trusty Gorilla Glue and designed for a snug fit on most North American 🇨🇦 tissue boxes, so it won't slip off. Feel free to get creative with your colors, but dark gray is more movie-accurate. May the Print be with you! Images:
- 1 reply
-
- 3
-

-
Looking forward to watching your progress. It's amazing how many projects you can have all at the same time, a downfall to this hobby
-
TK ANH Stunt by CloseTheBlastDoor
gmrhodes13 replied to CloseTheBlastDoor's topic in ANH Build Threads
Personally I would use something a little stronger, some harder setting glue like an epoxy ( or JB Weld or Devcon) and a piece of plastic behind, this should prevent further cracking -
ICOMM and trooper chatter question
gmrhodes13 replied to m.pire421's topic in Electronics for Helmets / Blasters
I use an mp3 player for background chatter, I use 2 wireless finger remotes with relays which can pause or play next track, I tend to use the pause mainly when I need to talk then press again after the chatter has finished, made sense to me if I was talking there would be no incoming sounds. All is run off a 3 x AA battery pack so quite small. The remotes once out of the housing are only slightly bigger than a 3025 batter, with a loop of elastic glued on they fit around the fingers and slide inside the gloves well. You can find background chatter in this thread.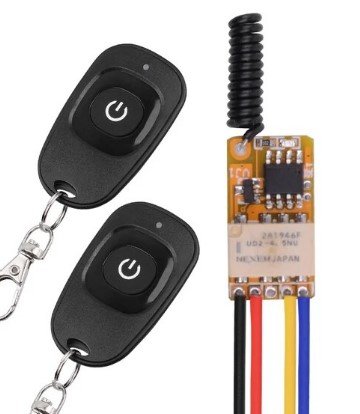
-
Sha Sha's (Slow) KB FOTK Build for Short Troopers
gmrhodes13 replied to shashachu's topic in TFA Build Threads
Great to see you back at this, looking forward to seeing the progress -
File Name: Galactic Empire Lamp Designer: Roberto Last Update: 23/07/2025 File-URL: https://makerworld.com/en/models/1631425-galactic-empire-lamp?from=search#profileId-1723140 Description: Beautiful table lamp with the Galactic Empire logo, there are two versions of the logo, one recessed and the other with un-recessed letters. The image shows the un-recessed version. You can find the LED lamp on aliexpress: https://a.aliexpress.com/_EwgnWUW Images:
-
- 2
-
-
File Name: Jawa Scavenger Lamp Modular Designer: warrell72 Last Update: 02/02/2024 File-URL: https://makerworld.com/en/models/167131-star-wars-jawa-scavenger-lamp-modular-parts-1#profileId-183518 Description: Overview This model comprises 6 modular rings that effortlessly screw together for easy assembly. The modular design offers the flexibility to print parts in distinct colors and interchange components seamlessly. Drawing inspiration from iconic in-universe designs such as Death Star wall panels, Lightsaber bases, Millennium Falcon seats, to thermal detonator caps, each part of the lamp exudes a distinctive Star Wars flair. Designed to accommodate the CFGROW LED Flame Effect Light but can be adapted to support a diverse range of lighting options. Images:
-
- 1
-
-
File Name: Imperial Cog Wall or Tabletop Decoration Designer: mgranger114 Last Update: 26/07/2025 File-URL: https://www.printables.com/model/1362630-star-wars-imperial-cog-wall-or-tabletop-decoration Description: I made two versions of the Imperial Cog to choose from. Both of them are 100mm circles. They have a cutout on the back to hang on a nail or screw. There's also a foot that connects to sit on a desk or shelf. imperial cog desk wall extruded.stl--There will be a color change after the background prints. The cog symbol will be the second color. If you were recreating the picture, it would be a black background, then white to finish it off. Change at 15.2mm when the background finishes. Cog symbol will be this second color. imperial cog desk wall recessed.stl Start the print with the color that you want recessed. The recessed areas will be that color (white in the recessed pictures). Make the change at 12.2mm where the solid fill of the recessed areas ends. Then it starts the outlines of the rest of the cog (black in the recessed pictures). The extruded ones were done on an old printer that I just use for test prints, that's why the background layer isn't very smooth. I also changed the filament one layer too soon, so I had to use a black Sharpie to color it. That's what the extraneous black marks are. I also made a Rebel Symbol 4-½" Desk or Wall Decoration Images:
-
- 1
-
-
File Name: Holo Communicator Wireless Charger Designer: MrCvok Last Update: 27/07/2025 File-URL: https://www.printables.com/model/1366539-star-wars-holo-communicator-wireless-charger Description: A 3D printed model of a wireless charger that recreates the holographic communicator from the Star Wars universe. Specifically, Qui-gon Jinn's communicator from The Phantom Menace. The model is created to the specifications of the ChoeTech Wireless Fast Charger Pad. https://www.alza.cz/choetech-wireless-fast-charger-pad-10w-black-d5881142.htm eBay link Images:
-
- 2
-
-

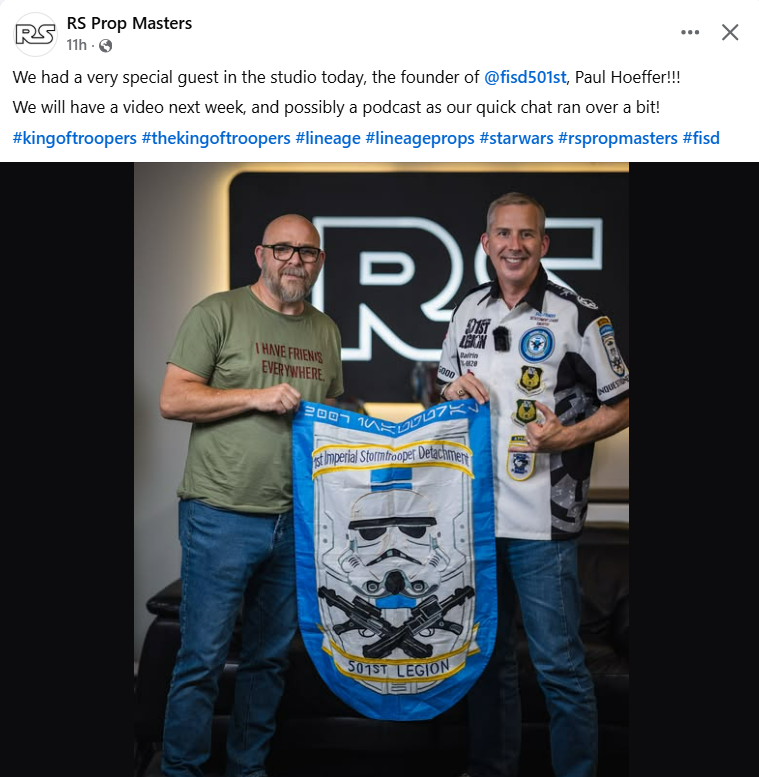
-
RS Props Gets a Special Visitor Keep your eyes open, there will be a video incoming soon
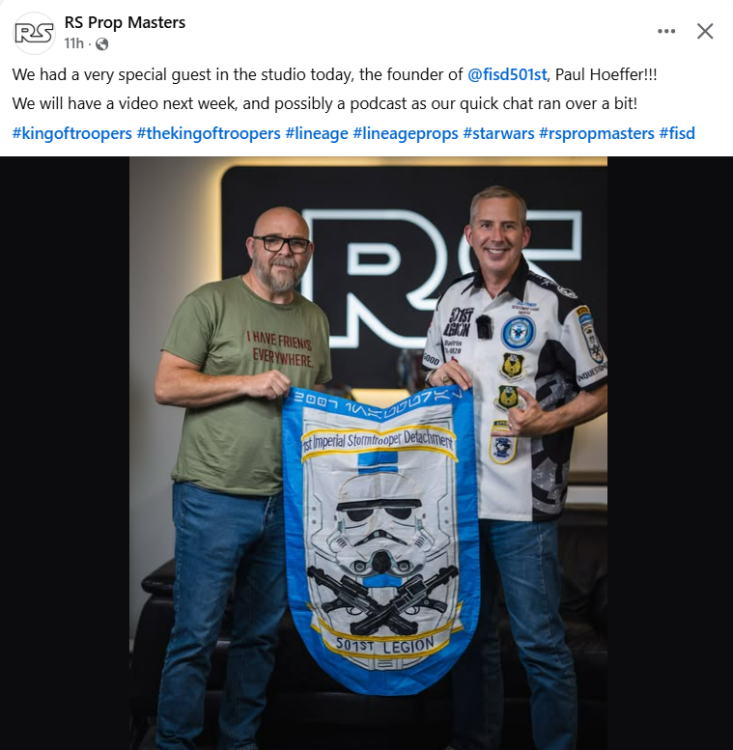
- 1 reply
-
- 9
-
-

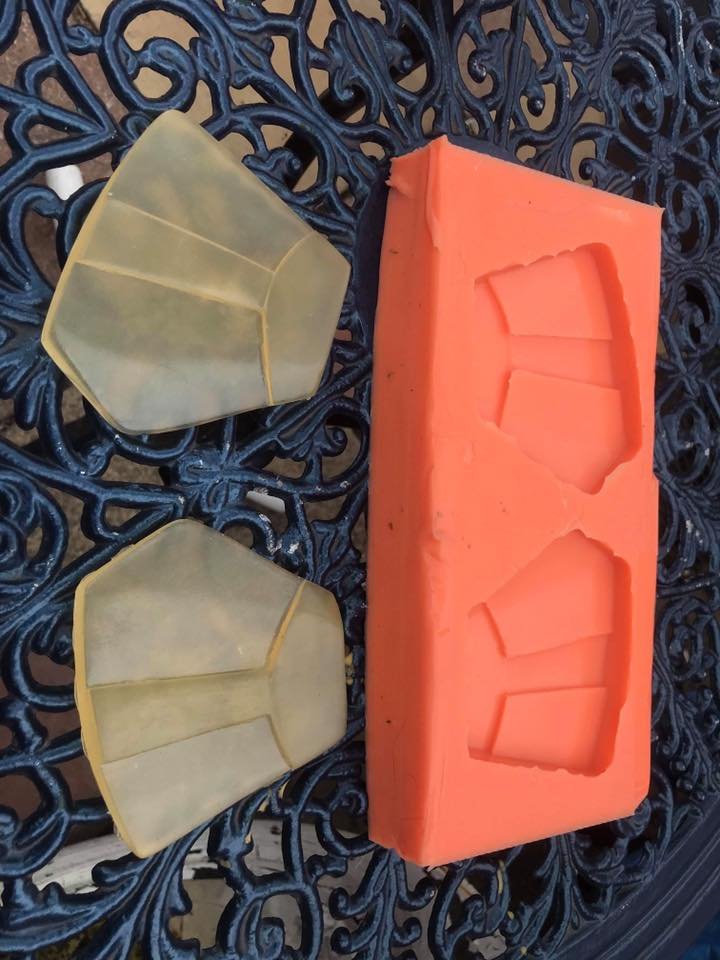
-
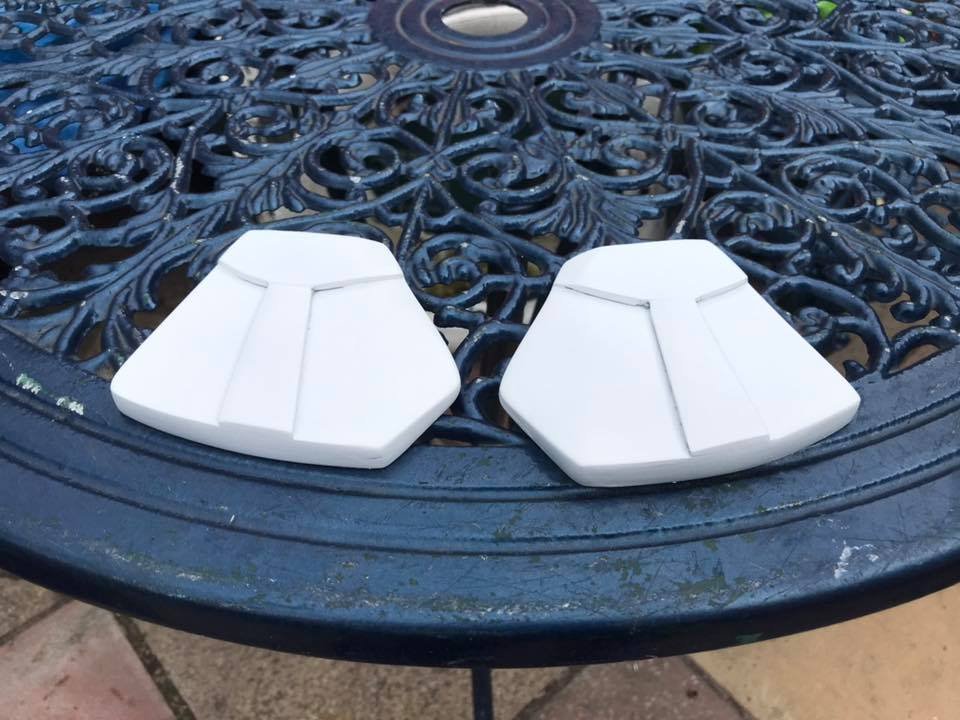
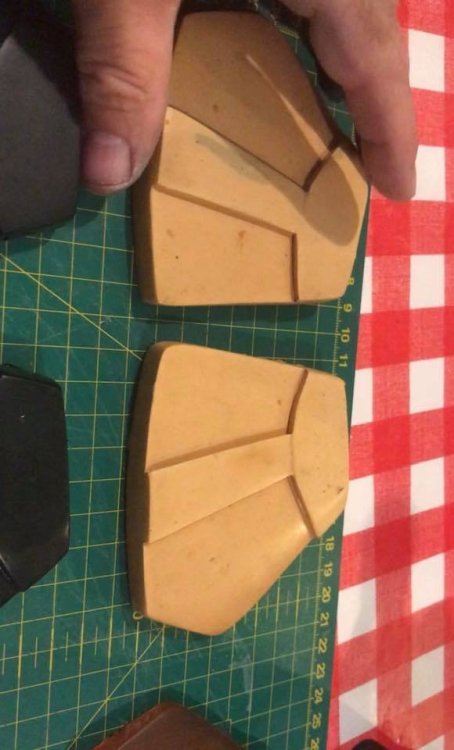
Found the images of the Sheer Tech rubber/silicon hand plates, they are missing the font indent

-
They look a lot better than the other 3D files out there, many have a curved area on the bottom and not straight Albeit they could have the side top corner rounded

-
No issues trimming the tops of the thighs so they don't dig in when moving. Some photos of your other thighs may help us to give you advice, really depends if they have ridges or not. You can use larger cover strips, we try to add these to the rear as the public doesn't see that area very much.
-
Images added


-
The only ones I have seen before are: Shear Tech RO E-11, Rubber RO Handguards https://www.facebook.com/sheartech/ I am not real familiar with these guys but the E-11 looks nice and the rubber hand guards are nice as well. I know they have recently been posting N-S9 Starpath units so may still be active with other props. There are some 3D files with the front indent https://www.thingiverse.com/thing:3910278
-
IG-41985 ANH Stunt TK Build Thread! (AM Armor)
gmrhodes13 replied to Artooritoo's topic in ANH Build Threads
A couple of threads you may find helpful making snaps. Also using a soldering iron or a heated metal screw helps prevent fraying and hole elongation. If you have any issues with loose snaps Also for any areas under strain it's recommended to use double snaps, in case one lets you still have a spare. General layout -
Or if you know someone who sews this could be an option, I've made a few myself and I only know basic sewing.
-
I have used some sign plastic for another member but I used 5 minute epoxy glue, the issue with E6000 is it flexes and can let the crack split again. You could also use fiberglass and matting which would also be very strong, if you go this way just watch how much hardener you use as it can create heat when curing. Be careful looking at a replacement pieces, shades of white can change from run to run even from the same supplier, from different suppliers it can be like chalk and cheese. I'm wondering how much gap you have between thighs and posterior, you may be better trimming a little off the top of the thighs, do you have any kitted up rear photos?
-
Your link is incorrect, try this one https://www.501st.com/members/displaymemberdetails.php?userID=48588
-
You can find a nice list of tools here And when you are opening your BBB and your smile wears off and the panic sets in make sure you have all your research done and ready for that first cut. A build thread is the best way to get feedback on your build so definitely post one of those