gmrhodes13
-
Posts
31,206 -
Joined
-
Last visited
-
Days Won
1,069
Content Type
Profiles
Forums
Gallery
Articles
Everything posted by gmrhodes13
-
Hello and welcome to the forum, this thread is full of helpful info which should get you on your way
-
My blaster is wrapped in a towel and lays in the bottom front of the suitcase with armor resting against it so it doesn't move
-
Now lets see that shinny white plastic Excitement level 3,000, scare factor when you realize you have to start trimming 1,000,000
-
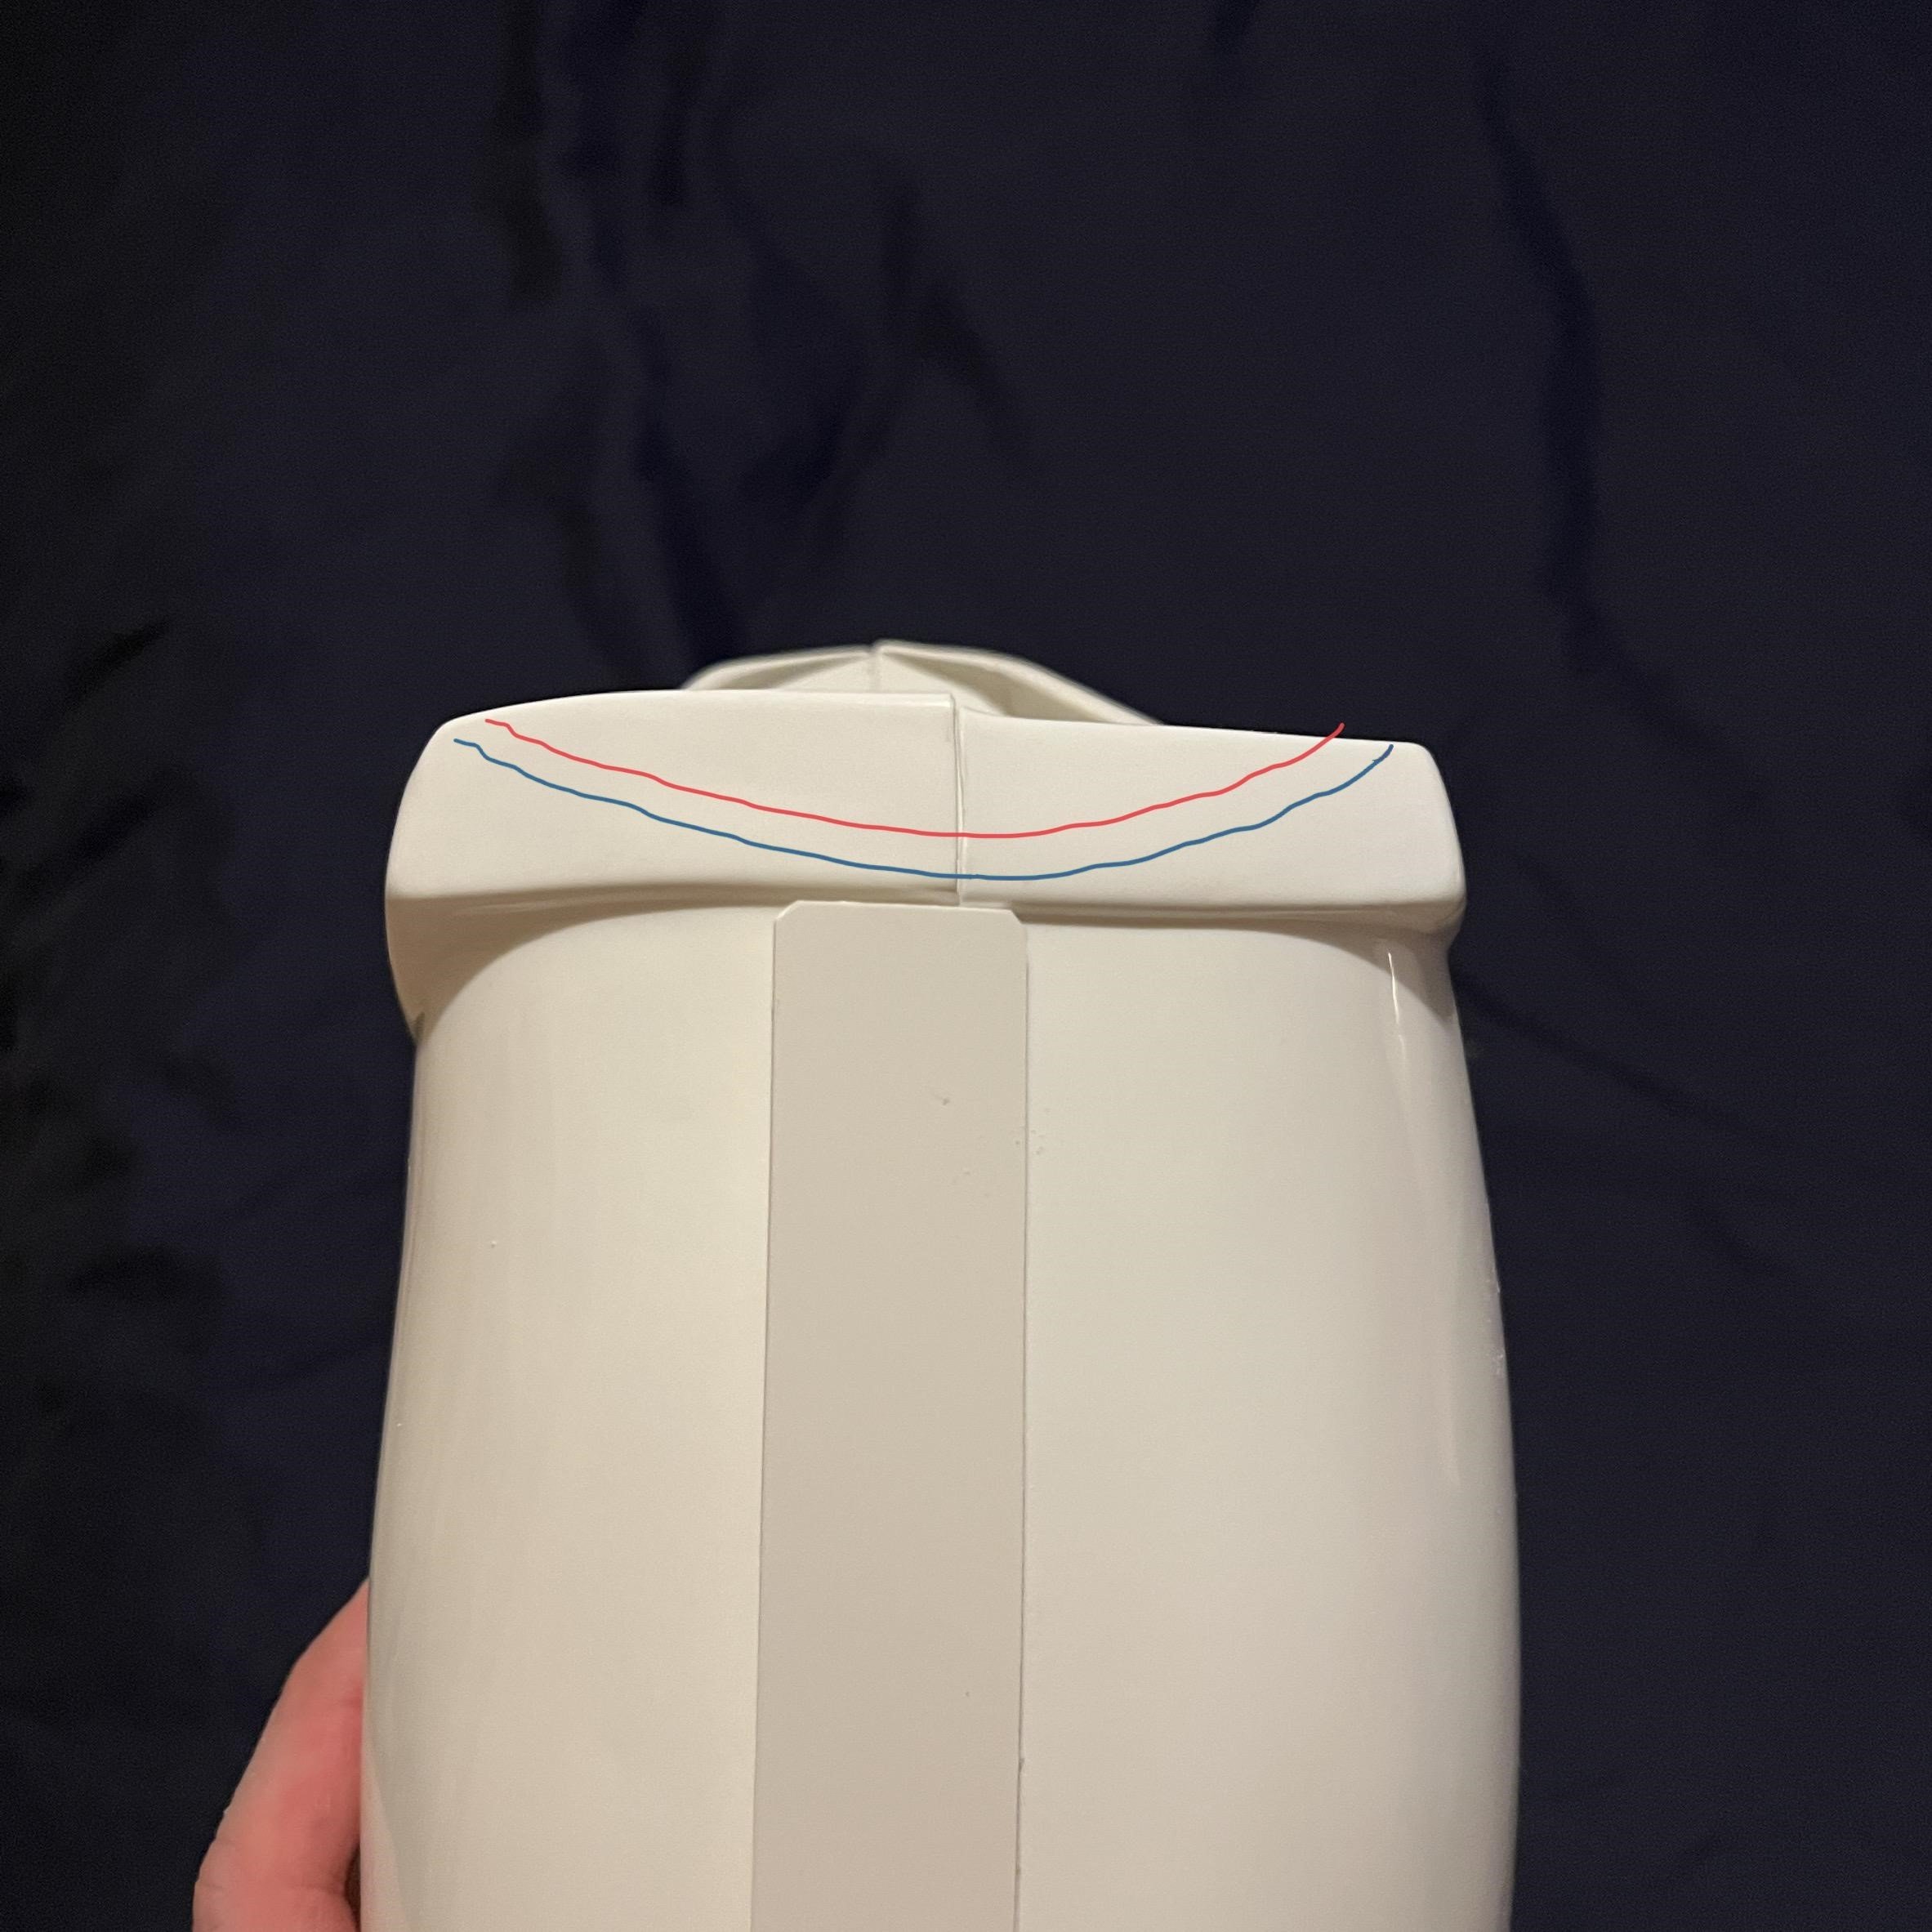
It's fine to add mobility cuts to the thighs and shins, references here
-

Tim’s first time build (RS Prop Masters ESB TK)
gmrhodes13 replied to TrickyT81's topic in ESB Build Threads
Velcro can be used for Centurion You can go all the way down to the ridge on the trim line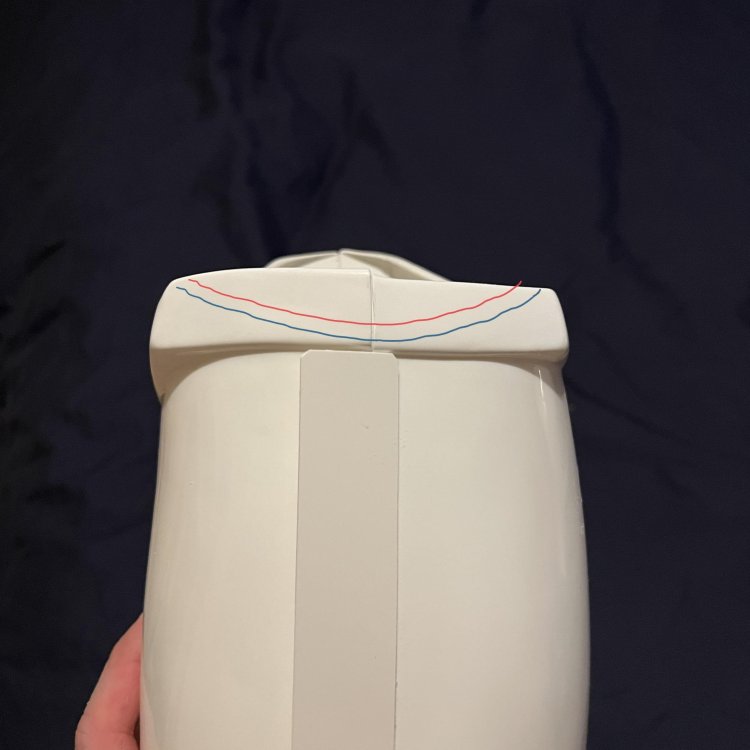
-
Some do weather the Hengslter, I did only minor amounts, corners and sides that would get scuffed in use, also a touch on the Hengstler logo so it could be seen a little easier.
-
There are armor makes for those who are taller, some of us not all can sit, depends how the armor fits you, this may help Research is the key and nobody walks into this blindly, it is not a cheap hobby to start with but it can be a very rewarding one. I do suggest reaching out to those members close to you, meet up with them at a troop or an armor build day, I'm sure they will be very helpful
-
Most don't 3d print armor especially for Original Trilogy armor, they purchase molded abs plastic, you can find recommended suppliers here
-
You don't have to attend an event to make TK armor, many don't even see anyone from their garrison until they have built and are 501st approved, this forum has a wealth of knowledge and people ready to help and give feedback. I would suggest though to reach out to your local garrison, some have armor build days and you may be able to see and feel how the helmet or armor pieces will fit and any restrictions. You can search for your local 501st garrison here https://www.501st.com/maps/
-
Tilheyra's FEM7 Build
gmrhodes13 replied to Tilheyra's topic in Other Non-Approved Star Wars Costumes
Great work, just make sure you clean up any sharp edges before painting, mainly around rims/ends of the armor
-
New TK build - RS Props (TI-97531)
gmrhodes13 replied to RippTiger's topic in Tutorials, Tips and HOWTOs
They don't need to match each other, you can trim off the overhang -
Great news, make sure you do your research so you are ready to go when your kit arrives, lots of reference material available here https://www.whitearmor.net/forum/gallery/category/24-anh-tk-reference/ If you are going to aim for EIB and Centurion make sure you check out some of those builds for extra details
-
Mine I could only get the large bump and 2 and 1/2 small bumps as ATA chest ridge is higher. Screen accurate have the large bump and 4 to 5 small bumps
-
Length around the pipe dependant on control panel placement and width of pipe. I normally make some templates out of cardboard for correct length (cereal box or similar works well)
-
Lots of info on the FOTK in this area https://www.whitearmor.net/forum/forum/218-first-order-battle-group/ and here Good luck with the research
-
Hello and welcome to the forum
-
Tilheyra's FEM7 Build
gmrhodes13 replied to Tilheyra's topic in Other Non-Approved Star Wars Costumes
Adding a piece of plastic behind the join with help with the strength of the joint. FYI you can get larger tubes of JB weld although not the needing type, I find works out a lot better price wise. Try not to heap it on, a few thinner coats will dry quicker and should give extra strength. Like anything it's all a learning curve and just adds to your future experience -
New TK build - RS Props (TI-97531)
gmrhodes13 replied to RippTiger's topic in Tutorials, Tips and HOWTOs
Yes you can trim the point -
A touch closer to the edge, a bit too much white showing, but as I say I'm picky
-
Some nice painting there
-
Personally I think you are pretty close, albeit if it was mine I would add a touch more paint, but I'm picky
-
Tim’s first time build (RS Prop Masters ESB TK)
gmrhodes13 replied to TrickyT81's topic in ESB Build Threads
I found some people have different calves too, I had to add an extra 15mm to a recruits armor I was building. Always compare how you look to references, here you can see very little gaps between some troopers armor pieces, you don't want to take too much off I would thread the height of the shins the same, with removing small amounts at time, it's easy to take more off but hard to put more back on. A little heat on the base can also help spread the opening allowing the shins to come down over your boots and ankles, may be worth have a look at. -
You need to add a link to your legion membership, please read the first post in this thread
-
More research, I had numerous build threads saved on my computer but still found I had to stop building to check online for a reference or two, there is no such things as too much research Tool wise another two Dremel's, I hate changing the bits mid armor trimming, I know have 3 which makes building so much quicker. Good luck with the build, hope to see some progress pictures soon