Jump to content

Kagamaru

501st Stormtrooper[TK]
  • Posts

    64
  • Joined

  • Last visited

About Kagamaru

Contact Methods

  • Website URL
    http://bryanalexis.art

Profile Information

  • Gender
    Male
  • Location
    Arkansas
  • Interests
    Design, Murals, Art, Star Wars

Standard Info

  • Name
    Bryan
  • 501st ID
    42414
  • 501st Unit
    Diamond Garrison

Recent Profile Visitors

472 profile views
  1. Awesome! Thank you. I might add a spring in that area behind the bolt just to complete the look before I make the end cap permanent with glue.
  2. E11 Well it has arrived. On advice of @justjoseph63 I’ve ordered the E11 from Quest Design. Very cool piece. Is it ready to go as is? Do I need to modify it more? It’s all black. Like everything. Is that okay? Or do I need to paint the shell ejection cover silver or gray. Also the counter is black. No numbers. And there is no spring in the channel. Is all of that required for Centurion or can I slowly add that stuff as I go. I do plan on modifying my airsoft eventually as it’s cool as. But I’m ready to start the application for centurion right away. side note: I have really been enjoying trooping. Been on three so far with another this Saturday. So much fun!
  3. Requesting 501st Status https://www.501st.com/members/displaymemberdetails.php?userID=37323 https://www.501st.com/members/displaymember.php?userID=37323&costumeID=125 TK42414 Kagamaru Diamond Garrison
  4. Armor Bite & Flexibility How far can I trim into the inner elbow of the forearm? I can almost reach my snaps on my shoulders but not quite. Or can you cut into the bicep any?
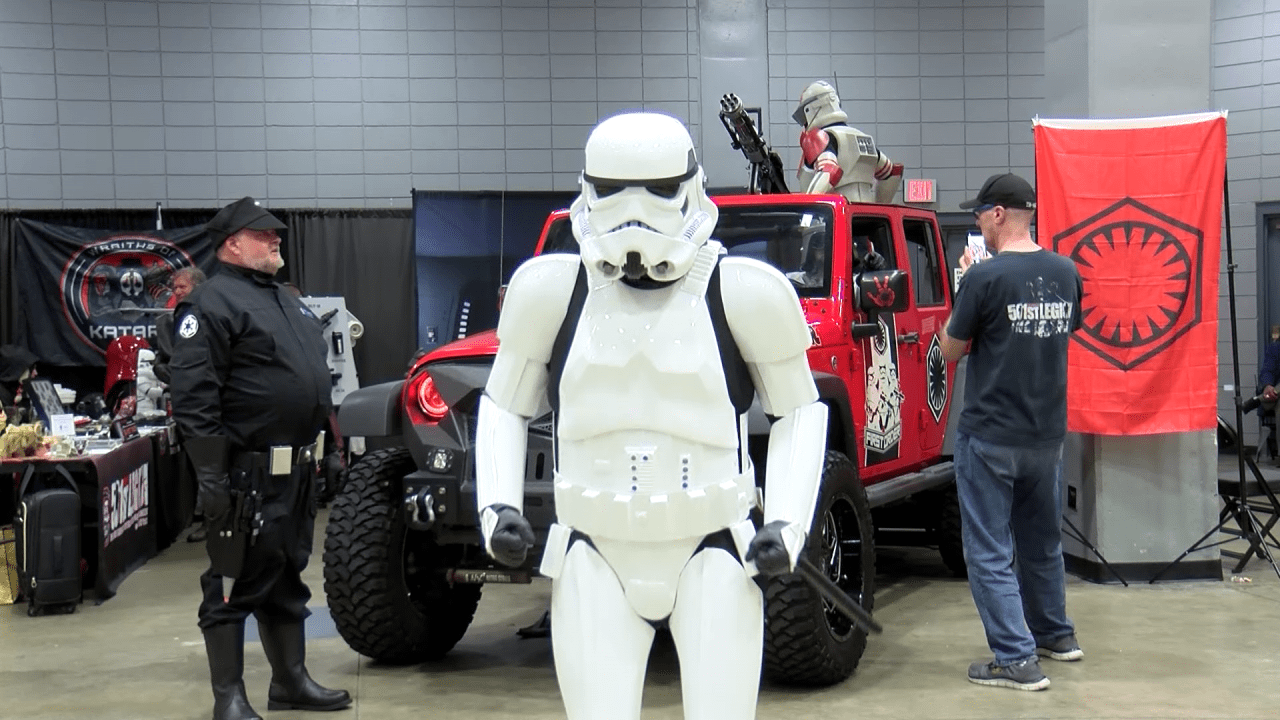
  5. Okay I removed and repositioned the shoulders. Much better now! Here I am at my first troop! I was approved for basic level yesterday! As soon as my blaster comes in and I fix some small things here and there I’m going to apply for centurion level. TK42414 Is there something I need to do to register my approval on this forum?
  6. On the straps I have velcro and elastic loops. Is there another trick I’m missing or make them line up?
  7. Thigh and Chest Adjustment I took the thigh strips off and replaced them with wider versions. Opened the top up about 1.5”. I feel like the are right at the top of my inner leg. When compared to the photo provided it doesn’t look high enough but it is higher. And the armor shape itself is different. one top is more pointy than the other. I haven’t removed any from the shape of the tops. They are how I got them from wtf. I figured it was the asymmetry the armor is famous for. Or at least how this set is. I could make them match but it would mean shaving the right one down and I didn’t want to do that. I did notice a guy in the back in the reference photo that was attached that has a space around the top of the thighs more like mine. Maybe I could pretend to be him? I repositioned the anchor points between the chest and the ab plate. I’m pleased with how that matches the reference photo. It made the shoulder straps and neck move up to a better position and the shoulder straps are more in line in the back. Does this look better? Unless I order whole new thigh pieces I’m afraid I’ll never get that tight look of the front row. If I keep expanding and sliding them up I will have a wide black band/space at the knee. I read that these extras were like 5’7”. I’m 6’. Maybe it’s all in my legs. Here you can see the wider thigh strip. Just so you know I did do the work to make it better. Thoughts?
  8. Test Fit 2 Ordered a different blaster. So no centurion until that comes in. I’m going to go ahead and try to come in at base level and then apply when it arrives. I am going to have to retake photos when I can have a member or someone who has an eye for detail help me out. I can’t see when things are poking out wrong or not tucked properly. My shoulder straps are reinforced with Velcro and the elastic loops but are still a bit misaligned. It might just be how I’m standing. If I had someone there that could keep an eye out for that stuff I think I could get a photo with everything more properly aligned. Anyway this is it so far. Gods this thing is hot. I thing I lost a liter of water wearing it.
  9. E-11 So a while back I ordered an airsoft e11 replica. It hasn’t shipped yet and was pre ordered. As I get close to finishing my armor I have started looking at that bit and came across this discussion: Toward the end it sounds like they are basically saying the airsoft version of the e11 is no bueno for Centurion L3. So should I cancel the order? I don’t want just a 3D printed blaster. I want something with some heft to it. Which the airsoft has as it’s not plastic. I have no idea how long I’m going to have to wait for it to even arrive in the states to be shipped to me so I feel like if I’m going to change gears I need to do it now. But I need some guidance on options that will pass muster but not be even more expensive than the airsoft which was like $450. Thanks for input.
  10. Comms Instructions Is there a tutorial somewhere that goes step by step on running fans, iComm, speakers, mic, and Aker amp, from one rechargeable power source. I built a Jawa mask that had two fans, a speaker, and a soundboard, from one. Jawa hoard had an awesomely detailed pdf that walked through it. Is there something similar for the tk helmet guts? I saw a cool layout by @kamakazi34 here, but the video demo seems more about layout instead of the super detailed step by step a novice needs, and doesn’t include a rechargeable power source. Any pointers would help. Thanks!
  11. Update Corrected Cover Strips I went ahead and did the deed. Starting with what I thought would be the most difficult first. I carefully cut away the dried E6000 on the back of the left thigh from the inside panel. Then made an angled cut of almost an inch! Yikes. But I wanted it as straight as possible, while hoping that the strip would angle back in rather than go further the other way. When I was test fitting and bending before my cut it seemed to be angling the right way. (Always test fit with painters tape!) I committed and made the cut. Re-glued it and waited. The fit was already tight but I had a good bit of return edge. So after drying I sanded away all of the return edge. Tried it on over the undersuit and violà! It fit AND was straight! While I was at it I went ahead and sanded a bit behind the knee for mobility, careful not to cut above the raised ridge line. Sorry for the butt shot. I tried to crop it down to spare your eyes: I’ve also corrected the rotation of the TD. I’ll post a photo of that next time I test fit the full uniform. Thoughts? Thanks for your feedback and guidance.
  12. I might try to adjust it when I’m wearing it. Perhaps it was twisted. Right now the strip is centered over the split. If I angle it like your diagram it wouldn’t follow the ridge on the left side. I’m not opposed to it. I just am not familiar enough with what adjustments are hierarchically more important than others. So in this case adding the angle makes it not square with creases in the armor. I’ll think on it though. Thank you so much for your constant and constructive help.
×
×
  • Create New...