RogueTrooper
-
Posts
4,222 -
Joined
-
Last visited
Content Type
Profiles
Forums
Gallery
Articles
Everything posted by RogueTrooper
-
That's a great looking bucket....
-
Cool video Chuck. You got some sith skills going on!!!
-
However the judge warned Mr Ainsworth that if he was to “seek any further selling into the US,” he would be in breach of copyright laws. I wonder how AA will try to get around this????
-
This a great tragedy. My heart and condolences go out to you Joe, and the family of Oz Schmid for this terrible loss. I will keep you and his family in my thoughts and prayers. Tom
-
Hi Brian, Sign me up for a autographed copy!!!!!!!!! PM SENT!!!! Tom
-
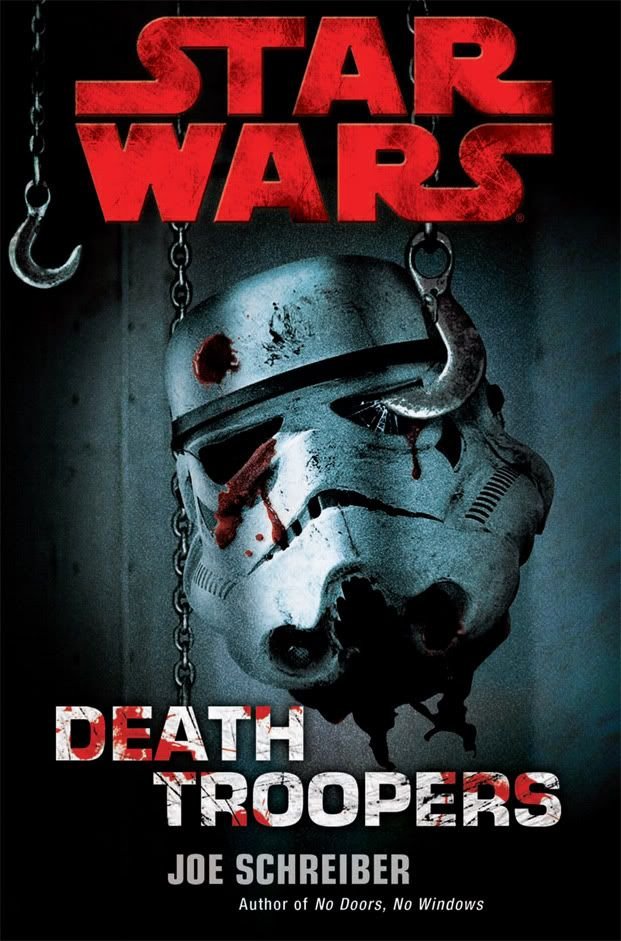
I thought since it is still around Halloween, This month, Star Wars novels take a terrifying plunge into horror with the release of Joe Schreiber's Death Troopers from Del Rey Books. The idea of zombie stormtroopers has inspired a lot of excitement -- and more importantly, creativity -- among the fan community. Del Rey had channeled that energy into a contest, where fans were encouraged submit their version of a Death Troopers video trailer. Below is the link for the winning trailer: Here is the link for the winning Death Trooper trailer When the Imperial prison barge Purge–temporary home to five hundred of the galaxy’s most ruthless killers, rebels, scoundrels, and thieves–breaks down in a distant, uninhabited part of space, its only hope appears to lie with a Star Destroyer found drifting, derelict, and seemingly abandoned. But when a boarding party from the Purge is sent to scavenge for parts, only half of them come back–bringing with them a horrific disease so lethal that within hours nearly all aboard the Purge die in ways too hideous to imagine. And death is only the beginning.
-
It's workin' now, thanks!! COOL PIC MAN!!
-
You might want to check out starwarshelmets.com link fan made stormtrooper helmets And this video link under TE derived Armor (Building and Discussion) called TE2 Move Along build by TK-4510, VIDEOS -------
-
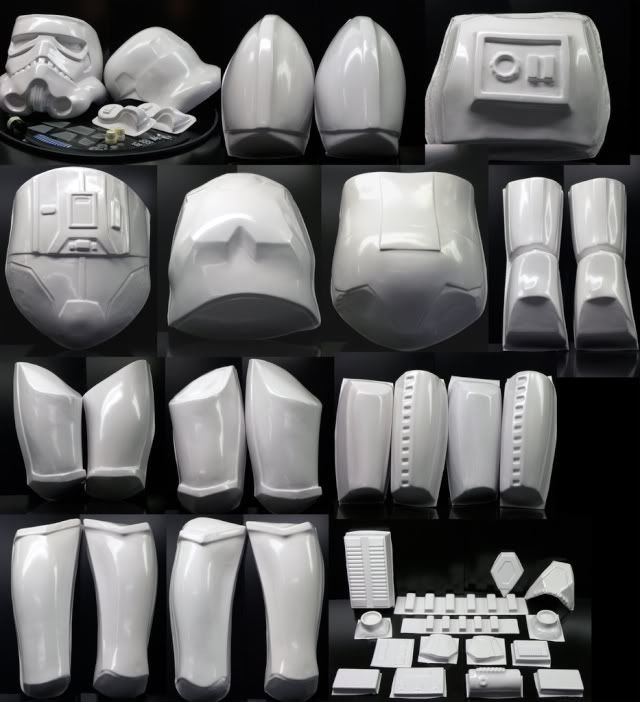
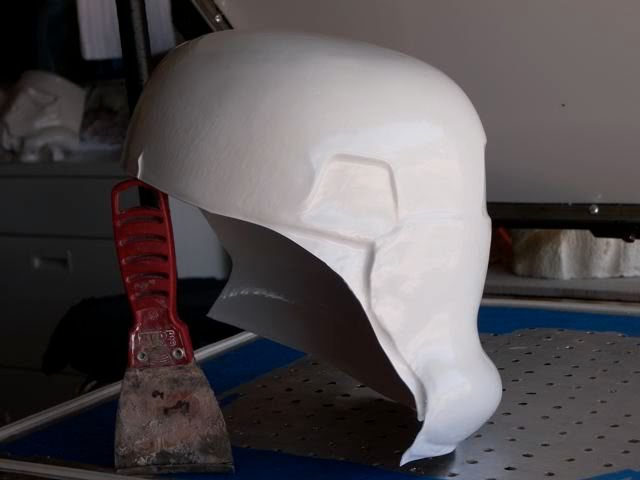
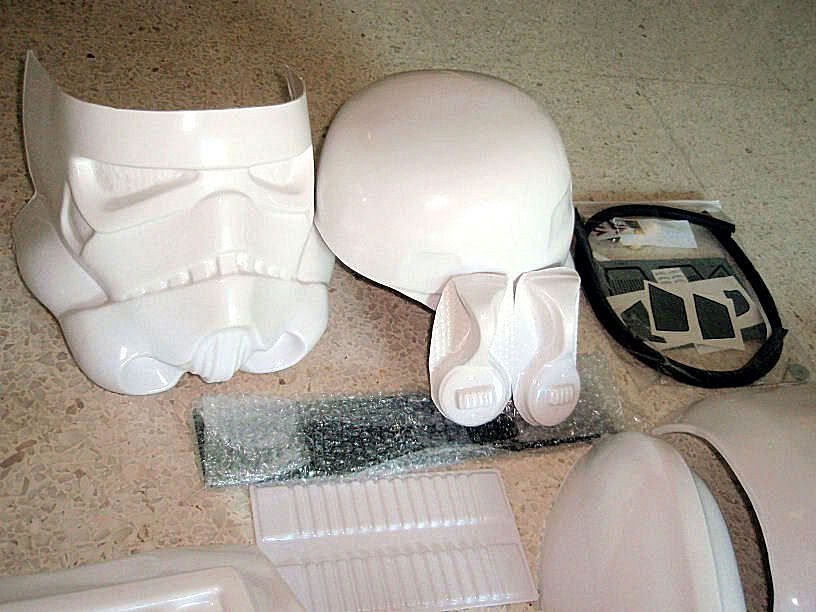
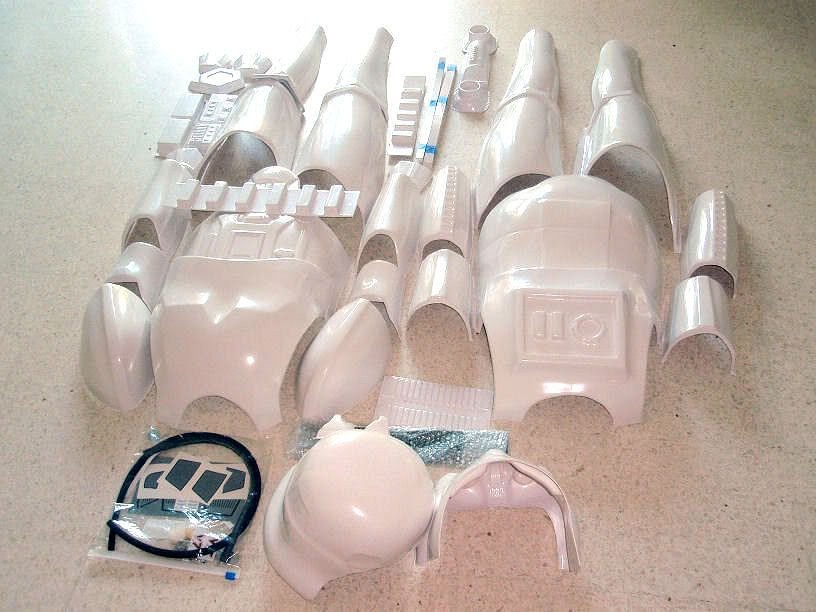
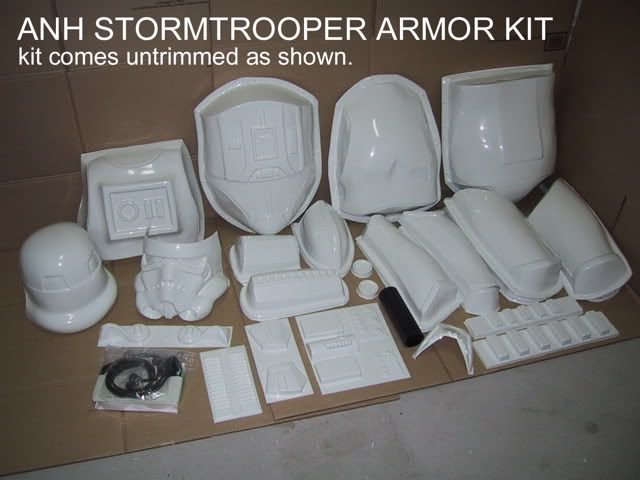
Hi Brad, There are many different helmets out there to choose from, it depends on how much time you want to devote to your helmet. TE2 (Trooper Expert generation 2) is cast from two original screen used ANH stunt helmets. The material is styrene and will need to be sanded, primed and painted. ATA (Affordable Troop Armor) is a recast of the TE2 helmet and I believe is the same material (styrene) and would also need to be sanded, primed and painted. Then there are ABS (Acrylonitrile-Butadiene-Styrene) helmets out there, which do not need sanded, primed or painted, just assembled. ABS is a more rigid material than styrene, but tends to lose a little bit of detail. Depends on who is casting it. AP (Accurate Props) which was also cast from molds from original stunt helmets. TM (TroopMaster) fan sculpted, most screen accurate that is not a cast from any armor or helmet. VT which is a recast or using the molds of CAP which was one of the helmet makers around here, but no longer cast. There are others: Gino, D. Laws, PT (Pirate Trooper), FX, I could keep going on. I hope this is some help and not confusing.
-
Hey JT, The link you put up states: "Sorry, the page you requested was not found."
-

darthfoster's RT-Mod
RogueTrooper replied to darthfoster's topic in Build Threads Requireing Maintenance
Great pics of your armor. I Like this pic the best.... The flashlight behind the lens makes it look like a Terminator has infiltrated the 501st I... AM.... LOOKING... FOR... PRINCESS...LEIA...ORGANA.... -
WOW! thanks for the info.. Did they keep the 3PO suit or what?
-
Hey Brian, You guys did an AWESOME! JOB on the the C3PO suit. What technique did you guys use for the gold finish? Chroming / electroplating? Vacuum-Metalising? FantaChrome / Cosmic Chrome (3pt spray) -----------
-
Here is a some quotes from Sgt JB who was there. "Thank you to the Empire City Garrison for making yesterday the most fun I've ever had.... Sorry We didn't tell you guys in the states to tape it, we were under strict orders to keep it hush hush. here's a slide show of the event, There was a life sized X-Wing in the middle of Rockafeller Center!!!!! Also, the blaster Al has, and the Lightsaber Matt has are the ORIGINAL props from 1977. THe Padme dress was the real Padme dress from the movies!!! What an amazing time!! Also, for anyone that watches the whole show, I'm the stormtrooper behind the mirror in the Make Over segment!! " ----------- Thanks Sgt JB for sharing!!! Anybody else from the Empire City Garrison?
-
Hey Jamie, If I could put my two cents in. I would look into TE2 Helmet. Great helmet at a Great price. Tony's helmets are cast off 2nd generation moulds taken from two original ANH Stunt helmet. You can check out the how to video by TK-4510 called " TE2 Move Along build" , here is the link: TE2 Move Along build
-
COME ON ! NObody has any pics? First-hand account from the TODAYS SHOW set?
-
1:1 Droideka, yep that what I'm building!
RogueTrooper replied to LaunchPad's topic in Non Star Wars Costuming
IMPRESSIVE!!...MOST IMPRESSIVE!!!! -
Hey, did anybody catch the Today Show (Firday, October 30th)? I guess it was there Halloween show and Kathy Lee was dressed as 3PO and Hoda Kotb was dressed as Yoda. They had several stormtroopers and clone troopers, etc. R2, Chewy and a couple of ewoks too!! If you were one of the guys in the armor, please upload any pics that you have and tell us what it was like. Here is the link to see video and more: -----------
-
Matt bipolar attitude towards the armor making and trooping does bother me, I am a rational adult . I just hope he doesn't spoil it for someone who runs across him first and thinks we are all like him...
-
I thought Matt/TE was out of the Armor Business?? There is a YouTube Vids with him saying so??? watch the end of pt2. --------------
-
MAN! When I first saw the tile " ATTENTION ALL TROOPERS! , FRAUD ALERT!!! I Thought this had to do with Trooping or Armor WHEW! All suspicious emails get put directly in my spam/junk folder and delete!!
-
Pandatrooper's build thread[*VT][*CAP]
RogueTrooper replied to pandatrooper's topic in Build Threads Requireing Maintenance
Looking good!!! Do you know what gauge is the VT armor? -
Coming Soon: Another ATA build[*ATA]
RogueTrooper replied to Darksaber's topic in Build Threads Requireing Maintenance
Thanks Paul for the gauge on your TM armor. Cheers! Do you know what gauge the ATA styrene is? Here are some of the gauges of the different armor out there: SDS/AA 0.060 / 1.5mm AP 0.080 / 2.00mm TE/TE2 0.090 / 2.25mm FX 0.090 / 2.25mm TM 0.080 / 2.0mm ABS ATA I don’t have that info -
It doesn't look like VT bucket nor AP bucket kits or at least not 1st generation, With Ebay it probably a recast of a recast. Here is the VT bucket and Armor Kits: here are the AP bucket and Armor Kits: Hope you find out.

-
Coming Soon: Another ATA build[*ATA]
RogueTrooper replied to Darksaber's topic in Build Threads Requireing Maintenance
Looks good! Do you know what gauge the ATA styrene is? Here are some of the gauges of the different armor out there: SDS/AA 0.060 / 1.5mm AP 0.080 / 2.00mm TE/TE2 0.090 / 2.25mm FX 0.090 / 2.25mm TM I don’t have that info ATA I don’t have that info