RogueTrooper
-
Posts
4,222 -
Joined
-
Last visited
Content Type
Profiles
Forums
Gallery
Articles
Media Demo
Everything posted by RogueTrooper
-
It's workin' now, thanks!! COOL PIC MAN!!
-
You might want to check out starwarshelmets.com link fan made stormtrooper helmets And this video link under TE derived Armor (Building and Discussion) called TE2 Move Along build by TK-4510, VIDEOS -------
-
Hi Brad, There are many different helmets out there to choose from, it depends on how much time you want to devote to your helmet. TE2 (Trooper Expert generation 2) is cast from two original screen used ANH stunt helmets. The material is styrene and will need to be sanded, primed and painted. ATA (Affordable Troop Armor) is a recast of the TE2 helmet and I believe is the same material (styrene) and would also need to be sanded, primed and painted. Then there are ABS (Acrylonitrile-Butadiene-Styrene) helmets out there, which do not need sanded, primed or painted, just assembled. ABS is a more rigid material than styrene, but tends to lose a little bit of detail. Depends on who is casting it. AP (Accurate Props) which was also cast from molds from original stunt helmets. TM (TroopMaster) fan sculpted, most screen accurate that is not a cast from any armor or helmet. VT which is a recast or using the molds of CAP which was one of the helmet makers around here, but no longer cast. There are others: Gino, D. Laws, PT (Pirate Trooper), FX, I could keep going on. I hope this is some help and not confusing.
-
Hey JT, The link you put up states: "Sorry, the page you requested was not found."
-

darthfoster's RT-Mod
RogueTrooper replied to darthfoster's topic in Build Threads Requireing Maintenance
Great pics of your armor. I Like this pic the best.... The flashlight behind the lens makes it look like a Terminator has infiltrated the 501st I... AM.... LOOKING... FOR... PRINCESS...LEIA...ORGANA.... -
WOW! thanks for the info.. Did they keep the 3PO suit or what?
-
Hey Brian, You guys did an AWESOME! JOB on the the C3PO suit. What technique did you guys use for the gold finish? Chroming / electroplating? Vacuum-Metalising? FantaChrome / Cosmic Chrome (3pt spray) -----------
-
Here is a some quotes from Sgt JB who was there. "Thank you to the Empire City Garrison for making yesterday the most fun I've ever had.... Sorry We didn't tell you guys in the states to tape it, we were under strict orders to keep it hush hush. here's a slide show of the event, There was a life sized X-Wing in the middle of Rockafeller Center!!!!! Also, the blaster Al has, and the Lightsaber Matt has are the ORIGINAL props from 1977. THe Padme dress was the real Padme dress from the movies!!! What an amazing time!! Also, for anyone that watches the whole show, I'm the stormtrooper behind the mirror in the Make Over segment!! " ----------- Thanks Sgt JB for sharing!!! Anybody else from the Empire City Garrison?
-
Hey Jamie, If I could put my two cents in. I would look into TE2 Helmet. Great helmet at a Great price. Tony's helmets are cast off 2nd generation moulds taken from two original ANH Stunt helmet. You can check out the how to video by TK-4510 called " TE2 Move Along build" , here is the link: TE2 Move Along build
-
COME ON ! NObody has any pics? First-hand account from the TODAYS SHOW set?
-
1:1 Droideka, yep that what I'm building!
RogueTrooper replied to LaunchPad's topic in Non Star Wars Costuming
IMPRESSIVE!!...MOST IMPRESSIVE!!!! -
Hey, did anybody catch the Today Show (Firday, October 30th)? I guess it was there Halloween show and Kathy Lee was dressed as 3PO and Hoda Kotb was dressed as Yoda. They had several stormtroopers and clone troopers, etc. R2, Chewy and a couple of ewoks too!! If you were one of the guys in the armor, please upload any pics that you have and tell us what it was like. Here is the link to see video and more: -----------
-
Matt bipolar attitude towards the armor making and trooping does bother me, I am a rational adult . I just hope he doesn't spoil it for someone who runs across him first and thinks we are all like him...
-
I thought Matt/TE was out of the Armor Business?? There is a YouTube Vids with him saying so??? watch the end of pt2. --------------
-
MAN! When I first saw the tile " ATTENTION ALL TROOPERS! , FRAUD ALERT!!! I Thought this had to do with Trooping or Armor WHEW! All suspicious emails get put directly in my spam/junk folder and delete!!
-
Pandatrooper's build thread[*VT][*CAP]
RogueTrooper replied to pandatrooper's topic in Build Threads Requireing Maintenance
Looking good!!! Do you know what gauge is the VT armor? -
Coming Soon: Another ATA build[*ATA]
RogueTrooper replied to Darksaber's topic in Build Threads Requireing Maintenance
Thanks Paul for the gauge on your TM armor. Cheers! Do you know what gauge the ATA styrene is? Here are some of the gauges of the different armor out there: SDS/AA 0.060 / 1.5mm AP 0.080 / 2.00mm TE/TE2 0.090 / 2.25mm FX 0.090 / 2.25mm TM 0.080 / 2.0mm ABS ATA I don’t have that info -
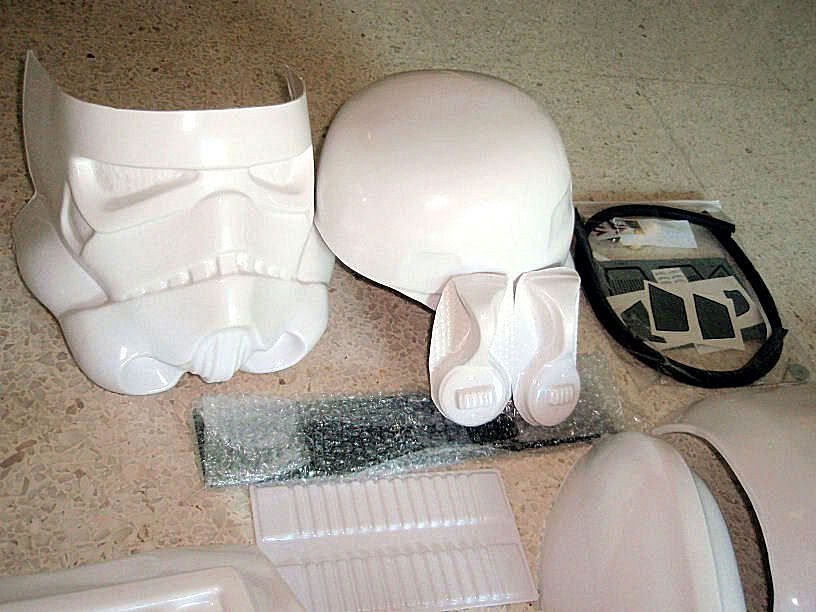
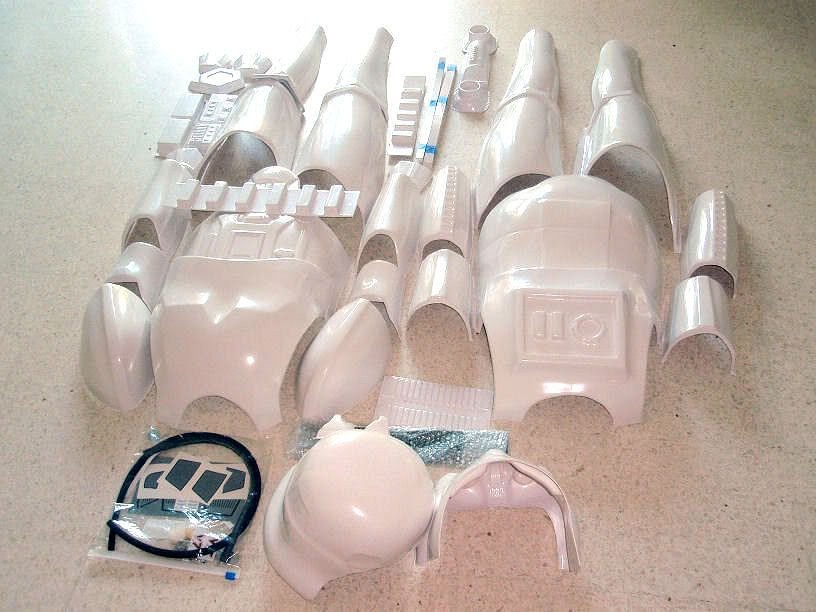
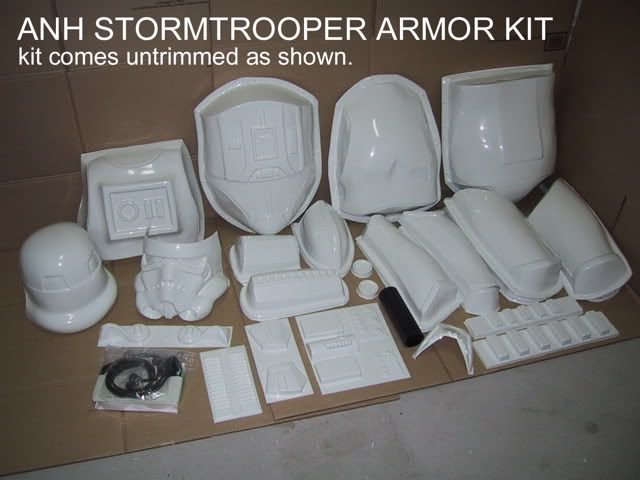
It doesn't look like VT bucket nor AP bucket kits or at least not 1st generation, With Ebay it probably a recast of a recast. Here is the VT bucket and Armor Kits: here are the AP bucket and Armor Kits: Hope you find out.

-
Coming Soon: Another ATA build[*ATA]
RogueTrooper replied to Darksaber's topic in Build Threads Requireing Maintenance
Looks good! Do you know what gauge the ATA styrene is? Here are some of the gauges of the different armor out there: SDS/AA 0.060 / 1.5mm AP 0.080 / 2.00mm TE/TE2 0.090 / 2.25mm FX 0.090 / 2.25mm TM I don’t have that info ATA I don’t have that info -
To clean, or not too clean?
RogueTrooper replied to firebladejedi's topic in Hard Armor (General Discussion)
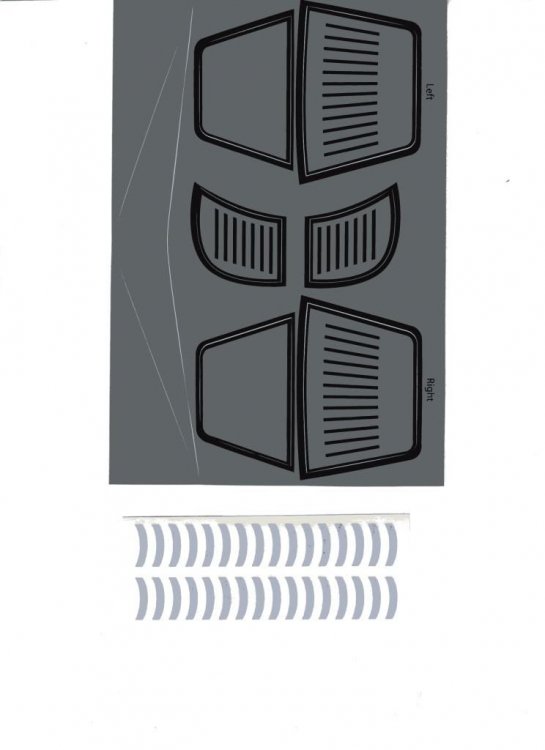
My vote is: NOT TOO CLEAN!!! If you look at the TK's on Tantive IV they had the grunge wearthered look going on.... George said he wanted a used lived in look to the SW Universe were everything didn't look fresh out of the box new and perfect. -
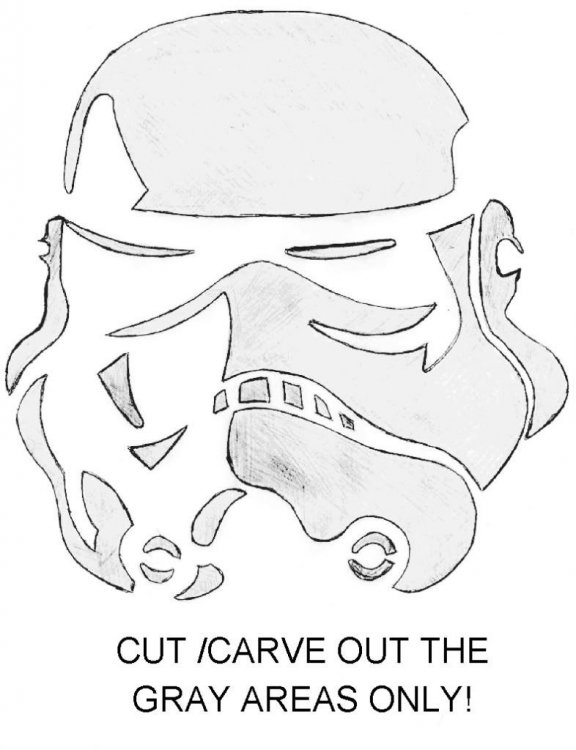
Here is a TK stencil for ya!!!! * For starters you need to make sure you have the right equipment to carve with. A lot of grocery stores will have pumpkin carving kits around Halloween, the most common are the Pumpkin Masters™ sets. These usually include a drill tool, poker, a safety saw, a detail saw and a scoop. The safety saw is often included for young children, but with Pumpkin Crazy stencils, we'll want to be using the detailed saw. * After most of the innards have been removed, start to scrape the inside walls. The smoother the walls the better the results will be later so try and get them as even as possible. You can also affect the strength of the carving by the thickness of the walls, so a pumpkin will be easier to carve if the walls are thin, but might not last as long for your display. * Now you've prepared the pumpkin for carving you'll need to transfer the printed pattern onto your pumpkin. Cut out the general shape of the design as well as small snips inside, away from any of the gray areas. These small snips will alow the pattern to wrap around the pumpkin more easily. * Once you've cut out the whole pattern into a more manageable shape, tape it down onto your pumpkin and try and make sure its on as smooth as possible. * Using the poking tool, start to a very impolite person the black outline of the pattern onto the pumpkin.You will be removing/carving out ONLY the GRAY AREAS . Some of the more recent Pumpkin Masters™ carving kits include a poking wheel that alow you to poke long lines and gradual curves more easily. After you've finished poking through the whole pattern, remove it from the pumpkin but keep it for reference. * Following the dots you have created with the poker, use the detail saw to cut out the smaller, central peices of your carving. By working from the inside to the outer edges and starting with the smaller sections, the carving should maintain its rigidity. Remember to hold the saw like a pencil while sawing and try not to twist it, If you need to turn a corner, remove the saw and reinsert it at the right angle. * The carving should really be shaping up now and you should start to see the features of your chosen design emerging. After you've finished on the smaller and central parts, move on to the outer sections with caution, these and the larger sections are more likely to cause instability. * After you've finished carving out all the pieces, look to see if there are any areas that could be neatened up. A scaple or X -Acto knife can be used to trim the edges, but kids you'll need to get an adult to help with this. But your carving won't really come into its own until its lit!!!!
-
Where can I watch Heart of an Empire?
RogueTrooper replied to Topgun's topic in Assembly, Mods, and Painting
NETFLIX: ----- -
When I was looking for Armor I ran across A few places to get AP Armor. I sent you a PM . hope it helps!!!!!!!!!!!!! RogueTrooper
-
Hey again...I also found some more how to links to help you with your FX KIT BUILD. here is two online tutorials . ----- Hope they help you....... RogueTrooper
-
Hey DEDEDEJr, If you can post some pics of the parts of that you cannot identify, will try to help you with it... Also try this YouTube Video, that is by a guy Dave Star Wars " White Armor " Project A step by step process of assembling a FX armor kit with special guest R2! ... Here is the link: This is the first part to the his how to. RogueTrooper