Leaderboard


Popular Content
Showing content with the highest reputation on 06/10/2023 in Posts
-
Please see below the links for four CRL's FISD currently has under construction and discussion. If we managed to get any more under way, they can also be added to the active WIP list. It is awesome to see that we have members working hard towards some exciting new additions to the detachments roster that will aid in further growing and enticing members to our friendly home. These are what we have, and if you have input or can assist these members in bringing their dreams to reality, please feel free to participate in the build threads. Commander Pyre NOW APPROVED, CRL IN LIBRARY. Artillery Trooper NOW APPROVED, CRL IN LIBRARY. (The Mandalorian) Imperial Armored Commando NOW APPROVED, CRL IN LIBRARY. Lt. Gauge (games based character) built to realistic vision. Captain Cardinal NOW APPROVED, CRL IN LIBRARY.1 point
-
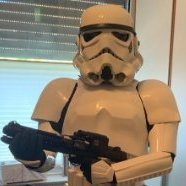
Hello ladies and gentlemen! I'm Tristan from germany. I'm have my roots in building and painting boba fett armor and especially helmets and now discovered my love to stormtrooper helmets. My first was a rs kit and it was a great fun to build and paint it. Then I get a beautiful da props hdpe kit and I was addicted :-D. now I try to discover new makers and techniques because all of that stuff is so exciting and awesome in my opinion! I'm looking forward to work with you guys n gals! Thanks for looking and take care, Tristan1 point
-
1 point
-
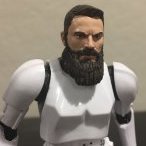
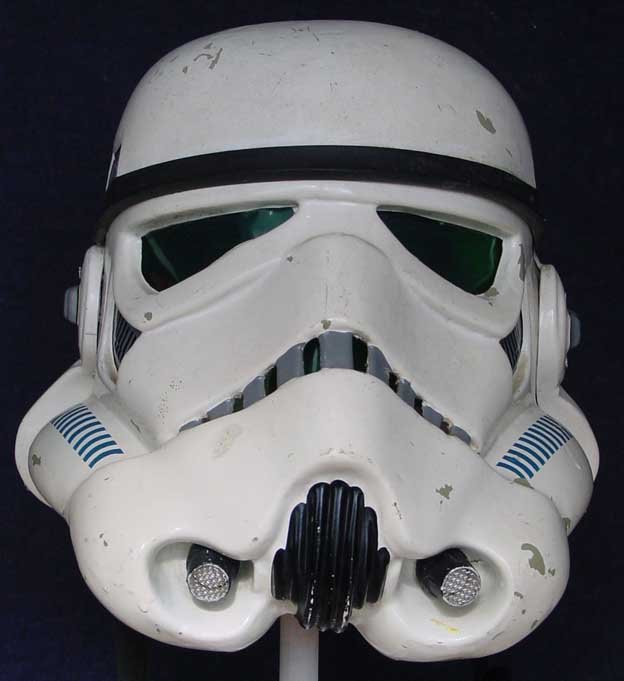
Lowered brow. I took pics of the side and realized that the left is further away from the eyes than the right. Guessing I need to adjust? Sent from my Pixel 7 Pro using Tapatalk1 point
-
Welcome! Good to have you here!1 point
-
I simply use 1/4" chicago screws for the canvas belt to plastic belt and for the holster. Everything simply comes apart with a flat head screwdriver. The snap and rivet idea seems nice, but the Chicago screws look just a tad bit better? I guess it's all up to our own personal ideas. Using a Chicago screw is as simple as punching a hole, and using a screwdriver!1 point
-
Welcome to FISD.1 point
-
It's a little difficult to tell how close the the thigh is fitting on the top, but you don't want it too tight (or loose for that matter) as it's important to have space for mobility and comfort. At some troops you may be walking for hours in your armor, and if it fits too snug the return edge on the inside (see photo) can/will cut into your inside leg and cause chafing. Not a pleasant thing. Most of us like the "thick" look" that return edges provide, but in reality they were pretty scarce in many parts of OT armor. It you decide to cut down those edges on any parts, I highly recommend doing it before final fitting/gluing. I have a thread here that can help answer questions on this. Keep up the great work!1 point
-
Hi Tristan. Welcome1 point
-
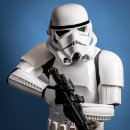
Thanks Justin, yes we always default to the real armour for a base, making guesses on a game version shouldn't be considered when we have a lot of references from the movies so things like the glove stitching, no side seams should stay true to what they have based this character off. The main references of difference being the helmet visor and pauldron are very well detailed, and you have done an excellent job of both those. As you well know, we don't make calls on strapping because it is something you cant see. As Gauge wears a double sided pauldron that is cut right up to the neck seal it conceals both shoulder bridge areas completely of the back and under chest connecting area. I think it is fine that you do not need to make that a one piece item and can leave that joint as is if you are using the DN kit. This area will never be seen. I will be creating the origin Wiki doc for the CRL later this weekend so we should continue to discuss the wording of this CRL and any potential additions etc. When you are complete and ready with your CRL images, please put them all in a google drive and PM me the link so I can get them ready to add to the CRL1 point
-
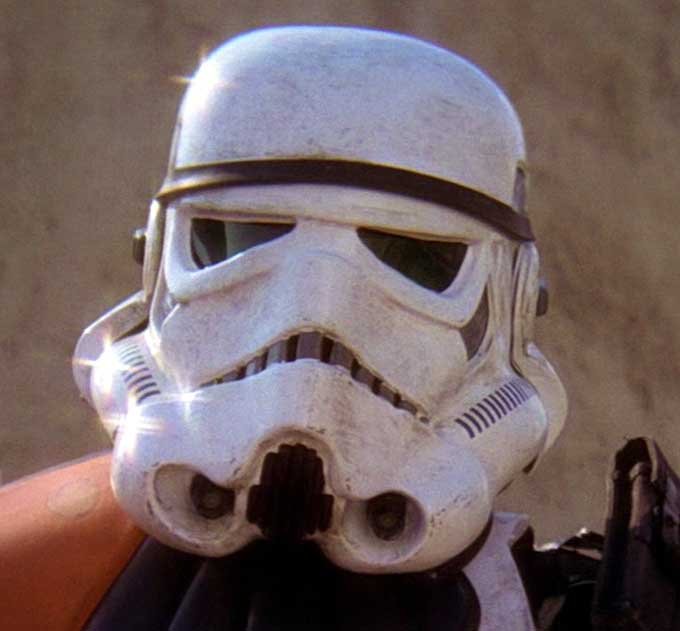
Personally I would drop it down a little just to straighten the curved appearance, looks very Sandtrooper with the higher brow Sandy
 1 point
 -
If anything perhaps a touch too high, drop it a few mm and take another photo please.1 point
-
Welcome aboard Tristan.1 point
-
I'll defer to the team and it's not a hill I'm willing to die on. The armor underneath is clearly TFA era, so the existing TFA CRL should be a great base, but we're just not going to be able to confirm many things based on the game graphics, so why would we include anything that would hold anyone to an artificial standard that we can't prove using the source material? Is there enough 360* clear imagery to warrant a CRL? I say heck yes. Is there enough detail to include ALL of the criteria from the TFA FOTK CRL? I would say no. And I would argue that the source material is meant to be "realistic". This is not an "animated" style or a style of armor that is specific to the game. The game is clearly intending to replica TFA era realistic movie armor within the best abilities of their graphics capabilities. It should be a slightly easier version of the TFA FOTK, but add the pauldron and visor. I know Endor Finders was offering white palms at one point, but that render was not in color. I suspect the palm stitching is black. But I couldn't prove it to you with a clear image from the game, so.... Spot on - they're painted with the same rattlecan Rust-Oleum Heritage Red satin paint. I am starting with a "clean" version (and will likely submit as a TFA FOTK first) and then will add light weathering for submission of Gauge once I've confirmed with the LMOs that substantive changes are not absolutely required. The character designer has confirmed that the curvature of the pauldron is an artefact during gameplay and that a soft leather should be an ideal material, similar to the Denuo Novo FOTK pauldrons. Mine should soften up a bit more with wear but there's no reason to make this any harder than it needs to be. I will attempt to replicate the game character as faithfully as possible, but there will be limitations when we are replicating a source material that isn't real world, and I accept that.1 point
-
This blaster is going to be big1 point
-
I've hidden a number of posts on this thread. If you don't like the character, that's fine, but keep those opinions to your self.1 point
-
I'd like to also note this character is based off TFA armour and there fore you are making and assumption there are no seams on the abdomen. The shoulders /back you would never see so that one make sense to me, but you have some convincing to do on the mid section I would wager Edited to add an additional thought as I ponder this costume, You mention the figures with square ends, which I get, but you need to choose a path not mix and match. Real world finger tips are round so if you go that real world route, then you need to continue with continuity and assemble the armour as seen on screen like all other game related characters have materialized as CRL's, or choose a game version and build it like the pictures. For the record, square ended gloves wouldn't look great in my opinion lol.1 point
-
Nice job on this so far, Daniel! You have been given some great advice so far, but if I could add a couple of things to cosider: The cod seems to be a bit long and probably could use at least an inch or so taken off the top. This would be a good start in giving you the space between it and tops of the thighs. As it looks now with the cod so close to/overlapping the tops of the thighs you would more than likely have difficulty walking as they would be constantly rubbing together. Note in the 2 reference images how much of a gap there is on all sides of the cod (and the distance between the tops of the thighs and the belt), so for comfort, mobility and closer screen accuracy trimming the tops may be an option. Here is a close up of Justin's @TheRascalKing Jimmi build where he got it spot-on. Larger photos of the complete look can be found here. Keep plugging away, sir, and keep those photos and questions rolling in. Looking forward to seeing your progress!1 point
-
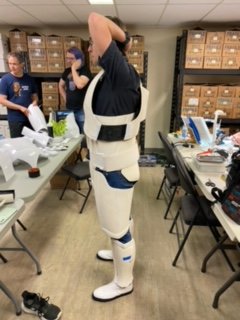
I had an opportunity to attend an armour party last Saturday and I was actually able to make a LOT of progress with the help of @GilesWoodward and the other lovely Badlands folks who were in attendance. We were able to accomplish a rough test fit of the armour and I was relieved to find that the armour needs little (if any) modification to fit me. The biggest issue we encountered was that the black extension pieces that connect the chest and back weren't sitting flush with the top of the abdomen (see photos below). Has anyone else encountered this issue? If so, is there a best way to go about fixing it? I realize that my armour is going to fit slightly differently because I was missing the rectangular back plate that sits under the belt behind the TD, so I'll probably need to do another test fitting of the torso armour, plus I haven't got a set of suspenders or straps to hold my ab armour up, so I was constantly needing to support it with my hands. With those things in mind, is there anything that sticks out as needing fixing/adjusting/alteration?
.jpeg.90cca1d0de6ab3819ada00e4f9505dee.jpeg)
.jpeg.2eaadb39cbfeda38195bf34d46501078.jpeg)
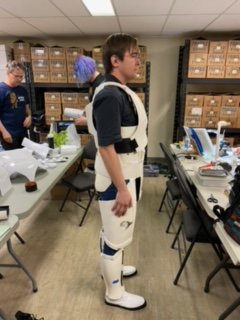 1 point
 -
After 18hrs of printing the 2nd part of the blaster is done! Untitled by Pyro, on Flickr Untitled by Pyro, on Flickr1 point
-
It printed very clean! Untitled by Pyro, on Flickr Untitled by Pyro, on Flickr Untitled by Pyro, on Flickr1 point
-
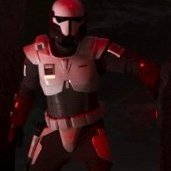
Meanwhile... Yeah, I know it's not part of my TK build, but while I'm waiting to submit we finished my wife Sally's Imperial Line Officer and I just had to share. A.J.1 point