Leaderboard


Popular Content
Showing content with the highest reputation on 11/04/2022 in all areas
-
Sorry boys! It was not an easy decision, but I fell in love with big guns and pauldrons. I would still love to do a TK at some point, but for now the dirt won me over. Ah, gotcha! You are right, I must have confused the CRL's here, because I only just noticed that the TK has levels in the CRL's and the TD does not. I could have sworn that the TD had tougher requirements regarding the gap for higher levels, but looks not to be the case. Thanks for the heads up!2 points
-
Oh yeah… Thank you eBay. I’ll get started in a couple days.2 points
-
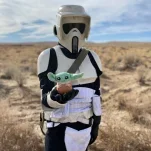
So this showed up a few days ago: Not the worse likeness (I don't think my nose is that big, though ...)2 points
-
Hello and welcome, you could reach out to your local garrison, some help as handler/wrangler/support staff, you can find a list of garrison's here https://www.501st.com/members/displayUnits.php Handler/Wrangler/Support Staff The handler or Imperial Support Staff is a vital part of any successful troop. You are the eyes and ears of your fellow troopers. It is your job to keep everyone safe, on time and damage free. You will likely be asked questions about the Legion and be asked to take photos of people with the troopers. Be the eyes and ears of the armored troopers: Watch out for children that get underfoot easily, so they don’t get stepped on or whacked with a blaster or backpack. Children are a big part of any event, since they love stormtroopers, and are usually a little too overjoyed to see them. (Some adults act the same way too) Stop the troopers when someone wants a picture and you have time, if not try to play ambassador and let them know you’re in a hurry to get somewhere. If the event has specific times and places for things “herd” the troopers to where they need to be when. Be the time keeper, keep the troop on schedule. Often troopers will need to be somewhere specific at an event. If the troops need to be somewhere keep an eye on the time, at a reasonable time before they need to be there, politely inform the people around the troops that they need to go and escort the troopers to their new destination. You might want to add some extra time because invariably they will get stopped along the way for “just one more picture” Remind the troops of breaks and make sure they take them. From time to time, about every half hour or so, check in with your helmeted characters to make sure they are doing ok, this can be a simple as a look and a “thumbs up sign” or discreetly stepping up and asking how they’re doing. If the troops need a break politely let the public know that your trooper needs to go for a few minutes and escort them back to the pre-event staging area / dressing area. Act as a buffer / body guard for the troop. (Someone always wants to push Vader’s Buttons or try to “steal” a nice E-11 Blaster, hijack a thermal detonator, or stick stickers on the armor.) This is when a handler is really needed. They should step in between the costumer and the child and the costumer should then turn their back and walk away. You don’t want to touch the child if you can avoid it, but you want to become a barrier between them and the costumer. First Aid Note Stay calm. Check whether your surroundings are safe. Don’t put yourself or the injured person at risk. If you are certified to perform first aid / are a medical professional, proceed as your training dictates. If not, stay with the injured person, provide much needed reassurance, and call for assistance. Street Sweeper / Pack Mule: Pick up various random pieces of armor that may fall off during the troop. Carry look after, wallets, watches, cell phones etc. Purveyor of Water (giver of life) Act as “official” garrison photographer: Take lots of trooping shots. Offer to help take shots for the public. “hey would you like to get in the picture too?” Dresser: Help people armor/de-armor if needed. Carry a fix-it kit. Garrison Ambassador Answer questions on the Garrison / Legion, why we are there, etc so the people in costume can act that character... Hand out PR stuff like stickers, temporary tattoos, business cards, flyers, etc. One part of being a handler, beyond all of the standard helping out here and there, is to be mindful of where you are at. When we make an appearance, those in costumes should be up front and center. You want to make sure when your a handler your not “in the shot” when people take photos of video. Group shots for us are different obviously. However, when walking in parades or mingling at events, you want to stay behind those in costumes so you’re not blocking someone’s shot or having someone try and figure out why that trooper is hanging out with someone in civilian attire.2 points
-
This was announced a couple of weeks ago, but I don't recall seeing it here: https://hasbropulse.com/pages/selfie-series I know some of us have gotten custom backing-boards and made custom figures, and now you can get a professionally made Black Series Stormtrooper figure of yourself. Available today in the U.S. (no dates on availability elsewhere unfortunately).1 point
-
I was looking for a clone commando costume as my next suit and I found this one on esty, https://wickedarmor.com/products/seamed-kit-commando-armor-inspired-by-star-wars-republic-commando?_pos=1&_sid=18224b428&_ss=r it looks good but I don't if its approvable or not.1 point
-
How about a comparison photo1 point
-
Of course. As Glen says ,yes you can still ask questions and continue your build here!
 1 point
 -
Sorry to hear you are going dirty, yes you can still ask questions and continue build here, many TK's once worn and torn modify to a Sandtrooper, I did and replaced my TK with a new one Sandtrooper CRL is a little different to TK's: For Level 2 Armor side gaps are closed or nearly closed. No more than 1/2 inch (12.7 mm) gap on either side. This is done by adding a shim (or shims) of a similar type and color of material as the Abdomen and Back Armor. Shims fit flush and may have seams, though ideally they will be seamless to the Abdomen and/or Back Armor, resulting in a single seam between the two rather than extra seams where the shims are joined. Nothing listed for Level 3 I see you've posted over at MEPD, no doubt someone should answer in regards to Police and Swat1 point
-
Hi Steve. As Caleb rightly says, at the end of the day, your local GML (Garrison Membership Liaison) will be the one to give final basic approval. However, the DO team, are now discussing this "internally", and will be able to give you some feedback shortly.. Thank you for your patience!1 point
-
Hi Jim, great job with the adjustments, easy basic pass.1 point
-
Ok, I've made a few more mods to this to: Shore up the chest/kidney sides to be parallel, closed and not popping out. Fill gaps in thigh backs & make mobility cuts following guidelines. Also got a better background & a mirror to check fit before pics. Imperial boots on order Fingers crossed this can get me closer to the finish line. Helmet off: Helmet on front Left Right Back Blaster Action Casual1 point
-
Logan, Great job so far; you nailed the paint color and scheme. Yes, maybe a couple more nicks and dings, but you're looking good so far. I do want to reiterate what Glen said about the belt boxes though: I'm not saying this because I designed those files, but rather because the ROTK CRL is pretty clear with this one basic requirement: The ammunition belt is accurate in detail and proportion to official references. So, in the absence of an artillery/ mortar stormtrooper CRL, we really need to emulate what we see in the ROTK CRL pics and the screen references. Also, since the artillery stormtrooper comes from the Disney+ (New Generation) armor pics, those armor sets need to be emulated carefully, and yes, there are differences. Here's a few pics: Ok, these two are a little blurry, but you can see the triangular/ prism shaped detail on top of the mid sized box. Additionally, you can see how it's lined up with the top of the belt and the large box is approximately 1/8" below the top. Here's a good pic of the trooper who got blasted in the belly by Boba. And here's a picture that was taken at celebration; it's probably the most clear picture of the top of the New Generation belt we have. Also, please note in all these pics how the edges have a pretty deliberate chamfer. Finally, here's a picture of the belt boxes I designed. These ones are printed in resin and are going to be used to create molds so I can start casting them. I am going to slightly alter the file in order to flatten the mid box detail, but not by much. Hope this helps.1 point
-
Welcome aboard Jason. It looks like you're well on your way, but I did want to hit on this thought: Glen's post regarding the BS helmet conversion is the "near definitive" resource for getting this project done. But, if you're looking for alternatives I'd push you towards purchasing the Jimmiroquai bucket, or doing the thing you don't want to do. Or do you? I only ask because I was a little thrown off my the "I can do that myself" quote. If you have the ability to 3D print a helmet, I'd encourage you to look into the Nico Henderson (DesertFareCosplay on Etsy) bucket; it's an incredible file and the most accurate ROTK helmet out there. Additionally, if you print carefully in something like a carbon fiber PLA filament, you wont have to suffer through the excruciating task of fill, sand, repeat, repeat, repeat. You'll still have to do some sanding, but I've had resin cast helmets that required more attention than the carbon fiber Nico bucket I printed recently. Additionally, though the CF filament is PLA based, it's not susceptible to heat warping like typical PLA or PLA+. Regardless, look up some of the pics of BS helmet conversions, but also take a look at these. The first is my Jimi bucket right after I did the initial spray, and the next few are pieces of the Nico bucket that just showcase their accuracy and how smooth the CF filament prints. I had to sand the face on this one because I had a loose carriage when I printed. But, I wanted to show you this so you can see the details Nico added, including the very subtle "bump" in the eye socket. Additionally, painting this helmet is incredibly easy due to the way that pieces such as the "teeth," tears and traps are accurately left separate from the main body. This is as bad as it got with the layer lines which sand out with one pass of 120grit. From there, it's just a light coat of filler primer. This is what most of the layers look like. And here's the chin lightly sanded and coated with a light coat of SEM filler primer. So I know you said you don't want to print, but it's actually an incredible option for this costume. Please let us know if you have any questions about the rest of the build.1 point
-
I want to give back to my community and wear the bad guys gear. Any help would be appreciated. I'm unable to buy gear at the moment or able to build any. Suggestions?1 point
-
1 point
-
Man I wish I could bid on this magnificent piece of work! I'm staring at it like... **(one day Jonatan... one day)** Set for stun! Thank you Joseph for the eye candy!1 point
-
Hi Matt. The armor looks better than you think.... Yes, it has small details to fix, but overall, it looks great. Apart from what you mentioned, I would add a couple of minor details, thinking mostly about the upper levels. -The left forearm is slightly rotated, and the right forearm could be lowered a little to match the left one. Very easy -You could raise the belt a little, and keep an eye on the drop box placement. The top of the ABS ammo belt should sit at or just above the bottom of the central and vertical abdomen button panels. Drop boxes are vertically aligned with the end of the ammo belt with minimal gap between belt and box. -The TD could be lowered a little more. It looks like the clips were not in place. Also, you could turn it a bit to the front, as for basic, the CRL states the following: The white control panel raised ribbed pad faces the rear, with the controls/round washer style detail closest to the right end cap. Reference image These are small details that are easy to fix. As I said, the armor looks great...Congratulations!1 point
-
And... TIME! Officially, it ended up being 18 days from placing my order to BBB Day. Not bad... Not bad at all. Here's what Denuo Novo's About Us page says: denuo (dē-nuō) -once more, a second time novo (noh'-vō) -to make anew, revive, change, alter, invent. I think it's fair to say that Denuo Novo has lived up to their name. I also know that there's a lot of people out there who are still jaded by Anovos, but I think the new company is doing a good job at putting that stigma aside. Regardless, I have another TK kit I'm finishing up, then I need to prioritize a few builds. Anybody have an extra TFA bucket they want to get rid of???1 point
-
—UPDATE— I just received this notification yesterday: Yup! Denuo Novo is living up to its word thus far. I’ll post pics on BBB day1 point