Leaderboard


Popular Content
Showing content with the highest reputation on 10/22/2022 in all areas
-
Thank you so much for this absolute honor! I'd also like to thank my photographer Henrik @TK-7959, and thanks to my "stylist " Daniel @TheSwede for making sure I looked great!4 points
-
Greetings fellow Troopers Today we updated the CRL model images for the ANH OT Hero CRL, with a great looking and slightly more accurate model. Congratulations to our new CRL model Jonatan, TK- 23592 (Nairy). Great build and photograph.3 points
-
Already sorted2 points
-
Congratulations2 points
-
I want to have a pack mounted E-11, but don't want to use any of the ones in my armory (of which there are three)... so I took an unloved Rubies blaster and painted it up. I didn't manage to take any in progress photos. Sorry about that. They start out looking like this. The thing weighs about 5 oz, so it fits the weight requirement for me. I don't have a Rebels E-11 in my collection yet, so it's not a duplicate for me. And if it gets destroyed on the side of my pack... I can just get another. Perfection! This is mine after paint and weathering. I sanded the seams and filled the holes (visible on the other side). I also put a screw in the side of the grip. No other mods. The grip got a coating of gloss clear while the rest is painted in matte. The ejection port is done with brushed metal foil, which the phone totally blew out. It looks a bit nicer than the bright blob in this pic. I weathered it a bit heavier than my usual taste so that the details would be noticeable from 10 feet away. I gave the front of the scope a small epoxy covered black dot to let it catch some light and look better than a piece of hollow plastic. And the back got a counter sticker and a printed holofoil scope decal - also better than hollow plastic. Not that these will really be visible on my pack... Just needs some velcro strap tape (on the way from amazon) and it'll be mounted up. I also added a couple latches to the side of my radio box to allow easier access than removing the 4 corner screws. The factory radio corner screws got removed and I glued (JB Welded) matching screw heads in their place. Now all of the boxes have the same mounting hardware, which satisfies my OCD. Gotta say, the latch details on the sides also make me happy. They look quite period correct for a 70s vintage piece of Star Wars tech.2 points
-
I've been collecting parts for this for a while. Time to start a thread for my pile of tupperwear! The bulk of what I've gathered up so far! 1) Garage Boss drain pan from amazon 2) Pack of Pop It!!! tupperware boxes 3) The Michael's photo box radio thing 4) All the little rubber feet anyone could need in a lifetime 5) A nice set of leather ammo pouches from ebay 6) Pauldrons! Because pauldrons. I prefer the black but the CRL has orange. 7) A rubber DLT-19. 8) Joseph's beautiful Electrobinocs Heh. Unsure about this. Such tupperware. Very plastic. Wow. Also, my wife is eyeing this pile of tupperware. Wants it for the cupboard and says I should just 3D print the boxes. My leather goods. In need of de-whitening and de-chromification. Question: Is this set of pouches approvable??? I ask because I haven't seen the center pouch for the chest on any HWT troops in many submissions, but it's on the CRL images. It's not in the game. I can cut it off, but really like it... Rubber DLT-19. It's really nice. A score from etsy. Back of the pouches are all angled. Gonna need some work. And just to show it off because I like it so much. To do: Everything.1 point
-
Got my magnets today, and I started installing inner cover strips on the biceps and forearms: I have also just ordered extended forearms from Walt, as I believe I’ll need them. I’m gonna be using 18mm strips on the forearms and the front of the biceps, and 20mm strips on the back of the biceps. Sent from my iPhone using Tapatalk1 point
-
Awesome, thank you so so much! I have two new sets of ears coming from trooperbay, so I’ll be practicing on those Sent from my iPhone using Tapatalk1 point
-
Alright, after a several month break and being in my own head so afraid to progress, I think I am ready to get back in the saddle. I have a set of replacement ears so that I don't have worry about fixing the original set that cracked so can proceed on the helmet if I wanted, but I think I am going to pivot and work on an easier part to build confidence. Realistically, I never trimmed any of my pieces (AM kit, Dave said it come trimmed but when I look at some pieces compared to other posts, it seems they are mostly trimmed?) so maybe starting there will be a good confidence gain.1 point
-
Looking amazing. Your work is truly inspiring1 point
-
Congrats.1 point
-
You better check again1 point
-
It’s TK 235921 point
-
Placement should be fine, screen suits were uneven in places especially on the fronts, some can look bowed
 1 point
 -
Indeed, As correctly Glen stated "it's not a requirement just a suggestion" as it's not exactly detailed in the CRL for level 3, but CRL States for Centurion level : Ideally, placement of ears (and screws) should closely follow the rear angle of the trap above them Honestly, you're almost perfect, if you can do de last adjustment it will be Great, but you can leave it as it.1 point
-
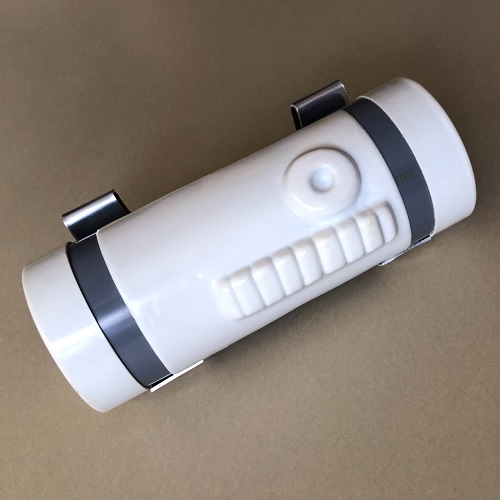
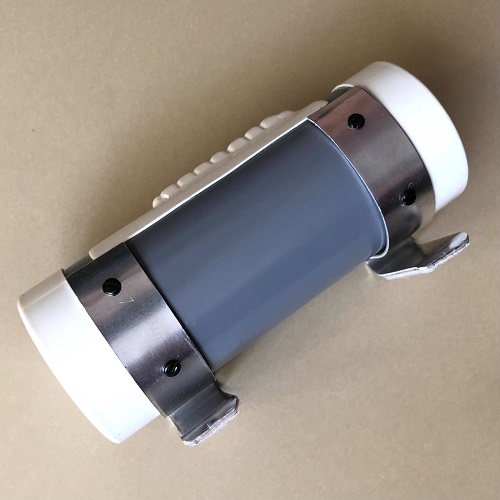
THERMAL DETONATOR: I obtained a surplus detonator from a HKG teammate to replace the ROTJ one today.
 1 point
 -
I GOT CENTURION TODAY!!!! My pack build was approved! Huge thanks @Chemi @TKSpartan and @justjoseph63 You guys made me very happy. And I'm specifically mentioning you all because... I'm now changing my pack. See, I wanted to build a replica of @equuspolo's Kenobi pack when I started this. Step 1 was getting the pack built and Step 2 was reaching Centurion. Because Ardeshir started out with a Centurion pack before modifying it for the show, I wanted to start from the same place. It makes sense in my head anyway... So. No disrespect meant to the DOs at all by my modification of an approved pack. Thanks for declaring my build Centurion Quality! I just am moving onto Step 3 - Recreate the Kenobi HWT Pack. I was SO excited when I saw these two run onto the screen. Seriously. I liked the Heavy Weapons Trooper pack and CRL before, but seeing it on the screen, even if just for a few seconds... it ignited a fire. I started buying parts for it that same week. This was the best screen grab I was able to do myself. It shows all the lights, the E11 mount, and pack config. I will not admit to buying software just for this... I used it on my E-11 ANH Leia Leveller replica build also!! So I already had the screen enhance software laying around... heh. All photos below were taken by and shared publicly by Ardeshir. They are not mine. Ardeshir shared these photos with the FISD staff and on the Facebook HWT group. Ultimately, it was decided against having a CRL for the Obiwan HWT... but I still want to build the pack. So I'm gonna! Very close to its roots. It just has some extra lights, switches, and the beautiful Disney drink bottle tops. (photo by equuspolo) Cog on the drop siphon, nice weathering, oval Meguiar's wipe bottle. I believe that's a battery box glued to the side of the radio box. (photo by equuspolo) Mortar tube side - pretty stock looking over here, just with the lovely weathering. (photo by equuspolo) The blaster side - I will likely paint up a Rubies E-11 because I don't have a Rebels one in my armory. Nice use of velcro tape! Also, Kenobi confirmed the existence of velcro in the SW universe (close-up of Leia's gloves). (photo by equuspolo) And LOOK AT THAT!!! That's the pack lights at night. Note that the blue lights are in fact white LEDs. It's a camera white balance making them appear blue. (photo by equuspolo) I cannot wait to have this. It will be mine!!!!!!!!!!!!!!!!!! Or at least there will be another one in the universe made out of my own pack. (photo by equuspolo) So that's the next step in my HWT pack build - lights, an antenna, some switches, and a pack mounted E-11.1 point
-
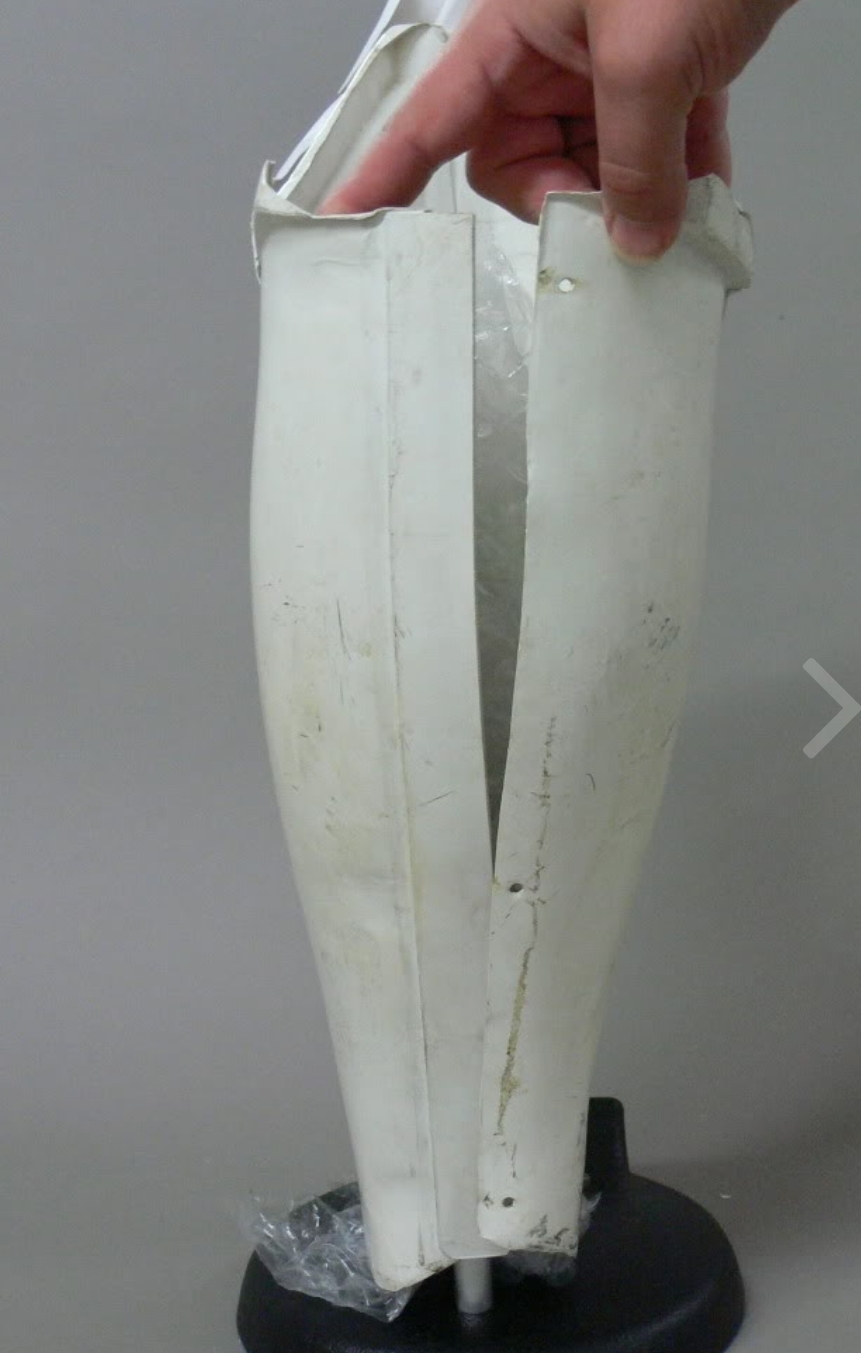
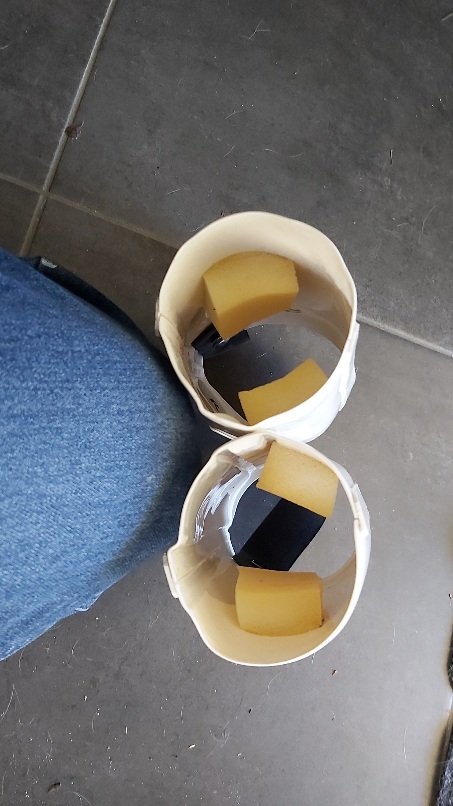
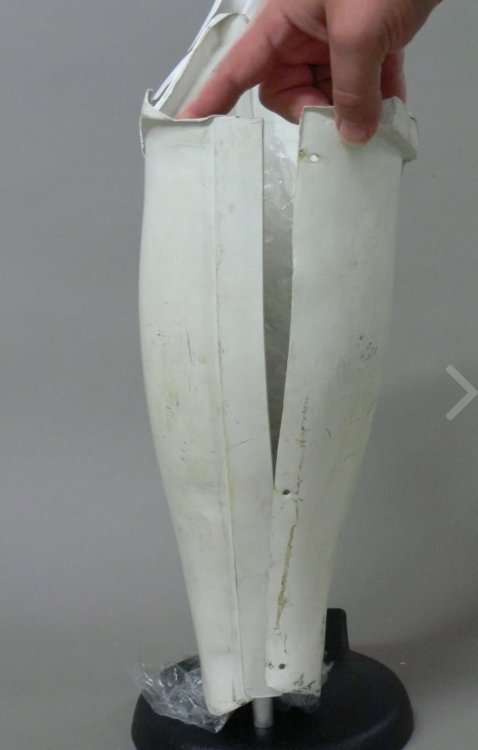
With trimming armor you don't want to trim them too small or it may look too small once the rest of the armor is on, even if you have narrow legs, I have the same problem and was lucky with my first set of armor as ATA has the raised ridges on the back so you can only trim so far. Since then putting together other armor, RS, AP I check the size against my ATA thighs (still going strong after almost 10 years) A little padding inside is not an issue, I also have some in the biceps and forearms to keep them in place. Only image I have handy
 1 point