Leaderboard


Popular Content
Showing content with the highest reputation on 03/21/2022 in all areas
-
Thanks everyone for your patience on this build. Here is the competed E-11 converted from an Asahi Airsoft Sterling with the Blast-FX and the gorgeous Bulldog's scope installed. Here are the photos with the metal folding stock extended which was one of the main points of using an Asahi Airsoft Sterling. It took me approximately one months for the build. It weighs 1.2 kilo so gives a good realistic and rugged feel of a weapon while not too heavy for trooping. Being able to install the Blast-FX and Bulldog's scope was definitely a charm for me. Couldn't have it done without the generous support from Blast-FX and Bulldog. It was quite challenging but I'm very happy how it turned out. I've yet to make the power cylinder but that'll be done at a another time since I'm currently busy having fun "pew pewing" with the E-11. Cheers. Hideya, TK 93800 of Japan Garrison2 points
-
This awesome thread needed a 7 year bump! I was trying to find something good to get my blasters off of tables with and google provided me with this thread. Thanks @Astyanax !!! The amazon product link still works. Prices have gone up a bit, but mine came out to about $3 each. A bargain IMO. Rock solid. No tipping, rolling, or wobbling. That Jawa blaster is just shy of 7 lbs. These hooks have no problems supporting that kind of weight. My stairway landing nook is cozy AND well armed.2 points
-
Hey there! I'm new to this, I've always wanted to get a set of stormtrooper armor but I have a weird body type (5'4" and 185#) and so I've never pulled the trigger on it. However my partner had a set and I thought it was super cool. So I settled for being the tie fighter pilot on Halloween haha. But he kept trying to convince me to get set of TK so we could match, and assured me that even short stormtroopers are cool. He passed away unexpectedly in November, and it's really been difficult. I've finally gotten my life fairly stable, and bought a house like we planned. And now I have the free time and stability to build an armor set. I think he'd be happy about that. I look forward to meeting some other TK fans and learning a lot more about the build process. Feel free to message me if you have any suggestions or anything, or even if you just want to chat. Still in the process of contacting armor makers to see if anybody is currently producing armor and I haven't had too much luck so if anybody has any suggestions please let me know. Thanks so much for taking the time to read this. -Danny1 point
-
Looks like you may have a little paint on the gums
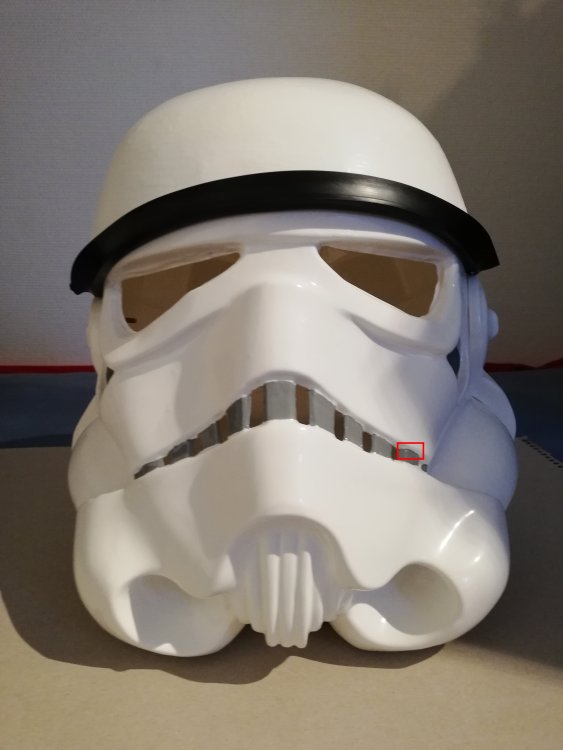 1 point
 -
I originally thought I needed to punch a hole through the scope body but I'm glad I didn't. Here's how the LED for the scope display and laser is routed from the Henglster through the base of the scope. I'll need to paint it black later but there's no knowing of the wirings at a first glance. Thanks for all your support on this build. Keep in touch ! Hope to be able to join you in the future trooping.1 point
-
Velcroed up the chest plate. Wow more than I thought! This plate goes under the yoke chest piece to give it strength and for the chest plate to mount to. I may not need this down the road but trying it for now… Added some extra abs here to build it up a bit then Velcro so it will transition nicely to the back wing. Back wing…1 point
-
Excellent build! It is great to see how you ran the wires from the scope by drilling the hole in the scope base. Although I make the scopes I have yet to try setting up a blastfx scope display. Hoping to try this soon. Thank you again for sharing such a detailed build log of your Asahi blaster. This deserves to be pinned for future member builds who attempt an Asahi blaster conversation.1 point
-
Thanks - that's a really nice display and I may get one too soon.1 point
-
Day 7: Today I finished the ears on both sides an put in the S-shaped Neck trim. I´m quite pleased with how they turned out. Not perfect but the way I like them. Regarding the eyes: I put in the green lenses (Magnets for the moment) and honestly I´m quite happy with the trimming. Maybe a little bit more on the left Eyes right site. Painting will be started probably this evening.1 point
-
As mentioned before, installation of the Blast-Fx was a trial and error. But once I decided on the routing of the wirings and which component to solder back later, it became a whole lot easier. Installation itself is quite simple and straight forward with all the cable length sufficient. Blast -FX main board was installed in the magazine well with detachable magazine to enable easy access to the mini SD card. Counter LED, 3.7v lipo battery, selector main menu switch was routed from the magazine well to the empty Hengstler counter. Rear end of the counter was attached with magnet to allow easy replacement of battery. On/Off switch was installed in the Hengster as well. Battery was connected with a easy detachable connector so it can be swapped if need to. Wirings for scope LED and laser LED was also routed from the magazine well, through the Hengstler and to the bottom hole I made under the scope rail and scope foot. Hope the photos reveal how I did it. This shows where all the wiring is taken out from the magazine well to the Henglster. Total of 5 sets of wiring is bundled up and wrapped with black cloth. I'm quite proud I was able to hide the wiring this way. I would imagine other builds would have the wirings fed out from the receiver but was not possible to the construction of the Asahi airgun. Anyway, here it is. Next upload will be the completed E-11 as of now.1 point
-
The original Asahi airgun did not have a end cap clip so it was made from styrene plates again. I didn't bother to get the correct dimensions but comparing with reference photo's, it was good enough for me. Yes, I installed a cut up spring from a ball point pen so it's a working clip. And here's what happened to the selector switch. The rotary selector switch supplied with the Blast-Fx was way too long, so it was sawed off till just a few millimeters of the knob was protruding from the grip. Then made a metal lever switch which would fit nicely with the selector. Scrap metal that was lying around was used, and covered up with plastic and epoxy putty to resemble the actual one. In the meantime, I replaced a mock bolt on the grip with a real one I had lying around.1 point
-
Awesome photos Taylor!1 point
-
Some great photos there, looks like you've had a great time. Looking forward to seeing your EIB application in the not too distant future1 point
-
Now with the painting completed, I was finally able to start installation of Blast-FX. I repeatedly went over Blast-FX facebook tutorials and builds on youtube, trying to imagine how it should be installed. There were many helpful ideas but it was still tough since there seems to be numerous ways and logic for each and every build. Not being able to find any builds for the Asahi airgun, which mine was another worrying factor. Such was the situation, the installation process was very much a trial and error process which involved numerous assembly and disassembly of the various parts. It was good that I had intentionally had most of the parts screwed in or bolted on for easy access. Anyway, my points in the installation are; 1. Blast-Fx main board in the magazine well and magazine. Magazine was detachable by the working release button to enable easy access to mini SD card. 2. Speaker in far rear of receiver with a short pipe to amplify sound. 3. Barrel LED strip was wrapped with wax paper from the kitchen for even distribution of light and then wrapped with transparent file folder material to keep it straight in the barrel. 4. Counter LED, menu button and battery cable was pulled through from a hole in the magazine well to the front of the Henglster counter. 5. Rear end of Henglster was attached with small magnet so the lipo battery in the empty Henglster can be easily replaced. 6. Scope LED wiring was pulled from the magazine well, through the Henglister and then outside to the underside of the rail, which was then pulled through a hole in the rail and scope feet so that wires were not visible from outside. Of course, the scope LED was soldered on later. 7. Laser was originally installed in the muzzle in front of the tri-cree. However the tri-cree behind the laser did not shine through as originally imagined so the Laser was eventually installed in front of the scope. 8. Rotary selector was installed in the grip by drilling a large hole in the grip and covering it with epoxy putty. 9. Trigger switch was attached to the original airgun metal trigger along with the original airgun trigger spring. I was able to retain the heavy airgun trigger feel. Here's the initial installation checking the wiring route and length of the wiring. See that the bolt is not yet inserted. It also show the large opening where the grip will be connected to the inner bolt. Yes, the pivot for the stock is metal and bolted to the receiver for a robust connection. Bolt is inserted into the receiver and trigger switch attached to the bolt. The bolt is connected to the receiver with screws hiding beneath the rail Rotary selector embedded into the grip with epoxy putty. Selector was way to long so I had saw it off. View from top of the grip. Rotary selector wiring goes up from the grip into the receiver and then to the Blast-FX main board in the magazine well. Barrel LED strip wrapped with wax paper from the kitchen for even distribution of light and then wrapped with transparent file folder material to keep it straight in the barrel. This was how the tri-cree was attached to the rear end of the muzzle. Matching holes through the rail and scope feet for the scope LED cable I forgot to take photos of Bulldog's beautiful scope installation but the Scope LED of the Blast-FX fitted into the scope like a charm as I believe the inner adapter was specifically made for the Blast-FX. Great job. Laser LED which was originally intended for the muzzle was eventually routed through the front of the scope was a simple and easy installation as well since Bulldog's scope was completely hollow inside. Bullldog's scope is highly recommended not only for the intricate attention to detail and construction but for the installation as well.1 point
-
TK-10545 reporting for duty! Approved today!1 point