Leaderboard


Popular Content
Showing content with the highest reputation on 06/22/2021 in all areas
-
Haven't trooped with it yet - I only completed the hearing assist installation 2 days ago, in fact, I just completed the entire electronics set up 2 days ago. but I've been vehemently been walking around the house with it. With fans on, the hearing assist helps significantly with detecting my wife trying to talk to me. If I really want to shut her out, I'd just turn it off I could hear better if I wasn't using open air walkman style headphones (in ear or ear buds). In ear buds would be a lot louder and would help me attenuate the audio better, but I prefer the hands free approach so I don't have to shove ear buds in my head before plopping on the bucket. I've been taking off and putting back on the bucket and the earphones I'm currently using stay stationary. It's a rare occasion that the phones fold the top of my ear down, I just reach in and fix it. Here's one more photo of the grommet (old grommet sliced in half to reduce profile height, adheres to the velcro strip)2 points
-
If you're curious, I'm probably one of the few people that drilled holes in the helmet to fit the mics. I drilled a 3/4 1/2 inch hole and used a grommet to secure the mic to the inner helmet wall. After posting here and adding insulation/baffles, the mics now reside inside the ear piece, outside of the inner helmet to avoid fan vibration, so I have fans mounted on the cheeks. Here are some pictures, albeit out of date. Planning, using grommets (again, not current method, mic installed with grommet) I figured it's best to show and tell - I took apart my current ear set up to show Foam padding is crucial between mic and ear, cut the vibration sounds by 25% This is what sits in the ear Used hand drills to drill out the ear ports along the black stripe. Per recommendation a superfine permanent marker/sharpie works good to black out the holes.2 points
-
Yeah I had those screenshots saved, I was considering doing the full chest plate but since the CRL for TLJ says “The back/yoke is one seamless piece.” I didn’t want to potentially get denied for something like that. Sent from my iPhone using Tapatalk2 points
-
Hi Jacob, and thank you for your EIB application! CRL and EIB Application Requirements: All required photos have been submitted, and on behalf of the entire D.O. staff we are pleased to welcome you to the rank of Expert Infantry. Congratulations! Other-Armor Fit/Assembly; In this area we review observations made by your fellow troopers and the DO team. Some observations may lead to suggestions to improve the overall look of your armour. Note that we consider both text (CRL) and pictures (screen caps/reference images) when reviewing submissions. Overall a spectacular build!!! Just a few items in this area, so let's get to it! - The paint details on the vocoder could use some definition with a few touch-ups. You can use the same method that you used with the teeth (some non-acetone paint remover, some toothpicks and a few cotton swabs). Reference images -Just a dressing issue. Your right shoulder bell aligns perfectly with the chest armor but the left needs to be lowered a bit. Reference images -Another dressing issue here. We suggest to move the right forearm down. The hand guard is quite far away from the forearm opening. I think the glove is bunched at the wrist, so, for this reason, the forearm is not in place. Reference images - A very small detail but one that can really make a difference. Aligning your thigh and shin pieces. It's small details like these that really elevate your look. Reference images *************************************************** Centurion Requirements; In this section we prepare you for Centurion. Because Centurion photos show more detail than EIB, items pertaining to Centurion might be seen there and not here and additional photos may be required. We try to point out all that we can from what we see, but the final accuracy is the responsibility of the trooper. -L3: The plastic shoulder straps need to be held down in the back via a white elastic band to the white fabric that connects/bridges the chest and back piece. In the published photos, I can't see clearly if the elastic is there or not. But the position of the shoulder straps suggests me that it's not. Adding the white elastic will also help the shoulder straps to be well positioned. Reference image - Although not specifically mentioned in the CRL, the O ring should not be facing toward the back and should be more toward the top so it will need to be raised for L3. Reference images - Your butt plate is riding out and should be brought in to where it aligns with the kidney plate. I would suggest doing a strapping adjustment to get it closer. You can also add a pair of "V tabs" to the end of the plate and this should make the fix. Reference images -Moving on to your thighs back, You have a small gap in the ridges. You could fill that gap with ABS paste, or, you can also just put a small square(very small in this case ) of ABS in, so the black doesn't show through. Very easy fix... Reference image -The front of the left thigh has the same case as in the previous point. 5 minutes and you're done! Reference images -The cover strips of your calves should close right in the center with an equal amount of space on each side of the strip itself, so it seems that they would have to be detached and placed correctly. Reference images -Sniper knee plate must be aligned with the ridges on the shin. As you can see , the sniper knee is a bit lower (discontinuous lines) and should go aligned with the shin (continuous lines). To fix that, It would be necessary to take it off and re-glue it higher to match the ridges correctly. We have a challenge here but we are confident that you can do it ,and here in the FISD you can find all the support and guidance you need to achieve this. remember, we are here to help. Reference images *************************************************** And that's it, trooper. Thanks for your patience. You have a great armor, and we have complete faith that you can address the above issues. After that, I look forward to seeing your submission for Centurion!!!2 points
-
Name = Richard Tibbetts 501st ID = TK-46116 FISD forum name = CallMeMrTibbles Garrison = UK Garrison Mandatory Information Armor = RWA Helmet= RWA Blaster= Sheartech rubber E11, promo version [Expert Infantry Request Thread URL] https://www.whitearmor.net/forum/topic/51095-tk-46116-requesting-esb-eib-status-rwa-1025/ Optional Height = 6'4" (193cm) Weight = 98.6kg (217lbs) Boots = Asos Canvas belt = RWA Hand Plates = RWA ESB clamshell on rubber gloves Electronics= no voice electronics, Troopacoola helmet fans Neck Seal = RWA Holster = Burkbench Designs Photos: Full Body Front Full Body Back Full Right Full Left Right Side Detail Left Side Detail Gloves Shoulder Bridge front Shoulder Bridge sides Shoulder Bridge Back Thigh Pack Attachment Sniper Knee Attachment Drop Box Back Crotch/Butt Detail Helmet Front Helmet Sides Helmet Back Hovi Tip Detail Lens Colour S trim Side screws Ammo Belt Neck Seal Blaster Left Side Blaster Right Side Blaster rear Holster (attached by loops. No rivets on Holster or belt) Thermal Detonator Action Shot Interior Strapping Posterior/kidney connection [ Abdomen Detail Wrist openings Boots: Following from EIB suggestion. A little less shiny Helmet off1 point
-
Name: Jacob Gonzales Username: Pistolsheets TK-86267 Southern California Garrison Inland Empire Squad Armor Maker = Anovos Helmet Maker = Anovos Blaster Type = E-11 by Hyperfirm Height = 5'10 Weight = 170lbs Boot Maker = Imperial Boots Canvas Belt = Kittle Belt Hand Plates = TrooperBay rubber latex plates Electronics = Icomm, UKSWrath fans, Microphone, Aker speaker Neck Seal Type = Anovos Holster Maker = Anovos1 point
-
Finally became a TK. Joined the 501st as a Shoretrooper in Oct 2017. I’m also an approved TIE Pilot. I am the 21st TK Rogue One in the 501st and the only one in the Tampa Bay Squad.1 point
-
Thanks for the feedback! I wasn't sure how important the curve of the elastic was, that was my other issue. I will look into those other options to see if they make them small enough1 point
-
Those have a weird curve to them on the elastic sides. Here are a few references, notice the thinner width of elastic Have you tried Imperial boots, not sure what sizes they go down too these days https://www.imperialboots.com/ You could also try Crowprops https://crowprops.bigcartel.com/product/jhodpur-tk-white-short-boots1 point
-
great. Thank You Sir.1 point
-
[emoji16] Thanks Mario I know I have more pics to upload. Hope to get them posted in the next couple of days. Sent from my SM-A715F using Tapatalk1 point
-
Hi Richard. Great to see your Centurion App so soon!! Joseph will be with you Shortly. Added to the processing line.1 point
-
Don't have a voice changer yet, but I think I'm edging towards having it all chest mounted. Partly because of feedback, but mostly because of room in my helmet. Cant have anything between top of my head and the lid or it raises the helmet up too high! Sent from my SM-A715F using Tapatalk1 point
-
Hey Rich you don't have to drill any holes to mount the mics. Simply use hot glue, tape of velcro. Many customers have gotten creative when it comes to mic placement but it's not necessary or required to drill holes.1 point
-
A better test will be when you go on your first troop. The average event can last an hour or more, but at cons you can be suited up for a lot longer. Here is an excerpt from my thread "Your first Troop...a Few Tips" (link here) that may help: 1. Before you leave- If you have not had the chance to wear your armor for any length of time, put it on (including your bucket) and wear it while walking around the house and maybe in your yard for a while. This will give you an idea of your range of vision, movement limitations, and let you know what you are in for. Walking up and down stairs will help. If you have any issues with any parts of your armor (pinching, etc.) we can help guide you through exactly how to remedy them.1 point
-
Coming along nicely, sir! For the S-trim, I'm really surprised that AP didn't include that. If not, you can get it from Trooperbay (link here). As Mario mentioned, the biceps look like they will need to come up a bit, but you are on the right track! You have probably figured this out, but I would remove the sharp point from the top of the forearm(s). One less thing to poke into you! GREAT to see that you removed all of the return edges on the bicep bottom and forearm top, but it looks like yo still have a tiny bit left. (Sorry, just my OCD kicking in, lol). Keep up the great work!1 point
-
Congratulations, welcome to the team.1 point
-
Most of the inside of armor does overlap When ever in doubt you can always check the gallery sections https://www.whitearmor.net/forum/gallery/category/27-tfa-tk-reference/
 1 point
 -
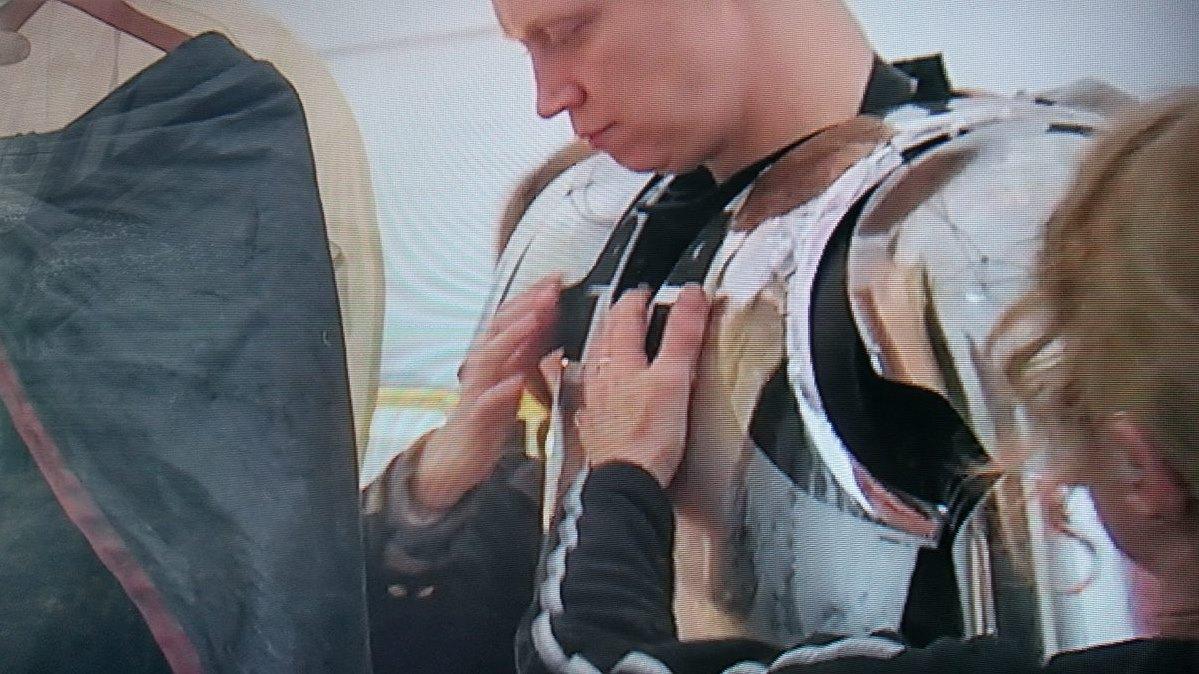
Just remembered these images in regards to the post you made in XYDIU's thread about chest cut out, in regards to screen accuracy (not comfort) Phasma had a full front section which was hinged at the top. Just a bit of trivia Also note how the full front plate has a cut out for the chest rectangle detail piece to come through
 1 point
 -
Also before trimming make sure you try with boots, undersuit and gaskets on, it can make a BIG difference to fitment.1 point
-
1 point
-
Looking good, when trial fitting you should wear your undersuit can feel completely different, strapping will definitely help with spacing and keeping everything in place. Nice work.1 point
-
You're ok at this stage of the build. Probably when do the next fit test using strapping , things going to sit better. You biceps could go up a little more so you can bend the arms when holding your blaster.1 point
-
Congratulations trooper and welcome to the EI ranks1 point
-
Congratulations Trooper !! Welcome to EIB and just a few adjustments and we'll see you at Centurion Ranks1 point
-
Awesome!! Thank you all so much! I can’t say enough how much I appreciate the help getting here. I definitely will make these changes and for the eventual centurion application! Just a couple questions I have regarding the changes for Centurion. 1. Will the TD need to be replaced if I move the O ring higher? The clips, as I understand it, need to be butted against the it on the bottom. 2. The gaps in the back of the thighs, can those be eliminated and be approved by removing more for mobility? It’s along the ridge by my estimation. 3. Not a question but an observation on the shoulder elastic straps. They are there, just my helper getting me suited up didn’t put them on correctly. smh lol I’ll be getting on these fixes right away! Again thank you everyone for everything!1 point
-
Congratulations and welcome to the EI ranks trooper1 point
-
Congratulations Trooper , Welcome to the ranks !!1 point
-
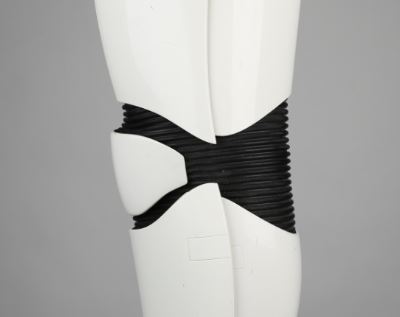
The cod is definitely weird. Also, that trooper on the left is suffering from an acute case of "Happy Trooper" and could use a taint strap.1 point