Leaderboard


Popular Content
Showing content with the highest reputation on 06/06/2021 in all areas
-
Hello there! My name is Natalie and I live in the central coast of Australia. I’ve just been approved for my ANH stunt TK kit! I’m so excited to start trooping with you guys! TK 12197 reporting for duty2 points
-
Nice work, on the shoulder bells you are closer on the rear than the front so you could adjust these to close the gap on the front. Having the snap point further forward on the shoulder strap elastic helps bring them forward. Nice gaps all round, the only issue is your butt plate gap, you could try tighter strapping or even some V tabs With a heat gun (or oven) you bend strips of ABS plastic into the shape of a V, only glue one side and the other remains free to allow movement when you bend. Just helps stop the butt plate from pushing back from the back plate. Your ab snap is a little low, may get picked up at higher levels TD screws are a little on the large side, although may not be picked at higher levels Hoping to see you approved very soon, good luck2 points
-
Nice work, for application photos make sure the area is well lit and try to have a blank background, makes it easier for your GWL to edit photos for your membership profile. You may want to try doubling over the elastic between your ab and kidney as you have a bit of a gap there. Drop boxes should align with the end of the plastic belt section. Belt could come up a little Looks like your shoulder strap has a kink in the middle of it, your backplate is a little higher than the chest, may want to bring your chest up a little so they match and this would allow the shoulder strap to lay flatter. Butt plate is just being pushed back a little, you could try tighter strapping or add some V tabs to help keep it in line. Very big gap between the ab and kidney on this side, you may want to add some kidney shims to reduce this gap. Although gap for basic is not requested it is for higher levels Any gap between the abdomen and kidney armor is no more than 1/2" (12.5mm) wide Also note your bicep is sitting outside your shoulder bell, you may want to reduce the strapping between them to hold them up or if you haven't you could add bicep hooks With a heat gun (or oven) you bend strips of ABS plastic into the shape of a V, only glue one side and the other remains free to allow movement when you bend. Just helps stop the butt plate from pushing back from the back plate. A few adjustments and you should be good to go.2 points
-
Hi Mark, thanks for your EIB app!!! Meanwhile one of us is assigned to your review , can you add one additional photo? -Back-lit shot showing lens color(helmet).2 points
-
Strapping is a little too loose, perhaps try slightly tighter. There are suppliers of larger shoulder bells but you want to make sure the color matches as there are a lot of differences in color from one armor maker to another. I still think rotating them a little would help but appears you can't go any further with your shoulder strap connection, perhaps try rotating your shoulders a little more forward when taking the photos.1 point
-
Thanks so much for that help mate. Slowly but surely I'm getting there [emoji106] Sent from my SM-G998B using Tapatalk1 point
-
http://blasterfactory.com/e-11-blaster-kits/1 point
-
1 point
-
My aluminum e11 sterling kits mag well assembly1 point
-
This OK? Sent from my VOG-L29 using Tapatalk1 point
-
Great finds, Henry. Thank you for posting here. Looks like I soon have to update the reference. Next two weeks will be busy for me at work, so it will take some time to get this added. Thanks again.1 point
-
Nice work trooper. Good luck with your application Pipertrooper TK-270561 point
-
Many Thanks! I forgot about using Tapatalk as well. Here are my photos: Sent from my VOG-L29 using Tapatalk1 point
-
Thanks for the link and information. It did make me chuckle that it's been asked ten years ago. I'm sure almost all questions have been asked and answerd at some point, it's just finding them. Thank you again.1 point
-
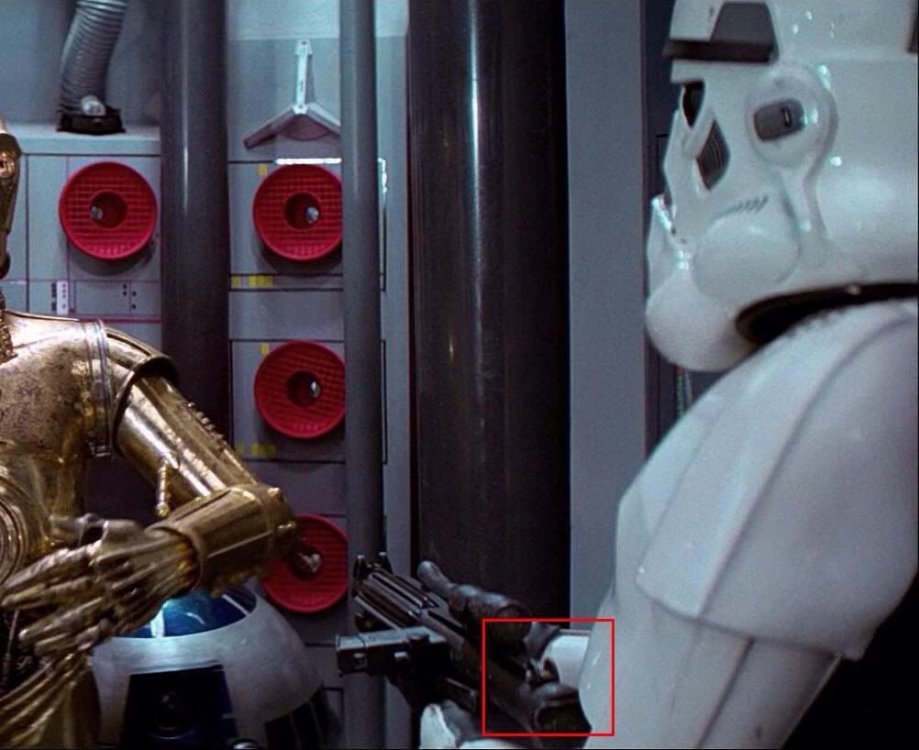
On a separate note from the Hex Nut and Bolt is the final Mounting Method the prop department resorted to for the Counter and Power Cylinders. After initially being Glued on and falling off during production the Counters and Power Cylinders were eventually mounted to the blasters with a wire simply wrapped around them. As you can see after initially being glued on and falling off while filming(especially the trash compactor scene) the Counters were finally mounted to the blaster with a wire wrapped around the base of the scope feet. The ‘Power Cylinders’ eventually utilized the same type of mounting method the prop department resorted to for the counters; A wire was wrapped over the ‘Power Cylinders’ and around the mag well of the Sterling Sub-Machine Gun. Here are several more photos of the Counters mounted with a wire wrapped around the base of the scope feet. some of these images almost look like it could possibly be a thin zip tie too. There was definitely some kind of Wires and Electrical Tape connected to the socket terminals on this Hengstler Counter, old news I know but 4K resolution gives us some new insight. This image also shows the Hex Nut just over Leia’s shoulder.1 point
-
Just as The5thHorseman and I posted about this here 5-6 years ago, the 4K version on Disney+ pretty much confirms the rear sight and pivot pin being removed and replaced with a Hex Nut and Bolt through the rear sight guard as yet another variation of the mounting method for the rear end of the scope rail. I know this is kind of old news but I think we can consider this one confirmed now. Another angle of the Hex Nut & Bolt, which appears to have a Slotted Head. Notice the Scope Rail is bent at an upwards angle behind the Hex Bolt holding it down. More angles showing the Slotted Head. Also a good view of the Greeblie on top of the Scope.
 1 point
 -
Good call! I'm holding off on gluing anything until i've painted -- I haven't entirely figured out my plan for that yet, but its in the works. Speaking of which, i haven't really considered what 'hardware' and screws i'm going to have to take out before painting. Will definitely have to pay attention to the reference photos.1 point
-
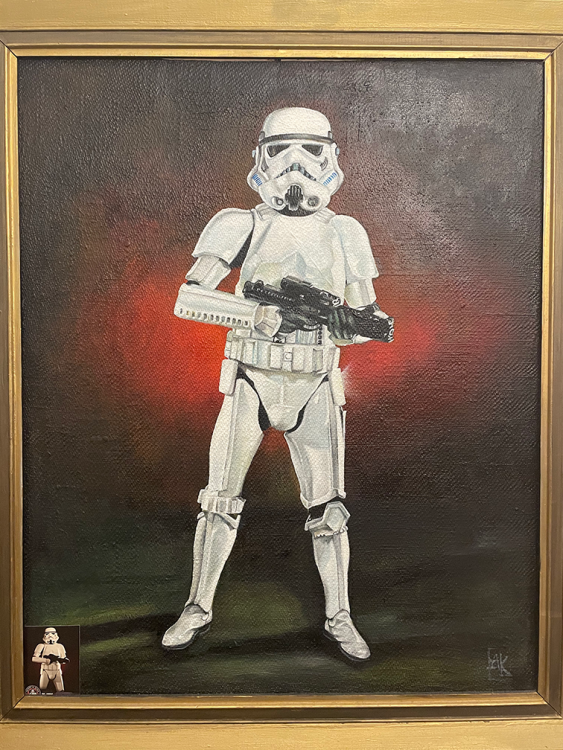
Nice work. I went the route of commissioning an actual painting instead.
 1 point


.thumb.jpg.a76e0f48e0bb54184765760e710c5f96.jpg)