Leaderboard


Popular Content
Showing content with the highest reputation on 12/26/2020 in all areas
-
CONGRATS to Daniel (Lord Q), TK 26306 for becoming our newest Centurion level Trooper! Way to go, sir!2 points
-
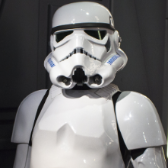
Name: Alexander Schwaninger TK-ID: 22504 Forum Name: azoroes Garrison: German Garrison (SESQ) Legion profile: https://www.501st.com/members/displaymemberdetails.php?userID=30445 EIB-Post: Armor: RS Prop Masters Helmet: RS Prop Masters Undersuit: RS Prop masters Blaster: Doopy Doo Kit Neckseal: Imperial Seamstress Gloves: RS Prop masters Belt: Selfmade Boots: Imperial Boots Size: 1,80m Weight: 63kg Full Shots: Improvements: I ordered a new brow trim and made a better fit: , Repainted the mouth for a better screen-match: Made a shorter strap in the middle to close the gap: Trimmed the back side of the tights: Ordered a new pair of gloves with more symetrical details (this are the RS gloves, they're pretty stiff as i only wore them one time but they're latex) Readjusted the Hengstler: Centurion Requirements: Tryed my best on fixing the frown: Rearranged my shoulders for a better fit: Ordered a new hard belt, unfortunatly it was pre-cut from RS but i think i got it right as it is now (also re-arranged the drop-boxes): Removed the last bits of the trim in the forearms: Repainted the barrel: Thanks for taking the time to inspect my costume another time, I hope to march to centurion really soon! Bonus:1 point
-
Slate - (Soon to be TK-####) Swedish Member Alright let's start of with an introduction. Hello! My name is Angus and I'm 17 years old. I was born in Sweden, Gothenburg and it is still my home town. I have been since a kid always had the dream to join the 501st legion as a Stormtrooper. And now that I'm almost old enough to join my local garrison, I think its time for me to chase that dream for real. Ever since that first convention, when I saw those troopers, following the Dark Lord. I told myself that I would be one of them. And that's why I'm here finally on the Whitearmor forum. I hope that I'll be welcomed here, you all seem so nice.1 point
-
Yes. It will pull out if you don't.1 point
-
BUCKETS OFF to Alex (azoroes) TK 22504 of the German Garrison for being the latest addition to the rank of Centurion. Way to go, sir! Only 10 spots left, Troopers...1 point
-
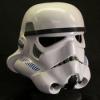
Hi Alex, and thank you for your application for ANH Stunt Centurion! CRL and Centurion Application Requirements: All required photos have been submitted, and on behalf of the entire D.O. staff we are pleased to welcome you to the rank of CENTURION. Congratulations! Other-Armor Fit/Assembly; In this area we review observations made by your fellow troopers and the DO team. Some observations may lead to suggestions to improve the overall look of your armour. Note that we consider both text (CRL) and pictures (screen caps/reference images) when reviewing submissions. You did it brother! Just a few small details we hope you will address to make this armor one step closer to perfect: It is seen in your first photos, but in the last ones it appears that the white elastic loop has slipped off the shoulder bridge/back plate tab, causing it to ride up. Something to keep an eye on when suiting up. As noted before, your kidney plate flares out on the sides (photo 1). This is mostly apparent when seen from the front, especially on the right side (photo 2), and in looking at one of your EI photos (3) it actually overlaps the chest slightly. Reference image This is what I would suggest: Trim down the kidney on the right side. This means you would no longer have the "notch" at the bottom, but that is no longer a requirement for Level 3 so you are good to go. I would also add some strapping as seen in the second 2 photos below to keep things in place. In a perfect world the ab and kidney should meet up perfectly, but if there is a slight overlap it looks much better to have the ab overlapping the kidney and not the other way around. Reference images And that's it! All the work you did on those updates has paid off, so you are now officially part of the "Original 500" Troopers to reach Centurion. Gut gemacht, Alex, und mein Eimer geht an Sie, Sir!1 point
-
Well i think its time to go for the next level.. E11 Blaster re done. New Bells and new kidney plate..1 point
-
Welcome to FISD Angus! Good to get a head start on your TK journey and have it ready to go by the time you hit 18, makes it a nice and quick approval into the 501st if your costume is ready to go. You will find everything you need here, and plenty of extreme knowledgeable members eager to help. No doubt you will get some great support from our resident Swede "TheSwede" TK99665 Daniel, he has a keen eye for detail and is the current GML of the Swedish garrison, and may be the one who approves your costume for the 501st. Enjoy the journey.1 point
-
Nice progress Greg1 point
-
Welcome aboard Jason, you are going to Love it here. Sent from my iPhone using Tapatalk1 point
-
Hello and welcome to FISD Jason.1 point
-
Welcome aboard Jason, look forward to seeing your build and progress.1 point
-
I'm surprised they didn't go for 501 for Cent but hey who ever gets that number has ultimate bragging rights in my opinion. I hope i can make this one i missed out on the 1000 and am waiting for ESB now1 point
-
PDF with photos HERE Start with a strip of aluminum polished with sandpaper grades 120 800 wipe down. aluminum strip is 1"x1/16" Mark 2 hole locations 1/2" and then 1 1/2" inches from that. 1/8" bit. Tools I use: 120 and 800 sandpaper and a towel. Slotted screwdriver TIn Snips 2 C clamps ruler sharpie slow speed drill and 1/8" bit 1 1/8" aluminum bar for side one of bending brake 2 1/8" aluminum bar for taped together side 2 of bending brake. (this is the spacer for the distance from the control panel to the tube. belt sander, or sanding block for shaping 60 grit. Start with 8 1/2 long. 8 1/2" long with holes marked and 6/32" with black painted pan head slotted screws with #6 washers I use slow speed on a drill. don't do this without experience. Line up and drill holes with the strip lined up with about 1/2" from each end of the tube. The hole aligned so that the end of the strip is almost flush with the cap. on one side leave an air release hole near one side of the front. This allows the caps to go on the pipe. Drill and mount the strips with the front screw positions. Bend by hand carefully a J shape. Tap the front edge with a hammer to shape the front of the clip to the curved shape. This helps flatten the front.https://imgur.com/oaOZnWM Drill the second hole in each J shaped bend using the strip hole as a guide. using a slow speed drill is key when doing it like this... nice and slow. Both J shapes bent and mounted with a screwdriver. put a spot of glue on the inside of the nut. Using 2 1/8" thick strips taped together, and one strip as the thin side. clamp the strips to the J shaped bends making sure they are square and keep the assembly level with the top of the control panel. Another angle of the assembly. Carefully and slowly bend the strips over first at a 90 then the full 180 degrees. Taper the top edges of your tube to make the cap fit easier. Measure 3 1/4" from the end of the folded bend. mark. Clamp a 1/8" strip in this location with another strip on top for the final bend. This shows the clamping jig for the last bend. This shows the strip ready to trim at the final bend. Closeup of marked bend area. Trimming with snips. sanded to shape with belt sander. Finished end. Lightly tap on with hammer. detail of bend. Side view. Hope you enjoy!1 point