Leaderboard


Popular Content
Showing content with the highest reputation on 05/03/2020 in all areas
-
Not a clear image but can just make out the shadow or the triangle Also seen in TROS2 points
-
My commission build will take about 2 months. So pace yourselves people. I’m trying to make this TK1K EIB group!2 points
-
Looking fantastic, Shane! I realize that you haven't started on the strapping yet, and the areas mentioned below will take care of those. You are definitely on the fast track for Centurion, sir! These would be my suggestions: 1. Having everything level/symmetrical is important for an ideal look. The bottoms of the bells and wrist openings are presently at a different heights, but no biggie, as once you install the straps you should be golden. I would definitely suggest making sure the tops of the bells touch (or are VERY close to) the ABS shoulder bridges. This will also bring them in closer to the chest and back plates. 2. The gap in the back/kidney connection should be reduced. This should be a matter of just dropping the back plate down a little. It's great that you haven't done the white shoulder elastic yet, as that will make it much easier. 3. The rear closures on your calf pieces need some tweaking. The yellow boxes are where the cover strips should go. It appears that you have plenty of wiggle room on the left one, and the right one may just need to be lined up. Keep up the great work, and keep those photos coming!1 point
-
I've been referencing your CRL QRG, it does a great job at explaining those as well but I think your last post explains even more. Took me a minute to realize the two pics were from the inside of the thigh. I was planning on closing the back of the thigh before finishing the ammo box, that way the rest of the piece won't change and nothing will get bound up when I close the back, but the front is set with the boxes. The lining up the back of the makes sense, I was planning on doing that by cutting the flange down. I have yet to trim those edges so I need to make them straight, then add the curve on the bottom. Ill plan on trimming the least amount possible, that way the rough edge is gone, but they will still reach to the back of the thigh far enough to not look wonky. well... wonkier than they should haha1 point
-
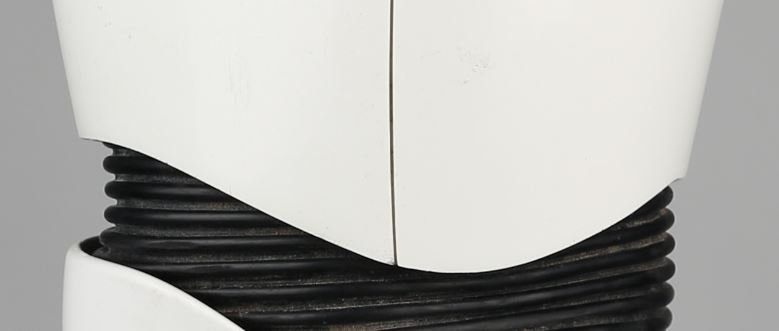
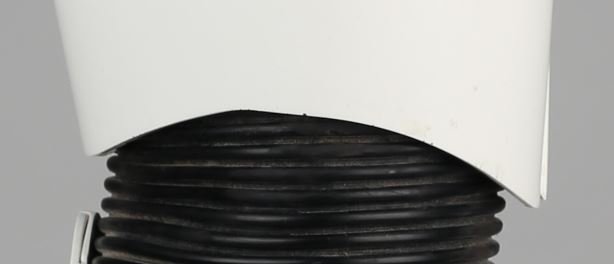
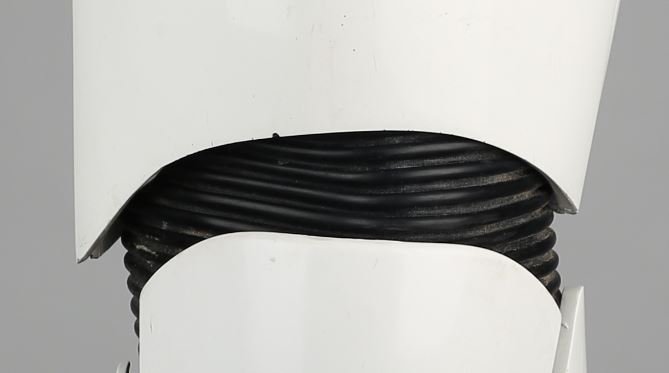
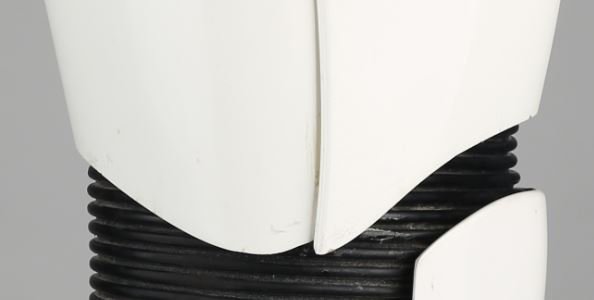
Before you glue anything, I would make sure that the rear ridges are level by either bringing the right side down or the left side up (same difference). It also looks like the side of the thigh ammo box is higher on the outside (yellow arrow). I see that you lined up the center ammo box with the cover strip. Note that while it may give a sleeker look, this is not a requirement at any level, as many of the ones in the films were off kilter a bit (bottom reference images). More importantly is that the ends of the tabs line up evenly on both sides of the bottom ridge and be equally spaced from the "corner" of the rear ridge.1 point
-
If you’ve got a bigger screen than me and a better copy of TLJ, just as Phasma is about to fall to her death, there’s a prone trooper on her left. My screen isn’t the biggest so I can’t get he best image1 point
-
Thanks @gmrhodes13. I found 1 maybe 2 that showed a shadow but nothing definitive. A few reasons really. Part I have used meshmixer far more and so know what to do to achieve things. Part is Armorsmith pegs my GPU and isn't as nice to use because of it. Maybe I need a new GPU but funds are going into build materials right now. Also I am not sure I want to go down that rabbit hole. Though my GT-720 is well past due! It's a bit frustrating as it's paid software but there you go. I'm going to approach the designer and see if I can get them added, just need to grab a few source images. The side holes I will still do my self so I can control the size as I want them right after scaling not before.1 point
-
Understood Here's some reference photos Left thigh outer back Front Inner
 1 point
 -
Looking Good, well done. The Following reference photos can help you to figure out how the screws go1 point