Leaderboard


Popular Content
Showing content with the highest reputation on 04/28/2020 in Posts
-
Took a day or so off to organise. There's a lot to deal with in this project: about 17-18 armour pieces (made up who knows how many sub components), 2 blasters and a helmet that all need more planning than "that bit looks like a good one to do next". I went through all the blaster parts I have and decided what needs a reprint in resin. Modified some to make it easier to add electronics to them. Things like adding a switch on the mag holder, went for a bigger one to make it easier to use but in the correct place, and hollowing out the Hengstler to make more room. I now have a plan for all those and will slowly work through the list. Some parts will be grey as shown above and I picked up some black for bits that will be black to help with con damage. The first plate came out prefect but was ruined when I washed them. There was a build up of old resin in the cleaning tub that stuck to the new parts. This has now been filtered and so should prevent future mishaps. It was a bit cold today due to rain so will re-run that plate again another day. Picture for interest: on the resin front here is my UV curing "bucket". It's a Rogue One Popcorn bucket lined with almost 5m of 405nm UV LEDs. Don't look in there, it's bad for your eyes. I take care to ensure its not on when not covered. I also scaled all of the upper body armour to what I think should fit me. It's up at 105% in the horizontal planes, and no change to height. The scaling was done part using armorsmith, partly in meshmixer. Armorsmith I'm using for a "does this look about right all together", this is so that nothing ends up out of proportion with the whole. Whilst 5% doesn't sound like a lot it's better to be able to see it before you spend days and money printing. The actual scaling was all in meshmixer. I won't go into to much detail as the plan is to make some videos on this process but I need to figure it out for my self first. This shows all parts after import into mesh mixer, combining, scaling, separating and then finally renaming. I also did was a couple of sizing tests. I was a bit worried about if certain parts would fit me after my scaling. Rather than print 4 full sections at about 11-13 hours each and over half a roll of filament, I cut out a ring from the model in the area I was most concerned about. I have child bearing hips my mother used to say... This was then cut up to fit onto my printer and printed as fast as I could get it to. We don't need quality here, it's only a test. This hopefully shows what I mean, I've move the parts to exaggerate what I am doing. Once this was printed out, which took about 4 hours for all of it, I was able to super glue it together. You need to let the glue truly set, so leave it for a few hours or you'll just break the glue when you flex it. I also did a slice from the chest plate as a check for further up the body You can then use the slice as a real test of size on your actual body. Tomorrow I will start printing part 1 of 8 abdomen parts. I'm able to print about 1 a day as I only print during the day and only have a single printer. I've taken a short screen capture as an experiment to see how I will make the videos so you might as well get to see it. It's rough as I didn't plan on actually making it until I was checking my work at the end.3 points
-
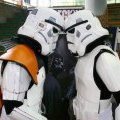
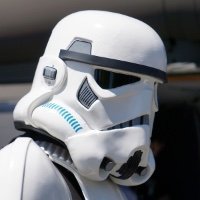
Hey troopers, Today, I’d like to run through some tips on ways to make a troopable replica Stunt TK helmet. The aim of my build was to make a helmet that looks closer to those seen in ANH back in ‘77, rather than how those helmets look now, over 40 years later. As we all know, the helmets on screen were used and abused by the actors/stunt team and this is clearly evident in ANH. Highlighted below, the helmets showed signs of cracked paint and usage markings. For those that don’t know, the original Stunt helmets were not white ABS (as many helmets are sold today). They were made of a khaki coloured material called HDPE. This was primed and then spray painted to get the final white appearance. This is why the helmets, when studied in closeups, have chips in the white paint showing the khaki plastic below. According to a trusted source, the process went something like this; 1. HDPE helmet primed oxide red 2. White primer added 3. Ears attached (unpainted) and helmet sprayed gloss white So, if one is looking for the closest appearance to screen used stunt helmets, the helmet has to be spray painted. This leaves a couple of options; Option 1; find a good quality HDPE helmet and follow the original methods Option 2; purchase an ABS helmet and fake the HDPE part For this project, I chose option two. Firstly, creating a “replica” helmet means studying the original helmets, such as how they were constructed and how they were finished. I’ve posted various threads about helmet alignment, brow heights, tubestripes and vocoders (which I’ll link at the end) as all of these elements help create a helmet that shouts ANH. For this build, I used a Troopermaster Stunt kit, 1.5mm ABS (not acrylic capped). After a rough trim, I could use magnets to hold the faceplate and back & cal together to start working on alignment. (More info on alignment https://www.whitearmor.net/forum/topic/48293-anh-helmet-alignment/) At every stage, I use a free smartphone app to compare my progress with movie screen shots. (FISD gallery: https://www.whitearmor.net/forum/gallery/) With the basics of alignment in place, the helmet can be fixed together. Let’s take a second to look at the eyes. As below, the screen used helmets appear to have had the eye sockets cut out with a sharp knife. Unlike many “idealised” builds, they were not finely tuned with sand paper or Dremels - they had nice, sharp cut lines. Once the construction is done, the undercoat that will give the appearance of the khaki HDPE plastic can be applied. I was recommended Rust-oleum Painter’s Touch Fossil. Now, whilst the original Stunt HDPE helmet were primed oxide red, I haven’t used that part of the process - this is because, in this build, the Fossil colour acts as the primer. So, for this build the process would be; 1. Helmet sprayed Fossil green 2. Apply liquid mask 3. Ears added and helmet primed white* 4. Gloss white 5. Clear lacquer applied IMPORTANT STEP To give the appearance of paint chips later on, time to apply liquid mask. This was applied with a paint brush to areas where the screen used helmets showed chips or weathering. As below, you can see that the liquid mask has been carefully applied. This dries to a latex finish and is removed after the gloss coat has cured later in the process. White primer; * to get the masking fluid correctly applied around the ears, the ear caps had to be added before the white primer, otherwise, creating the screen used look around the ear caps wouldn’t be possible. Gloss white; Helmet now ready for hand painted details. :-) So, now the helmet is shiny white, spray painted just like the originals, we can move on to the hand painted details. As always, I used screen shots throughout to be as accurate as possible. Videos part 7 through 10 cover the helmet detail painting; Hand painted details More details on the vocoder can be found here: https://www.whitearmor.net/forum/topic/48252-anh-tk-vocoder-examples/ For the tubestripes, I followed the process used by Troopermaster. Essentially, using masking tape (set 15mm apart), starting approximately a pencil width from the cheek, then using a curved template (made from offcuts of ABS) to mark the pencil lines. Each stripe should be approximately 3mm thick. Note the angle of the front few stripes - more details on that here; https://www.whitearmor.net/forum/topic/44755-tube-stripes-anh-stunt-dave-m/ With the tubestripes complete, some gentle weathering can be applied. I used an off cut of rubber s-trim to mark the helmet, then used damp newspaper to give it a slightly used look. And there we are - a helmet built using original construction methods, painting processes similar to the originals, and hand painted details, with realistic weathering. The completed helmet can be seen here; Also, the build can be seen throughout this playlist of videos; Thanks for stopping by. Any questions, please don’t hesitate to ask. Best wishes Dan2 points
-
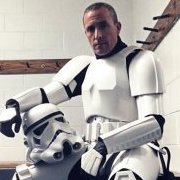
About 3 years ago now I decided to make a TK. Almost 5 years ago I decided to make a Vader (ANH) and that took about 18 months, so I've been doing this longer than I realized. I also have an R2 mostly finished, and a MSE mostly finished (I'm noticing a trend...). Somehow between 3 deployments (Active Duty Air Force), getting married, having a kid, and moving twice I haven't found time until my COVID quarantine to assemble anything, so yesterday at the virtual armor party I got some advice and started my first cuts. BBB day number 1 happened while I was deployed actually, back in 2017 with my RS props 40th anniversary set. I bought a helmet, armor, strapping kit, rubber gloves (not sure if they were included or not) and blaster from RS props ( still need a holster, paint, and a snap setting kit... plus whatever else you guys thing I need that I dont have). I think it was a week or two earlier I decided to buy a TK from ANOVOS. And then I got the discount code, so I figured I'd buy 2 because they were $400ish at the time and I had a hope that my now wife would be interested in wearing one... Both of those kits are now sold to fellow garrison members here in florida, and my wife decided she wanted a Jawa so we are working on that too. Well onto my build. A few days after I got home from that deployment I opened the RS box and pulled everything out for inventory. Here are the pics. Based on what I could tell then, and what I'm seeing now, all I really need is the undersuit, a holster, paint, and time. Yesterday I started trimming pieces, I didn't document anything until right now... so let me go take some pics. OK, I'm back, here are the pics and descriptions. I started with the shins per the squad's advice, then forearms, then on my own I did everything else. and sorry about the mess if it shows up in pics, this room doubles as the sewing room and office and junk room and computer room.... I need a storage unit haha. Here are the pics of what I've done. I still have more trimming to do but I didn't want to do more without having parts assembled so I could test fit everything. Measure twice, cut once right? I've read ukswrath's thread 2 or 3 times now and I'm referencing that while building, as well as youtube vids and asking on facebook, so I think I'm doing things correctly. Those still need a lot of trimming. My belt sander should help with the flat parts Question on the kidney plate. As you can see there is a funky bend in the top middle part of the return. What would be the best way offixing that? I'd like to get that fixed before strapping them together. Let me know if you need better pictures. And I finished the TD, what do you all think? Well that's all I've done for now, I will probably cut some strips tomorrow in prep for joining pieces together, I plan on cutting the thighs first, then shins, then forearms, then biceps. If I can Ill run to the store to get some snap setting tools. Oh I almost forgot, the helmet is still in the box. I plan on having fans and a sound system in there. Any and all input is welcome! Lvl 3 is the goal eventually, but I might as well start it right. Thanks for reading2 points
-
Looking good so far. Just a couple of things for you to keep in mind: Return edge: Keep about 1/8" return edge all around except for the wrist and ankles. They're not allowed in those two spots, otherwise, it helps your armor look thicker. Cover Strips: 1) Anovos only gives you precut (width) outer cover strips. These are for decoration and to cover the seams. I'd strongly recommend inner cover strips as well. Since you're local to San Diego, I'd recommend checking out ePlastics in Kearney Mesa for some thin sheeting to use as inner cover strip material. 2) Sizing is important. Not knowing your body type, you may need larger cover strips than the standard. If that's the case (and your GML will confirm) put the correct size in the front and put the larger cover strips, or shims, in the back. This is also where those inner cover strips come in handy. Holster: The standard Anovos holster, if I remember right, is a hero version. Not a big deal it can be modified for stunt. Other than that, have fun with the build. When we're out of quarrantine I'd be happy to talk to you at our Armor Party and help out any way I can.2 points
-
Same old story here! 40 y/o man child who grew up on and with Starwars! I work in the Emergency Room at a local children’s hospital and ran into a few of the local members cheering up the kiddos. That’s when I knew I wanted to join the cause!! So looking to build a kit!! Sent from my iPhone using Tapatalk1 point
-
Thanks Mario and Joseph, and Pura Vida Mario! I lived in Costa Rica for a few years, adopted the nickname for my forums because i couldn't think of anything else unique I'm reviewing the return edges 101 thread right now, might start fine tuning those parts today or tomorrow. While I was waiting on my wife to finish sewing I decided to test fit a few parts to understand the fit better. here are a few pics. Yes I know the shirt isn't approvable, but i have it for Vader so I figured it would work for these pics. I started with the torso section, put it all on, decided I didn't know what I was doing, then I put it on piece by piece. Here are the kidney to ab shots... looks like I'm a bit fatter than the original TK's... at 200lbs I could have told you that months ago haha Then I put the back and front on, looks like I need to remove some return edge... if not all if it from the shoulder areas and bend those tabs up a bit. I thinkthe front needs to go down a bit, gotta do more research. Then I moved onto the legs, I'm pulling the best pics of the 25 my wife took lol, there is a lot that can be trimmed around the thighs, I got poked in the buttocks too so I know some tips need to be softened. The thighs were up as high as I could pull them, and the shins were as low as they could go, I think the shins are pretty close, but the thighs need a bit of trimming. Lastly my arms, biceps will be trimmed like Joseph mentioned, just haven't done it yet. The forearms will need the wrist return edge trimmed completely, and modifying to make the arms bendable, they are too long as is. Also I fixed the bump in the kidney plate. I found a small block of wood, taped them together, then gently heated the plastic with a heat gun. I tested on a scrap piece to find the point where it starts to bend, and used about that much time for this one. I kept the heat moving as to not warp the piece even more, then once I thought it was hot enough (I was wrong 3-4 times... better to not be hot enough than too hot lol) I pressed the plastic down with another small block. As you can see it's nice and straight compared to what it was. That's it for now, back to work!1 point
-
Looking quite impressive so far, Carlos! As for the TD, as Mario mentioned the screws are indeed a little far from the end, but while it would definitely be a suggestion for Centurion it would not be a deal breaker. I see that you have your forearm/bicep pieces taped together, but before gluing anything I would strongly suggest the following: 1. Before final fitting/gluing, I recommend that you remove the return edges on the upper parts of your forearms. The reason being is that most of your time in armor will be spent with your arms bent (holding your weapon at the ready) and those areas will definitely dig into you ("armor bite"). If you glue them now and find that out later, removing those areas afterward will result in a super large opening. Not a good thing. The link to my "Return Edges" thread that Mario provided will explain it in more detail. 2. When trimming the ab-button plates, note in the reference images that the corners are squared, not rounded, and that they fit inside the raised ridges with space on all four sides. Hint: It's easier to paint these before you glue them on, and remember that the paint should not extend all the way to the bottoms of the buttons. You are doing the PERFECT thing by posting up photos and asking questions before moving ahead, sir. Keep that up, and I look forward to watching (and helping with) your TK journey!1 point
-
Fantastic .. Great job1 point
-
Amazing. congratulations.1 point
-
Hi again Cameron, and thanks for the fast reply! Fantastic to hear that you will be working on that gap, sir, and I look forward to seeing the results! With the new pics I see that you will need to remove the paint on the lower tab of the chest and posterior plate. EASY fix, sir. Some (non-acetone) paint remover and a few Q-tips and you will be good to go, brother. Reference images1 point
-
Good Evening Troopers, Alright, so I went ahead and uploaded the photos requested, everything should be here with the exception of my Kidney/Abdomen gap, which of course will require alteration. Please let me know if there are any other photos needed for approval and if there’s anything else to get closer to that EIB Badge. In the mean time I’ll be busy at home doing some shimming. Thanks again for all the help, I’m always blown away by the generosity of everyone here. https://imgur.com/a/AVcYTsg Very Respectfully, TK220201 point
-
Captain Phasma - TLJ First Order Stormtrooper - TLJ First Order Executioner - TLJ The rise of Skywalker Stormtrooper is representative of the Last Jedi version and as such will fall under that CRL at this time. As there are some weapons differences these will in turn be added as accessories specific to the movie they reside in.

 1 point
 -
I did mine too1 point
-
You will need to supply a link to your 501st profile https://www.501st.com/members/displaymemberdetails.php?userID=63931 point
-
Welcome to the FISD! Trooping as a TK is awesome, you are gonna love it.1 point
-
Hi Clint, welcome to FISD! Great! We hope to have you in our ranks soon1 point
-
DarthBiscuit, I did reinforce some areas with PC-7 (2-part epoxy paste) and I coated the entire inside of all armor with white liquid Flex Seal; however, I do not recommend apply the flex seal unless you are 100% sure where you want to place Velcro and mask those areas off. 3M backed Velcro will not stick to the Flex Seal and removal of cured Flex Seal is next to impossible. I chose to coat the inside of the armor with Flex Seal to minimize the abrasion of the fiberglass on the under suit but I did not realize that if I needed to remove a spot of Flex Seal to add some Velcro, the Flex Seal bonds to the fiberglass and even sanding it off will not fully remove it.1 point
-
Good luck Trooper !!!1 point
-
Hello Clint, Welcome to FISD!1 point
-
Hi Clint , Welcome to FISD, glad to read you are on the way of becoming an Imperial Stormtrooper.!! Feel free to ask whatever you need, search, read and asking for suggestions is the clue to take the best decisions and make the best investment. If you haven't done yet, take a look to the following forum section. Good luck and looking forward for you advances .1 point