Leaderboard


Popular Content
Showing content with the highest reputation on 06/01/2019 in all areas
-
Hello everyone, I recently got my hands on a full set of Jimmi's FOTK armor and helmet. The kicker is......it's v1! Lots of work ahead of me to make this thing look good. The armor and helmet were painted but I think it might have been painted with two different brands of white. The armor appears to be an off white and does not match the helmet. There was also no surface prep done before painting, so the first thing I started with was stripping the paint.1 point
-
Okay Troopers (and future Troopers), If you have kept up on recent events here, you are aware that the updated changes in the CRLs for ANH Stunt, ANH Hero, ESB and ROTJ will take effect on June 1st. We understand that many of you may have started your build before that date, and in order to avoid confusion and possibly causing you to have to make changes, we are allowing those in that scenario to adhere to the existing CRL guidelines. There are some conditions, though: 1. You must have started (and documented) your build here on the FISD prior to June 1st. 2. You will have until September 1st (approximately 90 days) of this year to submit for Expert Infantry and then Centurion if you opt to go for higher levels with that particular set of armor. 3. We took into consideration that an average set of armor takes approximately 3 months (or less) to build and that "life happens", but if you find that it will be taking longer than the 90 days, you will be required to contact the D.O. staff if you are aiming for EI or Centurion and explain your situation. After that date, you will be required to follow the requirements as per the updated CRL. If you have already started your build and would like to include the new updates, you are more than welcome (and encouraged) to do so. If you have met the above guidelines and would like to use the existing CRL, we suggest that you print a copy before June 1st, as these will not be available to view on the 501st site after that.1 point
-
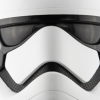
As mentioned, do not paint them, Michael. The exterior color (silver/chrome) will in fact be a requirement in the new CRL updates. Ones that are painted white are occasionally accepted by some GMLs for Basic approval, but for EI and Centurion they must have a silver(ish) finish. The inside parts of the snaps can be any color (within reason, lol).1 point
-
Best thinking, it's easy to take off than try to add on later1 point
-
Thank you Q Still thinking should I cut off that edge for better mobility. I'll make the final decision as strapping is done.1 point
-
Now that is a nice case!1 point
-
Okay. Other than doing pipe work on the house plumbing, I haven't done much ABS manipulation, so I'll have to study up on this. Long story short about the SDS: I always wanted TK armor, and googled "Real stormtrooper" which led me to SDS. I thought I read everything I could find about it. I got lost in the multitude of forums on this and other sites, but somehow never discovered the "issues" with SDS I have many other hobbies and couldn't invest the time in completely fabricating armor from scratch (cutting out armour pieces from ABS sheets, etc...) even though I'm handy. I had the wife's enthusiastic approval and some disposable $, so I paid the money and had it shipped. Less than 2 weeks later I was dressed as a Stormtrooper. And then I discovered the "issues". Oh well. I now figure it will take me less time to fix the SDS, than doing a do-it-yourself kit. Even now knowing there are problems, I think I would still go with SDS just for the service and ease. My 2 cents... Can't wait to be an official trooper helping others.1 point
-
Thanks, will keep an eye out. Been pretty happy with my suit case. Recently travelled to Melb and it held up really well. Only thing is my bucket doesn't fit inside. Sent from my SM-G960F using Tapatalk1 point
-
Why thank you very much!!!!! Forums have so much info and I haven't seen this. I'll check it out. Just looked at it. I never noticed the details of how the rear calf Velcro attachment are mirror images of each other. Both SDS calf pieces are left side overlapping right side. So only the left leg is correct. This is an easy fix with a bit of Velcro peeling and reattachment. I never noticed the snipe plate being attached with screws. Would it be more prudent to use the paste to cover the screw, or attempt to glue the plate on ?1 point
-
Bunnings (on the mainland, not sure if you guys have Bunnings there ) gets them in from time to time but I haven't seen them for the last few years. I've only used mine a couple of times, it's too big for most vehicles I go in but was great for air travel, pretty sturdy but the ground crew did manage to bust a wheel off, must have just dropped it outside the door straight to the ground.1 point
-
That is coming along really well. I’m jumping in the thread late, but my kit is Jim so I like to be of help. I cut out the vents on mine and used gaffers tape to cover in the interior. It just feels a little more accurate, but decals or paint is fine too. What are you painting with? That’s really good looking shine. I’m revamping my paint soon and want to emulate what you are doing. Sent from my iPhone using Tapatalk1 point
-
Motoring along, looking forward to the progress1 point
-
1 point
-
Coming along nicely, looking forward to seeing it all painted, I remember the excitement seeing mine all in white1 point
-
Congratulations trooper and welcome to the ranks1 point
-
Congrats! That's a great picture! And here is where you request 501st and full FISD access: Detachment status updates are done in bulk a few times be year, so don't worry if it says Pending for a while in your profile on the 501st site. That only matters once Legion elections come up, in early 2020. (see also the first post in this thread:1 point
-
Inside and outside thigh Sent from my SM-G955U using Tapatalk1 point
-
First test fit of bicep and forearm with gaskets. I am quite pleased so far.1 point
-
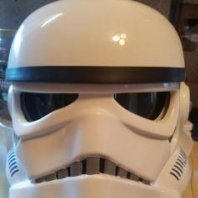
Basic pic of me. This is the first time in my armour so it isn't fitted exactly. Through more digging on forums (grrrr....) I've found more detail about the issues I mentioned earlier. Like I said, most are easy fixes. PhilBobTheFish, I am happy with the look overall and love the armour. Just one of the little buyers remorse issues. Hey, I have a TK armour and what kid wouldn't be happy!? Allay, Thanks for the reminder of my imgur account. Didn't even think of that. I also will start a build thread. Once again, time has been an issue. Frank 75139, I haven't had the chance to apply yet due to family commitments and battling a wicked cold for a while. Project was put on hold. I am starting up again this weekend doing some adjustments to straps and modifications of the most glaring errors.1 point
-
Thank you Brad --- All the big parts are done! I glued the final cover strip to my left thigh and also attached ammo belt to the right. There are no thigh or shin straps yet but what do you think? I think this looks pretty solid.1 point
-
Seven months later...... To sum up my progress, it didn’t work. The forearms are still a mess. Discouraged, I put the kit away in the garage and thought about it sparingly. Then, wonderfully, Star Wars Celebration Chicago finally came to town. One of the best things about SWCC was the ability to talk to other builders and see how their builds turned out. That was huge for me. It took seeing the armor in the field for me to realize it ain’t going to be perfect. Just talking with other TKs reinforced that this is not an exact science and the best thing to do is get the job done so that you can enjoy it. To all the troopers I met and talked with, thank you. Since then I've gotten to work on a Rubies conversion E11, a 3D print full size E11, and worked on my chest, back, shoulder bells, biceps, and ammo belt. Photos and background to follow.1 point
-
Tops of biceps and thighs are very common sizing areas. I'm short so ended up griding away at both the top and bottom of my thighs its good chance to see if you want to do the finn mods or just make sure you reshape the thigh to look more accurate. Make sure you double check ref pics and draw out your lines and recheck before making any cuts.1 point
-
Aah that explains it1 point
-
Here's a little more progress. Shins and spats. I'm not doing Velcro closures on these. I will be doing magnets on most of my closures going forward and that will take place after most of my parts are glued together. I did not follow the Anovos instructions on the spats. They call for the greeblie side to be glued down and I dont like that look so I am following Ukswraths build for the spats. Also, beware if you are using the supplied templates for placing any resin parts on the armor. The templates are not to full scale.1 point