Leaderboard


Popular Content
Showing content with the highest reputation on 09/01/2018 in all areas
-
I think the path of going sandy once your TK is worn out is not uncommon. One thing for sure is that no matter how light the pack is, it will feel heavy after an hour. For sure go elastic vs. cordura as you will need to move. I'd also suggest that even after you get it approved, you are not done. It's one thing to walk around your house in armor and think "I look good" and get approved by your GML. It's another to go through a few troops where you have to put in on/off by yourself in a small changing room, or you want to run down a hallway for a skit or just for fun. Bending over, stairs, etc. You will likely find that you will continue to make adjustments over the first several months of trooping. As a GML I try to tell people to use Velcro at first if you are unsure vs. glue, esp. on the thighs and sometimes the forearms too until they've trooped a few times. As others mention it doesn't have to be perfect to get approved, so get it pretty good and then adjust. My $.02...3 points
-
Backpack. So to get level 2 approval, a trooper needs a pack. Although the Docking Bay captain does not have one, the Cantina Capt does, so I purchased a #3 (standard) backpack from CrookKnight. He had a May 4th sale that made it too hard to pass up on. Anyway, the pack arrived today. The pack came very well... packed. Took me awhile to get to the actual pack. However, as impressive as the packing efforts were - it was no match to the brutality of the Post. The plunger head came off - which is fine since it should be mounted at a bit of an angle anyways (which I was going to do if not done so already). One of the seed trays was cracked on the bottom. Again - a little black tape and it will look probably even more screen accurate. A screw for the canteen fell out. I found the screw in the packing, but realized it was probably a little too short anyways - so I'll put in a longer one. I do have another canteen to replace the 3D printed one at some point down the road. So anyway, the pack is pretty sweet. It saved me a ton of work of finding and putting this stuff together. That said, I might make a few changes to make it more screen accurate. I'm not taking this pack to SWAT (if that happens), so I won't go really crazy. I have no idea what is actually required of the pack for PO (L2) but I guess I will find out. The changes I might make are: add small disc to top of lab pipe (upper left circle in pic) mount the plunger at an angle (dashed line showing exaggerated orientation) cut the mortar tube down a bit or lower the whole thing if possible. the white caps are 3D printed, I have ABS ones if needed. I might augment the bee stinger and make it a bit shorter (lower mid of pack) the radar dish (?) or tupperware lid needs a black backing to it and should sit a little lower on the mortar tube. As you can see, a few things are a little high or a little low compared to the reference pic. But I really can't complain, I could just weather this guy and go. Sent from my iPhone using Tapatalk3 points
-
Painting T21 wood parts. So I guess a person has a choice with the grips and butt of the T-21. black, or bakelite look, or wood look. I like the wood look so that is what I'm going to do. at the end of the day, it will be very dark so it doesn't stand out as wood - like most of the reference pics. I use a method of applying many washes of acrylic paint to make it look like wood. So starting, mask the area off. The black is primer. Paint white strips with various amounts of water. By the way, I'm using vallejo acrylic paints so water is the thinner. I even used my finger to run the white in to make the streaks. This base layer will dictate the direction and look of the wood grain. Now,this looks crazy but it works. I paint a bunch of different, bright colours in washes. I just slap it on any way, following the brush stroke direction of the white. This will give the brown washes, that I will add later, some more life and variation. I took 80 grit sandpaper to it and scratched it down to the primer and occasionally down to the black plastic below. I add a layer of light brown to neutralize things a bit. Then I sanded again very lightly. I started added washes of brown. Starting with brown mixed with red, and then brown mixed with black. Keep on adding washes of brown with various tones. My final wash was pretty much black to give the wood a nice aged look. then I removed the masking tape. ready for the next step - darkening the metal parts. Sent from my iPhone using Tapatalk3 points
-
Shoulders tomorrow then half-a-Stormtrooper-dance it is2 points
-
Someone with a fused back and bulging disc in his neck2 points
-
Actually, most kits are sold with the helmet unassembled so that should not be a problem, Ron.1 point
-
Wow right sorry bro I copied the wrong link thanks for correcting my mistake !! Troopers helping troopers !1 point
-
Looking great! Those shins really worked out. Nice work! My right thigh did the same thing. I had to glue the bottom half first due to the slight curve of the return edge. Sent from my iPhone using Tapatalk1 point
-
I think he said he tried that but something went wrong. I will check back with him again and ask.1 point
-
Yup, that makes complete sense. Thanks! Will definitely note that just in case. Sidenote, didn't notice until now that the cover strip on the right thigh went crooked somehow. So I just pulled it off, cleaned off the E6000 (good grief that wasn't fun), and reglued it. Definitely time for bed now.1 point
-
Don't really have an issue with them coming out of alignment sideways, most of the time it's an issue of trying to keep the butt plate from pushing out, this can be achieved with tight elastic connecting the pieces or a tighter strap between cod and butt plate. If you still have issues with the butt sticking out you could use a couple of pieces of rectangle ABS, use some heat and mould it over the joins on either side, bit like making a V tab, hopefully you get what I mean. You can then glue one side of the V and the other will be free to allow movement. Bit like this.1 point
-
Great work as always.1 point
-
1 point
-
Gigggidy..! Sent from my SM-J530F using Tapatalk1 point
-
So true, it’s a really fun build to experiment on And onwards we go...after some test I moved the front ”snaps” closer as there was a risk to get them tangled with the yoke comming down...I snapped them on and made a mark roughly were to drill and drilled a pilot hole and then the big one Testing...jepp it works Drilled away and strapping complete1 point
-
The Aluminium sheet that I bought to replace the feed tray cover on my DLT-19 arrived yesterday. I duly cut out the required pieces and formed them into the box shape using reference pics to judge the size this should be. I then painted the box matt black, and when the paint had dried I weathered the box by scraping off paint with an old plastic card. I had to cut a slot between the existing moulded feed tray box and the bottom edge of the feed mechanism. I decided looking at reference pics that I did not need to alter the size of the moulded box and the new metal one would be fine fitted over the top. The box simply wedges in place like the original did and needs no extra securing. Having done all of this though I am not completely happy with the end result. It's not bad at all, but I think that due to the thickness of the sheet I bought (0.8mm) the radius on the bent edges is too big, and needs to be sharper. To this end I have ordered some 0.4mm thick sheet aluminium to make a second box, and see if I can get the edges to look more how I want them too. Here are the pics of this first attempt box.1 point
-
Mail arrived! I’ll post more info later. Sent from my iPhone using Tapatalk1 point
-
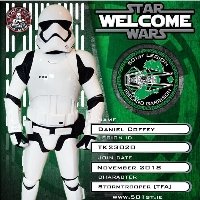
Good evening (UK time) TK-31275 reporting in. South Hampshire based. Awaiting my UK Garrison induction event. Nice to part of it all.1 point
-
Hurray my ANH Hero TK has just been approved! I’m so happy – a dream come true! I’ve been a huge fan of Star Wars since I was a little girl and was lucky enough to be able to work for Disney when they’ve purchased Lucasfilm a few years ago. While working on the campaigns I've met the lovely people from the Dutch Garrison and before I knew it I was dreaming of creating my own costume. Back in January I was finally able to purchase my kit from TM. I was so happy when my BBB arrived in March! Thank you so much @troopermaster for this gorgeous kit! I was very afraid to touch it, let alone make some cuts, too afraid I would damage something I could not repair. From July until last weekend, it was a roller coaster, blue tape everywhere and not to forget the smell of E6000. I will definitely miss it ; ) If I would do everything over, I wouldn’t fuss so much about the cutting/sanding the perfect lines for the fore arms, biceps, thighs and shins – the cover strips will hide it anyway, and not to mention the many re-cuts you have to do while fitting it to the right size. Big thanks to @VulpX (for getting me started and introduce me into the TK world, we had fun : ) @toxication and Nadia (for the lovely evenings, sharing progress and ideas), @TheSwede & @Frank75139 & @lucnak & @CableGuy (for the super swift responses on my WIP-posts – so happy with your feedback!) and last but not least everyone who contributed to this awesome forum! I’ve spend so many hours reading all tips & tricks, it’s so great to see troopers taking the time to help each other to build awesome costumes. I’m proud to be part of the family, and I’m looking forward to serve the Empire the best way I can. Now moving on to Expert Infantryman1 point
-
I'll probably get slapped for saying this but build it to Centurion standards and if you're not finished by Halloween just use white gaffers to tape to hold together whatever's not completed. I mean you're in your neighborhood, no one will know or care how imperfect you may look . You're a Stormtrooper that's awesome enough lol . After Halloween's over continue building it the correct way. Just a thought1 point
-
Congrats man! It is a weird feeling finally finishing this huge project and being happy that you've completed it... Then that little bit of sadness hits now that it's over. The real journey is just beginning, though. Have fun trooping!1 point
-
Great question, canon armor was assembled mostly with elastic for obvious reasons, mobility. For nice tight fitting armor either use nylon or tight elastic. Something to keep in mind any excessive gaps in these areas may be mentioned at the higher levels of approval., so nice and snug is recommended. That said, this is your armor and as Glen mentioned flexibility is key when trooping. I personally use both, most torso connections I use nylon (except for the shoulders), and lower arms are elastic. This allows for a nice tight fitting armor where it needs to be and flexible in those areas.1 point
-
Primed Pattern for tube tube primed Aluminum base coat Sent from my iPhone using Tapatalk1 point