Leaderboard


Popular Content
Showing content with the highest reputation on 07/08/2017 in all areas
-
FYI, I may have started it all, but it was the tireless and unrelenting effort of a whole team of people who helped build and grow this site. Everyone who has ever been on staff is owed the same gratitude.2 points
-
There are a lot of options out there, but I personally prefer the 2 piece suit. Makes it MUCH easier for when, uh... "nature calls". You can find black compression shirts/pants on Amazon (links below). Don't worry if some have graphics, as long as they can't be seen (your armor will cover them) you are good to go. -----------2 points
-
Here we go with my WIP thread for my TKC. Followed are the pictures I have so far from working on my bucket. This first setup the taping off for laying down the blue stripe and showing the anchors on the ear caps. The next two are showing the completion of three layers of 3 different shades of blue; Royal, Brilliant and Spa. Some of the fine worn areas were achieved by using liquid latex as a masking agent. Also if you stand back and mist the paint in spurts you can get the speckled effect. I also brushed on a some Transparent Oriental Blue and Blue Metallic for highlights. Weathering!!!! Here are the two squirrel fans I have installed on the backside of my mic tip. I used 1" screws to attach them. Testing out the white noise generator…I mean fans in my helmet. Now I have to figure out how to stop the fans from vibrating my helmet. At the moment they are attached to a longer screw behind the mic tips. I'm wondering if I should glue down the other side to the helmet, will that do the trick? After this I will be getting one of those "whisper 2000" sound amplifiers and mod'ing it to fit in my helmet. That way I can hear what is being said to me. I have seen a couple of different ones at Harbor Freight and they are pretty inexpensive.1 point
-
Yes, as i complete assemblies they are put on eBay and my site.. The E11 is a rather large project,, the counter will be completed and released in a couple weeks. I finally got the injection molded parts i needed.. Now ill complete the solenoid assembly and come up with a cylinder for the numbers... Few thing left to do on it... The sterling itself will be done soon but i am releasing some of the individual parts such as the rear sight and the rear cap latch ,as i get them packaged up... ebay http://www.ebay.com/usr/vmusicstore http://www.warmachinepaintball.com/ http://www.warmachinepaintball.com/o...tore-replicas/ http://www.therpf.com/showthread.php?t=267831 /forum/topi...l-build/page-11 point
-
Well today I've sort of tidied up the magnetic greave closures, these are the pieces that will go on the inside of each greave, I still have the outside closures to do Anyway glue dried Trimmed the excess glue from the edges and around the magnets Got all the excess glue off and sanded the edges This is how they will be fitted to the greaves, the parts where the magnets are covered by the greave will be dremeled out Cut and sanded the inner cover strips to both greaves Sanded the inside of the greaves 20mm inner cover strips glued and fitted They will be treated to a hot water bath on Monday to get the rear to align properly .... I'm well chuffed with today's progress1 point
-
Purdy boots. Armor wise you're almost ready for assembly, a few trimming adjustment and you're ready to go .1 point
-
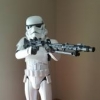
Ultimate Lego blaster!1 point
-
Thanks so much guys. This is a great way to start off the day! Again I have to offer up my gratitude to many of the great people on this site who helped get me here through their tutorials, advice, and innovative build ideas.
 1 point
 -
What part of the Orlando area is he in? I am willing to help, so please ask him to PM me. https://www.whitearmor.net/forum/profile/22112-justjoseph63/?wr=eyJhcHAiOiJmb3J1bXMiLCJtb2R1bGUiOiJmb3J1bXMtY29tbWVudCIsImlkXzEiOjI5OTkxLCJpZF8yIjo1NTY4Mjl91 point
-
Ordered some 1x5 flat pieces for the T-Tracks. I think we'll call this done now Thanks for stopping by everyone!1 point
-
Hey Frank welcome back and thank your Centurion application, let's do this. CRL and Centurion Application Requirements: All required submission photos are present. Thank you for making the corrections suggested on your EIP app. We are happy to say your armor displays all the elements as set out in the Centurion CRL. Sly and myself would like to congratulate and welcome you to the L3 rank brother. Great job Other-Armor Fit/Assembly: In this section we may mention any additional adjustments needed to enhance the overall armor appearance, of course we have nothing to add . Excellent job, troop on Frank1 point
-
You are selling these parts on Ebay?1 point
-
I am like a kid waiting for Christmas and your posts are the Sears Wishbook. The plastic top piece and window look great. Can't wait to see your finished Hengstler.1 point
-
Also have a look at crickets and fragarocks builds good solid info on alterations1 point
-
The hengstler counter plastic front and window has arrived from the molding shop...1 point
-
Hi there, things are looking a lot better in terms of placement , I think your good to move forward as it is, once the clamps are off the OII plate will sit better try a test fit wearing your under suit or some cheap compression leggings as for gaps at the back you should be ok at this stage I think shims will be required on the sides of he kidney plate to gain EIB And centurion but just check the crls. Are you using the original strapping sysytem ?? ( brackets and elastics)1 point
-
Hey, cool! Yes, very proud. One tip, please don't attempt to install these until you've fitted your shins perfectly to your legs. Once you've made the cuts for the magnets to fit, that's it- future sizing will be super difficult after that point. Before installation, you'll need your shins to not only fit, but to meet together at the back nicely. It took a hot water bath to do it, but here's how mine looked right before adding the magnets: My goal was to make sure the tops lined up and they closed on their own without any assistance, and I think I achieved that. The awkward cuts were not the fault of the RS armor. That was entirely user error. These cuts could have been made much more straight if I had known what I was doing in the first place. I know now to always clamp a ruler to your shins while cutting if you want straight cuts. Good to hear that the greave trimming is coming along! My greaves did not arrive to me in perfect alignment at the back, either. I had to do a lot of fine tuning to get them just right. I ended up cutting them at an angle, kind of like a pie wedge, so that the ankles were tapered in more than the tops. Here's an example of how my cuts went on my shins (it's a thigh, but the same principals apply): Keep up the good work, Stephen! You're on the right track!1 point
-
I much prefer a 1-piece suit, that way the layers never slip apart when on long troops. Neosport dive skin from Leisure Pro- $27US. http://www.leisurepro.com/p-blrlm/neosport-unisex-lycra-spandex-skin-suit1 point
-
This: https://www.stormtrooperundersuit.com/index.php Or this (has an extra zipper so Troopers can, um, do maintenance when they need to): --------- ask for Jeff. Some troopers also use underarmor, one or two pieces. Basically you want a matte black, breathable undersuit that has some stretch. Happy undersuiting!1 point
-
Thank you for taking your time to review. I'm very happy I'm approved. I can definitely fix get the shoulder bells closer and the belt sitting a tiny bit higher. Ab buttons I'll work on after those two previous things are fixed up. I'll start on my Centurion requirements in the CRL. Once again thank you to you and FISD team for your efforts.1 point
-
I do these more on my Garrison boards so some of the narrative might not make sense, I just try to copy over the big ones like this and my AM TK build for people here. Would it be okay to move this to the open area now? I remember at one point there was a post saying we could send them over if we wanted, I'd be okay with it myself.1 point
-
I've been super busy trying to finish this and am basically done. I have some other shots in my Garrison build thread but they mostly mirror other guys here since I used their info for mine hahaha. The only thing I wanted to throw out that might help is actually assembling the belt - how I did it Belt boxes 1) Finished the two horizontal ones, again used foam and glue and secured them. 2) Added top box part to the vertical three part one. 3) Using foam and glue finished off the last two vertical ones. Belt: A little tricky but not to difficult. Used a leather punch to put holes in the rubber outer one, and soldering iron to put holes in the web inner one. 1) First thing you have to do is put on the armor, put on the belt and mark there the ends will be. After that I used chicago screws through the holes. 2) Using the measuring guide on the FIDS and facebook group I laid out the boxes in order. I made marks then taped them up and tried it on before committing to holes and screws. 3) To mark where the holes will go I put silver marker on the end of each screw and pushed it on the belt at the proper placement. This left a faint transfer I then dotted with the marker. Always double and triple check the placement for each one. 4) Quick test fit to make sure they are okay. 5) Used the chicago screws to attach each box. I haven't seen any actual step by step on securing them so I'll try to document it here for future help. 1) Using the marks made in the first stage, I took the leather punch to the rubber and made the holes. 2) Used the marker to mark the spot on the web belt. 3) Used the soldering iron to make the holes in the web belt. 4) Put the box on the outside, through the rubber. The boxes have the female screw part. 5) Put the web belt over the screws... 6) Screwed in the male part of the set. Repeat down the line until you are done I have some excess rubber on the ends, so I sewed on some velcro to hold it in place. All this will be covered by the soft pouch, and by leaving it I'll have the ability to adjust things if ever needed.1 point
-
Next comes the belt boxes. After matching them up I put in holes (they were already marked) for the chicago screws I'll use to attach it to the soft belt. I added a small amount of E-6000 on the screw mounts and pushed them through. This will help hold them in place a little better. The large soft pouch has a plastic part that sits on the outside. Simple enough as the soft pouch already has velcro sewed in on the flap, all I had to do was put sticky velcro on the plastic. Luckily I had my own because ANOVOS gives you the matching hook part but it's sew on so you'd have to glue it lmao The second, smaller soft pouch stays as is but is the perfect size for one of those "deck boxes" I had lying around. This will give it some shape support. Using a glue gun and some old scrap from my Ashtooper build I constructed an inner plastic support box for the larger pouch... but because the scraps were all weird left over shapes it came out crappy so I threw it away and constructed a new one out of flat ABS I had from my AM2.0 build *** updated box: In the meantime I've been researching the threads and photos - am I to understand those two smaller belt boxes that attach in the front horizontally are supposed to be rubber on the bottom part that attaches to the belt?1 point
-
Forearms weren't too bad to figure out. A LOT of parts but it is what it is lol. 1) I used reference and ultimately taped it up for a test: 2) Using the correct shims (patterns provided with the instructions or online) glued them first: 3) After the sides are secure you glue on the top. Test fit to see if you can get your hand through. If you can, just glue it on. If you can't then they say to leave the bottom third by the wrist unglued so it will flex and allow you to get in and out of it. Personally I don't think that is smart or will last so even though it's REALLY tight I can in fact get my hand in and out so I glued the whole thing1 point


.thumb.jpg.55c74df05456b40069c85977e140b535.jpg)