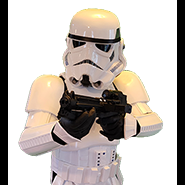
KFo TK-21921[TK] Posted January 17, 2024 Report Posted January 17, 2024 Name: Kevin Forman ID: TK-21921 Username: KFo TK-21921 Garrison: Old Line Garrison Armor Maker: Walt’s Trooper Factory Helmet Maker: Walt’s Trooper Factory Blaster Maker: 3D Printed Self Height/Weight: 5 foot 9” 165lbs Boot Maker: Imperial Boots (keeptropping) Canvas Belt Supplier: The Tatooine Trader (ebay) Neck Seal: The Costume Base (Amazon) Hand Guard: Trooperbay Holster Maker: Darman Props 501st Link: https://www.501st.com/members/displaymember.php?userID=39911&costumeID=124 1 Quote
TKSpartan[Staff] Posted January 17, 2024 Report Posted January 17, 2024 Hi Kevin. Thank you for your EIB submission. Would you please add the additional photos according to the bellow thread? Thank you Quote
KFo TK-21921[TK] Posted January 17, 2024 Author Report Posted January 17, 2024 I was going to work on finishing that tonight. I was testing out just posting pictures. I didn't think anyone would look at my post this quickly. Thanks! 2 Quote
KFo TK-21921[TK] Posted January 18, 2024 Author Report Posted January 18, 2024 (edited) Edited February 20, 2024 by KFo TK-21921 Quote
gmrhodes13[Staff] Posted January 18, 2024 Report Posted January 18, 2024 You may want to address a few things on your helmet before the DO's review. Not enough lines Cheek traps, not enough lines and too short Frown is painted gray and does not leave the teeth area. Vocoder ridges/steps on side Correct Aerators/Hovi-MIX tips are present. Screens used shall be of a wide type mesh, with the rim of the mic and the inside white or painted white. Ideally, the tube stripes are positioned approximately a pencil width from the side of the cheek. Fall of tube stripe tops ideally lean toward the front. 1 Quote
TKSpartan[Staff] Posted January 20, 2024 Report Posted January 20, 2024 Hi Kevin, sorry for delaying. Your EIB submission has been added to the processing line. You did a nice work building your armor and your 3d blaster as well . In order to start your EIB review we'll need you to make some fixes , most of then are about your helmet as Glen noted before . 1. The Rear traps and tears : You will need to add some more vertical black lines and some of then need to go a little thicker as the references. Reference 2. Frown Paint: Just a toothpick with some Non Acetone paint thinner would do the work to refine the teeth cut. References 3. Hovi tips : You will need to change the mesh to a more accurate one and add some more white paint to the rim. CRL L2: Screens used shall be of a wide type mesh, with the rim of the mic and the inside white or painted white. References One method I used to change the hovi tips was : Using a wide mesh strainer, marker's top cover and some white paint. 4. Tube Strips. Yours are a little far from the pencil width position from the side of the cheek and will need to be relocated. 5. The vocoder paint detail. Another painting session will be needed to refine the lines as the references. References 6. The Thermal detonator. as the CRL states for Basic "The white control panel raised ribbed pad faces the rear" Your TD's ribbed pad needs to be relocated to face the rear more so the round washer control can be seen . References And finally Trooper. Your E11 blaster has indeed a great finish but as the crl states no 3d lines can be seen CRL: 3-D printed blasters can not contain visible print lines, and must be sanded smooth for a more realistic appearance. It's just a small section that show some 3d lines . I'm sure you can solve in a great manner. It looks like a lot of work ahead , but we think you can do it . Let us know if you need some help . Looking forward to place that EIB badge under your name Trooper. 1 Quote
KFo TK-21921[TK] Posted January 20, 2024 Author Report Posted January 20, 2024 (edited) This is as far as I got as of now. Are these corrections ok? I have to wait for new tube stickers to be shipped. New Blaster image New Teeth Image New Hovi Tips I cleaned up the vocoder, but I still need to add some more paint on the outsides. Edited January 20, 2024 by KFo TK-21921 1 Quote
gmrhodes13[Staff] Posted January 20, 2024 Report Posted January 20, 2024 You need a little more paint on the side ridges Quote
KFo TK-21921[TK] Posted January 20, 2024 Author Report Posted January 20, 2024 (edited) I know. I mentioned that under the picture. That picture was just to show the new hovi tips. I'm going to do all the helmet painting corrections at the same time. I have to do the gray first anyway. I also had to order the paint to match since WTF did the helmet. I hope to get the paint and stickers before next weekend. I'll also retake the TD picture when I take the fixed helmet. Just wanted to make sure what I did so for is good enough while I wait for my shipments. Edited January 20, 2024 by KFo TK-21921 2 Quote
TKSpartan[Staff] Posted January 22, 2024 Report Posted January 22, 2024 On 1/20/2024 at 2:04 PM, KFo TK-21921 said: This is as far as I got as of now. Are these corrections ok? I have to wait for new tube stickers to be shipped. New Blaster image New Teeth Image New Hovi Tips I cleaned up the vocoder, but I still need to add some more paint on the outsides. Nice work Kevin. keep it up. Quote
KFo TK-21921[TK] Posted February 11, 2024 Author Report Posted February 11, 2024 (edited) Ok, here are all the fixes. Edited February 20, 2024 by KFo TK-21921 2 Quote
TKSpartan[Staff] Posted February 12, 2024 Report Posted February 12, 2024 Great Kevin! Thank you for the update. Gerald @Doggydoc will be working on your review and will be with you as soon as posible.. 1 Quote
Doggydoc[Staff] Posted February 18, 2024 Report Posted February 18, 2024 Hi Kevin, and thank you for your EIB application! CRL and EIB Application Requirements: All required photos have been submitted, and on behalf of the entire D.O. staff we are pleased to welcome you to the rank of Expert Infantry. Congratulations! Other-Armor Fit/Assembly; In this area we review observations made by your fellow troopers and the DO team. Some observations may lead to suggestions to improve the overall look of your armor, and please keep in mind that we consider both text (CRL) and pictures (screen caps/reference images) when reviewing submissions. 1. You moved the tube stripes in perfectly, but it appears you have placed them on the wrong side and as a result, they are leaning towards the back and not the front. CRL L2 : Fall of tube stripe tops ideally lean toward the front. Reference 2. The alignment of the screws securing the ear pieces does not follow the line of the traps. As we have explained in other occasions, we will only require it for Centurion, when the helmet looks "weird", which is not your case and if you choose not to correct this it likely would not prevent your centurion approval. CRL L3: Ideally, placement of ears (and screws) should closely follow the rear angle of the trap above them. References 3. Your Helmet is sitting a bit too high on your head. Ideally, the bottom of the helmet should sit just above the shoulders. This is fairly easily corrected by removing some of the padding on the top of the helmet. This will give a much better overall appearance to your costume and often will improve your vision. References 4. In order to avoid some "armour bite" when walking, we could suggest some additional trimming to the back section of the thigh and this could allow lift a little the lower section of the rear armour. References *************************************************** Centurion Requirements: In this section we prepare you for our highest tier of approval. Because Centurion photos must show more detail than EIB, items pertaining to Level 3 might be seen there and not here and additional photos may be required. We try to point out all that we can from what we are able to clearly see, but the final accuracy is the responsibility of the trooper. 1. The LEFT side ear location and brow trim cut are perfect but the Right side needs to be corrected for L3 accuracy CRL: The helmet is accurate in detail and proportion to official references Reference 2. The rank bar on your helmet is a little bit thin. to be more screen accurate, it will need to be widened slightly. References This should just take a bit of black paint in the areas outlined below 3. The left lower ear screw is sitting ion an angle and should be flush with the helmet. CRL L3: Ear screws shall be slotted, flat topped, countersunk and painted white. Reference 4. You will need to add some white elastic to secure the shoulder straps in the back. CRL L3: The plastic shoulder straps need to be held down in the back via a white elastic band to the white fabric that connects/bridges the chest and back piece. Reference On closer review, I can see the strapping on the image below. Just make sure to remember to put it around the shoulder bridge when dressing. 5. You still have some return edge on the wrist side of your forearms. This will need to be trimmed or sanded to remove all return edge. CRL L3: No return edge on the inside of the front of the forearm is allowed. Reference 6. The belt position should be a little higher (L3). CRL L3: The top of the ABS ammo belt should sit at or just above the bottom of the central and vertical abdomen button panels. References 7. Your left belt box is slightly out of position. This is likely a dressing issue and you just need to ensure that it lines up properly when kitting up. A small dab of E6000 can be used to secure the strap for the box the inside of the belt. CRL L3: Drop boxes are vertically aligned with the end of the ammo belt with minimal gap between belt and box. Right side is perfect Left side needs to move back slightly Reference 1 Quote
giskard8[Staff] Posted February 18, 2024 Report Posted February 18, 2024 Congratulations Trooper, Welcome to EIB. 1 Quote
gmrhodes13[Staff] Posted February 18, 2024 Report Posted February 18, 2024 Congratulations trooper, welcome to Expert Infantry and the EI Honor Gallery 2 Quote
Nairy[Staff] Posted February 18, 2024 Report Posted February 18, 2024 Amazing work Kevin! Congratulations and welcome EI #1073! 1 Quote
Chemi[Staff] Posted February 18, 2024 Report Posted February 18, 2024 Congratulations Kevin!!! 1 Quote
Crampeat[TK] Posted February 19, 2024 Report Posted February 19, 2024 Excellent work, Kevin! That EIB is well deserved! 1 Quote
MaskedVengeance[Staff] Posted February 19, 2024 Report Posted February 19, 2024 Congratulations, Kevin! Excellent work! 1 Quote
KFo TK-21921[TK] Posted February 22, 2024 Author Report Posted February 22, 2024 (edited) After taking your suggestion to line up the screws with the same angle as the traps, one of my ears is now cut a little too much in my opinion. Would this pass for Centurion or do I need a whole new ear? Edited February 22, 2024 by KFo TK-21921 Quote
KFo TK-21921[TK] Posted February 22, 2024 Author Report Posted February 22, 2024 (edited) I'm guessing based on these reference photos, I should be ok? Edited February 22, 2024 by KFo TK-21921 Quote
Doggydoc[Staff] Posted February 22, 2024 Report Posted February 22, 2024 Hi Kevin. Great work on lining up those screws with the back of the trap angle. I think you are still okay. Your ears are not too thin at this point and if you look at the screen used helmets, they often did not fight tight to the helmet. If you look where the ears are sitting on the helmet, this is the area that holds the other parts off of the helmet, so careful incremental sanding may bring them in a bit tighter. The helmet seam showing in the gap does affect the look some. Not sure if you have some room to trim it back a bit to hide it. Different helmet manufacturers will all have slightly different layouts to the alignment. Here are some screen used references. 1 Quote
Doggydoc[Staff] Posted February 22, 2024 Report Posted February 22, 2024 2 minutes ago, KFo TK-21921 said: I'm guessing based on these reference photos, I should be ok? LOL. You posted while I was answering with the same photo Quote

Recommended Posts
Join the conversation
You can post now and register later. If you have an account, sign in now to post with your account.