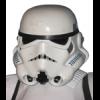
keith Posted August 31, 2010 Report Share Posted August 31, 2010 This is my helmet which is just about ready for painting. Ignore the bolts, i am painting all the parts separatley so i need to be able to take it apart. I didn't use the stainless steel ANH/ESB screen for the mics. I found this stuff which has larger squares and i painted it silver. Its all in the details..... I formed some bubble lenses (I hate making these!).... More soon, Keith. Quote Link to comment Share on other sites More sharing options...
TK bondservnt[501st] Posted August 31, 2010 Report Share Posted August 31, 2010 (edited) getting really nice looking in here! the thickness of the brow trim, and the look of the quality of the lenses... Edited August 31, 2010 by TK Bondservnt 2392 Quote Link to comment Share on other sites More sharing options...
Daetrin[Admin] Posted August 31, 2010 Report Share Posted August 31, 2010 Rocking good so far Quote Link to comment Share on other sites More sharing options...
keith Posted September 12, 2010 Author Report Share Posted September 12, 2010 I'm painting this helmet tomorrow. I can't spray paint in the house, so i've had to wait until weekend. I've fitted bolts to the ears that are just long enough to fit the nut on inside the helmet. The top bolts will be hidden by the chin strap and the bottom ones are hidden by the neck trim. Here is an ear showing the small bolts that hold them on Keith. Quote Link to comment Share on other sites More sharing options...
Daetrin[Admin] Posted September 12, 2010 Report Share Posted September 12, 2010 Excellent work - you're making this look *good* Quote Link to comment Share on other sites More sharing options...
riveting Posted September 12, 2010 Report Share Posted September 12, 2010 Nice assembly, as expected I like the hidden screw idea, is that epoxy on the bottom & sandwiched plastic on the top one? Quote Link to comment Share on other sites More sharing options...
TK-4510[TK] Posted September 12, 2010 Report Share Posted September 12, 2010 Excellent Keith Quote Link to comment Share on other sites More sharing options...
JoeR Posted September 12, 2010 Report Share Posted September 12, 2010 Awesome work Keith. It really captures the film look, and your assembly and trimming are flawless. What material did you go for inside the mic tips? Quote Link to comment Share on other sites More sharing options...
sskunky Posted September 12, 2010 Report Share Posted September 12, 2010 Looks great so far, can't wait to see more. What colour are yo using or the paint job? I like the resin in the ear idea with the hidden screws very inventive. Quote Link to comment Share on other sites More sharing options...
keith Posted September 12, 2010 Author Report Share Posted September 12, 2010 (edited) Thanks guys. Its resin holding the bolts in the ears as Mark said. Joe, you sent me the stuff inside the mics when you sent the helmets. Its a chopped up polystyrene-foam peanut thingy from the packaging. Mark I am using Halfords Mercedes polar white to paint it. Its a nice shade of white for the Jedi helmets. Its a fantastic helmet to work with! Thanks, Keith. Edited September 12, 2010 by keith Quote Link to comment Share on other sites More sharing options...
keith Posted September 12, 2010 Author Report Share Posted September 12, 2010 BTW all the parts of the helmet are now painted. Here is my painting method again for any newer memebers who might have missed it years ago.... Mask off the inside of the helmet parts if you are fussy and want it to look like an unpainted helmet. Prime the parts with white primer. The best primer to use is Tamiya fine surface white primer in an aerosol. You can use normal automotive white primer, but you will probably have to wet sand it when it is dry, which means unmasking and remasking the inside of the parts again and this takes a while. You don't have to wet sand the Tamiya stuff. Stand the can of primer in hot water for a few minutes before spraying it on the parts. When the primer is dry, check for any dust particles that may be on the helmet and remove them. For the gloss white, i use Halfords automotive spray paints. This paint is fantastic, but i don't think it will be available outisde the UK. A really nice white is Mercedes polar white. Its very white, but a sort of brown white and not a blue white if you know what i mean. This paint is in 300ml cans and you will need three of them for one stormtrooper helmet. Again, stand the gloss white paint can in hot water for a few minutes. If you are not very good at spray painting and always seem to get paint runs, you might want to skip the standing the paint in hot water part. Spray the helmet fast to keep the paint wet and avoid overspray as much as possible. Thats the hardest part of the job. You want to find a sort of spraying path around the parts that keeps the paint as wet and glossy with as little overspray as possible. Make sure you get paint all around the eyes and inside the mic tip wells. As soon as you are done with each coat, get a hairdryer set on warm on the part quick. The paint can get conensation on it otherwise and it will leave little dimples in the paint. You also want to avoid paint runs. If you do see the paint start to run, stop spraying and get the hairdryer on the part, holding it at an angle so the run won't get any worse. You should be able to sand away the paint run later, so just keep coating the part with paint trying to avoid anymore runs. Do not sand the paint between coats. If you have any dust particles in the paint, dry the area a bit more with the hairdryer (don't over heat the plastic though) and sand it out with very fine wet and dry paper. Take great care doing this, as the paint will be far from set. For the final two coats, i always change the aerosol for a new one, as they spray the paint better when full. You want to avoid overspray on the hard to sand areas on the final coats. So get the paint nice and glossy inside the tears, traps, mic tip wells, frown, around the eyes, around the vocoder and so on and have the overspray on the open, less detailed areas of the part you are painting. Let the paint set for a week or so and then, using very fine wet and dry paper, wet sand the paint smooth. Take care sanding where there are high spots or edges, you don't want to sand all the way through the paint, as you will have to start again. Sand an area, give it a quick wipe with a towel to dry it and you will see lots of glossy dots. This is the texture of the paint. The high spots of the texture have been sanded and the lower spots have still not been touched by the wet and dry paper. You need to keep going until there are no glossy dots and the surface is flat and smooth. Try and sand the parts until you only just get rid of the texture/glossy dots. Sanding more than this will just make the coat thinner and you will be at more risk of sanding through to the plastic. Now you have sanded away the top layers of paint, you will probably find that the paint is soft again in these lower layers, so take care how you hold the part, or you will leave fingerprints in the paint. It will take weeks to fully harden, so just watch how you handle it for a while. Use a cutting compound like T-Cut on a soft cloth to polish the paint to the finish you want. You can get a mirror finish if you want. Do not use polish or car wax of any kind, as this will slow down or even stop the paint from fully setting. Thats it! Keith. Quote Link to comment Share on other sites More sharing options...
riveting Posted September 13, 2010 Report Share Posted September 13, 2010 Thanks for the refresher Keith Rings a distant bell from the UKPP but I could be wrong Quote Link to comment Share on other sites More sharing options...
keith Posted September 28, 2010 Author Report Share Posted September 28, 2010 I've finished T-cutting the paint and it looks perfect. Just going to give it a few more days before i start painting the frown and stuff. Keith. Quote Link to comment Share on other sites More sharing options...
RogueTrooper[TK] Posted September 29, 2010 Report Share Posted September 29, 2010 Spot on Keith! please sir, may I have some more pix Quote Link to comment Share on other sites More sharing options...
sskunky Posted September 29, 2010 Report Share Posted September 29, 2010 Great tutorial on painting. That should help loads of unsure troopers. It's patience and care that's the key to getting a nice finish on the paint. Cheers Keith. Quote Link to comment Share on other sites More sharing options...
keith Posted September 29, 2010 Author Report Share Posted September 29, 2010 No problem Mark is correct, patience is the key here. And the longer you can leave the paint to set the better. It will become a rock hard shell after a month or so. Keith. Quote Link to comment Share on other sites More sharing options...
keith Posted February 1, 2011 Author Report Share Posted February 1, 2011 Here are some photos now the helmet is painted. Again, it is totally impossible to tell its painted even with close inspection. The decals made from the scans of original decals are still not done and i'm still looking for a neck trim that matches the original ROTJ trim. I know the correct neck trim is out there, as i had small section of perfect ROTJ neck trim a while back. Here are some without the flash: Keith. Quote Link to comment Share on other sites More sharing options...
john danter Posted February 1, 2011 Report Share Posted February 1, 2011 (edited) Schweeet! Now why didn't my build go as smooth as this Any tips for painting the frown as I've had to start mine again lol! Edited February 1, 2011 by john danter Quote Link to comment Share on other sites More sharing options...
JoeR Posted February 1, 2011 Report Share Posted February 1, 2011 Amazing work as always Keith. You are a true master and your attention to detail is second to none. If anyone wants an assembled helmet by Keith drop one of us a pm. Joe Quote Link to comment Share on other sites More sharing options...
john danter Posted February 1, 2011 Report Share Posted February 1, 2011 If anyone wants an assembled helmet by Keith drop one of us a pm. Joe Lol, why didn't you tell me this 2 weeks ago. I'd be 2 cans of primer, 2 cans of paint, 1 tub of filler better off That is a lovely helmet, fair play. I can second the fact these helmets are really easy to work with. I had a second off Joe (cracked cap) but filled it and sprayed over. Everything just sits together nice with too much thought. Mine's nowhere near as nice as the one above though Quote Link to comment Share on other sites More sharing options...
keith Posted February 2, 2011 Author Report Share Posted February 2, 2011 Thanks! Here are two photos with the brow pushed up higher. Sometimes i like this look better, sometimes i like the low brow look better: A side view: The tea stain on the left has now been cleaned off. Don't know how that got there as i don't drink tea. Must ask my wife about that!: A close up showing some original mold damage, probably from when they cut the faces off the mold. It will be under the neck trim, but i made sure it didn't get touched when i was working on the draft on the molds: Keith. Quote Link to comment Share on other sites More sharing options...
AJCG Posted February 4, 2011 Report Share Posted February 4, 2011 Very nice Keith! I love this helmet. to be honest i like it better lower Cheers A Quote Link to comment Share on other sites More sharing options...
Rob .T .[TK] Posted February 4, 2011 Report Share Posted February 4, 2011 Originally , I thought high brows looked odd, but the more I see of them , the more I like them ...higher.......higher !!! Quote Link to comment Share on other sites More sharing options...
john danter Posted February 4, 2011 Report Share Posted February 4, 2011 What decals will you use for this? Quote Link to comment Share on other sites More sharing options...
Sonnenschein Posted March 30, 2011 Report Share Posted March 30, 2011 Fantastic build! I just started to looking into ROTJ. What I like to know: if there aren't any srews used, how on earth are the chin straps mounted? Quote Link to comment Share on other sites More sharing options...

Recommended Posts
Join the conversation
You can post now and register later. If you have an account, sign in now to post with your account.