

charlesnarles
-
Posts
1,016 -
Joined
-
Last visited
-
Days Won
2
Content Type
Profiles
Forums
Gallery
Articles
Everything posted by charlesnarles
-
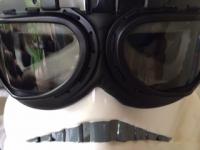
lol I love the doopy smiley made of parts😉 It's kinda hard to get an image to be magnified and be in-focus without some kind of functional focusing adjustment mechanism like on binoculars etc. Authentic M38/19 azimuths have pretty fuzzy images when they're mounted backwards on blasters. Flipping the image might be easy with a middle lens if it has the right shape
-
Need smaller Speakers for Blaster
charlesnarles replied to Quadan's topic in Electronics for Helmets / Blasters
The speakers in the Disney model are only about .75 inch in diameter. You could use the Disney speaker in the Rebels, and use the Hasbro speaker in the Disney counter cavity. Just brainstorming for a sec. I'm sure there are suitable speakers more available to you and cheaper than the Disney guns, tho -
Self-powered digital counter display
charlesnarles replied to charlesnarles's topic in Electronics for Helmets / Blasters
This finally came (psch, I'm too impatient) and it's pretty great. Definitely will fit nicely into a resin counter logo-half: ----------- -
Accidentally bought a 6-pack of special order spraypaint that I was going to use for my 3 scopes. Guess I didn't think one was gonna be enough lol. Following in the footsteps of those who post before me, (and not in attempt to take credit for their ideas) I'm in a position to make some hollowed out scopes with killer weathering if anyone would be interested at all. I'd be asking for whatever it would cost for the resin scope (or send me yours?), the monocular ($10 or so), and shipping an even lighter scope back to you (or ideally, come pick it up). My goal would be under $50 cont US, but don't quote me til I make sure that's feasible. Not trying to turn a profit, just want to kill two birds.😀 Doopydoo's has an M38 I can get for $20 and DVH made an M19 but idk what PhoenixProps uses now. Again, his kinda fell on my lap, so I'm just wondering what I can do with this much antique brass other than go Midas on my car😎
-
Nice job, looks great especially considering your supply costs thanks to some ingenuity. 👠Use super glue made for the plastic you're using if you're confident. Use E6000 if you're not, cause it's rubbery and can be removed relatively easily although it cures much more slowly
-
DoopyDoo's + deac. parts = Scott's build
charlesnarles replied to charlesnarles's topic in ANH BlasTech E11
Now I can't find it, but thanks to whomever directed me to none other than Gazmosis' doopy thread for instructions on the removal of the stock hinge. He sure made it seem easy; took me almost an hour of prying and twisting to get one side off... then another while for the other side, but its finally off of there after how many decades... Whew!: Also noticed they dont give you a bolt or even a cocking handle = excuse to get some PhoenixProps upgrades -
Based on reference photos, I picked matte. They're just not as shiny as the armor, so I'll spit shine them if matte is too flat
-
Disney's stormtrooper voice changing mask
charlesnarles replied to ikartev's topic in Build Threads Requireing Maintenance
I got the old solder off no problem, but... I can not get that ground to take any solder! Twice I could get the red/white tinned (poorly) and twice the ground just got corroded by the heat before it could melt the solder. I cleaned my tip and re-stripped the wire but the solder still drips right off: I read that headphone wires have an enamel coating on everything so I'll need either sandpaper to buff it off or an iron more powerful than the 25w I'm using. Weird! -
Oh good, I got that kind of paint but forgot to get sealer! Thanks for reminding me, saved me a trip👠Here's my supply rundown: -Roamers Jodhpurs size 12 -Tandy Leather Fiebings Deglazer -Angelus acrylic leather paint in white -Tulip dimensional fabric paint in white -Mod Podge clear acrylic sealer in matte -Frog tape (because I already had it. We'll see how the frog treats me) -foam brushes -rags (no lint!) -razor for final tape removal The boots fit me snugly, but I have high arches so I prefer looser shoes. They'll only get more comfortable as they stretch a little and get worn in. Seems like a relatively nice pair for the money, I didn't see any real blemishes or the like. Stitching is nice and everything feels sturdely secured. They're utilitarian equestrian boots so there's a quality standard at play, which again, I appreciate for the price. I've paid more for worse riding boots. Anywho, I think I'm gonna use the shirt I just put on to start deglazing since its synthetic and covered in car battery acid burn holes..😅
-
My medium brown box came after only 2 weeks. Not bad at all! The box cracked me up, being British and all, I couldn't help but think of Flying Circus... It's! Doopydoo's full ANH kit! (dadaduda dada da, doo dah dee)... I got my hands all dusty tonight but I'll wash them and post some pics. Everything looks greatly improved since even last year, except for the magazine... but that's why Steve is a boss. More to come, and soon!
-
Looks like we had the same idea with that sale. I was surprised to learn the stock is all spring-loaded on front😠My airsoft stock is not! Neat little spots of realism make a huge difference. Can't do that with resin. Is yours all greasy?
-
Nice work! Can't wait to see it in action
-
Anovos TK armor preorder
charlesnarles replied to bearings's topic in Hard Armor (General Discussion)
Aw, I thought they'd give us a visual rundown of all the hard and soft parts, even prototypes/placeholders would've been nice. That pneumatic saw idea seems ..excessive -
Disney's stormtrooper voice changing mask
charlesnarles replied to ikartev's topic in Build Threads Requireing Maintenance
Please do criticize anything you see me doing wrong! Lol I really appreciate the help, thank you both. I've been using the 'Tube and Google searches to teach myself electronics but there's so many contexts for every term/color/etc. And now I have a solder helper stand thing which fixes the problem of needing another hand (iron✅; board✅; wire....😕? = bad contact). COOL! Onwards! -
S&T(airsoft) Sterling L2A1 to E11 "build" thread
charlesnarles replied to charlesnarles's topic in ANH BlasTech E11
Small pseudo-update. Turns out their stock is close enough to the original specs that if I had gotten the "ready to install" version (without the cut-out piece of the main tube still attached at the pivot, which I wanted for my doopy build) then I'd be able to unscrew theirs and (I guess use a pop rivet or something to) attach the vintage one. I just can't imagine getting that bit of tube off of mine. Only "catch" is you'd have to open the cutout under the nose to fit the slightly bigger latch: An original end cap is frustratingly close to fitting, but doesn't quite let you. I would rather try to mod their cap than the mounting for the cap, since I can replace it quickly: -
Anovos TK armor preorder
charlesnarles replied to bearings's topic in Hard Armor (General Discussion)
Well they did adhere to the 9-16 tube stripes rule, but they coulda left some off.. Weird choice for the fabled SDCC prototype reveal if you ask me. Exciting business! -
It is not easy to find a dropped pair of loose pre-sanded DVH finger guards made of black resin, so I assume they do it this way for our benefit. Good luck with your degree, hurry back😉
-
Anovos TK armor preorder
charlesnarles replied to bearings's topic in Hard Armor (General Discussion)
And we all just happen to have the perfect replacement set, Tony😎 Such a low brow, I wonder if the design will be conducive to reassembly. Kinda alienating sandies, unless that's on their to-do list (cross your fingers) -
My experience with dying boots so far hasn't included deglazing/stripping or anything but black dye, so I'll share what I do experience in case it helps anyone with theirs. I got Roamers brand "Jodhpurs" (elastic instead of buckle, so technically Chelseas) in size 12. I found them on this thread: http://www.whitearmor.net/forum/topic/28920-which-one-is-the-right-boot/ Based on other threads, I'll be sure to use a lot of deglazer (maybe all of it), I'll take care to fully seal the painters tape covering the sole, I'll do many thin-er (not "thinner"😉) layers of white, and I'll be sure to carefully (safely) cut the painters tape around the sole to prevent peel-ups. More to come later once I open the box. I *think* it's a shoebox lol
-
Anovos TK armor preorder
charlesnarles replied to bearings's topic in Hard Armor (General Discussion)
In other words, it's copyrighted now. Their hands are tied -
Home Depot has an "antique brass" all-purpose: http://m.homedepot.com/p/Rust-Oleum-Universal-11-oz-All-Surface-Metallic-Antique-Brass-Spray-Paint-and-Primer-in-One-6-Pack-260728/204515209?MERCH=REC-_-mobileweb_pip_rr-1-_-100205665-_-204515209-_-N I was gonna try it soon, my doopydoo just shipped😆
-
Anovos TK armor preorder
charlesnarles replied to bearings's topic in Hard Armor (General Discussion)
-
imho, a good option for a beginner is a Disney blaster ($25 w/out cast discount) with a Hasbro doopy kit ($40 incl shipping to CA). Spend maybe a week gluing and painting and you're all set. After that, modify it at your leisure and to your heart's content 😉
-
I have a simple question about the wiring of your selector switch: Are your positions Auto Repeat Safe from left to right? More technically, I'm trying to find out which of the pins goes to which of the 9 positions on the rotary switch. Thanks bud
-
Shoulder Pauldron
charlesnarles replied to ArmyDocTrooper18's topic in Boots, Soft Parts, and other Accessories
This might help: http://starwars.wikia.com/wiki/Wookieepedia:Canon_policy
