

illusionz_09
-
Posts
998 -
Joined
-
Last visited
-
Days Won
1
Content Type
Profiles
Forums
Gallery
Articles
Everything posted by illusionz_09
-

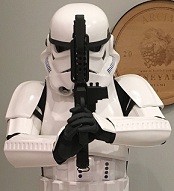
iLLuSiOnZ_09 ATA Bucket Build (*ATA)
illusionz_09 replied to illusionz_09's topic in Build Threads Requireing Maintenance
First i had to just hold the bucket in my hand and just marvel at the beauty lmfao... strategically think of what im doing next lol. I definitely used the trooperbay videos and other online threads here at inspiration/tutorials to help me. So thanks to all Troops helping troops! First I scored basic shape in the eyes and drilled some small wholes to get a basic shape open. Once i had a rough opening, using online examples and following the molding shape on the ATA, i used a pencil to mark the line i needed to cut to. Using my exacto knife, i carefully cut the eyes to where i wanted. Once i got the eyes to where i wanted them ( i will sand/file them up a little once i finish with the frown to do both together), i then drilled some small wholes on the frown to be able to get my x-acto knife in there. I'm not sure if you can see the wholes to well, but they are just to be able to get my knife in there to start cutting away. I then started cutting away at the frown. This is where i left my current status for the night. Next up on the agenda will be to finish up these frown wholes... to me getting the eyes and frown wholes just right are really important. Getting the face right is CRUCIAL lol... -
This thread is just going to be for my bucket. I will create a separate thread later for the armor once I complete the helmet. Anyway, after waiting almost 10 months, i finally received my "BIG BROWN BOX" and crap it did not disappoint! Naturally I opened the box and layed it out somewhat accordingly so that i can make sure all the pieces were in there. I definitely got some TK Wood from holding the kit in my hand lol... It's going to be a process building this but I'm going to take my time and do it right. Cant wait!!!!
-
Yes, keep in mind that both the stunt and the hero version of a TK can become EIB or Centurion status. Its all just preference. What type of look do you prefer. Its all subtle changes on the bucket; for the most part the body armors are similar. these are just a couple examples. Hope it helps.
-
Helmet Build DMAC74
illusionz_09 replied to TKDMAC74's topic in Build Threads Requireing Maintenance
i was going to say the same thing. -
Apparently the file is too big to attach, here is the barrel template: Like i said, print it until it wraps perfectly around the barrel and the circles align.
-
@DoneByDan & @Heathen Viking attached is the template for the barrel. As far as the length to the barrel use, as i mentioned on my instructions: "When i printed the template exactly at 100% it didnt fit right around my tube, so i reprinted at 144% (crazy right, maybe its the printer lol. just make sure when you print you print and print until it fits perfect) but it fit perfectly after. tape it on so you can use the template without it moving." As far as the originals go, the barrel from base to muzzle should be about 8 inches. @DoneByDan, can you ellaborate on your question for the electronics? i thought my thread spoke of what i did, but i can answer anything that was unclear. hope this helps!
-
looks amazing... you definitely need to take some professional pics once your completely done! great job!
-
Episode 7 Stormtrooper Helmet, WIP
illusionz_09 replied to Dday's topic in Build Threads Requireing Maintenance
lmfao at "the left side," but you know these buckets are usually symmetrical (for the most part) lol. glad to see this concept. I'm glad they left the overall feel of the TK the same at least. Hopefully some old TK parts can still be used for the new TK. Good job so far! -
short Trooper problem :(
illusionz_09 replied to WarPug's topic in Getting Started - Read this First!
For any short Trooper, you should definitely look at Diana's thread as the best guide and benchmark for building your TK http://www.whitearmor.net/forum/topic/25919-dianas-rs-props-build-anh-stunt/ She did an amazing job. She kept touching up and touching up and adjusting until it fit her smaller frame just right. -
this should look amazing when finished. Can't wait to see the progress. Good Luck!
-
Diana's RS Props Build- ANH Stunt
illusionz_09 replied to AsBlondeAsLuke's topic in Build Threads Requireing Maintenance
Really Amazing Job Diana! -
Basic / Simple Hasbro E-11
illusionz_09 replied to Sir Tomasu's topic in Build Threads Requireing Maintenance
Looks great. Nice Job! -
Congrats Andrew!
-
Thanks Glen, yours was definitely an inspiration lol...
-
Good Luck!
-
Fuumantroop's AM armor build
illusionz_09 replied to fuumantroop's topic in Build Threads Requireing Maintenance
Congrats Kid! -
Ep. VII Stormtrooper armor costume concept art?
illusionz_09 replied to maxsteele's topic in Off Topic
but thats not what they are saying the buckets look like...so i can't imagine they are going this route. Although i agree with raintrooper, definitely beautiful lol! -
DF92 ATA Armor Build
illusionz_09 replied to Darth Fader 92's topic in Build Threads Requireing Maintenance
I'm still waiting for my ATA to arrive. But I can't wait to follow this build. Good Luck and enjoy! -
TKBoots is definitely the way to go.
-
great job trooper!! looks much better! nice work.
-
sorry yea thats what i meant. The hard plastic, thats what made it shiny. thanks for the clarrification. in either case, yes i suggest you "flatten" the rest of the gun and leave the handle shiny.
-
also, i'd hate to say it, but i think the gun in too "shiny/glossy" the guns were a bit more matte. The handle however was more vibrant in color since it was a rubber grip and therefore looks more shiny than the rest of the gun. still looks great none the less. Always appreciate the hard work of creating a hasbro conversion.
-
Fuumantroop's AM armor build
illusionz_09 replied to fuumantroop's topic in Build Threads Requireing Maintenance
i agree with the heat gun. Its definitely out too much on your side. Should grab your chest and lats more. great job though! keep up the good work! -
thanks Tim! yes i decided to keep this blaster "newly issued." I should be getting my ATA kit soon so i dont want to mess with my blaster and get frustrated. what i will do is once I am an official TK i may just do a full resin blaster and weather that one (once i see field action lol) but this will be my starter and "kid friendly" blaster. keeping is clean!!!
-
looking good. Love the bucket
