

illusionz_09
-
Posts
998 -
Joined
-
Last visited
-
Days Won
1
Content Type
Profiles
Forums
Gallery
Articles
Everything posted by illusionz_09
-

Zarlon's First ANH Build Thread (ATA)
illusionz_09 replied to Zarlon's topic in Build Threads Requireing Maintenance
Yup...im going to start painting tonight as well lol... Good Luck! -
Yea I saw ur progress. Good luck! Enjoy the process
-
Zarlon's First ANH Build Thread (ATA)
illusionz_09 replied to Zarlon's topic in Build Threads Requireing Maintenance
Much better. great job! -
iLLuSiOnZ_09 ATA Bucket Build (*ATA)
illusionz_09 replied to illusionz_09's topic in Build Threads Requireing Maintenance
i've seen so many buckets and ultimately they all have gaps lol. It really doesn't bother me. I will be making the paste for the armor, but for the bucket i want to keep it clean lol. I almost gave up and was gonna have you do my ear lmfao... -
iLLuSiOnZ_09 ATA Bucket Build (*ATA)
illusionz_09 replied to illusionz_09's topic in Build Threads Requireing Maintenance
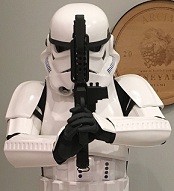
Ok so i lowered the brow. Much Better lol. I agree! And then i had to tackle those damn ears. Whoever said they each take 2-3 hours are right lmfao. Its not perfect, but I'm at least happy with them lol. I definitely know why the new buckets in Episode 7 they decided to go earless!!!! But at least the difficult part is over lol... And then to finish for the night i had to take a quick selfie!!! Just to make sure i go to bed happy I probably should have taken them with the lenses on, but it was late. I needed a break. -
Boomer's Bucket Build (ATA)
illusionz_09 replied to boomer75's topic in Build Threads Requireing Maintenance
Remember, the ears have black outline too... everything is looking great though, keep up the good work. -
iLLuSiOnZ_09 ATA Bucket Build (*ATA)
illusionz_09 replied to illusionz_09's topic in Build Threads Requireing Maintenance
lmfao...y did you have to show me your Hero Bucket lol. Damn i love that one. Both look amazing though, but yea, i'm gonna do low brow too then. -
iLLuSiOnZ_09 ATA Bucket Build (*ATA)
illusionz_09 replied to illusionz_09's topic in Build Threads Requireing Maintenance
FML, i agree lmfao!!! I was hoping you guys would change my mind lol. I'll work on adjusting brow and ears tonight. -
iLLuSiOnZ_09 ATA Bucket Build (*ATA)
illusionz_09 replied to illusionz_09's topic in Build Threads Requireing Maintenance
do you guys think my brow is too high? i should lower it a bit right. -
iLLuSiOnZ_09 ATA Bucket Build (*ATA)
illusionz_09 replied to illusionz_09's topic in Build Threads Requireing Maintenance
Its just a little tiny bent on the upper outside of the eye. The clamp got away from me a bit. I may just not mess with it, its just my OCD on making it perfect lol. The maker always sees the imperfections of their build lol... thanks for the encouragement guys... -
iLLuSiOnZ_09 ATA Bucket Build (*ATA)
illusionz_09 replied to illusionz_09's topic in Build Threads Requireing Maintenance
lmfao...i like how the forum changes words automatically lol... Shucks? really? haha. And "Slave Leia" instead of B*tch! lmfao hilarious. -
iLLuSiOnZ_09 ATA Bucket Build (*ATA)
illusionz_09 replied to illusionz_09's topic in Build Threads Requireing Maintenance
I'm a little upset about my clamps... they did slight damage on the right eye, but ill try to touch it up with some heat and sanding later. Anyway, i cut the brow and then put the cap and face plate together. if you notice on the right side i had some issues and had to fix the hole. It will be covered by the ears anyway. So i put the overall bucket to where i was happy with it. (Except that right eye in the corner lol) Then i started working on the ears. First i drew a line to get an idea, then do a rough trim off. and Holy crap!!!!!!! am i glad it came with a second pair lol.. Those ears are difficult as shucks to get right. It's really a slave Leia lmfao. Perfecting these really takes a lot of practice. Hopefully the second pair i can get better by doing it little by little, i'm doing those tonight. I'll keep posted the final ears on. -
Zarlon's First ANH Build Thread (ATA)
illusionz_09 replied to Zarlon's topic in Build Threads Requireing Maintenance
i feel you...how annoying are these EARS!!!!!!!!! holy crap.... -
Boomer's Bucket Build (ATA)
illusionz_09 replied to boomer75's topic in Build Threads Requireing Maintenance
its coming along. Looks great -
SDS Battle spec armour and paint.
illusionz_09 replied to tomnewdelhi's topic in Assembly, Mods, and Painting
I just finished painting the inside of my bucket Flat Black. I have an ABS bucket from ATA and it worked perfectly. The ABS is thick enough that the black does not affect the external color AT ALL. the inside of the bucket is completely up to the owner, you may do anything inside you like. -
On a side not if you really want a full blaster kit, then you can either search for the doopydoo on ebay or even go to trooperbay.com so get his. up to you.
-
Sebastien, your Hasbro blaster and conversion kit is perfect to get not only basic approval, but also to become EIB (expert infantry) certified; which like they mentioned is up to level 2. The only thing is you cannot become Centurion (Level 3) with a Hasbro. But that also depends how far you want to get certified.
-
iLLuSiOnZ_09 ATA Bucket Build (*ATA)
illusionz_09 replied to illusionz_09's topic in Build Threads Requireing Maintenance
I just had to paint the inside of the bucket for sanity lmfao. I ended up using Flat Black (I still had it from my Blaster build) Taping up took longer than I thought... I covered up the ATA sign to leave the TM. And covers the frown holes i made as clean as i could. The ABS isnt the easiest thing to stick the painters tape to. Then ended up doing 2 coats of the Flat Black. After it dried for a while i removed everything and saw the finished paint job. Im really happy with everything overall. I may touch up the frown a bit by hand later to make it cleaner; well see. for now im happy. Up next is to put this together then do the ears... -
iLLuSiOnZ_09 ATA Bucket Build (*ATA)
illusionz_09 replied to illusionz_09's topic in Build Threads Requireing Maintenance
I actually ended up buying some Satin Black Spray Paint to paint the inside of the bucket (for mic tips too). I'll just tape off the holes to paint bucket. I have a question, should i put some Bondo or putty in the inside of the bucket behind the mic tips? I have heard of some people doing that. Is it needed for an ATA build? -
iLLuSiOnZ_09 ATA Bucket Build (*ATA)
illusionz_09 replied to illusionz_09's topic in Build Threads Requireing Maintenance
Touche lol... So back to the build. I finished off the teeth on the frown to where i was happy with them and did some light filing (in the wholes i can get inside lol); the others just cleaned with the x-acto blade. Finished Frown & Eyes Based on the shape of the mold, i then cut the sides of the face plate and the neck trim underneath. BTW, those molds are seriously harder/stronger than they look lol. It was pretty difficult to shape with the scissors i have so i had to clean it up with my x-acto. (i use this blade for everything lol) I left a little extra just in case...let me know if I should get closer. Now that i have the face plate where i want it, i began working on the back cap. Just as before, i drew light lines with a pencil to get an idea of where i wanted to cut it. I'm not sure if you can see it in the pic. On both sides and below. Then I drilled a whole where the lines come to a point for support, as we all do. Then I cut at about where i drew the lines. I did not take a picture of the process of actually cutting, but I'm sure you can imagine lol. Anyway, this is where i left it off for the night. All trimmed and ready to start of the ears. Please provide some input if i should may trim a little more anywhere. Any feedback would be greatly appreciated lol... I'll work on the ears sometime this week and hopefully have it assembled soon, then ready for paint. -
iLLuSiOnZ_09 ATA Bucket Build (*ATA)
illusionz_09 replied to illusionz_09's topic in Build Threads Requireing Maintenance
thanks for the heads up. I might end up doing it with plastidip then; i have one concern though, wouldn't the plastidip make it hot inside the bucket since and act as an insulator? -
iLLuSiOnZ_09 ATA Bucket Build (*ATA)
illusionz_09 replied to illusionz_09's topic in Build Threads Requireing Maintenance
Thanks for the encouragement everyone...i'll keep you posted as i make more progress. I have a question, should i paint/spray the inside of the bucket black? I have seen some do it and some neglect to do so. Yay or Nay...will be more annoying now that i have made the holes, but i want to make sure i do everything the best as possible. I know its not required, but just want some insight. -
Zarlon's First ANH Build Thread (ATA)
illusionz_09 replied to Zarlon's topic in Build Threads Requireing Maintenance
Great job so far. I am exactly on the same process as you right now. Working on my ATA bucket. As far as smoothing out edges, files will work great. But to get the best detail, i am using my X-acto knife. working out nice so far... just don't rush it. Little by little. Then finish of with some sanding/filing. -
holy crap...the event pics are amazing! Everything really came out great.
-
Nice Job! Great pics!
