

MartinSivertsen
-
Posts
541 -
Joined
-
Last visited
Content Type
Profiles
Forums
Gallery
Articles
Everything posted by MartinSivertsen
-
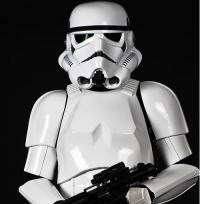
Regarding padding I really recommend MICH pads (the kind they use in modern military helmets), you can get packs of them really cheap over on the bay of e. You can fit them as you want for a snug and great fit. They fit great for my use, to keep the helmet in place and not wobble. I also don't use any padding on top, as I have a long neck and extra padding would make the helmet sit unnaturally high and look goofy. So this worked out perfect for me.
-

My Boots from TKBOOTS
MartinSivertsen replied to selfy's topic in Boots, Soft Parts, and other Accessories
This I like. -
After some research I mounted mine between the fourth and the fifth rib. Cool to see that it's accurate to go all the way to five. Also looking forward to seeing what becomes of these neckseals. I like the project.
-
Martin's TM ANH Stunt build [*TM]
MartinSivertsen replied to MartinSivertsen's topic in ANH Build Threads
Don't worry, I'll make you proud! -
Martin's TM ANH Stunt build [*TM]
MartinSivertsen replied to MartinSivertsen's topic in ANH Build Threads
Got some really nice pads that i installed it the helmet, so now it sits snug and nice. Fitted the shoulderbells with snaps and elastics. Glued on ab buttons (finally!). So slowly but surely. -
I guess he'd just look like a black man dressed as Han Solo And we'd still be faced with the task of sewing an outfit from scratch. I like the idea though
-
Haha! I've browsed a bit over at the Rebel Legion forums, but didn't find anything substantial, only people asking for help to source materials or how to sew stuff. Looks like that's the only way to go, so it might be a tedious project for someone who really doesn't know how to sew But definitely do-able.
-
I'm sorry if this is the wrong forum for this, but I'll just throw it out there anyway. I have an african friend who's a big Star Wars fan, and we joked around that it would be cool if he got a Lando Calrissian outfit (he's already got the hair and the mustache). My question is, where can I find one, or is the only option sourcing materials and sewing it together myself (or get someone else to do it)? Sincerely
-
TM 2011 ANH Stunt Kit a.k.a My First TK
MartinSivertsen replied to TKmAx's topic in Build Threads Requireing Maintenance
Congratulations Alan! -
Ebay FX armor ... any thoughts or suggestions... please
MartinSivertsen replied to überTrooper's topic in eBay Armor
Juan said it. Patience is a great virtue, especially when it comes to building armor. If you sit down and read a little on these forums you'll find everything you need to know. If you plan on getting a suit you can get everything you need from this site, and as a rule of thumb don't buy anything from ebay. It is much better to support the community by buying directly from the great people here on this forum who do a great service to us all by using their spare time to supply us with everything we need in our search for accuracy and greatness. -
Holy crap, this is amazing! Can't believe I've missed this. Great skill!
-
Another E-11 conversion
MartinSivertsen replied to darksideemt's topic in Build Threads Requireing Maintenance
-
Martin's TM ANH Stunt build [*TM]
MartinSivertsen replied to MartinSivertsen's topic in ANH Build Threads
Nah, I opted for the spraypaint alternative, Easier than to struggle getting a bodysuit on and off, plus you can't really tell the difference once the armorpieces are on -
Martin's TM ANH Stunt build [*TM]
MartinSivertsen replied to MartinSivertsen's topic in ANH Build Threads
Glued on ribbed shoulder straps: Sprayed my mannequin on strategic locations: Forced the armor on him (he has a wee bit shorter legs than me. I think. He is my height, but he is standing on his toes.) The thighs are supposed to sit a tad lower and the calfs a tad higher. The boots aren't on him , as they are impossible to get on. And his calfs are too thick (or they don't have the right swoop on the inside), so the shins won't close fully. Going to have to do something about that. Remove some of the meat on his shins maybe. The pieces fit well on me, and that's what counts. Noticed something I might have to deal with though... I have fixed the chest to the abdomen so that it sits symmetrical along the edges, but the abdomen is crooked, and the codpiece ends up being misaligned. I hate to think it, but i might have to rip out and re-install the snap-plates on the chest and upper back to rotate the midsection slightly and get the codpiece to center. Anyone have any experience with this? -
I like the idea! Personally, I feel the forums have been a little slow in traffic recently, but maybe it's just me getting used to the pace here at FISD?
-
Acima's TM build[*TM]
MartinSivertsen replied to KarinOlava's topic in Build Threads Requireing Maintenance
And it might look like your thigh ammo belt is a little bit shorter where the split rivets fasten it? But seriously, you guys look awesome. -
About Armor's Carring and Storage
MartinSivertsen replied to JKCHEN's topic in Boots, Soft Parts, and other Accessories
It would suck if that actually was a recurring problem and an actual reason to get something else to transport your armor in. -
tk 409's neck seal?
MartinSivertsen replied to TK5144's topic in Boots, Soft Parts, and other Accessories
Alright! Guess I'll just shoot them an email If it takes too long. -
Martin's TM ANH Stunt build [*TM]
MartinSivertsen replied to MartinSivertsen's topic in ANH Build Threads
That puts my mind a little at ease regarding the shins, thanks guys. I also saw a thread TKittel made regarding this where he used velcrostrips. Guess it's just a matter of finishing the shins and dealing with the problem if and when it should arise. -
MTK ANH Helmet Build
MartinSivertsen replied to Spectre's topic in Build Threads Requireing Maintenance
Good luck, and have fun! -
tk 409's neck seal?
MartinSivertsen replied to TK5144's topic in Boots, Soft Parts, and other Accessories
Sent a payment for a neckseal a week ago, but haven't heard anything. Hoping it's on its way or at least will be soon. -
Martin's TM ANH Stunt build [*TM]
MartinSivertsen replied to MartinSivertsen's topic in ANH Build Threads
I've painted the ear screws and the split rivets on the side of the abdomen white, glued the cover strips on the backs of the thighs and installed a few more snaps. What I'm missing now (from top to bottom) is: - Padding (MICH pads ordered from the bay of e) - Chin strap - Frown mesh - Neckseal (ordered from TK409) - Glueing on the plastic ribbed shoulder straps - Sewing/installing snaps for the shoulderbells on the white elastic - Maybe making some hooks to keep the biceps up by hooking onto the elastic at the bottom of the shoulderbell - Maybe installing some foam padding in the forearms to keep them in place - Thigh garters (already been in touch with MightyTank here on FISD) - Belt: connecting canvas to plastic, and riveting on holster (waiting on canvas belt that's hopefully on it's way in the mail) - Fasten thigh ammo box - Glue on kneeplate - Glue on rear cover strips on shins (Still waiting on an answer as to how I can avoid the shins riding up the boots and the boots slipping out, have the shins tight or loose at the ankles over the boots?) And I think that's about it. Hoping to be done by next week and send in an application to be approved! -
Acima's TM build[*TM]
MartinSivertsen replied to KarinOlava's topic in Build Threads Requireing Maintenance
Looking good there! How do you attach the thighs by the way? -
Jorran's T/MC ANH Stunt Build [*T/MC]
MartinSivertsen replied to Jorran's topic in ANH Build Threads
Looking very good!