dashrazor
-
Posts
3,109 -
Joined
-
Last visited
Content Type
Profiles
Forums
Gallery
Articles
Everything posted by dashrazor
-
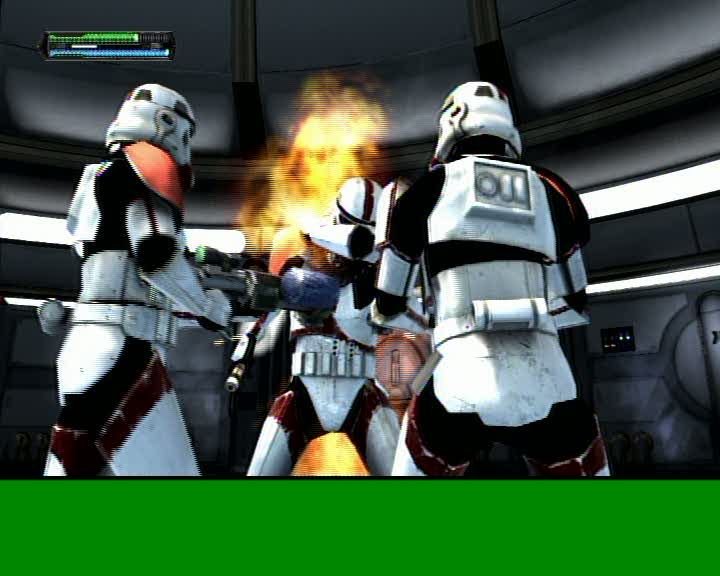
Frenchie Incinerator
dashrazor replied to stevechewbacca's topic in Build Threads Requireing Maintenance
just dont cut all the way through the foam or red fabric, the black fabric is really thin, and it is glued to the foam inside, i ran mine under hot water to loosen up the glue then carefully cut a slit in the black fabric on the underside of the pauldron. you will need to peel the black fabric off the foam. then you can insert the plastic if you want more pics i can post them for you -
looking at the rotj screen-shots i can see the torso has no rivets in the sides connecting the ab armor to the butt/kidney, like anh/esb clamshell setup my question is... is there straps holding them together or does the belt hold the parts? also i cant seem to find any pictures of ROTJ strapping anywhere does anyone have some pics for reference? advice? thanks
-
i masked off the chest armor and just used some ripped pieces of paper to mask off the heavily damaged areas then airbrushed with the same black/red mix applied the door trim and glued it in place with plumbers goop (best glue ever IMO, besides super glue ) tip: the trim may buckle when bent too much, a few drops of super glue will fix that... finished chest armor next i will door trim the rest of the armor
-
i got tired of running from my workshop to my PC every time i needed to look at references for the paint scheme so i made these full page printable reference pages with various angles of the armor and helmet (i also added a pic of the masking details) hope this helps
-
What's the cheapest EIB passable helmet ?
dashrazor replied to EE-3 slinger's topic in Hard Armor (General Discussion)
i was going to say that also i love my ATA helmet, taste great less filling oh wait that's miller ... looks great less $$$ -
it would be sweet if it were adhesive to prevent bleeding. but not to sticky as to remove the paint underneath (assuming it is a painted helmet like ATA) it took a while to do it by cutting 1/8" automotive masking tape strips then trying to line them all up but it worked well with an airbrush
-
thanks! i was worried i might have glued it on upside down
-
i started joining the but/back pieces, is this the right way? i thought the back peice may be upside down... hard to tell from the screen caps i joined using a strip of white rubber and hot glue i want to make sure its on the right way before i finish trimming and reinforce the hot glue seam permanently
-
i got this screen cap from the force unleashed 2 cinematic trailer it clearly shows the door trim on the but piece of a regular trooper <_< it was the best screen cap i could get but it is clearly there
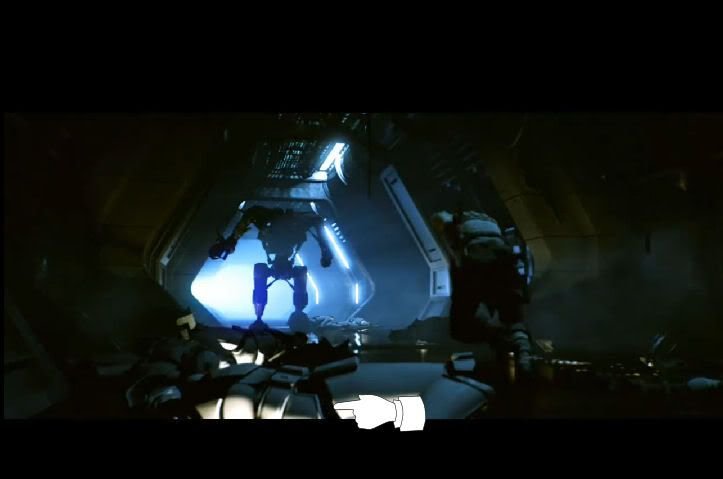
-
i joined using a strip of white rubber and hot glue i will reinforce the hot glue seam permanently soon as i come up with a good way of doing it
-
i highly suspect it is a problem with your service.. i have used RR broadband for several years without many issues (except for several dead cable modems) it could be your modem is failing. try unplugging your modem for 5-10 mins. when i start getting any type of reoccurring connection issues i just pull my modem and return it to the local RR office for a new one. i think ive done this about 6 or 7 times lol. and it always fixes the issues... if you're using IE. There's your problem. Switch to Firefox or chrome it could also be malware or a browser hijack but troubleshooting is hard without knowing the systems specs. also if you have an old Motorola modem they are total trash and (technically) its not really the modem, its the dns server failing to recognize your mac address. a new modem will have a new mac address, thus fixing your connection issues
-
TIP: TE / ROTJ tour suit screen lineage arm ID
dashrazor replied to pandatrooper's topic in Tutorials, Tips and HOWTOs
thanks!! i am just about to start my arms this should be pinned for us first timers great work -
my ata ears did the same thing i think it took a few tries to get them to fit. but this is what i did. i removed the bottom screw and put some plumbers goop on the inside edges of the ears. then i clamped them like this after a few hours of drying i had to re-drill the bottom screw holes, but then they fit perfectly i also put some hot glue under the ear to reinforce the area around the bottom screw
-
Frenchie Incinerator
dashrazor replied to stevechewbacca's topic in Build Threads Requireing Maintenance
yes red is cheaper because it is not as popular supply and demand i guess. just send an email they make a nice red pauldron also remember to prep the areas to be painted before you paint i wash with soap and water, rinse, sand the area with 400 grit sandpaper. then use spray primer, if you dont do this, the paint will just fall off eventually also automotive paint is very good... but remember to test any paints you use on a scrap piece of plastic first... some chemicals can react badly with plastics -
Frenchie Incinerator
dashrazor replied to stevechewbacca's topic in Build Threads Requireing Maintenance
great!! another ICN i used cardinal red acrylic craft paint (there are no hobby stores in my area for model paints) it was a little too light so i mixed in a little black to darken it. but i think your armor is ABS so i would use model paints if you can find them i wouldn't use a brush personally, but i used a small hobby airbrush to apply the red markings on the helmet and it worked good. as for the deflector box issue i already asked the same thing lol read all the other threads in this subject as for the pauldron.. i tried to make one but i cant sew to save my life, so i bought a custom red one HERE it was only 18$ us, (just email the site and ask for a red one) and i modified it to look more accurate (see my easy pauldron mod thread) welcome aboard -
I'd like some input as to the Protocal
dashrazor replied to ELP's topic in Electronics for Helmets / Blasters
oh no lol.. i just noticed the possible problem and just gave advice based on what i have learned over the years, if down the road something happened your helmet, i would have felt guilty for not telling you my opinion. better safe than sorry... mason -
you can get the marine grade trim HERE if anyone is wondering
-
i noticed since the new imperial academy site was updated that my google trick no longer works as good either . it is trying to search the new site as well as the forums (since they share a domain). also it searches old outated sale threads... im no expert but would think it is a indexing issue, but from what i remember those can be very hard to fix
-
i started fitting the pvc trim before i start painting.. this stuff looks nice and for 75 cents a foot it was a great deal tip: leave the trim out in the sun for a bit...it makes it easier to work with
-
that's what i was thinking would be most practical and functional myself, as i would imagine it would allow for more freedom of movement. i think the game animators took this into account when creating the computer models, if the parts were one piece (in the game) the troopers movements would look more stiff and robotic than human, thus taking away from the realism and fluid human mobility. i am hoping to achieve EIB status (im a bit of a perfectionist ), but i have always had (and will always have) a tendency to put functional/practical before "screen" accuracy. i think Daetrin hit it spot on by saying it is the intent of the design rather than it's implementation. take for instance the E11-blaster, it was not intended to be a 9mm sub machine gun made by sterling arms. it was intended to be a imperial laser blaster made by Blastech.... so then a deactivated sterling with original markings would be less accurate than a blaster with the blastech logo or no markings at all? well IMHO yes! but then again in the case of the E11 functionality won out over artistic rendition or intention. it was far more practical to take a "real" functional weapon and cosmetically modify it on the outside while retaining its blank firing ability for realism and special effects, rather than scratch building a completely fantasy laser blaster from an artists imagination ... in a perfect world the artists ideas would overtake the practical application of a studio prop. in science the word accuracy has great meaning, but in any form of art the word accuracy is relative..... sorry to ramble on so much but i got some alcohol for my birthday lol it tends to make me over-think things.....
-
measure twice and cut once that's why i ask the experts when i am unsure about something..thanks for the input
-
I'd like some input as to the Protocal
dashrazor replied to ELP's topic in Electronics for Helmets / Blasters
i have no doubt that a 12v fan would run on a 9v battery.. but suggesting you use cheap batteries to prevent overheating is laughable. i am no expert on helmet fans by any means.. heck my helmet doesn't even have one yet... but i have been working with diy electronics since i was about 10 yrs old.. and i know for a fact that running any DC motor at lower than specified voltages will cause it to run slower and burn out faster than normal. there are several applications that correct voltages are not critical, say for instance some audio amplifiers that runs on 5 or6 volts will function perfect with a 9v battery.. but many circuits of this kind have integrated voltage regulation, a motor or fan does not have this.. like i said before this is only my opinion, but i think of it like this. i have invested a lot of time and money into my armor, and i am trying to save as much money as i can (my budget is almost gone ) but if you or someone you know has kids you know how much batteries cost. i would rather spend a bit more on higher quality fans and run them off the specified voltages. not only for more efficient power usage, i think i would cry if battery acid melted my helmet and i were to make a tutorial on helmet fans that use 12v fans with 9v batteries i would put up a disclaimer stating that running fans with lower than specified voltages "MAY" cause adverse effects.. there are probably 10s of thousands of different types of 12v fans but the amount of amperage they require can differ greatly from fan to fan some may be fine while others could cause an explosion in time. and someone inexperienced with electronics may just grab any 12v fan without taking this into account. i think ill put up a video of a high amperage 12v fan hooked a 9v battery if i have time, i think it would be a good deterrent from anyone doing this also i like to blow stuff up lol -
i took out the foam lining from an old hokey mask i got at a yard sale and glued it into the helmet with plumbers goop (i also may use the helmet strap from this also) fits perfect and is really comfortable... then i installed Smittys awesome mic tips doing the final sanding and trimming was taking forever with a dremel and the dremel (no matter how good your skills are) is prone to kickback and slipping.. so i decided to take a gamble and try my bench belt sander i was a but reluctant at first, but using the drum end it was super easy to trim/sand in one easy step, i used an extremely worn out belt so it removes the excess plastic slowly and precisely. i am in a bit of a time crunch on this build because my cousins 10yr old son son having a birthday soon and him and his brother are super crazy about Star Wars .. i sure to give them one big surprise since they have never seen a real life star wars character before.. enough rambling on... i hope to start priming and painting some parts today if all goes well here is a video of me trimming with a craftman belt sander (my daughter filmed it so the camera work is a bit wonky)
-
i agree, and it was my intention to go 100% RTOJ style, but i only have my ps3 and wii versions of the game for reference, so when i noticed the armor was splitting when in action i was afraid if i joined the back/but plates it would be incorrect. on another note, i noticed the ROTJ style edge trim/molding is visible around the upper armor sections (back and chest plates) but it doesn't appear on the cod or but/kidney sections. just thought that was strange its like an ESB/ANH+ROTJ hybrid armor a artist render would be awsome!!!
-
yes that is why i was a bit confused