dashrazor
-
Posts
3,109 -
Joined
-
Last visited
Content Type
Profiles
Forums
Gallery
Articles
Everything posted by dashrazor
-
i am attaching the ears with a combination of 3 glues. gorilla super glue gel, automotive goop and hot glue i allied the goop to the edges of the ears and clamped in place then i put in all the ear screws and tightened, applying small drops of super glue gel in any small gaps i filled the seams inside the helmet with hot glue for reinforcement i cleaned up the little bits of visible goop with an exacto blade and pencil eraser then sanded every inch with imperial wet dry sandpaper and claened with automotive surface prep cleaner first coat of primer
-
test fitting ears
-
i hope this is looking ok the final trimming is scary.... i am trying not to over trim but i dont want to under trim.. any input would be helpful thanks to jessie for your ata helmet build thread, it has been a big help
-
questions before i start my first build
dashrazor replied to dashrazor's topic in Assembly, Mods, and Painting
yes it is the same on the ps3 version also, none of the tk's have 2 drop boxes. i think it has to do with the weapons animation and lightsaber the lightsaber attaches where the other drop box should be (playing as a regular tk) -
i love the smell of burning plastic in the morning i made a short demo video of my hot wire trimmer (please note i am cutting with one hand while filming with the other) here it the other ear rough trimmed now i will start fine trimming with a dremel
-
i am starting out my incinerator trooper build thread my plan of action 1. helmet 2. armor 3. custom pauldron 4. flamethrower got my brown box of goodies also my scrap built ammo pouch is complete (click here for templates and howto) HELMET before i do any trimming, i am coating the inside of the helmet with rustolium truck bed liner, first i scrubbed the inside of the helmet with dawn dish soap and a steel wool, then i wrapped the helmet in an old walmart bag to prevent over-spray, also i taped around the edges to hold the bags in place after 2 coats now ill let this cure over night and then begin trimming now for rough trimming i will be using my craftsman radial arm saw to do most of the rough trim work no im not kidding... i made a makeshift hot wire cutter using my radial saw and some junk making first cuts, it works very smoothly and by adjusting the voltage i can fine tune the cutting speed you cant see the cuts because they almost re-weld after cutting the cut pieces just pop off after cutting this is the cutting circuit it is made from a 12 volt transformer, variac from a sewing machine and a guitar string i tested this on some scrap plastic first and was surprised how much easier it was than scissors or a blade, i like this method because it reduces the risk of cracking the plastic, also it is very easy to guide the cuts and you can change cutting angles on a dime... *ATA
-
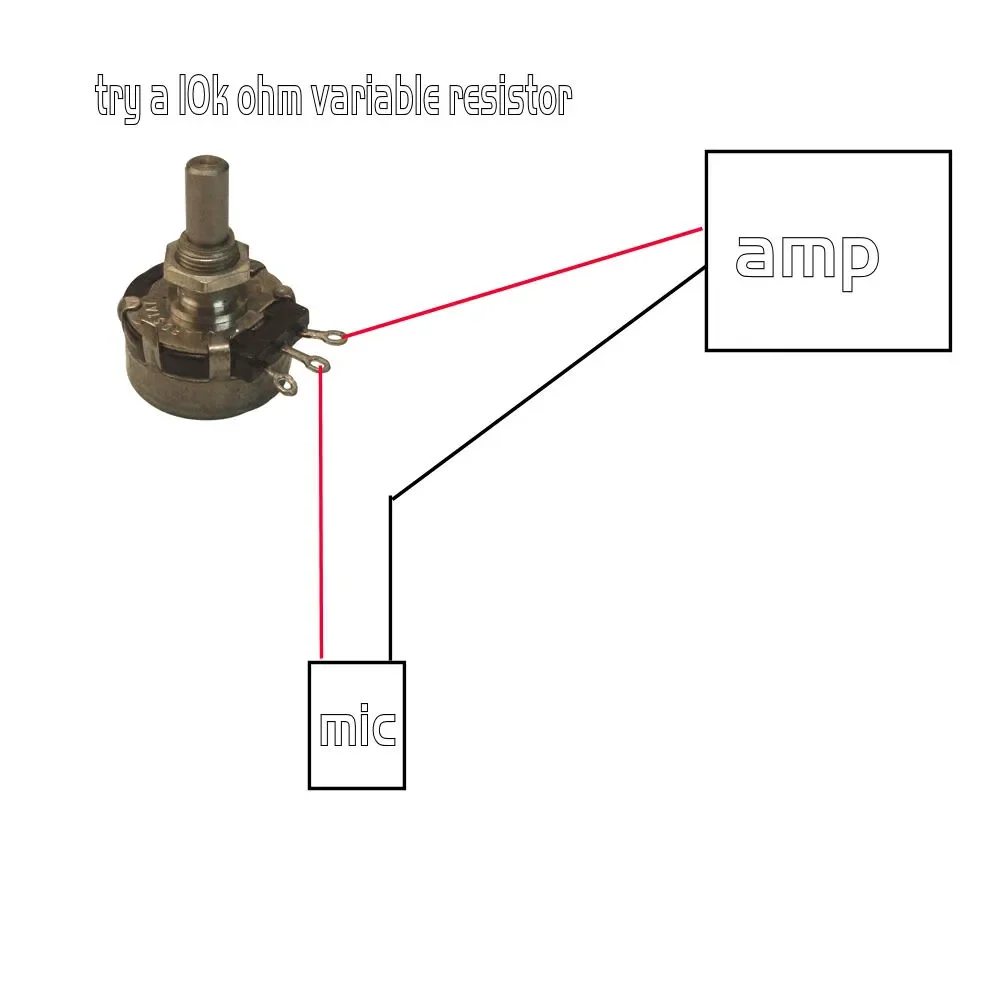
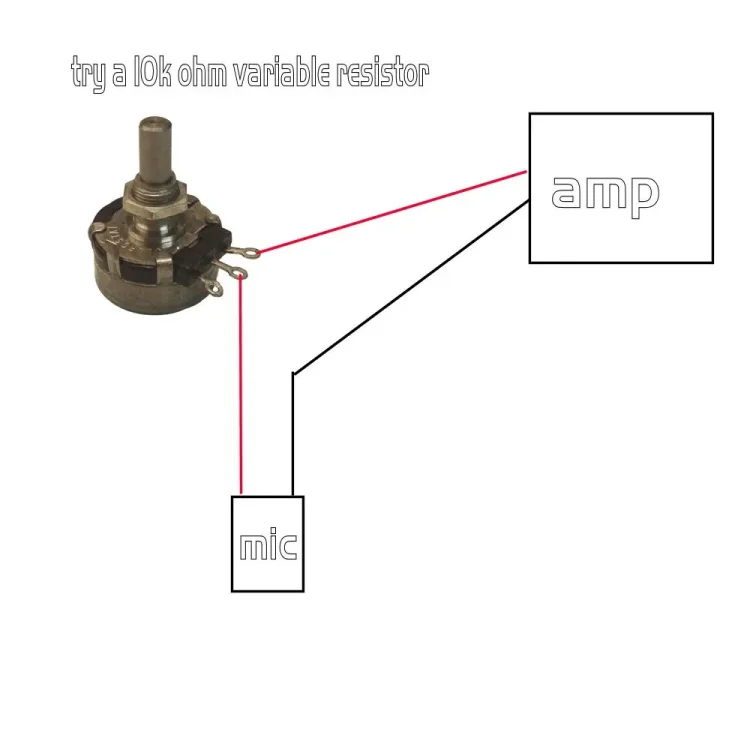
you can try adding a variable resistor in line between the amplifier and microphone to reduce the gain, this may help. fine tune it until the feedback stops, but this may reduce the overall volume a bit
-
HOWTO: Make an MP40 ammo pouch for $1 in one hour
dashrazor replied to dashrazor's topic in Tutorials, Tips and HOWTOs
sure i think i can do that no problem -
wow! nice work also if you don't want to sacrifice your aker amp i can hook you up with my electronics source, 20 watt amp kits for around 10$ shipped (you just need to solder all the components together) and they work great
-
HOWTO: Make a Grip Cross Hatch Cutter
dashrazor replied to Werstrooper's topic in Tutorials, Tips and HOWTOs
awesome idea!! Ive been experimenting with ways to make grip material for a while now... this will save me a ton of time! thanks beats using a putty knife and hammer -
HOWTO: Make an MP40 ammo pouch for $1 in one hour
dashrazor replied to dashrazor's topic in Tutorials, Tips and HOWTOs
thanks! i thought of using foam initially, but i chose wood because it will hold a nails and screws. this same method could be used with almost any material (just use crazy glue instead of nails) -
HOWTO: Make an MP40 ammo pouch for $1 in one hour
dashrazor replied to dashrazor's topic in Tutorials, Tips and HOWTOs
lol! not at all, i am building on a tight budget, gotta cut expenses wherever i can since i got laid from my job of 4 years, i got loads of free time, gotta stay productive;) basically im gonna build everything i can from scratch -
HOWTO: Make an MP40 ammo pouch for $1 in one hour
dashrazor replied to dashrazor's topic in Tutorials, Tips and HOWTOs
not at all it is lightweight pine -
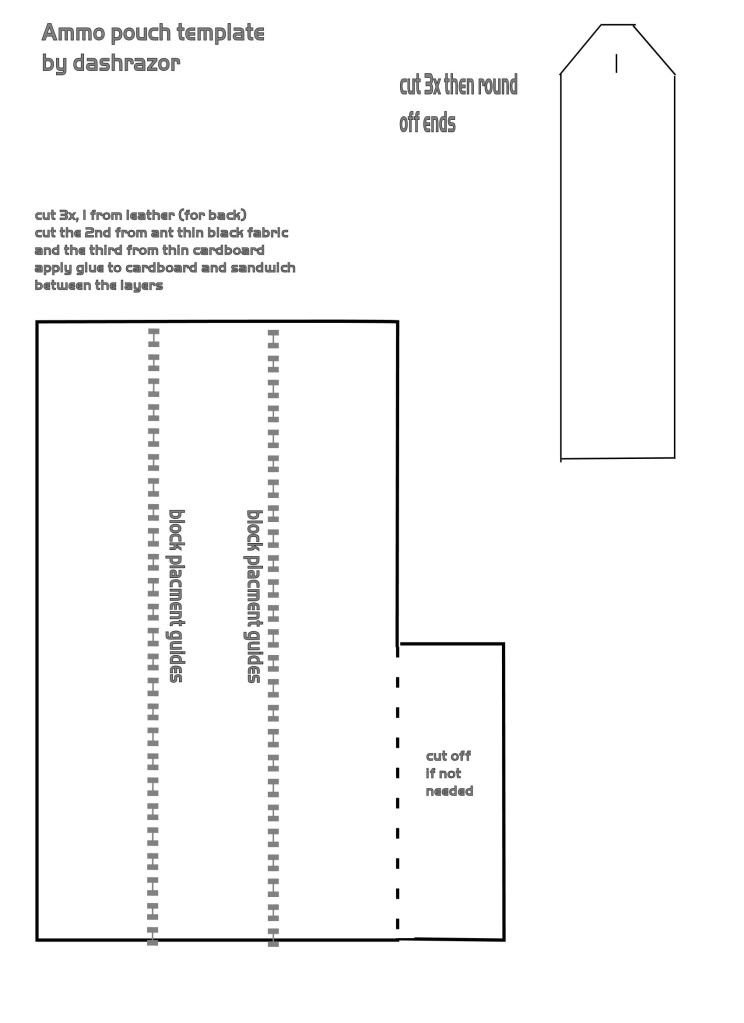
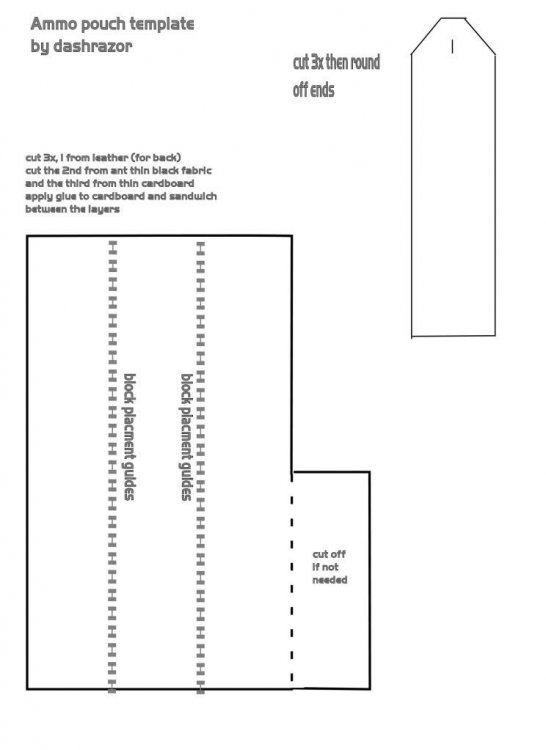
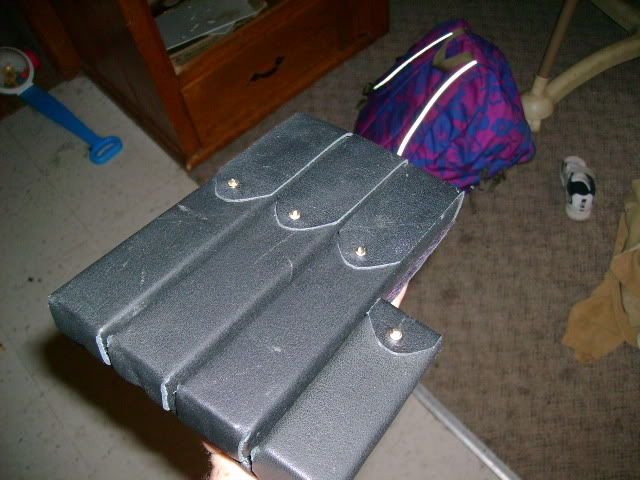
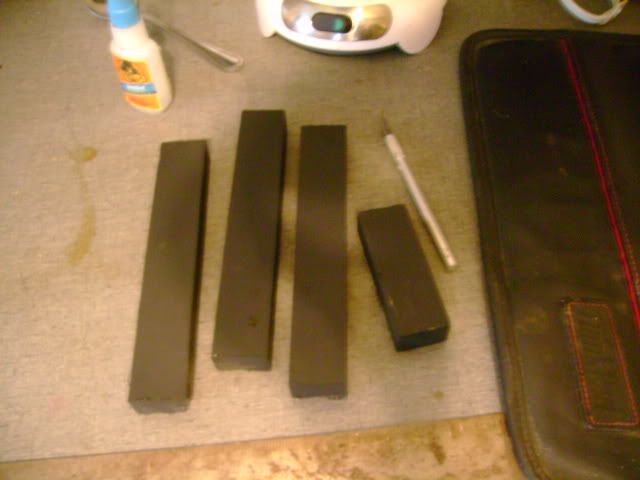
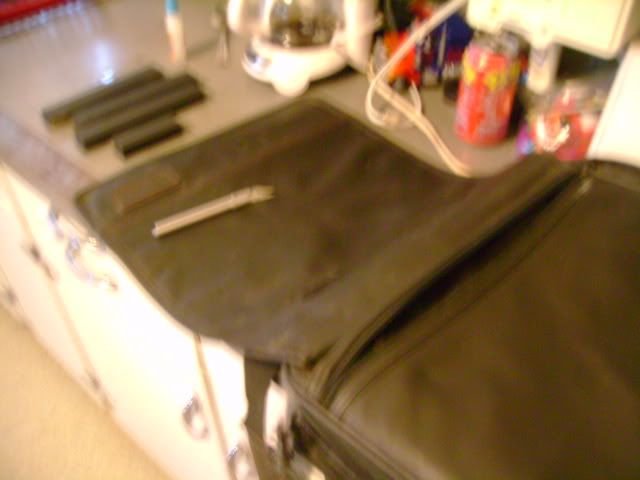
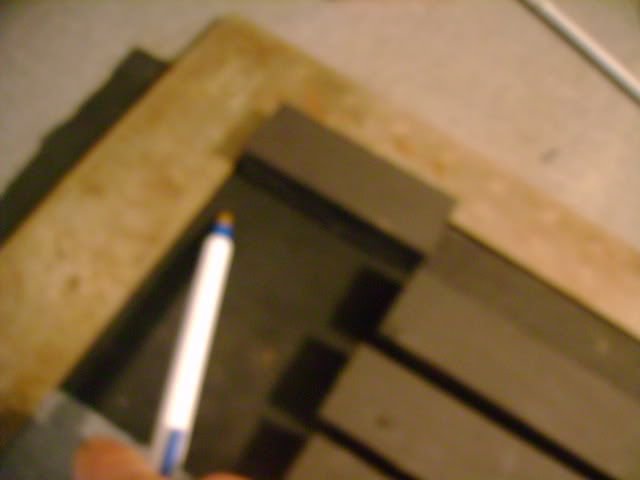
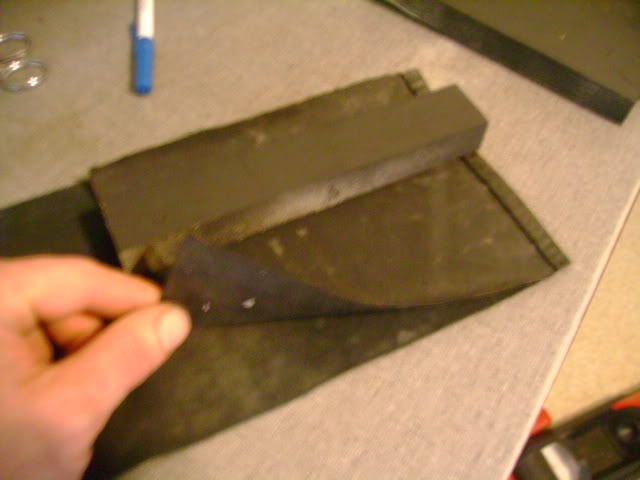
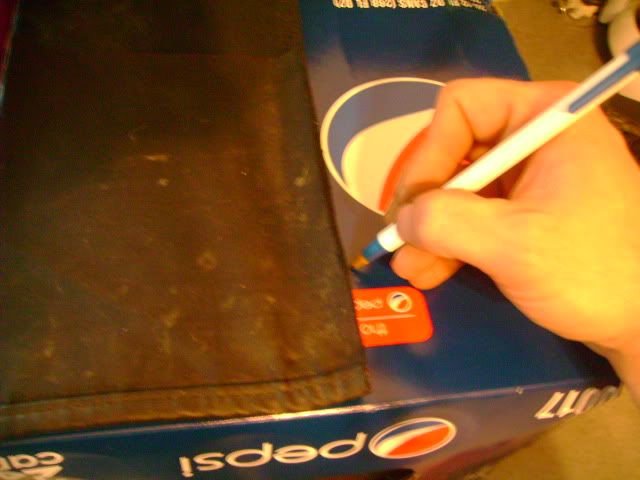
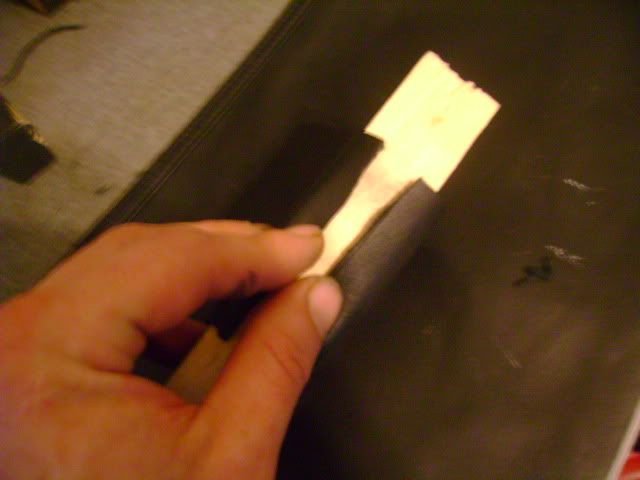
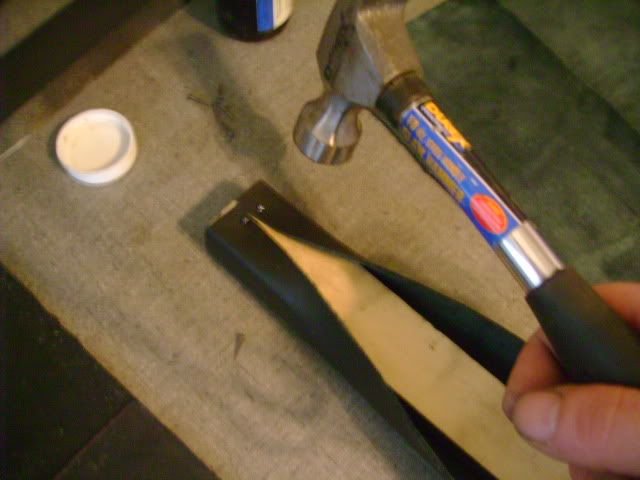
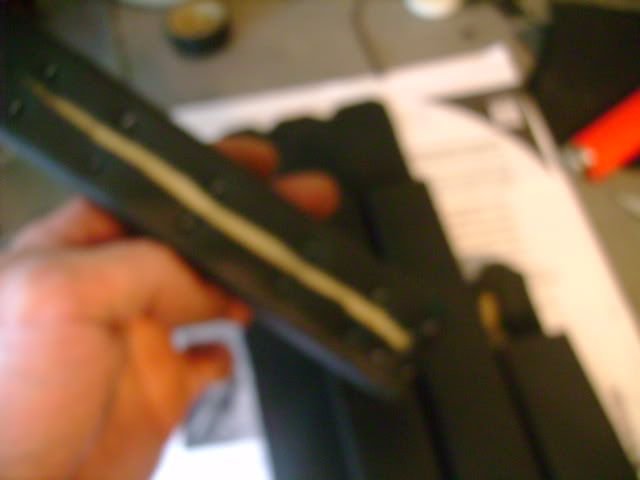
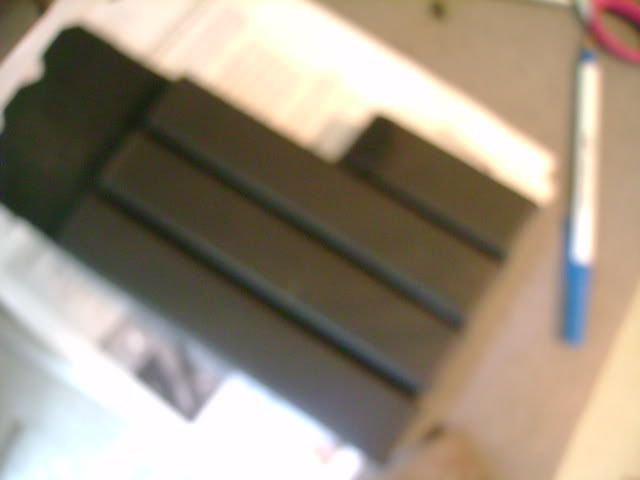
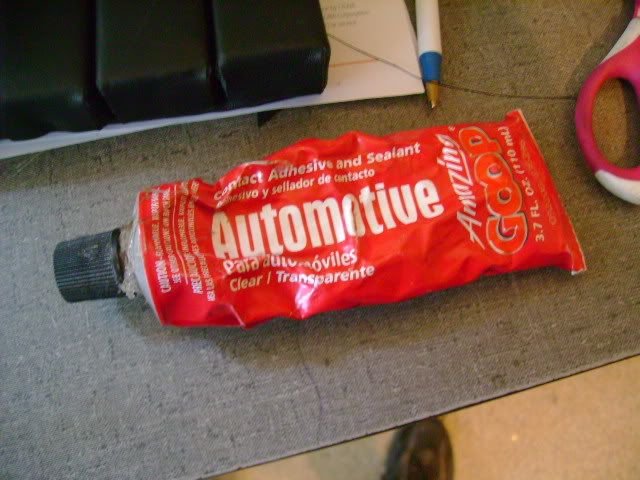
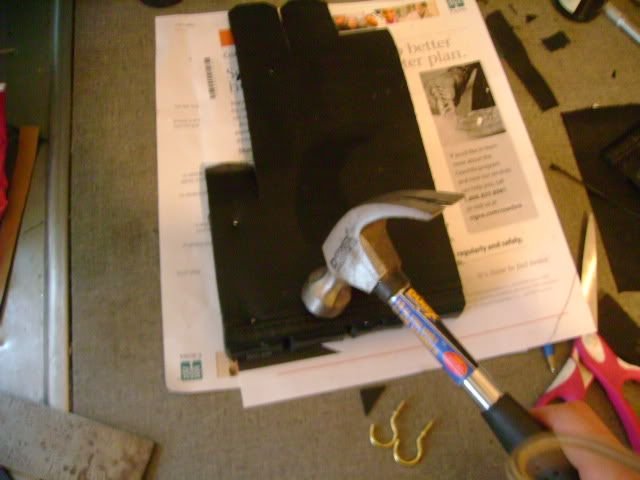
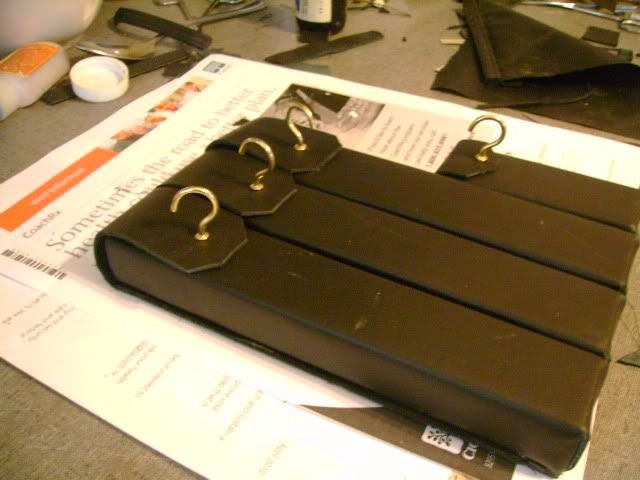
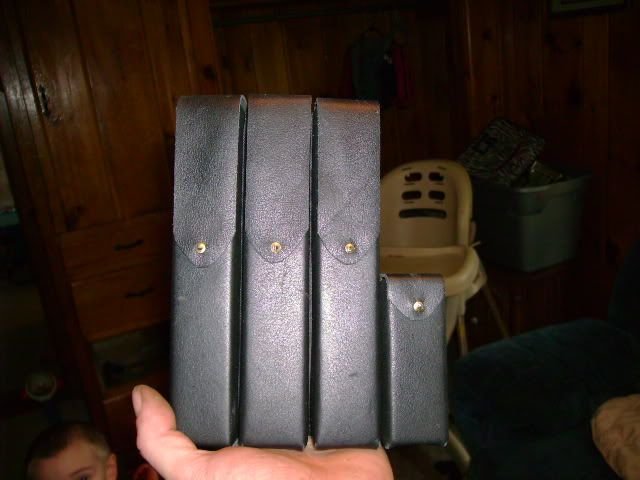
this is my new ammo pouch for my incinerator trooper (sorry about the blurry photos my camera is on the fritz) here is a rough template (by request) first i cut some 1/2" thick scrap wood into the approximate shape and size of a mp40 magazine (7" for the long 3 1/4 for the short one) then i cut all the leather off this old laptop case then i placed the blocks next to each other with about 1/8" gap between them, i used a framing square and exacto knife to cut out the shape of the backing then i reinforced the backing with some cardboard to make it more ridged, i glued it with some vinyl tile adhesive i had left over from tiling my floor, but any permanent glue should work like E6000. the backing is 2 layers, one of the leather one of thin black fabric. trace around the backing smear cardboard with glue and sandwich between the 2 backing layers i then cut strips of leather that almost wrap around the dummy clips, be sure to make the strips a few inches longer so you can close the bottom end.. then i nailed the strips to the wooden dummy clips with small nails i then glued the leather covered clips to the backing with automotive goop (great for vinyl or leather) i then nailed trough the backing after gluing (its never coming off) then i used utility hooks for snaps then cut off the hooks final result although you cant put anything in the pouches it does the job, and doesn't require any sewing:D i used this photo to help with sizing the blocks


-
my first armor is almost ready!! but after going over my screen caps i noticed a few details, they are small but i would like to include them in my build, would these details be acceptable? tube stripes go all the way to the ears the belt only has 1 drop box and it is dark gray (looks about the same gray as the tears and traps) i thougt at first it was just shadow but it is gray from every angle and lighting. and the wrap around shoulder pauldron of course would these changes be acceptable? for 501st acceptance and EIB? can i even get EIB status as an incinerator trooper? i want to make my first armor as accurate as i can, but most of these details are not in the any CRL. i just want to measure twice and cut once i cant wait to start cutting plastic!!!
-
mg-15 tutorial
dashrazor replied to dashrazor's topic in MiniMag PTL Missile Launcher, T-21, RT-97C (MG-15)
more pics -
mg-15 tutorial
dashrazor replied to dashrazor's topic in MiniMag PTL Missile Launcher, T-21, RT-97C (MG-15)
finishing the final assembly of the ammo drum ( i could barley fit all the electronics in the drum lol) got some brand new scopes yesterday!!! after paint and polish i printed imperial crosshairs on transparency for the large infra red scope done!! sound demo overall features 1: 20 watt amplifier (note: it is not pushing the total 20w) 2: microphone input with volume control 3: amplified blaster sounds with volume control, 10x blaster sounds to choose from and a pitch bending knob 4: working bolt action and trigger 5: 2x real scopes. an ultimate arms tactical scope and a tasco as well 5: large scope has imperial cross hairs 6: light array throughout the barrel (light can function without the amplifier) 7:2x 4" sony speakers in the ammo drum 8: battery compartment is locking, has some spare room for small items -
mg-15 tutorial
dashrazor replied to dashrazor's topic in MiniMag PTL Missile Launcher, T-21, RT-97C (MG-15)
lol... it is super loud, probably the loudest blaster in the galaxy lol -
im working on some of the small bits of detail parts before i get my armor, i am planning a incinerator trooper build. i need to make a customized shoulder pauldron for this(to get the proper look). does anyone have the sandtrooper shoulder pauldron templates in PDF format? i cant seem to find them anywhere... but i have heard they are out there... any help would be appreciated FOUND IT!!
-
i just bought a bunch of tubes at walmart... mine say amazing on the top and industrial on the side? i hope there is no difference.... i haven't even got armor yet:( but i like to be prepared..
-
i made a printable template for the light panels if you want them, i planned on putting them in my workshop for extra lighting. not sure on the size or accuracy but its a start
-
i pulled this screen cap its the best i could find
-
blaster dimensions
dashrazor replied to Quebectrooper's topic in Build Threads Requireing Maintenance
i have got those airsoft ones and there very close, more detailed than the bbc ones (the only thing i notice that was off was the original barrel diameter was not exactly1.5 inches) but the origonal manual Here tells the accurate length if you find some better ones i want them 2 lol:D -
blaster dimensions
dashrazor replied to Quebectrooper's topic in Build Threads Requireing Maintenance
according to my blueprints the main receiver tube is 449 mm long and the overall length is 48.2 cm -
mg-15 tutorial
dashrazor replied to dashrazor's topic in MiniMag PTL Missile Launcher, T-21, RT-97C (MG-15)
for the ammo drum, i cut the basic shapes from thin wood paneling (to reduce the weight). i used the templates for the shape, but had to adjust the size a bit for the 4" plastic pipe (note: the pipe is not pvc)i cut the pipe with a dremel cut off wheeli then fit 2 4" Sony speakers in the ammo drum i used vents from a PC case as the speaker covers now the electronics after soldering all the components finally initial testing before installing it is super loud!!!!