Leaderboard


Popular Content
Showing content with the highest reputation on 02/20/2025 in Posts
-
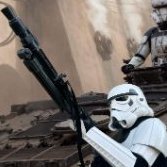
Wow! Thanks team! It's an honor to be in the 500's! This has been a great learning experience and got me more confident in tackling armor modifications, it also opened my eyes to the smaller details. Thanks again! *do you need an action shot?2 points
-
Hi everyone. Years ago I had my eye on this character from the Force Arena game: TK-7193 This character has similarities with the TFU TK which already has a CRL, but we have some differences in the handplates, shoulders, boots, thermal detonator, "ear" painting, battle damage and of course the black pauldron. I have the 3D model available directly from the game as a reference, so if I create this suit, a new CRL would be possible? I don't know, maybe some authority from the detachment can answer me. @TKSpartan Thank you.1 point
-
Hello there! Nothing happens on my build, still waiting for the clothes! But i repainted the helmet, i think it looks much better now and the gold is better. Iknow it looks like black on the sides but its not :) Catch you later!1 point
-
Definitely wiping out your armor with a Clorox wipe or 5 after a hot troop will help keep it in the best shape possible (and not smell). If you have pads in it, remove those and wash a few times in the summer. At least here in NM, they don't get very sweaty in the other seasons. I have a few vents installed in my armor bin to let air circulate and heat escape. That only bit me one time when the armor was in the back of a truck during an epic downpour. Those vents let in a lot of water... but it gave me a nice chance to wash the bin inside once I got home.1 point
-
Terrific, thank you!1 point
-
I'm from the opposite end of the country so I've been worried when temps drop to the negative teens and twenties. I haven't heard of 100 degree heat being a problem. The worst thing for armor is not cleaning sweat and especially direct sunlight (yellowing). I feel like the armor would hold up but hopefully someone else here knows more1 point
-
Another Centurion amazing! Stellar job1 point
-
Not for Centurion, we'll not yet anyway ;)1 point
-
Congratulations1 point
-
Thanks for the links. I had previously read through and bookmarked Sha-Sha's build when I first started looking, I'll check out the other 2 as well!1 point
-
Congratulations trooper and welcome to the centurion ranks Don't forget the approval number # in the title ;) @Doggydoc1 point
-
Don't forget to add approval number # to the title @Doggydoc1 point
-
Hi Trooper, I'm sorry for delaying. I'll be the Do working on your EIB submission. I'll be with you asap. Thank you for your patience1 point
-
Congratulations1 point
-
Congratulations!!!1 point
-
Hi Eric, CRL and Centurion Application Requirements: All required photos have been submitted, and on behalf of the entire D.O. staff we are pleased to welcome you to the rank of Centurion. Great job on the requested changes. Congratulations! Other-Armor Fit/Assembly; In this area we review observations made by your fellow troopers and the DO team. Some observations may lead to suggestions to improve the overall look of your armor, and please keep in mind that we consider both text (CRL) and pictures (screen caps/reference images) when reviewing submissions.1 point
-
Congratulations!!! Awesome!!! 🫡1 point
-
Quite a few went with the velcro method as that is what Anovos used on their armor kits, albeit some said it was not very strong and upgraded to better industrial strength, I personally find it can be a pain to use as it has no give so very restrictive with big movements. I've had only one issue with my snaps pulling through elastic, this was before I used a solder iron to make the holes which seal the edges making them quite firm and harder to pull through. I do have a set of snaps on elastic set at different positions for minor adjustments, I glue all the snaps/plates on to the armor and test to see which distance works best then make the snaps to that. Elastic does last quite some times as it's not always getting pulled, just standing there there is not much if any strain on the elastic it is only with movement. Either method is fine and approvable up to L3 so entirely up to you. Take a look through some of the anh builds threads, once there search "velcro" or "snaps" you should get quite a few results1 point
-
Congratulations!1 point
-
Congratulations! What a beautiful application!1 point
-
Well i think I finally managed to get it to match the top sides and make it look ok when seeing it face on.1 point
-
Congratulations!!1 point
-
FISD flash logo coaster File-Name: FISD.3mf Last Update: 02/2025 Description: A simple coaster featuring the FISD Beret Flash logo as it's the simplest to print well. This is a 2 colour design, so you will either want a multi colour capable printer, or you're going to have to do it by hand. The black is only 2 layers thick, so it's only 3 changes which isn't unreasonable. Print face down to get the best look, a textured plate will give a nice finish. I also backed the example print with adhesive EVA foam. File is from Orca slicer, but it's just a 3mf so should work in all slicers that support it. Terms of Use: Nobody is allowed to sell these. There is no permission to recast and resell this design. You can print it for yourself, for your friends, garrison or squad mates, but you have to give it away. No money involved 👍 Image: Printed with a 0.4mm nozzle, a 0.2 will probably be able to manage the trigger and other details better but not tested. Maybe try "detect thin walls" if that is an option. FISD.3mf1 point
-
We have some strange elements in the armor, but easy to recreate. And yes, I am interested in this project, I already have experience with this, together with the Spec Ops Detachment we created a CRL of a trooper of Task Force 99. So I think it's a nice project.1 point
-
Great job. We will take a look over everything and be with you ASAP1 point
-
Just ordered a WTF kit- couldn't wait any longer!! lol Thanks again for the input1 point
-
Hey folks, I know it has been pretty silent, but I had to do some modifications (then pictures fully suited and more little mods) But I finally got to a point where I am pretty pleased and have taken all your inspirations and thoughts into it, so here we go, hope all of you like it: First one is cutout, quality for the CRL will be better, but I only gonna start with it as soon as I got the go to move on!1 point
-
I dropped by a local auto chain, O'Reilly Auto Parts, to see what gloss white choices they had for the helmet. I learned that a different store location could color match and mix paints, and they could also put the paint into an aerosol spray can which was good since I don't own an airbrush or any type of sprayer. I went to the second location and was met by a super helpful salesperson, Jason. He took a picture of the white on the back armor plate which I had with me, but there was no auto paint that was an exact match. He then pulled out all the white color samples and we started to compare them. The best match was a Monaco White from Hyundai. Jason mixed up the paint and before putting it into a spray can (which costs a bit more), he gave me a sample 1oz bottle with brush applicator. I used a piece of scrap armor and did a test paint. The before and after pictures are below. Before, scrap armor only: After, Monaco White is in a square above the word "Test." The line above the arrow is a shade from the layer of paint applied to the armor. I'm very happy with the color match. Thank you, Jason!1 point
-
Hi There! So excited! Mike Foglia TK-26300 Centurion Letter Mario Thanks so much! Here you go Mike. ! https://www.whitearmor.net/eib/certificates/26300-centurion.png1 point