Leaderboard


Popular Content
Showing content with the highest reputation on 05/22/2023 in Posts
-
Ok, so I built Nico's helmet shortly after he released his files around 4 years ago, and I have a build thread that I started back then, and that I only recently updated to show how it ended up turning out. Here's a couple pics of that build. I love that helmet and the sculpt that Nico created. But over the years and with so much new reference material from Solo to Andor and everything in between, I've been wanting to modify a few things to make the helmet a bit closer to what I've been seeing on the screen as well as make it easier to assemble along the way. I started about 6 months ago with wanting to try my hand at modifying the files and make the cheek tubes penetrate into the chin area. That was the beginning of a long journey, ha! I didn't really have any experience with 3D software, other than tinkering with minor modifications on files before. I've been working on a mod in my spare time, with some insight and plenty of reference from Ryder Kinion I've finally got it to where I'm ready to start a build. I ended up lightly to moderately modifying every part, as well as utilizing and slightly modifying David Os's ear and temple trap pieces. The list is pretty extensive, I won't go into every little detail I modified but here's an overview of some of the main changes I made: 1. I slightly narrowed the overall sculpt side to side as well as slightly reduced the height of the dome. 2. Added alignment pegs and holes between almost every piece that attaches together. 3. Like I mentioned, I made the cheek tubes penetrate into the chin and added attachment plates between the end of the tubes and inside the chin piece. 4. Modified the teeth to add the last tooth and added attachment plates to secure them better to the inside of the helmet. 5. Added a slight recess to the regions where the tears, temple traps and back traps sit. As well as cut out a hole behind the tears and back traps for ventilation. I plan on adding a black, breathable fabric backing similar to what has been reported by those familiar with the screen used helmets. 6. Modified the brow trim to look similar to the rubber trim used on screen-used helmets. I may end up trying to use actual rubber trim. We'll see what works best. At this angle you can really see not only the brow trim difference, but also the reduction in height of the dome, the angle of the vocoder and the modification of the point where the cheek tubes penetrate into the chin. 7. Modified vocoder angle and length of some tubes and added additional alignment and attachment points. 8. And for all the fans of the Mimban trooper, I modified the Mimban shield and pins to be more narrow and sit closer to the width of the helmet and increased the height of the brow trim feature on the shield I made a couple miniature test prints along the way which helped me see if my mods were working the way they were supposed to. They also helped me see other modifications that needed to be made. These are the first two I made. They were printed at 35% scale, the one on the left was the my first test print to see if the alignment pegs and keyholes worked properly as well as seeing how the tubes to chin connection looked and worked in real life. Then after comparing to reference and talking to Ryder we both agreed it needed to be narrower side-to-side which made the dome too tall and square. So I slimmed the whole thing down by 3% and reduced the height of the dome. But then after seeing it in real life we felt it was a bit too narrow. So I decided to try it closer to 2% narrower from the original and it finally looked right. So after a few more tweaks to a few details (and after getting a larger resin printer, that I picked up at a great deal), I decided to give it another go at a test print. This time at 50% scale. I finally feel that this is the one! And now I think I'm ready to start my build. I think I'm going to avoid all the heavy post processing work this time around and get the big pieces resin printed with a strong resin, probably from Corellia Creations and resin print all the smaller pieces myself. As I've found from doing miniatures, resin is so much easier to get to paint ready than an FDM print. This may be slow go on my part, as I try to work on it in my spare time when I've got the motivation and energy, ha! But I'm hoping my excitement to see the finished piece will provide me with enough. Wish me luck, I'll post updates as it's coming along!3 points
-
Hello, I’m Alex from Luxembourg and I’m 33 years old. I’m a huge fan of Star Wars since a long time. I discovered the 501 last year and i quickly started to work on an armor to get access. So I recently finished and validated my first armor of Captain Rex phase 2 (all 3D print). https://www.501st.com/members/displaymember.php?userID=35917&costumeID=482 Currently I work in parallel on the armor of Hunter season 1 bad batch in 3D printing. The stormtrooper has always occupied my thoughts and by discussing/seeing the club members I decided to order one. I listened to their advice and ordered on RS prop master ANH Stunt (diy kit + finished helmet). I’m really looking forward to starting work and I’m sure I’ll find a lot of information and help on the forum. thanks!1 point
-
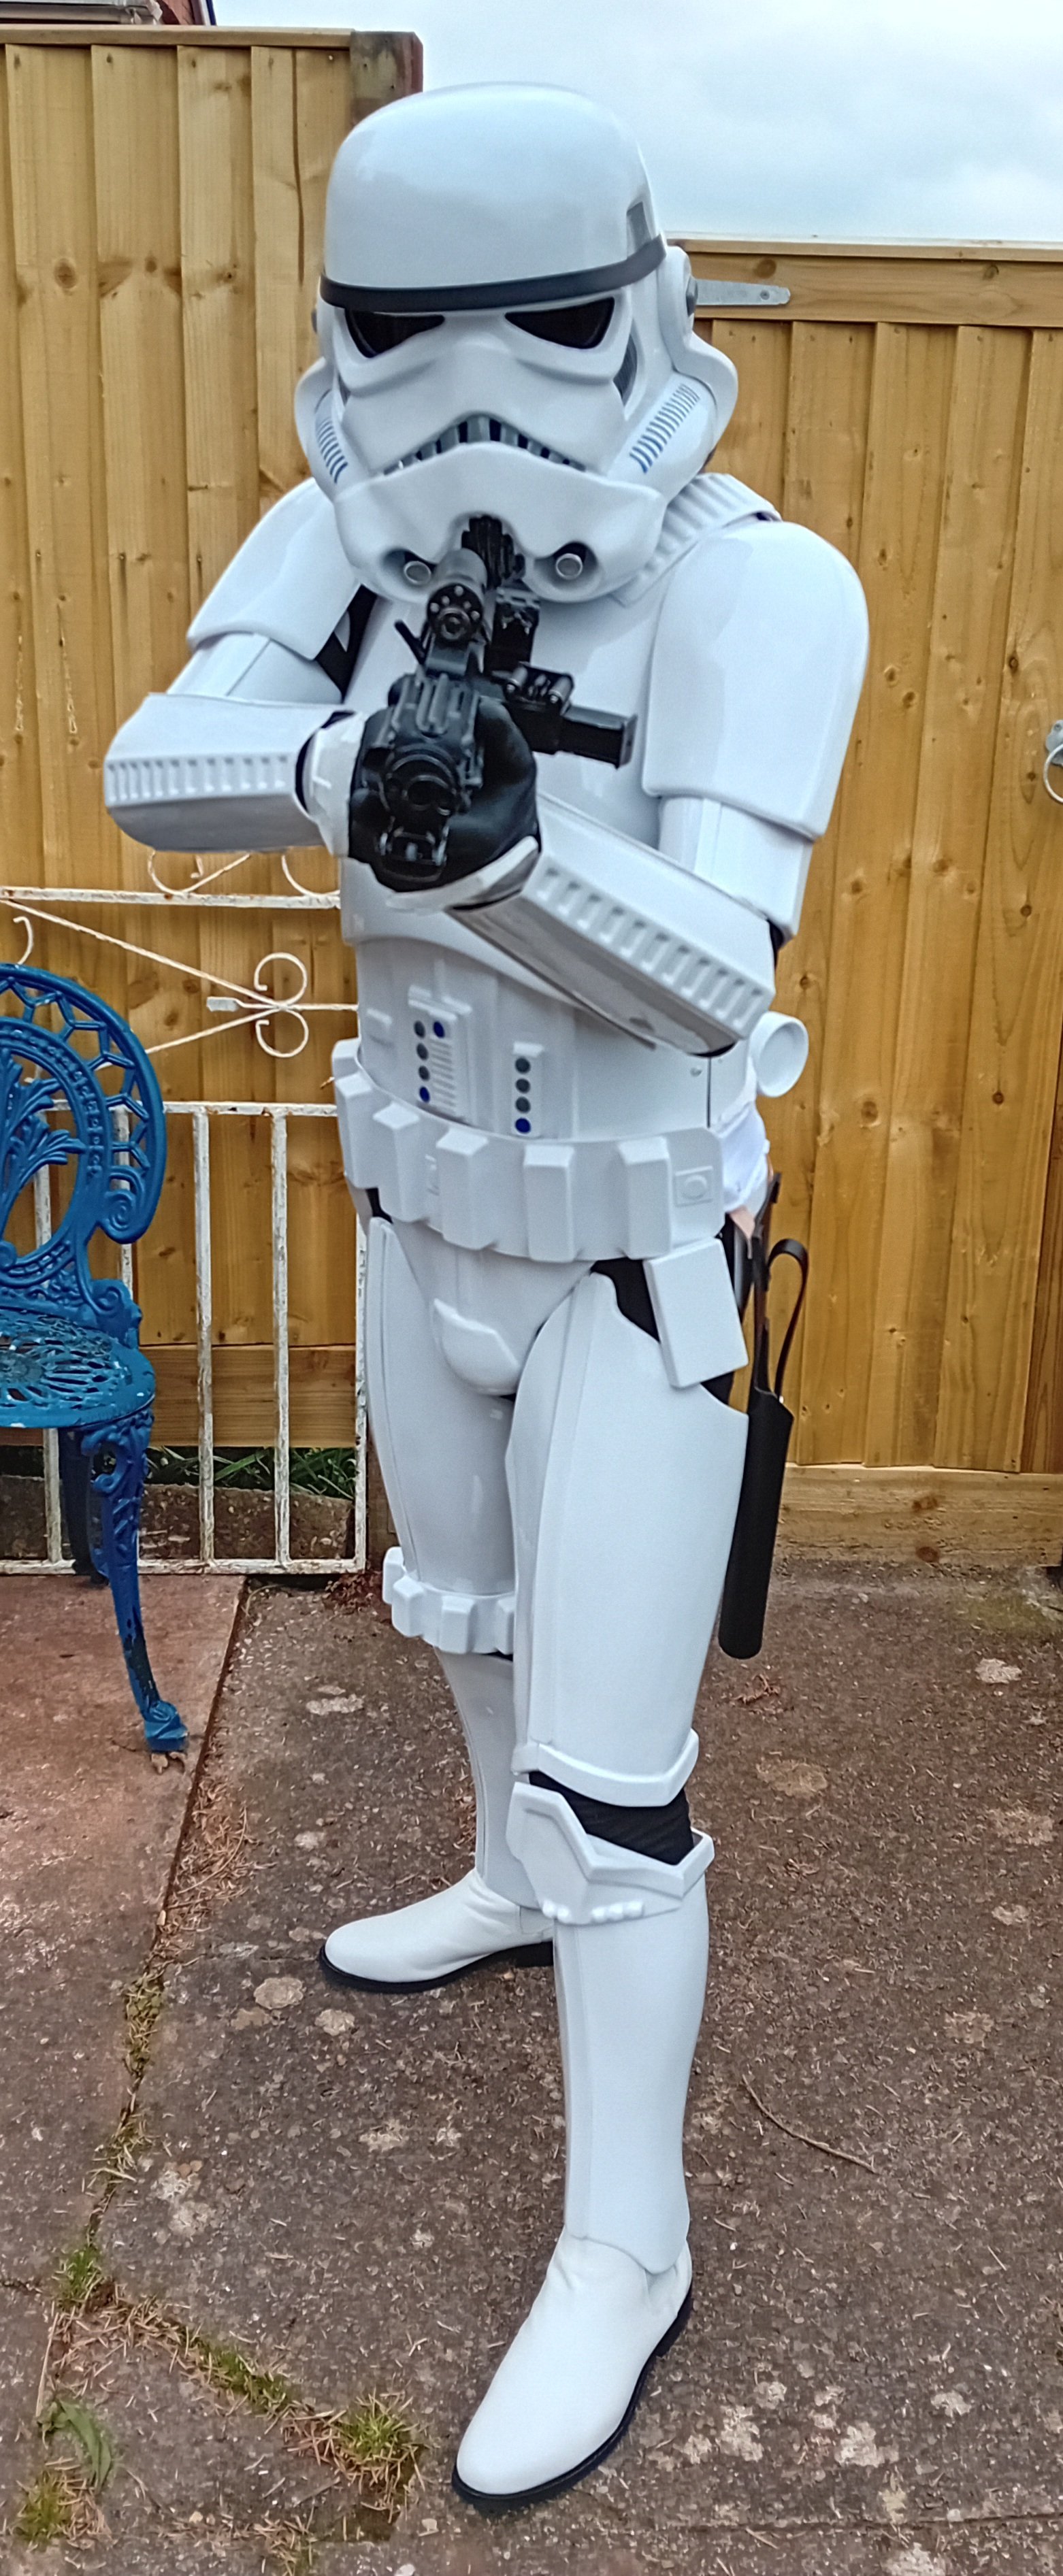
Name: Sean Pringle Kosikowsky TK 21103 UK Garrison Forum ID: SeanPK Please look me over for expert status. Extra info: Height: 5' 10" Weight: 11.1 Stone / 70.31kg / 155lb Armour: RWA Blaster: JMC E-11 Kit build Boots: Imperial Boots Belt: RWA Hand Guard: Imperial Warfighters Holster: RWA Neck Seal: Imperial Seamstress
 1 point
 -
You have to apply for EIB and be approved before you can apply for Centurion, it's all about the details for each level. CRL EIB blue and Centurion Red https://databank.501st.com/databank/Costuming:TK_anh_stunt1 point
-
Thanks! The BBB has not yet been sent I looked for Centurion and EIB and it seems interesting. What is the difference between the two? If I want to achieve this validation, can you direct me to what I have to buy/do?1 point
-
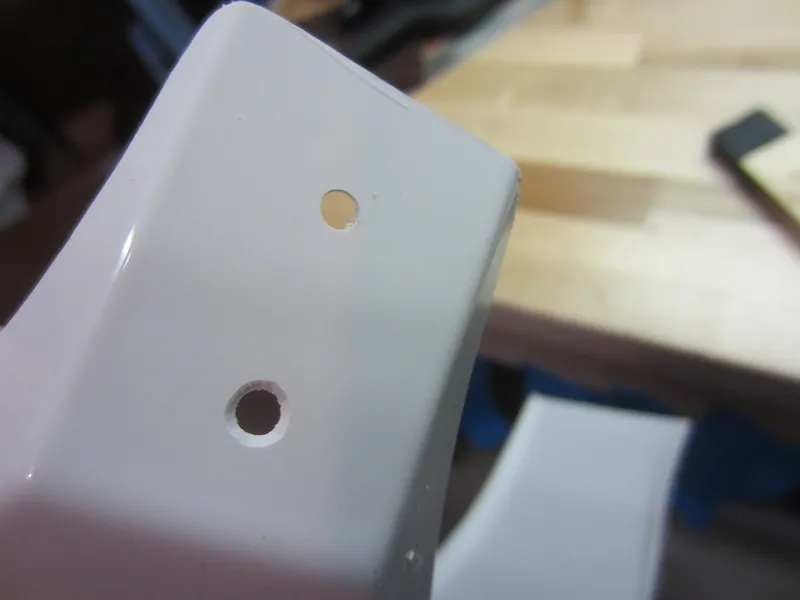
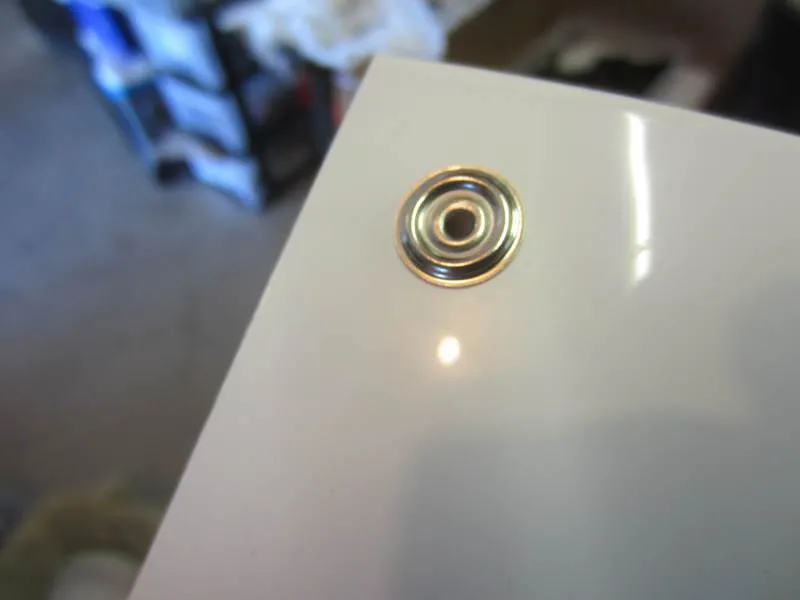
Looks pretty good Yes posterior does get trimmed, 5mm is enough of an edge A couple of AM EIB references Really depends how the posts collapse, sometimes they offset to one side and make it harder to close or they don't squash down as much as they should. I found once setting to use a bolt the same size as the opening and give a tap to squash the post a little more. Try not to hold too tight with pliers it can deform the opening which also makes them harder to close.
 1 point
 -
Got an anvoos lid from ebay; the aertaor and nose piece snapped out fairly easily with gentle force, they really dont use much glue on those things. Decided to just mask off black areas and paint. Have some cure curing to do and some drying than polish with 3k and one more coat. Waiting on gio and geeky pink is facing issues with fires, so this project will probably be tabled for some time. My fault for thinking this was going to be "easy" Tip never say anything is going to be easy. In the mean time I'm going to fix some worn out elastic strapping, replace velcro, and various other maintenance items. Probably go nuts with a good clear coat and polish to make everything super shiny. Need to get my attention back to my DN Kit anyway. I think this project has taught me I love Behr spray paint and I believe I'm going to also paint my DN Kit and bucket so everything matches well and it helps fight yellowing1 point
-
Welcome to the FISD Alex! A great tip whilst waiting for the BBB is to look at EIB and Centurion applications so that you can have this into consideration when building your armor! The high standards are so much easier to achieve when building with them in mind rather than having it as an afterthought! Regardless if you want EIB and Centurion or not, it will really help your armor look truly amazing! Looking forward to your build thread!1 point
-
Love seeing the effort going into this! Can't wait for the build.1 point
-
I measured 10 mm for the Han snap. Does this look closer? Also, I plan to go ahead and start trimming the posterior section and attaching it to the kidney piece. What is the rule of thumb for return edges for this section? Am I able to leave about 5 mm on the tops like I did for the kidney pieces, and do the bottoms get removed entirely? Also, does the crotch area where the snaps go get trimmed at all, or just rounded out?1 point
-
Exploded views are very cool, helmets looks fantastic.1 point
-
Loving the updates, looking forward to seeing the progress, good luck1 point
-
That is what I purchased based on what Wook1138 also suggested. Seems to have stuck. I'll see how it holds up. What I found is that the glue stayed on the glove, but it pulled away at the latex which left little tear outs in the latex. Bart1 point
-
Sorry, must have forgotten this image. Sent from my SM-A145R using Tapatalk1 point
-
Thanks for the feedback, I will start on correcting it and show images when done. Thank you for your time1 point
-
Overall a really sharp looking job on this armor, Sean! A couple of things may hold you back, but both are pretty straightforward to correct. As per the CRL for Basic approval, the paint on the teeth "does not leave the teeth area". Some (non acetone) paint remover and a toothpick will take care of that. Should take 10-15 minutes. Reference images For the TD, the white control panel (raised ribs) must face the rear, and yours is sitting pretty high. The clips should barely be seen (or not at all). One way to do this is to remove the TD, roll it back to the ideal position, cut off the ends, re-drill the holes and re-mount it. Again, 10-15 minutes or so and you will be golden. Reference image The D.O.s will need photos with your arms raised on the left side, showing the drop-box alignment and canvas belt details. You have a little work in front of you, but after seeing what a great job you did on this build these items should be a breeze! If you have any questions or need help we are here, so just ask. Looking forward to seeing the results!1 point
-
Hi Sean! First, best of luck on your approval! You will need quite a few additional photos of your armor as well as your blaster. I have a thread (link here) that will show what is required. Looking forward to seeing them!1 point
-
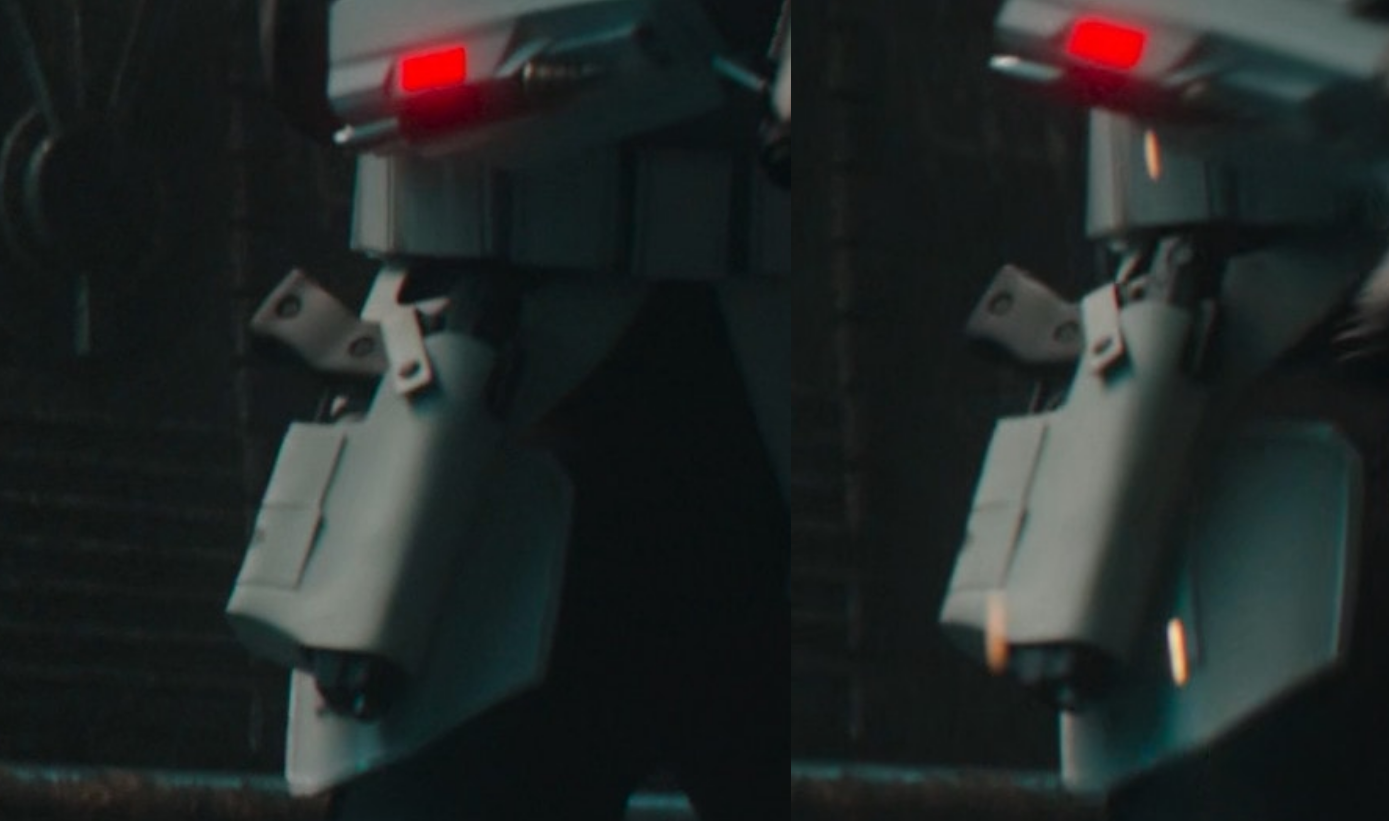
Sidearm Curved Handle The new sidearm for the imperial commado's is very similar to the SE-14R which had me thinking if the handle would be curved/molded the same way, appears it does Rexim Favor Se-14R Imperial Commando sidearm
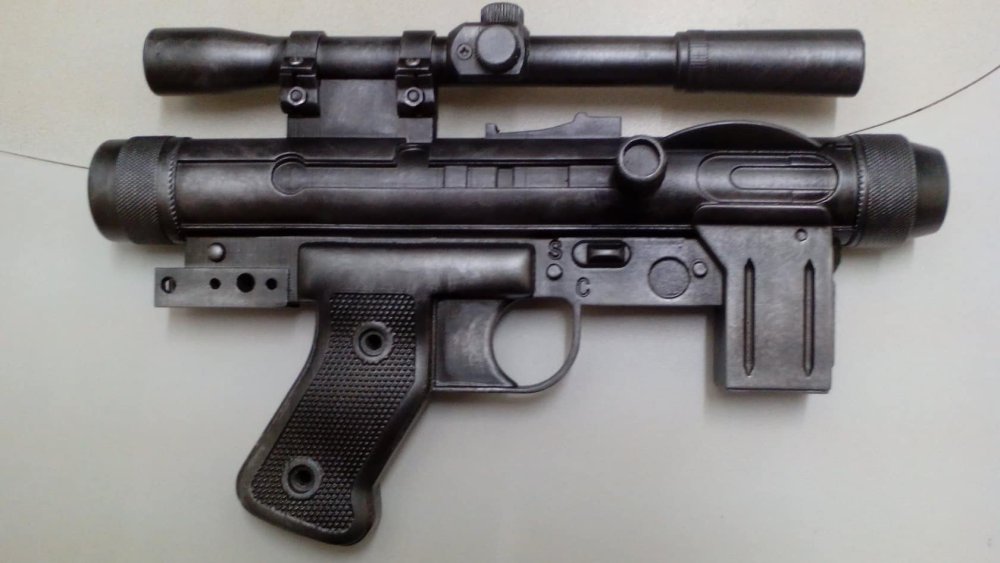
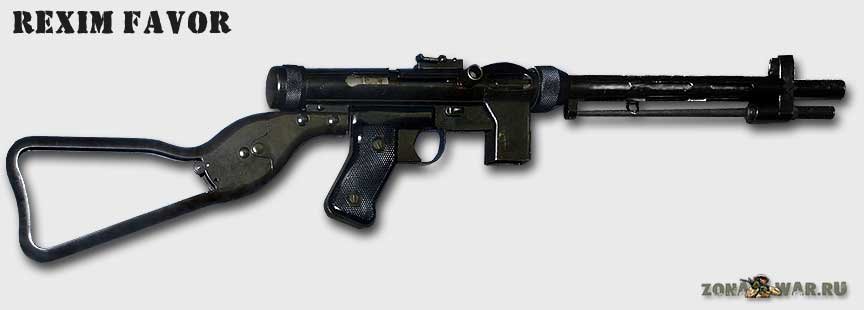
 1 point
 -
I agree with waiting for final trimming till you do a test suit up. Getting there1 point
-
They use two straps which buckle with parachute buckles. The straps are covered in the ribbed fabric that matches the rubbing of the undersuit1 point
-
Alright. Made some cuts.1 point
-
I'm really looking forward to receiving the BBB and being able to start working on it. Yes I was planning to do a build thread and I will put some pictures. Thanks for your feedback1 point
-
Welcome to FISD Alex! Looks like you made a great purchase, RS is very nice armour indeed and i am sure you will not be disappointed. When your BBB ( Big brown box) arrives, pleas don't forget to make a build thread, ask plenty of questions and of course we love photos. Looking forward to your build1 point
-
I had these same questions. I thought about hiding mine behind the drop boxes. Didn't because of access to the clips. I went with straight down the side...being an 850 AW kit I attached the top to the abdominal. Easy peasy! Remember to have fun! Check out all the build threads....1 point