Leaderboard


Popular Content
Showing content with the highest reputation on 06/03/2022 in Posts
-
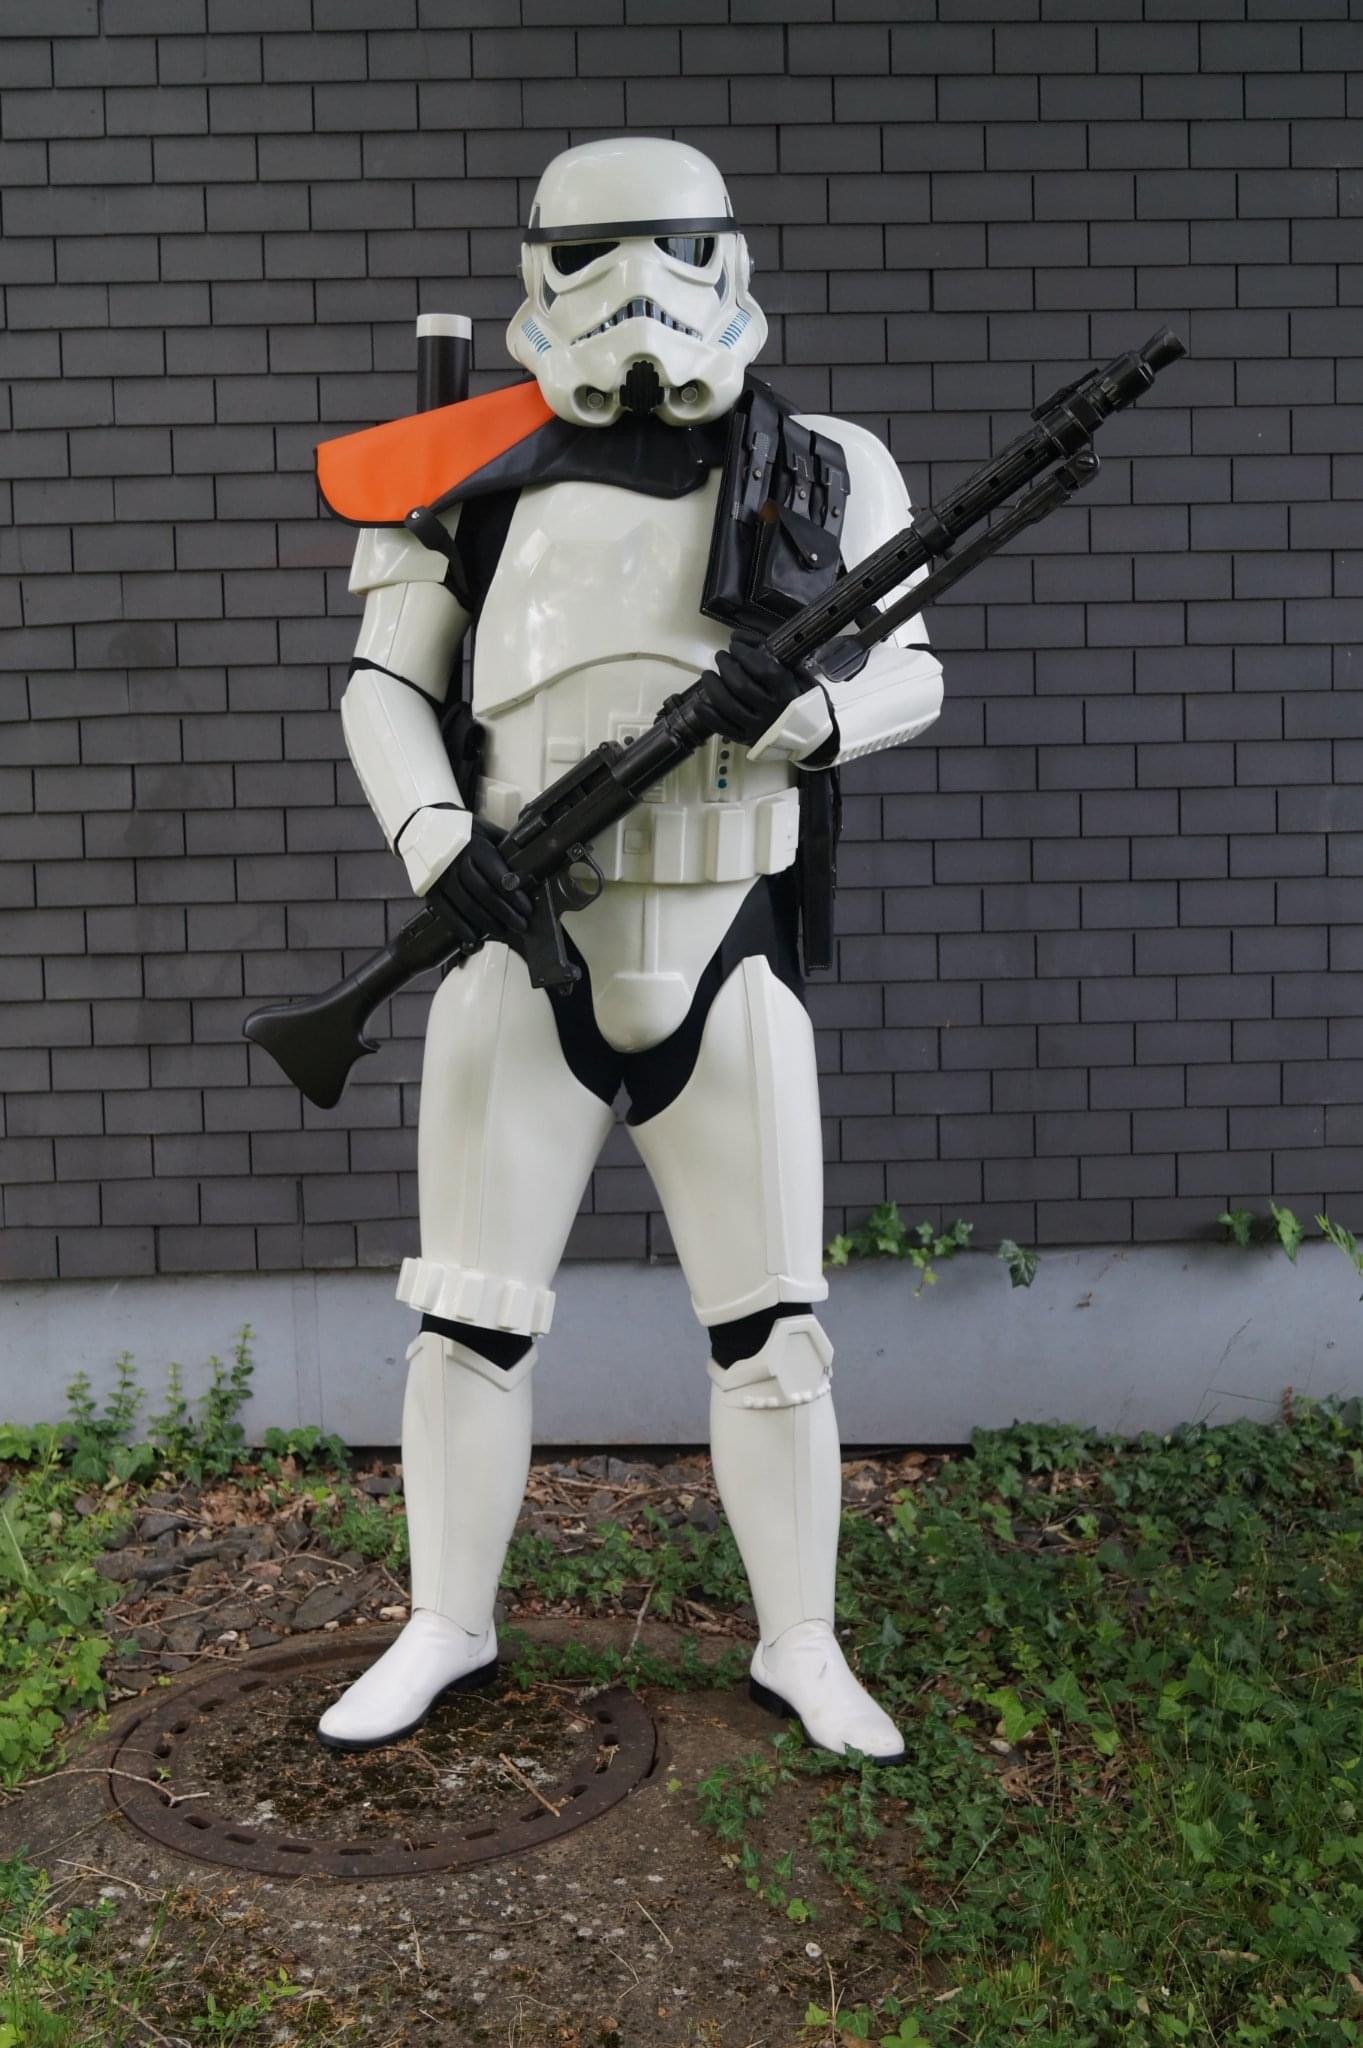
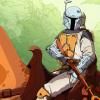
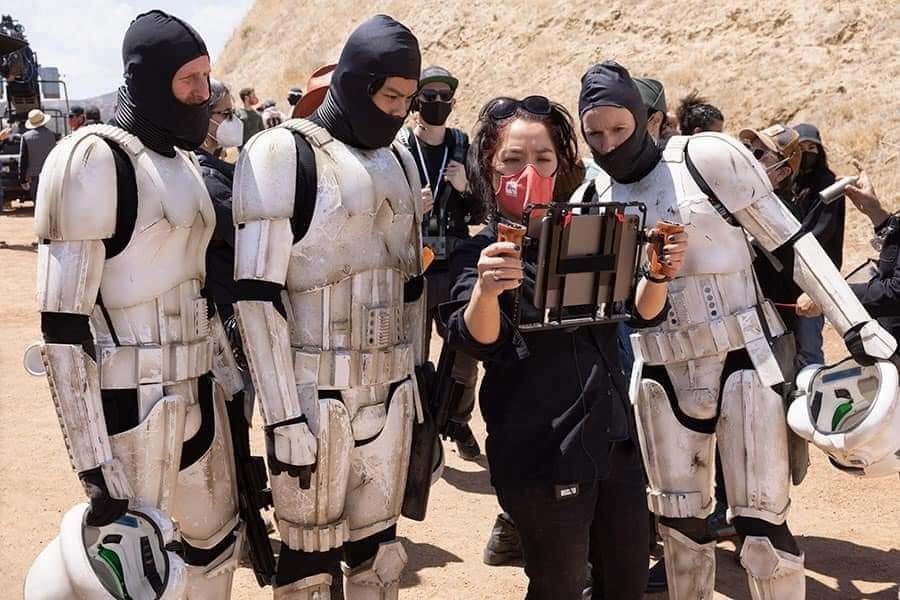
Some additional reference coming in for you! Man, seeing that scene from Mando season 1 being shot was so cool. Quick story - Jon Favreau could see that we were stoked on the new Incinerator and were geeking out over it, so he actually called us forward and showed us where the edge of the shot was so that we could stand as close as possible without being a bother. Nice guy, and a true fan. Was even cooler to see it after they added the flames in post!5 points
-
3 points
-
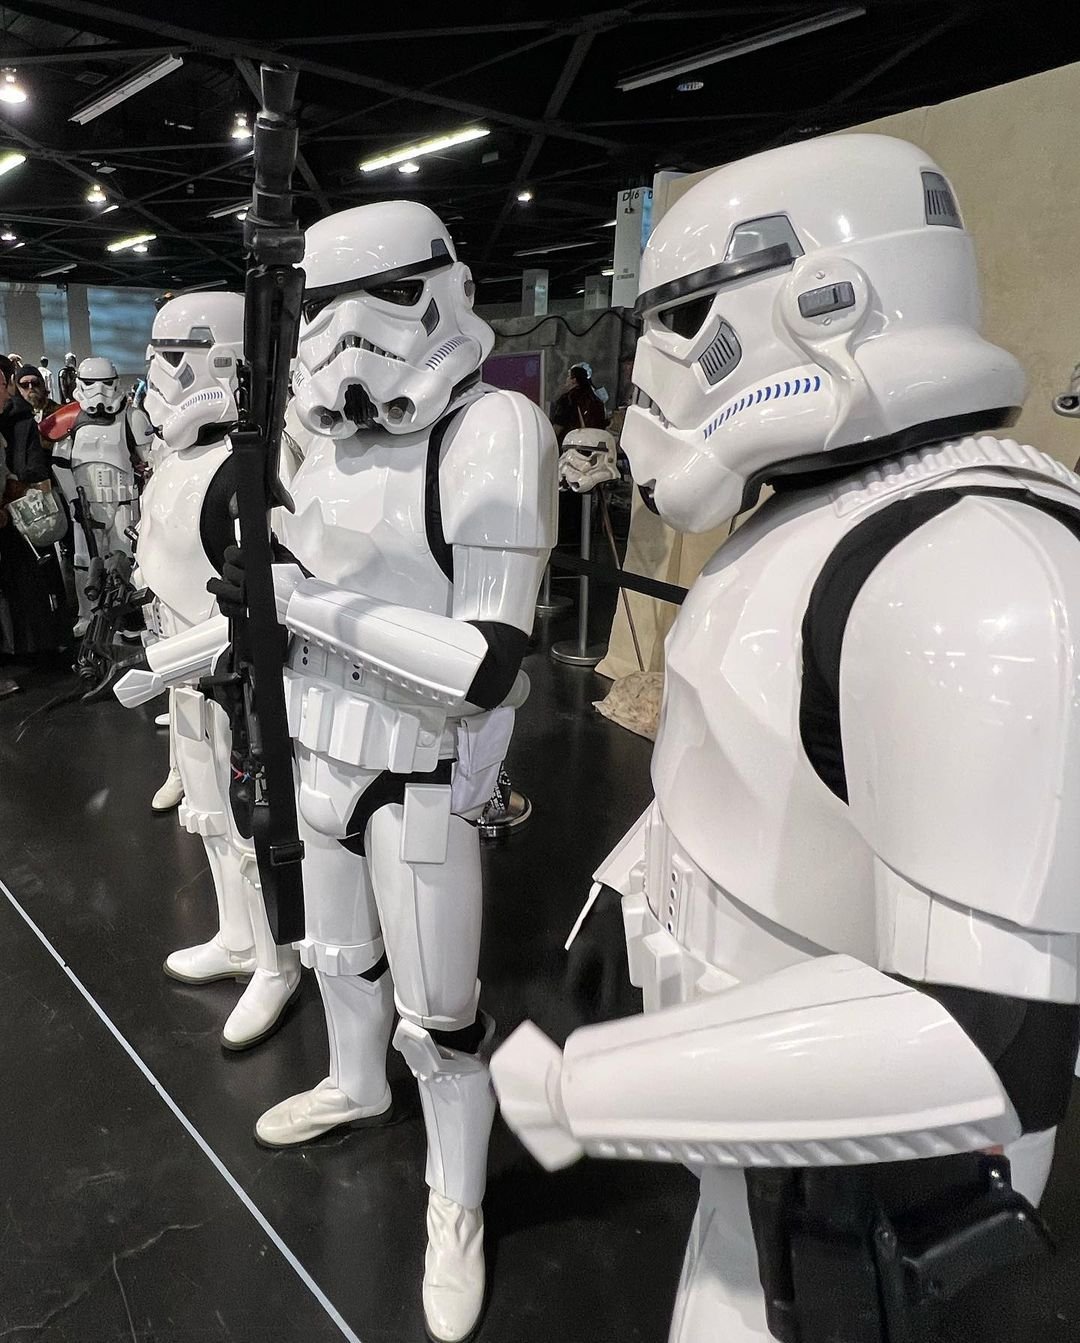
Nice forearm gap trooper on right Added some screen caps to the Obi-Wan gallery area3 points
-
Celebration 2022 Photos / Video Post them if you have them Legion group
 2 points
 -
Cross posted form the legion forums https://www.501st.com/forum/viewtopic.php?f=249&t=110667 RE: Star Wars Celebration COVID Cases Hey All, Star Wars’ Celebration, I'm starting to see alot of people from around the Legions posting on social media they either have been exposed or have tested positive for Covid coming out of Celebration. From my experience at Celebration, the Mask Policy wasn’t Enforced at all, other than entering the event, I seen even the event staff wasn't following the rules and now cases of COVID from the convention are Popping Up. I'm even guilty of taking my mask off once or twice for Photos or to catch my breath being in custom, I suggest if you know you are positive please reach out to people who you may been around for periods of time, so that they may get self-tested at home, watch for any symptoms, get rest and stay hydrated. Take over-the-counter medicines if needed, such as acetaminophen, to help you feel better. Stay in touch with your doctor if you see any symptoms. Please take care of yourselves and your families. Vince Vigil @23vince232 points
-
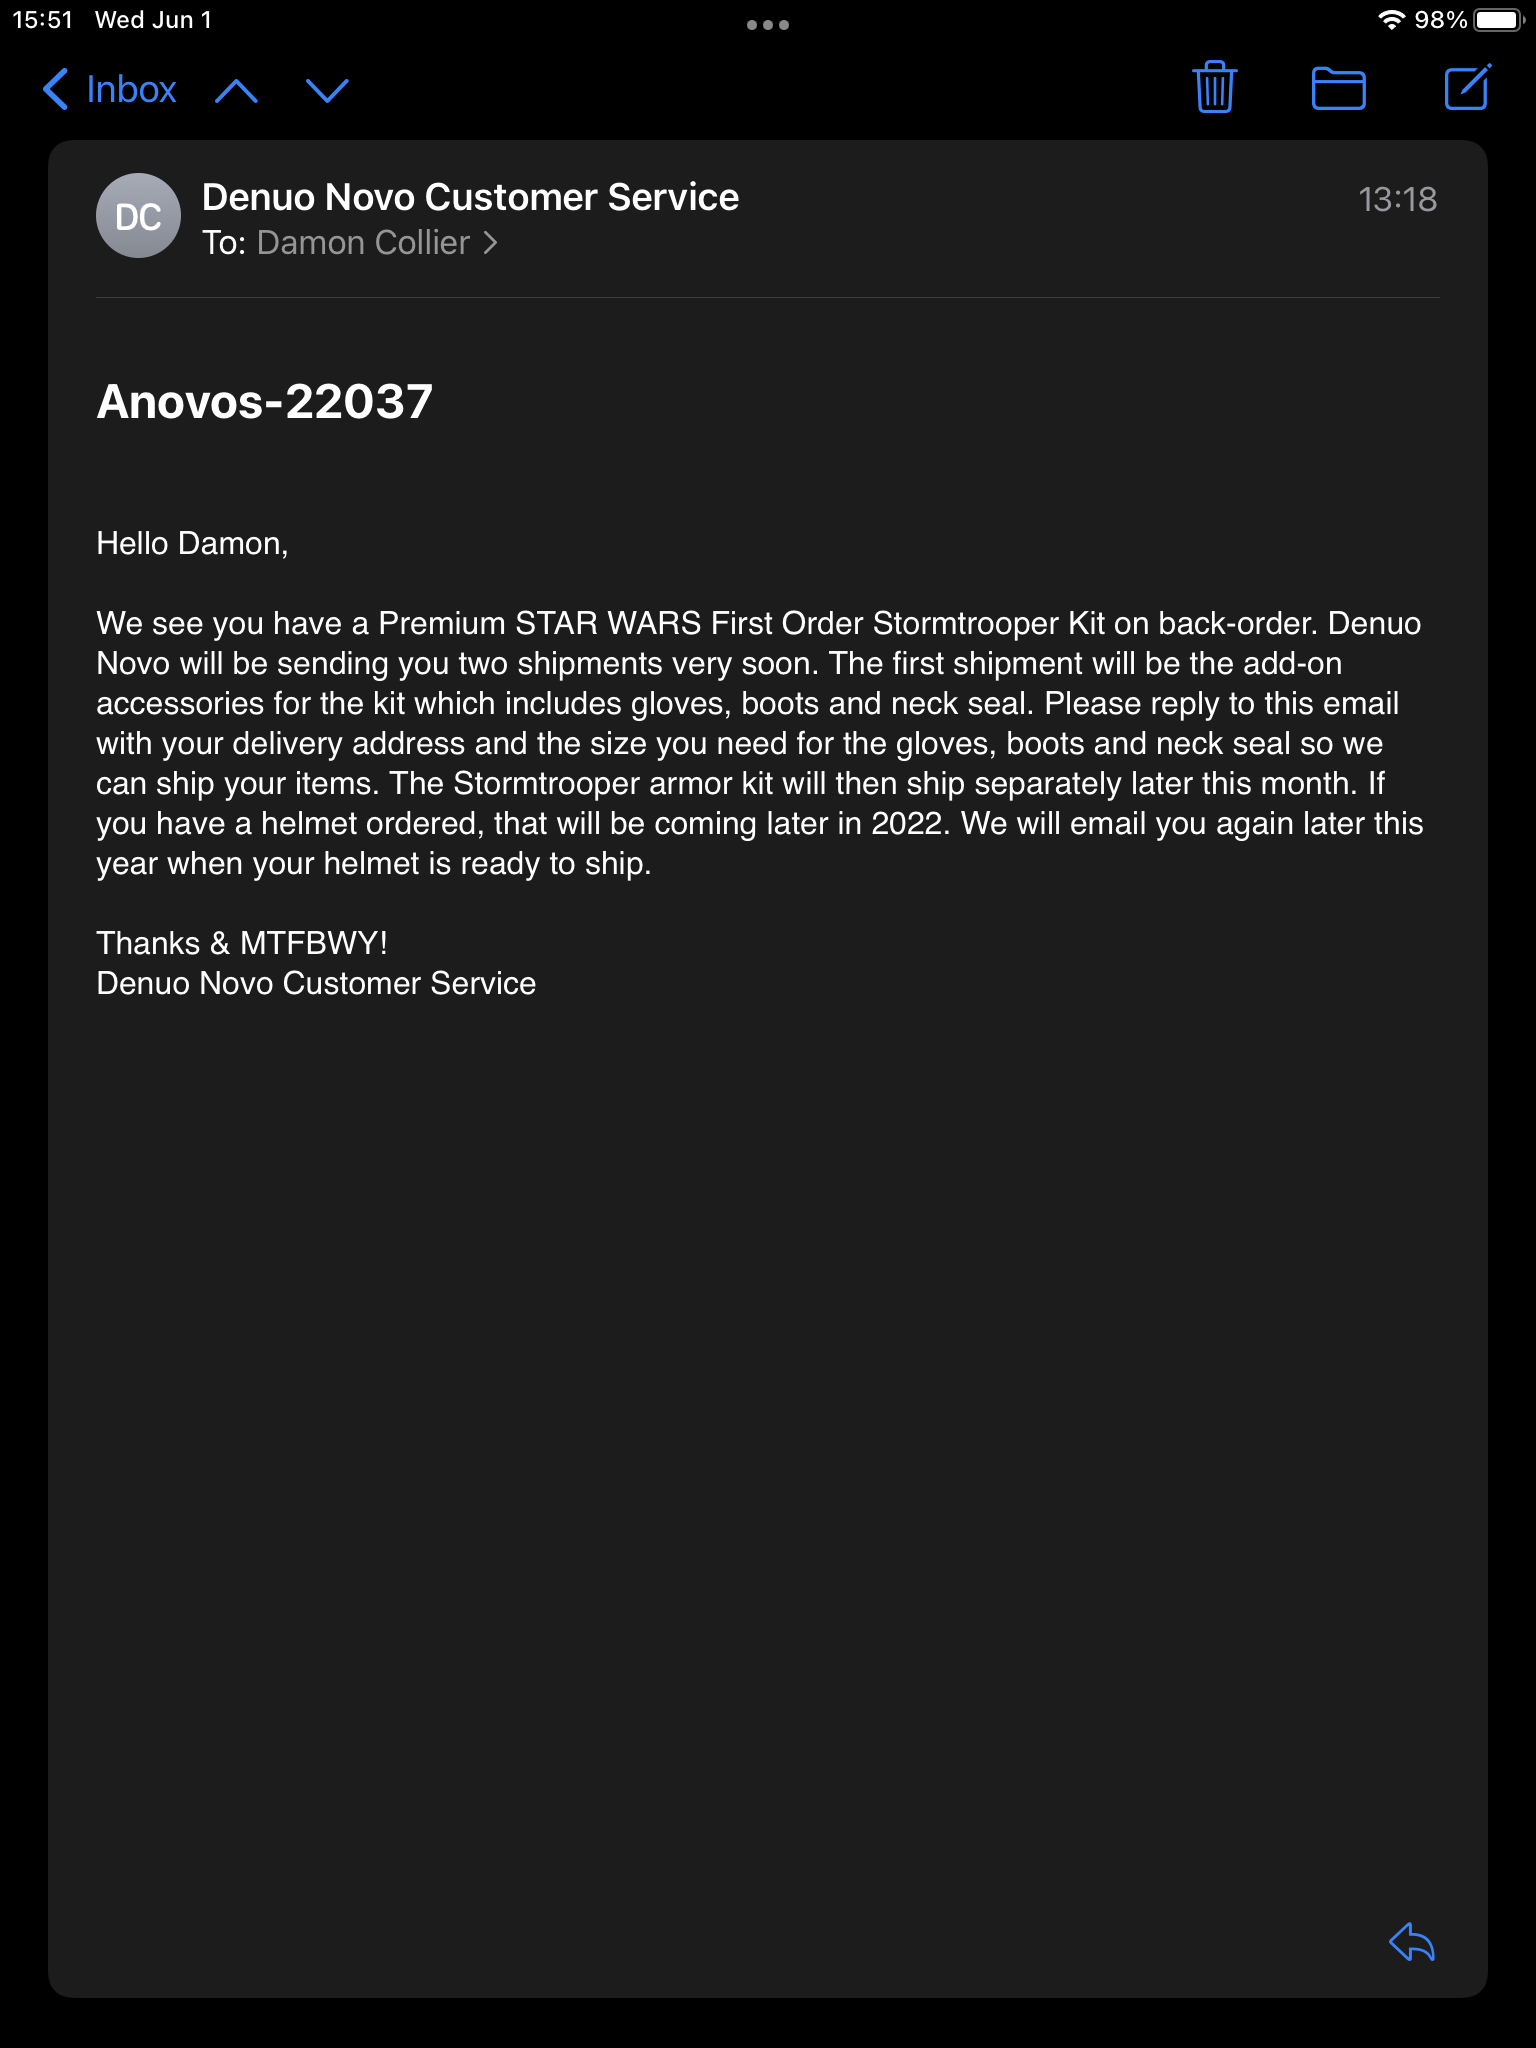
I received 3 neckseals a few weeks back and 2 pauldrons are on their way via DHL and the FOTK is later this month so it’s starting to look really good2 points
-
Well apparently my pauldron and neck seal are on their way via DHL, should hopefully see them soon. Hope others recieve some good news soon, it's long overdue.2 points
-
2 points
-
I was able to get some pics with the armor on (forgot the thermal detonator). I feel it's coming together. I still have some issues to fix, like the left side of the kidney still wanting to pop out a little. Back came out a little dark for some reason I also taped on the rough trimmed shoulder bell. So far so good. But really need the bicep to see the fit. I'll use Glen's method above when adding the snaps.2 points
-
I got some parts painted. Preliminary assembly with some paint. It looks gooooood. I used hammertone on the main body pieces. I sprayed some areas purposely thicker and some thinner. I didn't want fresh wrinkle finish on this blaster. Wrinkle paint takes a long time to wear down to a nice "used" looking level. Hammertone goes to that level almost out of the can. It gives some of that variation in tone that the real guns have. Thinner on the barrel and a bit thicker on the folding stock. No hammertone on the guard, inner barrel, scope, or various other pieces. I also wanted to black out that center gold stripe on my vintage counter, but I didn't want to paint. It's also very very thin clearance inside, so a piece of electrical tape won't fit. However, a piece of clear scotch tape fits fine. I colored it with a black sharpie and that takes care of the gold inner counter problem. Moving onto the power cylinders! I wanted a little bit of crustiness inside the main capacitors/insulators/whatever, so I gave them a bit of a white acrylic wash. Nothing really awesome, just something to show that it's not plain copper inside those little side slits. Decently successful. The one feature the Fieldmarshall cylinders is missing is these outer wings. I snipped some extra from the T-tracks and glued it in place. It's slightly blobby but a really tiny and hard to see detail. And it's really on there! This may survive a couple troops. Inner capacitors! The nose holes needed drilling out slightly to allow clearance for the wires. I angled the outer capacitor so that METALMITE would always be readable if you knew where to look. Seriously, this kit is so very much the Easy Button. Almost nothing to change to make it perfect. It feels like cheating to build. I don't have much fabrication or alteration. Just smooth sailing. The included red wire is a perfect size for those rear capacitor leads once you remove the inner copper. It pulls out with a needle nose easily and any left over comes out by itself when you shove the cap lead into the red. And here's my first pass at a screen accurate power cylinder. Weathering is easy, but that red speck at the back required a bit of thought. The angle proves it isn't one of the center power wires. There seems to be an extra red power wire coming out the back rear of the outer insulator. You can also (barely) make out the presence of an extra flat feature on the outside edge from that rear view. Here it is from behind. Pretty similar shape overall. (Also, I'm happy with my wiring and resistors.) More thought and comparison with my in-hand replica vs the screen grabs made me realize I had the wire angled backwards. It should arc down and back instead of back and then down. And it seems to have a segment of black painted wire or a resistor at the end. It's rough and ready. It's used and abused. It might be old and tired, but it's my power cylinder. And I *think* it's decently accurate. Rear view with painted wires. It was hard to make myself paint over the pretty capacitors and wires, but that's how the original was and that's how this one needs to be.2 points
-
Elastic and snaps are usually what are used, the elastic has some give so your arms can move a little more freely. I do prefer using double snaps, great to have a spare if one fails, but many find one enough1 point
-
Well, today i got a day off work as it's the Queens 70th Platinum Jubilee here in the UK. So I put that spare time to good use and assembled my right bicep, also decided to cut out my left bicep as i felt it was too loose, it's now more tailored to my needs. In the RS prop youtube tutorials they suggest attaching the bicep to the shoulder bell with white tape and another option with attaching elastic, is there any prefernces on which method to use? That's all for today, next i plan to do the elastics on the arms.1 point
-
Yuppppp, multiple people from the home Garrison have tested positive, most with mild/manageable symptoms. Corona was definitely an attendee of the convention. For any of you that I saw in person, I have had 3 negative RAT tests over the last couple days, so I think I dodged it. Stay safe and smart!1 point
-
I really hope they come through Justin, it certainly does sound very positive. Anovos were just like this when they kicked off, so I totally understand if anyone has trepidation at this early stage. I long for the day our members flood the forums with "I got it, I finally got it" Then build threads for FO TK's start populating the First Order battle group threads with BBB (Big brown Box) images.1 point
-
Looks like we are going to have a clean and a weathered version CRL to build/update1 point
-
A nice image from Disney, very dirty boys Funny that even without the torches they also don't have the picatinny rail, which is the opposite for what was done for the First Order troopers in TLJ and TROS, their weapons didn't have torches either but still had the picatinny rail. I'd say it's these troopers
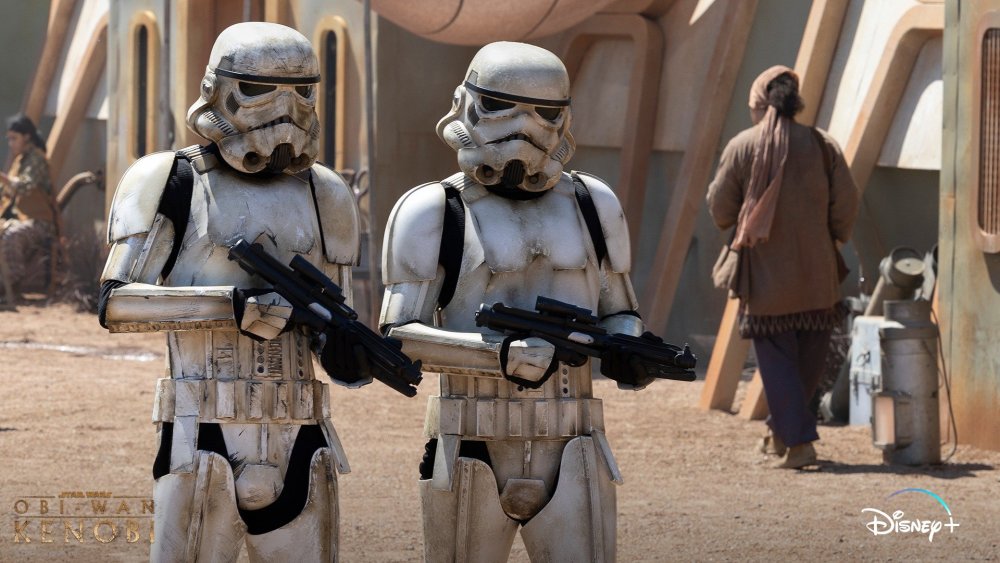
 1 point
 -
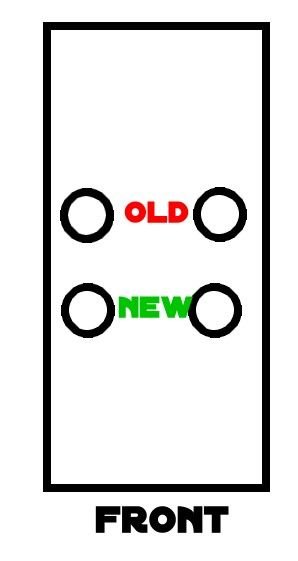
They are connected or should I say they have been in past New Era TK's With how they are attached it allows he shoulder bell to come open quite a bit as there is no loop of elastic which we see on OTTK's. I don't know if it was for more movement could just have been the way they tackled how to connect them, but it does streamline the look with no external elastic loop like OTTK's. "In these images we can see Velcro in various places as well as some sort of plastic hook lines connecting the shoulder bells to the biceps." Great thread here on comparison between the OT and R1 TK's1 point
-
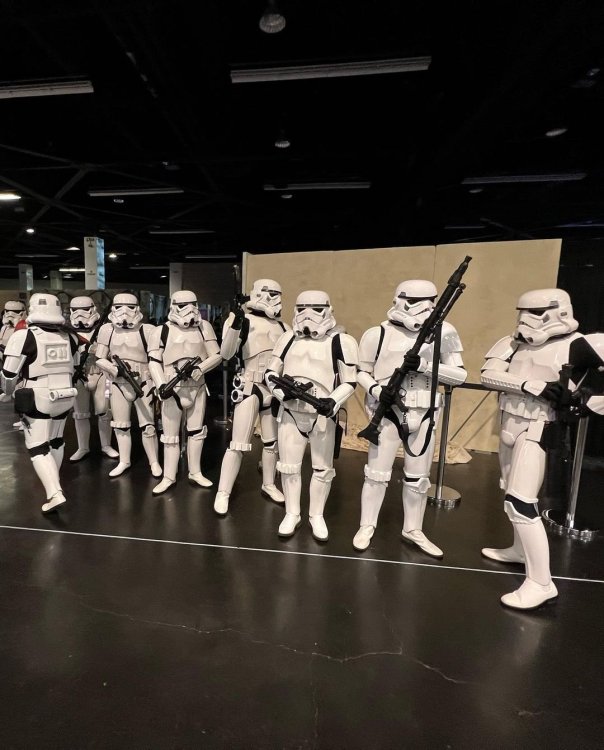
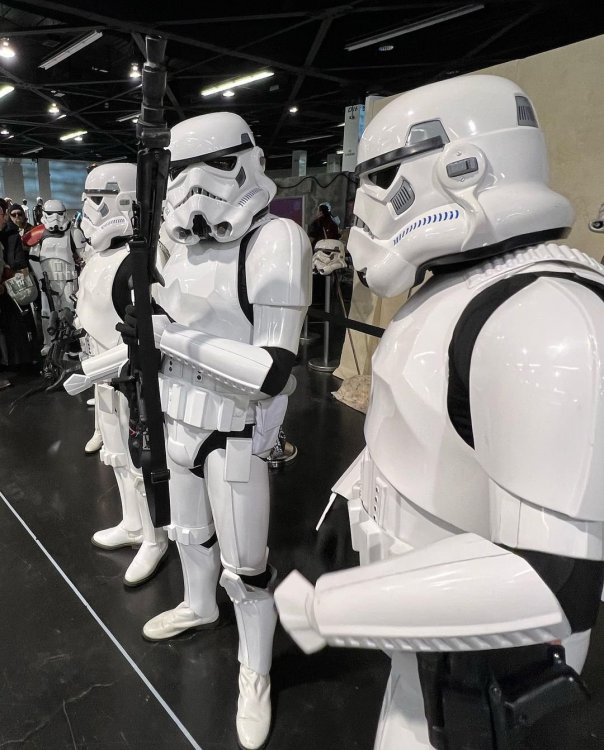
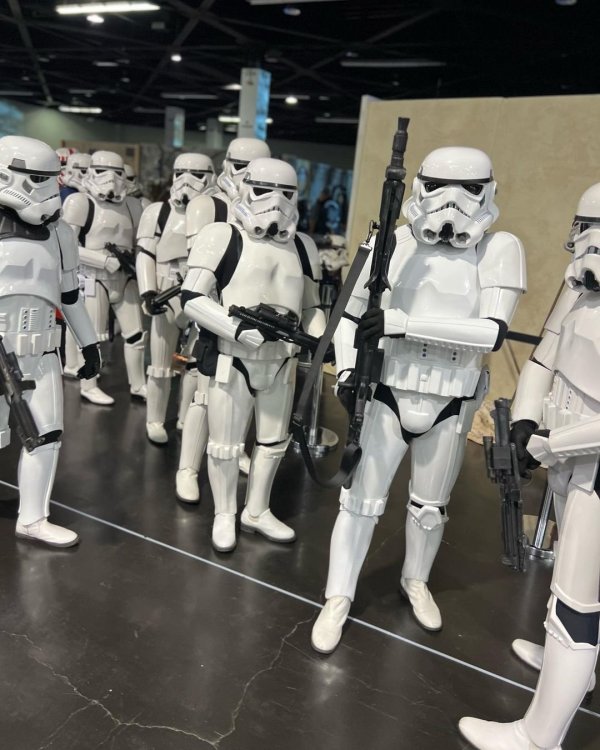
I also posted pics of the SE-14R and Flamethrower shown at the exhibit. Always wish I took more photos, but here's a few more!1 point
-
Move the shoulder bell snap further towards the front, this allows the shoulder bell to come in at the front when you have moved your arms as there is more tension on the front. ATA shoulder bells are not as wide as most makers, a trick when taking your photos is to have someone on standby to check your gaps and a little tweak or two may be needed, do the same the the rear photos too Comparison of my ATA's and with RS ATA ATA RS RS
 1 point
 -
Look at the sight guard on those. And the folding stock area around the grip. Both are quite solid. Definitely rubber E-11s.1 point
-
Hello and welcome, there aren't a lot of files out there for Stormtroopers as there are so many suppliers of ABS plastic versions so there has not been a great demand for print files, unlike a lot of the newer Star Wars costumes of the last few years. Although you can find some files around none that I am aware have been legion approved. This thread has a bit of info you may find useful.1 point
-
Pretty easy fix. Just filed and sanded a bit deeper into the corners.1 point
-
Looking good1 point
-
Tony, I just wanted to say thank you again for this wonderful thread. It has been a life saver, since the actual "instructions" suck... I finished up my Strapping system and it looks great; I'm waiting to paint the armor before I attach it. It's a slow process, waiting for a nice days and doing my best to get it done. With that said, here is that 3d model shoulder piece I made up from your instructions if anyone wants them here they are: https://goo.gl/k1g4WQ it's a bit thicker and doesn't actually need the off shoot piece to be bent. it's not perfect, all the holes are the same size but it works for me, thought I would share!1 point