
Leaderboard


Popular Content
Showing content with the highest reputation on 05/21/2022 in all areas
-
So while an actual FOTK build is still a ways away, I decided to try and make the blaster, with details below. Given that I started printed this in March and have slowly been working on it since then, I'm hoping to have it done soon, with most parts already painted and somewhat assembled. Build comments: For this project I printed each piece, painted them all with filler primer, with the help of my fiancée sanded them at 400 and then 1000 grit, and then painted them. I realize this not involving Bondo means there will still be some print lines, but I'm honestly alright with this as this gun was one of the reasons I wanted to get into 3D printing in the first place, so it's a nice learning experience (though not my first build, as I printed two DC-17s for a friend). One crucial mistake I'd say I made here was not using good masking tape. I used blue painter tape for everything at first, which worked reasonably well but wasn't quite perfect. On my second attempt, I used Frog Tape (an all green painter tape that I found here in Ohio) which was far better for the painting process. Another mistake was definitely being impatient with printing. With over 50 pieces, I was focused on trying to get them printed as quickly as possible, and in the process neglected the quality on a few pieces. I wouldn't say they would impact the final result, but definitely required a little sanding / dremeling to fit properly. Printer: Ender 3 Pro Material: Inland Tough PLA (I know I could've gone with something tougher, but at this point the gun is meant purely for display. If it needs replacing with tougher parts, I'm prepared to do that down the road. Files: The 5th Horseman Binding Agent / Glue: E6000 - I know that some have said plastic welding was the best option here, but I find that this works reasonably well. Flashlight: Streamlight 73001 Nano Light Miniature Keychain LED Flashlight Ammo counter / magazine lights: 3 LED Headlamp (I saw this on the FOTK facebook page - can't be too specific as I can't tell the brand) Scope lenses: I cut up some of the plastic that the main underbarrel flashlight arrived in and glued these parts to the scope lenses before completing scope assembly. Custom parts: I used a different front trigger made by another FISD member who's name escapes me. I also made a few small parts to go on either side of it to prevent the trigger from moving sideways along the pin (which itself was from a large binder clip). Unpainted printed parts: Rough fit of some of the parts: Main receiver / stock rough fit (I realize these look gray in the photo but they are actually white already - Rustoleum Gloss Protective Enamel White to be specific): (Mostly) Assembled stock: Completed underbarrel portion: (This required additional dremeling compared to the originally intended Aimkon flashlight which I was unable to find) My next step is to finish painting Scope Mount 1 (Which has given me issues due to its small size making painting details a little difficult for me), assembling the handle and rear folding stock units together (This required some dremeling after I thought it was all done so that the rear trigger would be useable), and then move on to hopefully the last bit of glue before final assembly. Bonus rough fit DC-17 pic for reading through a newbie's build thread:2 points
-
Haha if you hadn't done it, I would have so thanks for taking the bullet!2 points
-
You got this. Lots of helpful advice here and they don’t laugh too hard when you put your pieces on upside down.2 points
-
Love it1 point
-
Actually that is just the light playing tricks, that’s a photo of an original bicep and those have no ridges at all.1 point
-
A lot of makers added the raised ridges to their molds but as you can see in that image there are none, but other armor parts there are raised ridges. Also added a few references to match your cut/angle line on the biceps we discussed previously. Ideally for biceps (if you have a loose fit) would be trim 8mm from both ridges, then add a 15mm cover strip. If you need more room you can add slightly larger cover strips. Here's a thread from last year in regards to larger cover strips A couple of other bicep references, note none of this have raised edges on the biceps. Here's the "Promo" trooper, notice the cut angle on his cover strips on the tops of the biceps And the trooper on the right, cover strips to the end1 point
-
UPDATE: Now that I am settled in to my new home, I dug this project out so that I can finish it up this weekend. I had quite a bit of trouble sourcing the U-channels, but finally found a set online (details to follow). Although not inexpensive, they are crazy accurate and arrived pre-cut to the correct lengths with the corners rounded. Made of 22 gauge aluminum they are incredibly sturdy. As I mentioned, this will be a display piece but I am sure they would hold up even under rigorous trooping. A quick sand with 220 grit paper to help paint adhesion, a thorough cleaning and 3 coats of paint later they are DONE! Next up: Attaching the folding stock, front D ring, U channels and weathering.1 point
-
It didnt sit right with me to leave the 3D files the same since Ive learned a lot and made so many changes. I had a few hours free tonight and decided to fix it up. I present the V3 (I think its 3, lost count) Files. Some small tweaks to go but the majority is fixed. Changes include: - New eyes - Modified tears - New Vocoder - Correct Faceplate positioning - More pronounced cheeks - New ears (may need some tweaks) Comparison to V2 on the Left, V3 on right. As always let me know what you think1 point
-
So I decided to make my neck seal today while I wait for my BBB from Authentic Props. I figured, that since I enjoy costuming, I would give it a go. I think it turned out pretty good. I am going to post a guide on how I made it in case someone else wants to try and make their own.1 point
-
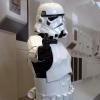
I've seen lots of PVC pipe mannequins posted up, but I haven't seen this yet and thought I'd share it. Just came up with this idea when I saw a new type of 1-1/4 end cap at Home Depot. The poses are endless. I'll post more pics when it's done, but you get the idea from the pics. [/uR I cut 1/2 inch lengths of 1-1/4" to use as rotater cuffs for the joints. Lot more solid with the cuffs.1 point


.thumb.png.69856e02550a2e6d07e44a2b1bda020c.png)
