Leaderboard


Popular Content
Showing content with the highest reputation on 05/02/2022 in Posts
-
A few of your lines are a little on the wobbly side and a little thick, I have found you can remove some excess paint with a toothpick or sharpened popstick or scrap plastic. You may want to remove a little paint from the gums too Frown is painted gray and does not leave the teeth area. Some references to compare with what you have
 2 points
 -
BBB day!1 point
-
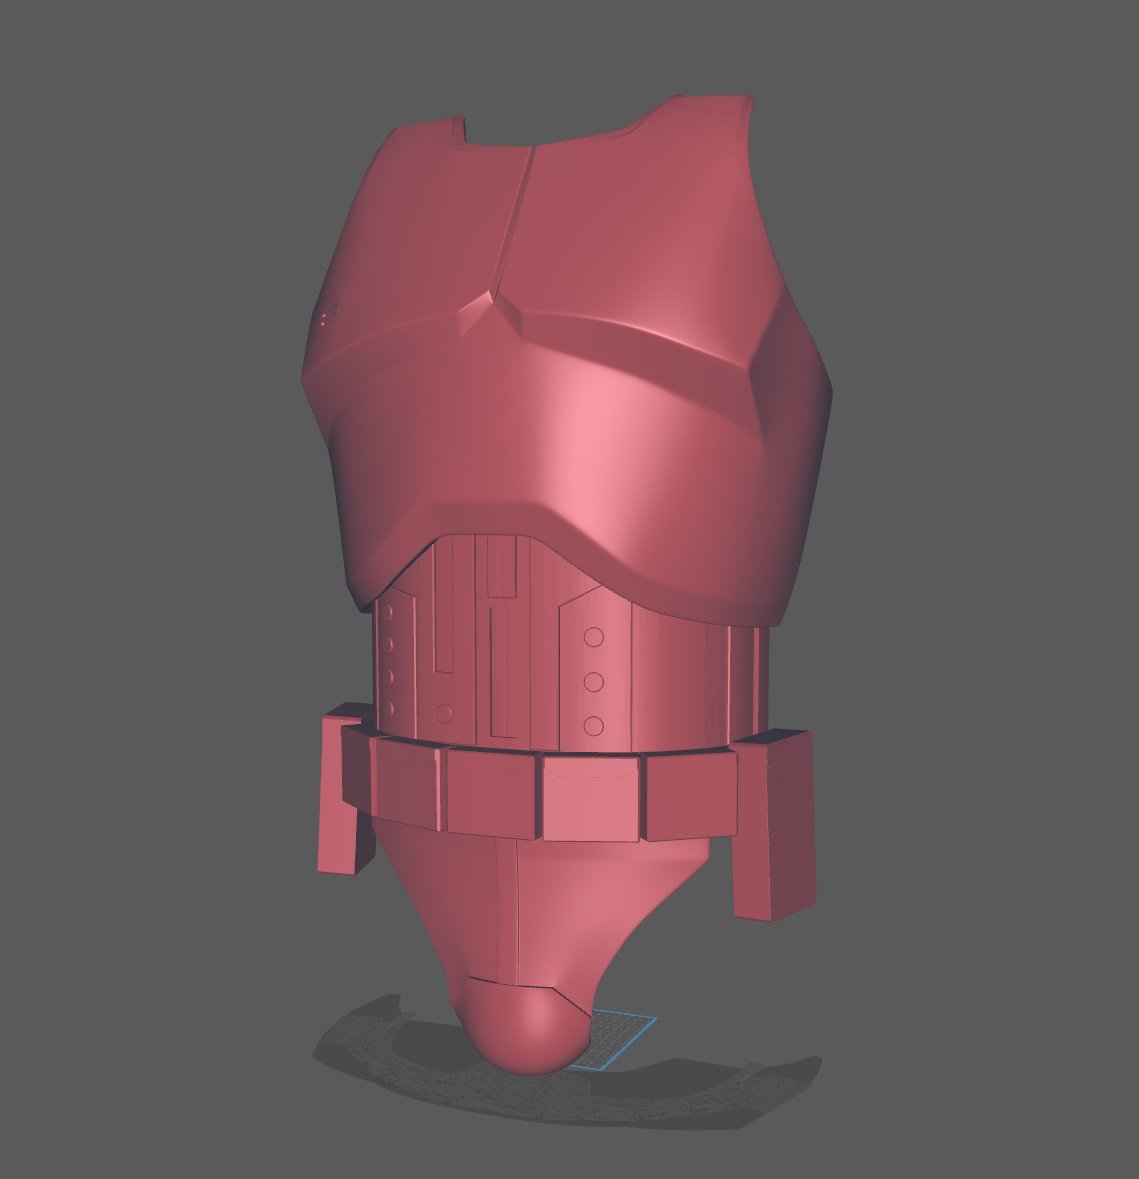
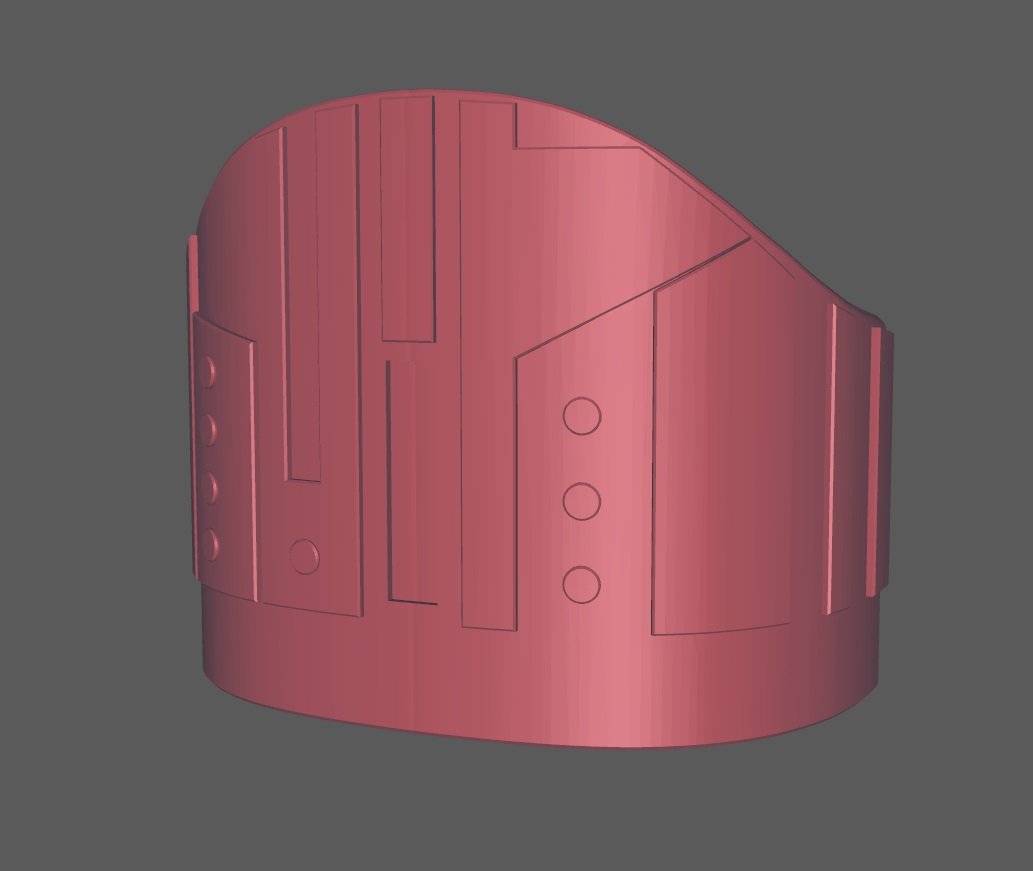
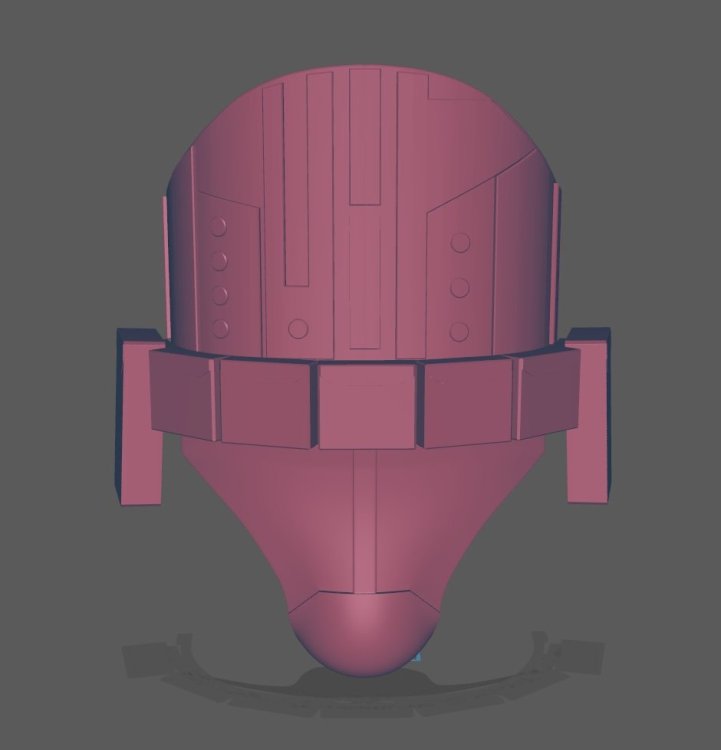
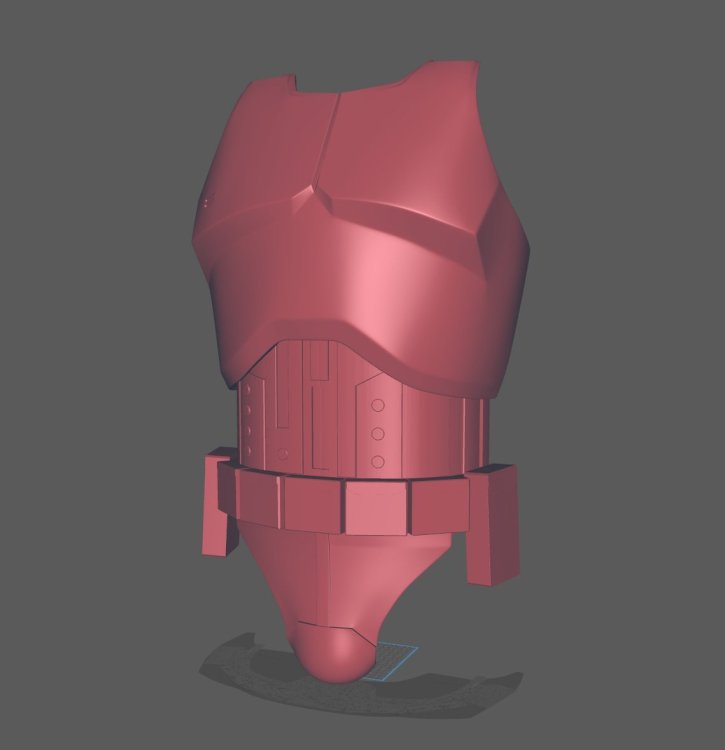
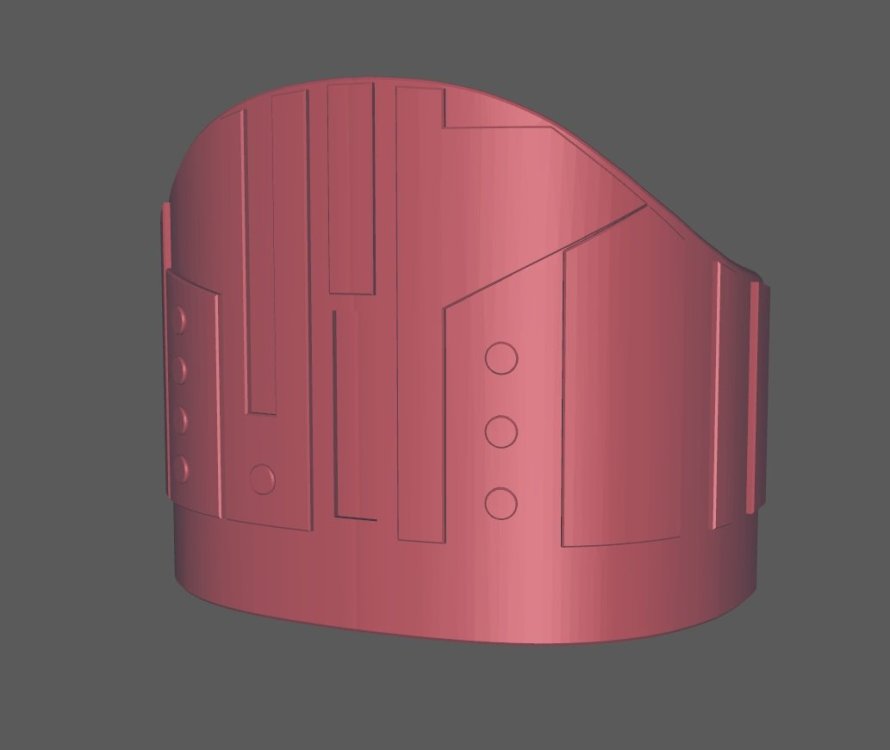
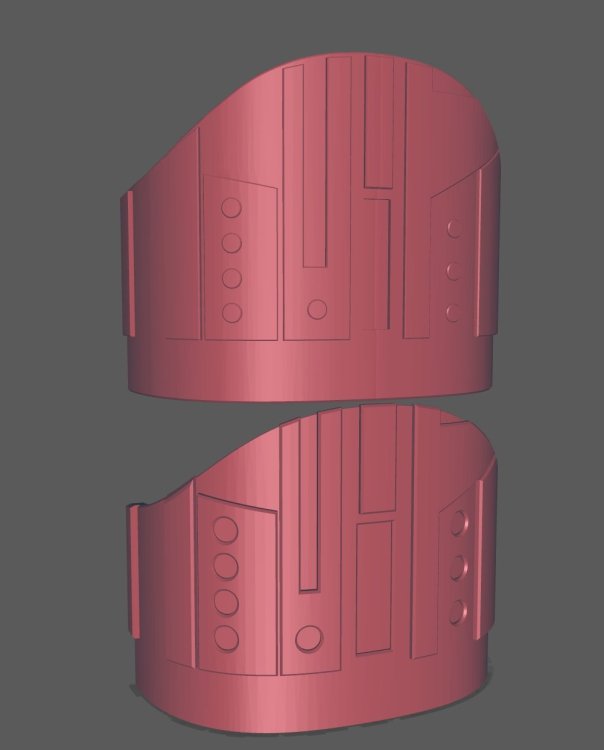
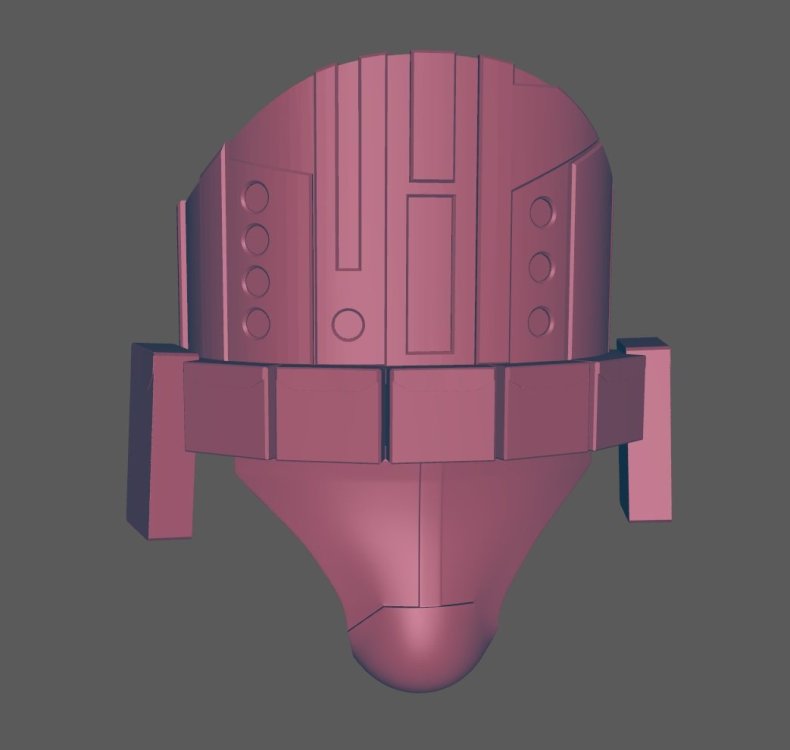
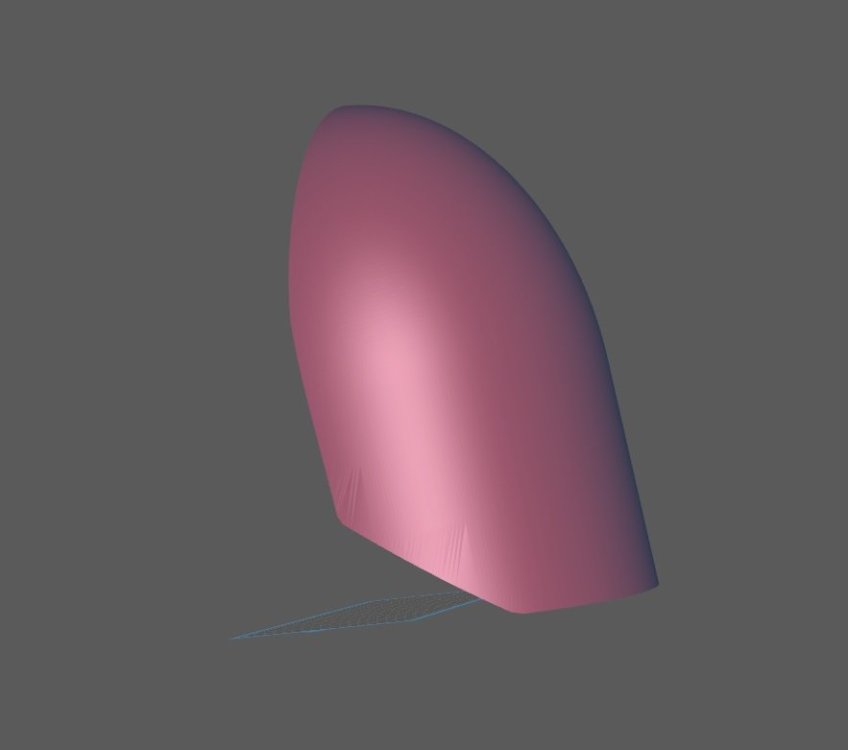
I noticed some inaccurate parts of the belly plate so made a new version. Still early in the learning curve but hopefully I can make more parts for the community as time goes on! : https://www.thingiverse.com/thing:5375297
 1 point
 -
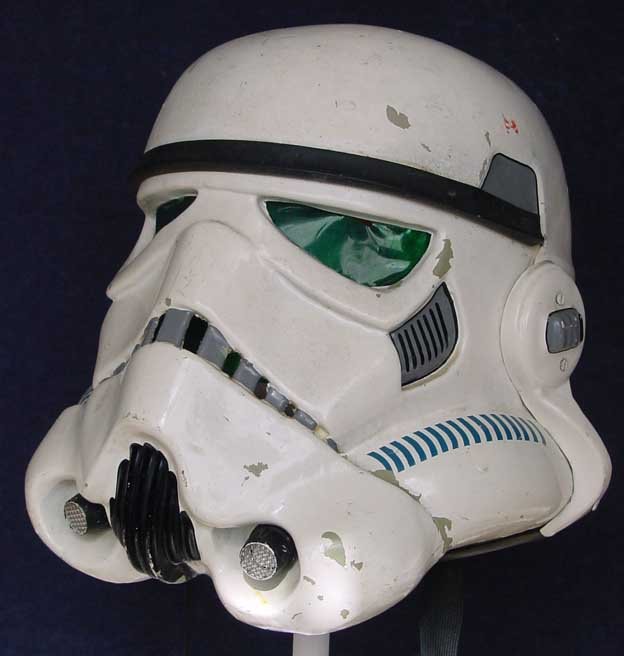
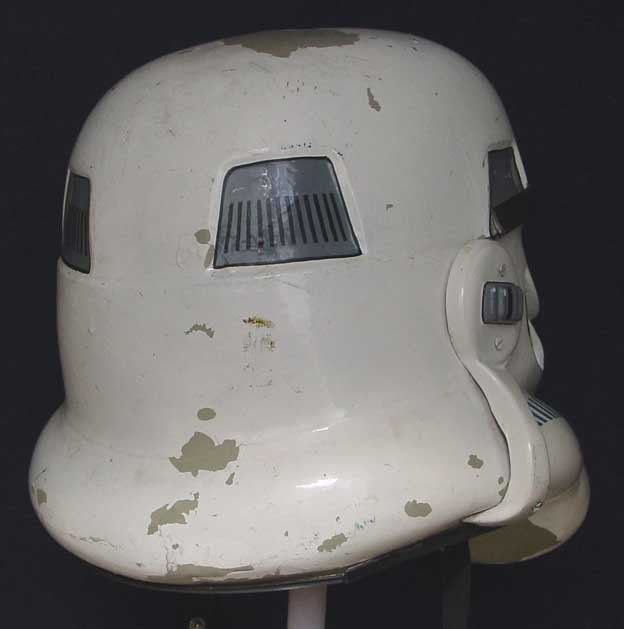
Hey trooper, Sorry I’m so late to the thread. If your helmet maker supplied two sets of ears, personally, I’d consider trimming the second set to about half the thickness and see how it looks. Here’s some side-by-side photos to give you some reference: Approx trim line in red It looks like your ears have a mould line in them where they would usually be trimmed; As below, you have quite a bit of excess on the back&cap where it meets the faceplate. This might be keeping the two parts from butting up. Just suggestions, so don’t feel you have to make these suggested changes, just maybe worth a go if you have spare ears. :-)1 point
-
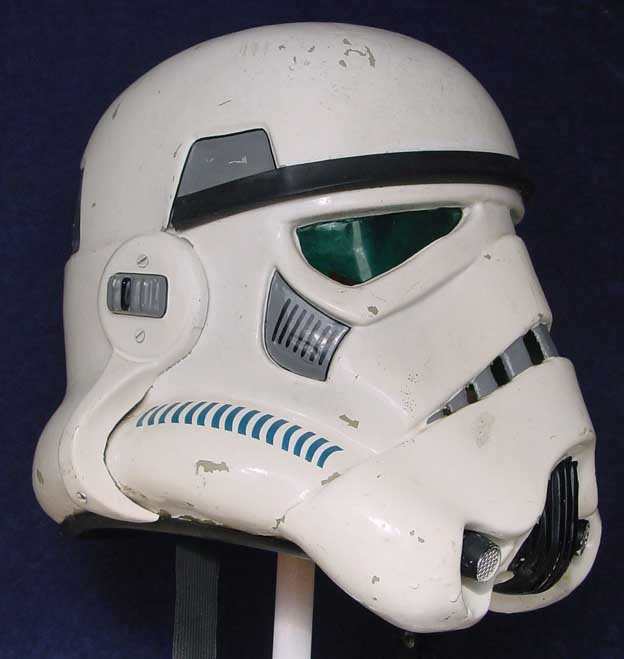
Making good progress, Michael. :-) If you’d like to tidy up the vocoder a little bit, I’d highly recommend a “filbert” brush as these have a nice rounded tip. As below, your’s is currently a little more ‘squared’, whereas the originals are a little more rounded. If you need to remove some paint to create a rounder shape, I find you can gently scrape with a wooden tooth pick / cocktail stick without damaging the plastic. As below, I’d aim for something a little more like this: Here’s a video of how I paint mine using a filbert brush: (skip to around 8mins) [/url] And, here’s a useful thread on the different vocoder styles. Most “stunt” troopers had a “fuller” vocoder, just like the reference photos above. https://www.whitearmor.net/forum/topic/48252-anh-tk-vocoder-examples/1 point
-
That trim line should give you a little more room. Notice also one of your sides/ear is very close the the trap while the other has a large gap, it's ok to have a difference but can make a difference to were they meet underneath. The tilt of the front plate can also open or close the opening. Here is a comparison to a recent centurion approved RS helmet, the photos are taken slightly differently but will give you an idea, notice the slight difference in the tilt/angle of the faceplate to the cap, also the length from the front area to back of the helmet, yours length appears slightly less. To adjust the faceplate you would need to remove the ears, drill out rivets or bolts what every has been used, then bring the faceplate forward on the base to increase this angle and opening, you will also need to check how much you can move it while the two pieces still meet underneath allowing ears to cover any gap. Hope that makes sense I've only had one coffee Dan has a great thread showing the angles/tilt on helmets which may help you see the differences
 1 point
 -
I don't know where I got that "AM" from when I started this thread, it's an RS Propmasters kit. Perhaps I was thinking of ANH... I dunno.1 point
-
I’ve decided to mod my BS stormtrooper helmet for more wearability so my glasses will fit inside I’ve taken most interior and electronic parts so far. I’m considering making this RO accurate but seems like a lot of work1 point
-
Trimmed the shroud and eyes a bit:1 point
-
OK So here's the hard work that's been happening this last week. Cape! I got the following pattern from the Captain Phasma Builders FB Group. Super helpful, if a little difficult to figure out without a legend. The measurements were originally in mm, I converted to cm and reduced by ~10%, since i'm not 6' tall. I used a white charcoal pencil to map out the placement of my panels - doing this I was able to triple-check my measurements and min-max my panels/fabric. With only slight adjustment, I managed to fit all 4 panels on 4 yards of fabric, in this orientation. I sewed the panels together, keeping a bit of length on them just in case. This is after extensive steaming/ironing. I used my pencil and roughed out my curve, this really helped a lot. The cats also helped a lot. I ironed & pinned the hems, following the CRL to make sure my sides were 1.25-1.5 inches, the bottom hem was double folded and roughly 3/4". I seamed all the pockets/straps (missing one in this pic). Then I sewed them down, doubling up the top stitches. Pinned the pockets down, ensured placement matched references as best I could. Yes, i'm adding a 2nd strap. Painted the long hem using cheap red gloss acrylic paint. I know some people use fabric paint, but I felt the acrylic looks better/more screen accurate. It took two coats. I then used Liquitex clear gloss gesso to give the shiny/waterproof look. This pic was after a first coat using 8oz jar. I should have just gotten the larger jar, I ended up going back and getting a 2nd for full coverage. On the second coating I mixed in some black acrylic paint, so I didn't get the hazy look - it's now full dark. Took the cape to a small build party, and had some garrison guys help pleat and clip some folds in to the neck area. Next i'm going to iron the pleats a bit more, clip my cape a bit more, and start to whip-stitch the pleats together to make sure they stay in place.1 point
-
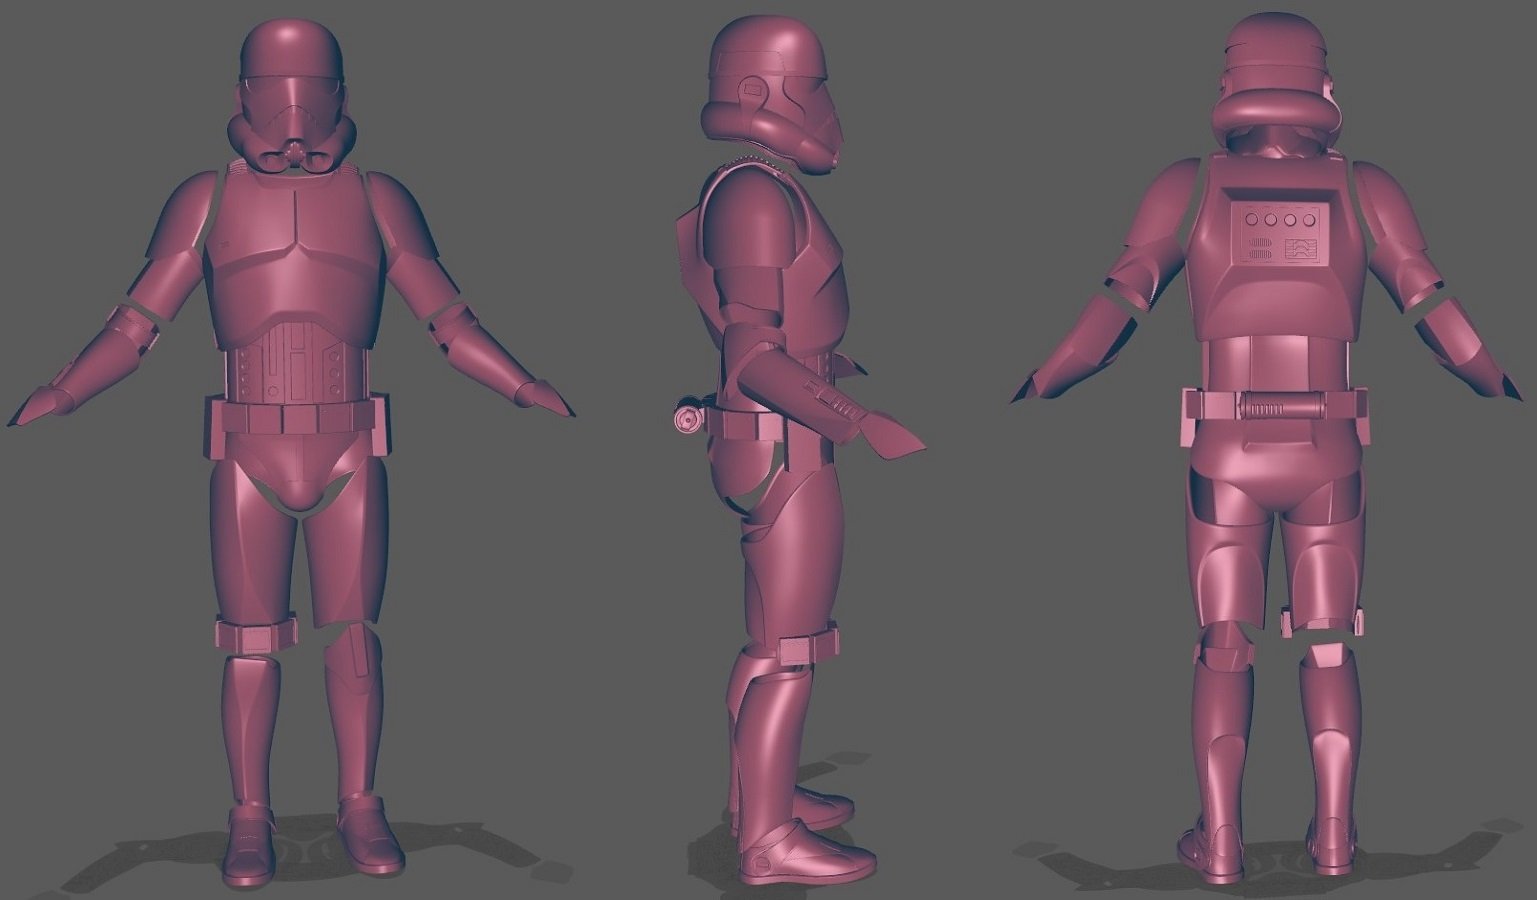
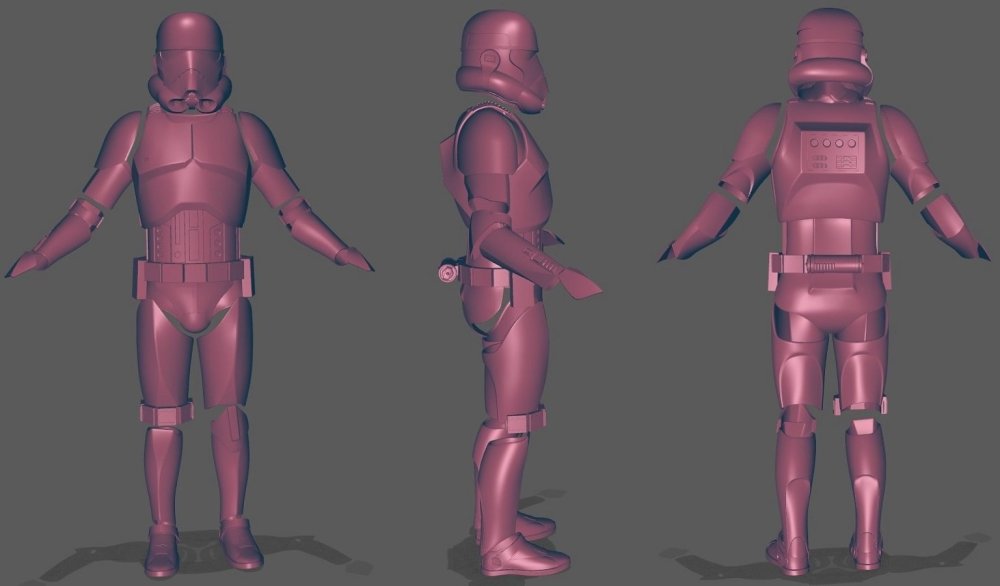
"I like to "translate" between artstyles. I don't adhere to an artstyle 100% when "converting" to realism or vice versa, hence the liberties I took." Don't worry, I wasn't knocking it! I wish I had started dabbling in 3D earlier though, I could have contributed when it was needed! Made a mock-up using all the files. some needed to be re-scaled to work but a full suit is now possible. As I improve my own 3d modelling I will improve upon the parts I made and maybe add more bespoke parts but for now, between you fine members on this thread who made the helmet, myself and the creators on Thingiverse who made the Clone, Scout and TK parts used we have the full suit.
 1 point
 -
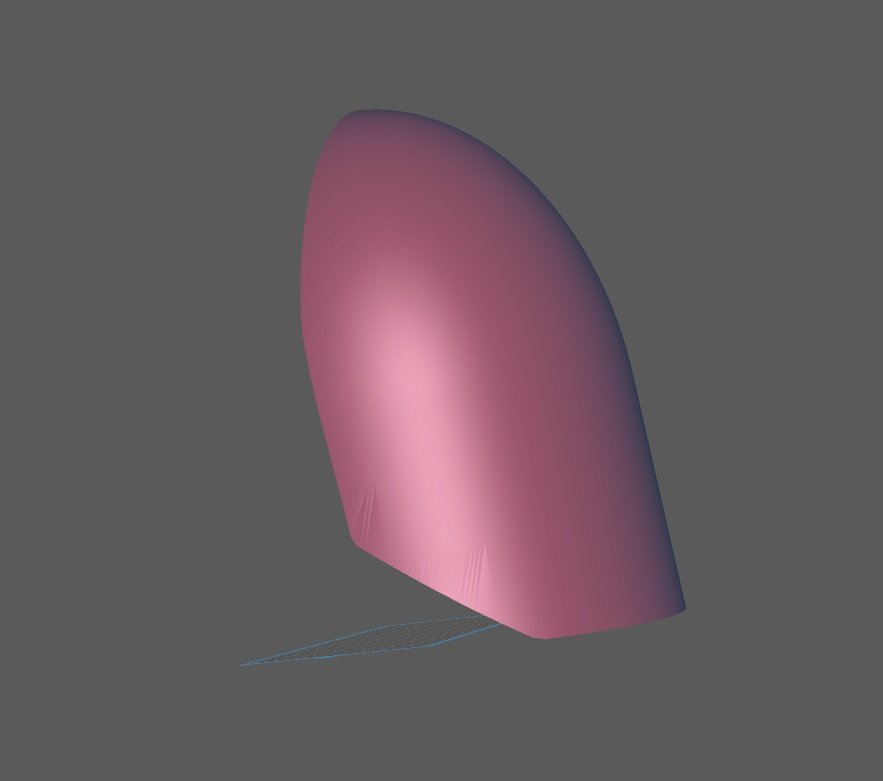
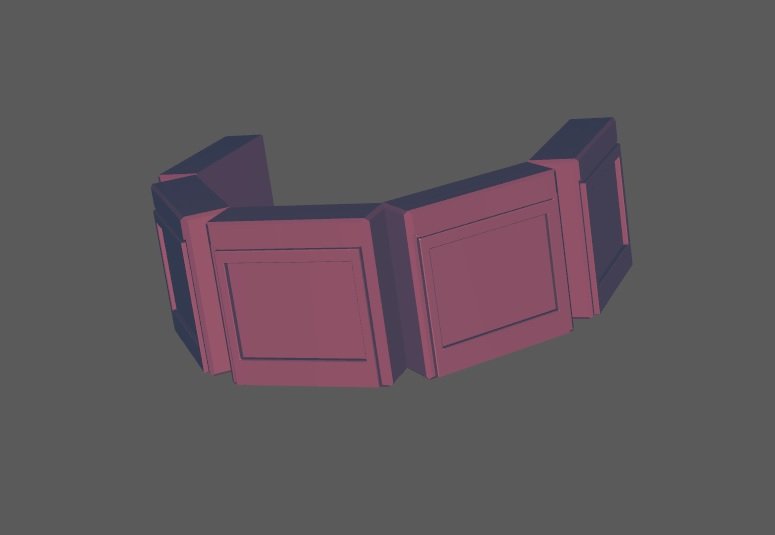
Hi, long time lurker new member. Despite being an absolute noob I have been trying to make the armour parts for the phase 3 trooper. Here are the parts I have made (Most are remixes and I have today added my first scratch made parts). They are not gonna be super duper accurate but more accurate than any existing versions. Right knee ammo, codpiece, shoulder, belt and abs/belly plate: https://www.thingiverse.com/jaztermareal/designs
 1 point
 -
Mod is done!! I gave credit and linked to this website. Hopefully the mod manages to get pass the sussy files stage on Nexus. Anyway I want to say a major thank you to this little forum. https://www.nexusmods.com/starwarsbattlefront22017/mods/8108/?tab=files1 point
-
Greetings fellow Troopers, A few months ago, I finished a T-21 scratch build using templates from Pandatrooper. He did an amazing job on both the templates and the instructions. I was looking for something similar for the DLT-19. As many of you know, there are some blueprints available. These schematics do a nice job showing scale and detail, but they didn't provide piece by piece cuts. I guess I was looking to be spoon fed. Using these blueprints, I made my own simplified templates that can be applied to wood and PVC pipe/couplings. My goal was to construct a sturdy DLT-19 using standard hand tools with parts that are readily available. You will notice that there are some details missing, such as a trigger, sights, T-tracks, and other small greeblies. I left the trigger and sights off because I plan to troop with this thing and it will get thrown around. I was afraid those parts would snap off or get caught on something. If you decide to construct a DLT-19 with these templates, perhaps you can improve on the design. I've seen a few other scratch builds on here that are MUCH better than mine. I guess you can consider this a simplified version. If you find ways to improve the build, please share with the class! Before we jump in, I'd like to give a shout-out to Astyanax here on whitearmor.net. I used some of the ideas from his build (found here). Specifically, the mouthwash cap for the endpiece, and shelving brackets for the bipod. The trooper that drew up the MG34 blueprints is also a member here. If you are reading this WizardOfFlight, thank you for the awesome blueprints! Without them, I wouldn't have known where to start. Instead of writing up a bunch of steps with photos, I made an instructional video. It gave me a chance to play dress-up and incorporate some cheezy special effects. It's a DLT-19, there's a lot going on, so the video weighs in at 30+ minutes Here is the video: Here are some pics of the finished product: Here are the ingredients: DLT-19 Wood/PVC/Plastic templates http://wp.me/p6OqN2-1se FREE 1” x 10” x 6’ (actual: ¾” x 9-¾” x 6’ ) premium board http://low.es/2kW8vw5$10 1-¼” PVC pipe (2 feet) http://thd.co/2lCSM43$4 4 x 1-¼” PVC couplings (Home Depot couplings were more uniform on outside) http://thd.co/2kz0yMo$3 1” x ¾” PVC adapter http://low.es/2l3hUnX$1 (Lowe’s has wrong pic on the site...product number in the link is correct) ⅞” wood dowel http://low.es/2kksX7O$4 Plastic sign http://thd.co/2l3qALi$5 Shelving brackets http://thd.co/2kGRszu$6 ½” type LB conduit body http://thd.co/2kki7Pc$3 ¾” corner braces (2 packs) http://low.es/2hID3hB$4 Mouthwash cap (large) local Grocery/Pharmacy ~3$ 1-½” PVC conduit clamp http://low.es/2l8Uj4Z$2 ½” #8-32 flathead machine screws and nuts http://low.es/2iIIyOZ$1 2” #8 wood screws http://low.es/2kksAuj$1 2” #10-24 round machine screws and nuts http://low.es/2kgC3ra$1 ¾” #12 oval-head sheet metal screws http://thd.co/2kH4pJV$1 ¾” #6 oval-head sheet metal screws http://thd.co/2kktXJa$1 #6 finishing washers http://thd.co/2lEocYK$1 ½” mending plates http://low.es/2lCRczh$4 #10-24 rubber well nut http://low.es/2kWn9Dv$1 ⅜” #6-32 round machine screws w/ washers & nuts http://low.es/2kgDxl9$1 ½” #4 pan head sheet metal screws http://thd.co/2h4Ikox$1 ¾” chicago bolts x 4 http://low.es/2kH3EjY$4 ½” chicago bolt x 1 http://low.es/2kkq1Z7$1 ⅝” or ½” #8 oval head sheet metal screws http://low.es/2l7O8yd$1 1” #6 oval head sheet metal screws http://low.es/2lD7zfr$1 ½” #8 machine screws, nuts, and finishing washers used to fill the holes in the shelving brackets $1 Approximate cost of materials: 66$ Finishing Materials Bondo E6000 adhesive Elmer’s Wood Glue Sandpaper (60, 120, 220, 400 grit) Friction tape #0000 steel wool Graphite powder http://amzn.to/2lFq4R7 Rustoleum Painter's Touch gray primer spray Rustoleum Painter's Touch flat black spray Rustoleum Painter's Touch metallic aluminum spray Satin clear spray Polyurethane in satin finish Tools Jigsaw http://amzn.to/2klqxGd Dremel http://amzn.to/2lFpfrB Drill http://amzn.to/2klyStp Drill bits http://amzn.to/2kluKtE Hacksaw http://amzn.to/2l8Vl0R Files & rasps Screwdrivers Lexan scissors http://amzn.to/2klB5Fi Star Wars pencils! http://amzn.to/2l4wHz0 Airbrush (optional) http://amzn.to/2l4x7VV Hope you guys can improve on the design. If I add any additional templates for the build, I'll put them in the zip file in the d/l link. Thanks for looking! This build does take some time and patience. Your hard work will pay off in the end, the DLT-19 is a beautiful weapon!1 point
-
Mic tips painted, mesh added and installed. sanded the edge of the white screws installed on the bottom1 point