Leaderboard


Popular Content
Showing content with the highest reputation on 11/11/2021 in all areas
-
Browsing various threads here, I noticed something about my bucket... BEFORE I didn't do the best job of painting my vocoder. It's not terrible, but there's room for improvement. The AP helmet is pretty soft in this area and the vocoder isn't well defined. I struggled with figuring out what to paint... 2 years ago. When this build started. heh. Also, the hovi tips are not so white. Again, not terrible, but could be improved. These are the built-in-speaker tips from Ukswrath, which I really really like. They just need a bit more white. AFTER! While maybe still not perfect, this is a LOT better IMO. Worth the half hour of careful painting, measuring, and repainting. I also redid the inside of my bucket. I want to get the SHA and headphones built in and working, so I needed to move some stuff around. The ICOMM and amp used to be basically next to my ears. I had some padding at the top that was making the helmet flop around. And the USB battery used to sit in the very back, which caused the helmet to always be slowly pivoting backwards and obscuring my view. Everything now fits better and it's much more comfy. Happy with these small changes. I managed to drop my Hyperfirm and the counter popped off. It was held on by standard CA glue which was pretty crusty and sparse. Black stuff to the rescue!!! I sanded down the blaster side and matching side on the counter to remove all old CA glue. A quick coating of black stuff... Repaired. Hopefully much more resilient than the old crusty superglue. And finally, more magnet boxes from @Scimitar! These ones are in a slightly sexier black, complete with shadow trooper-sourced ABS covers. These are going on the other side of the torso to keep alignment correct. And since there's far less visibility on this side, I installed them a bit differently. Each set of magnet boxes got polarity and positioning figured out, then set aside. Then I sanded and E6000'd the area and all boxes. Next, I installed a box on one half of the armor, being very careful to line up the seem edge with the box edge. Some blue tape was applied to keep the box from shifting forward when it's buddy appeared for glue-down. Finally, I added the matching box, applied a little force to keep them in place temporarily, and repeated on the 2nd pair above. Located, glued, placed, and clamped. And there they sat another 2 days. Everything was dry enough tonight that I got to try things on and inspect the alignment... and it's just epic. No bulging. No gap. The belt doesn't skew anything. Nothing but perfection. These magnet boxes are something else. Huge thanks to Eric for sending them. And, well, everything else in this build. It would still be in a sad brown box in storage if not for him.2 points
-
This is very informative. I like to communicate on topics for which there is no definite answer, as well as any question about the definition of true evil and good. And this example with the bright personality of the character of Darat Vader, the character of the Star Wars universe, is an excellent example of this. I am interested in understanding psychology different reviews help very well on this issue. I was very surprised to find out how many problems can be solved this way.1 point
-
Oh man that's pretty cool and totally helpful!1 point
-
I see someone hasn't been exposed to the Star Wars Christmas Special! [emoji38]1 point
-
Wow, Richard your Gadget Man. Very impressed with what you have achieved. Awesome. Love the tunes except for the last one. What’s that all about ‘peace’?? Had to laugh. Well done m8. You’ve got skills. Sent from my iPhone using Tapatalk1 point
-
Basically finished, except for a bit of paint touch up, and at some point I'll replace the internal USB cable so that I can use it to reprogram rather than only use it to charge the battery. Comments and suggestions welcomed [emoji106] -----------1 point
-
I dunno if this helps, but it's how I did my shoulder bridges. Small bits of spare ABS to fill the voids. I slopped them in there with E6000. Then, while the E6000 was still curing, I added a piece of aluminum stock from Home Depot. I used the thinnest they had, which I think was 1/16 if I remember right. Glue in place and don't let the aluminum go all the way to either end of the bridge. Having a gap at the end allows you to heat and shape the ABS slightly to hide the metal completely. Last, I covered with fuzzy velcro. It's extremely easy to reshape this way and it holds whatever shape you bend. Other troopers have used this sort of metal shoulder bridge for years without problems. Hope this helps! And congrats on the snap setting.1 point
-
Note sure if you still need anything at this point, but I can send you the 3D files in .step format if you'd like. Just keep in mind that most of them will have edge fillets 'baked in' which might get in the way.1 point
-
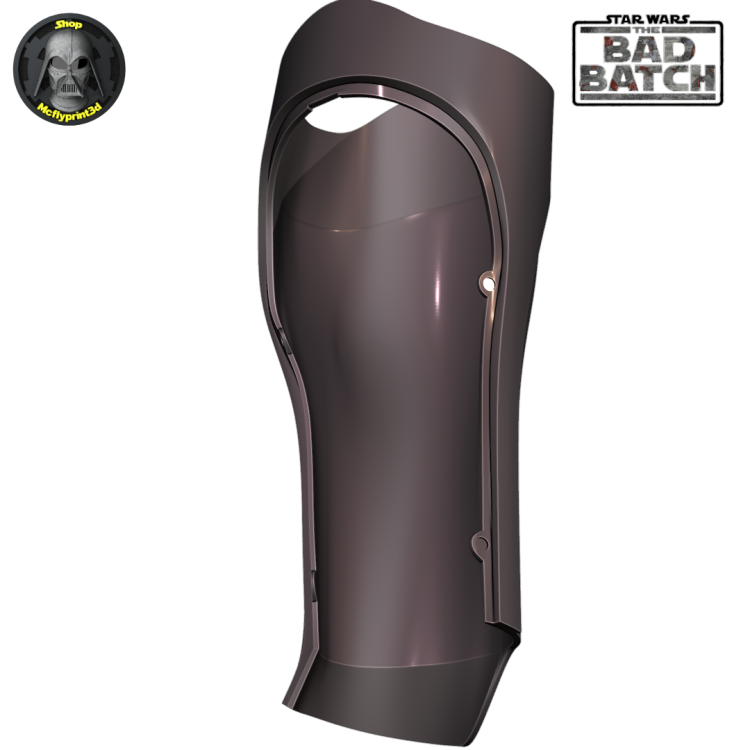
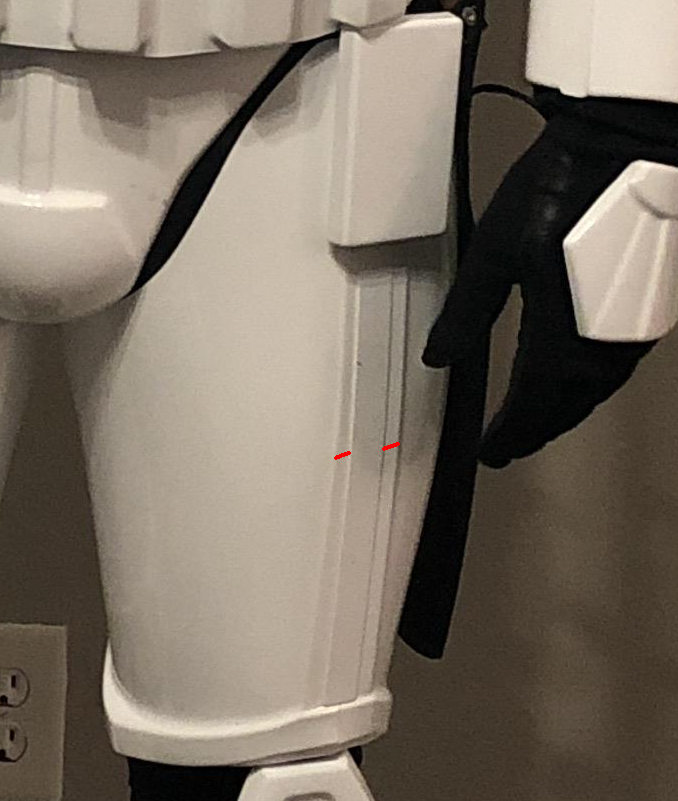
Looking good. Sebastian added some magnet recesses to the shins, 2 at first with a tab at the top and I asked if he could add a couple more, they are only 2 x 8mm so not sure how strong they will be I normally use a little larger magnets. The other issue will be once there is some paint on both pieces how the inserts will fit, again its just a case of trial and error. Extra magnets
 1 point
 -
I have officially purchased my kit from Armor Masters (AM) and am excited to begin my journey!1 point
-
Hey guys! I'm not dead! lol 6 months of chemo and some TLC later I'd thought id post an update. So far its looking like I'm in the clear. Had 2 doctors appointments checking in with scans so far and they have come out good. Hair is growing back and I feel like my old self again except now I weigh more D: So before I can get going on my armor again I need to lose the stomach. But I'm still here! Missed out on the Centurion stuff I know...but thats okay. My #1 goal after all was just to get my armor finished and approved! One day it'll happen!1 point
-
Well , I got my 501st approval today , our garrison GML got back to me this afternoon and I had an email shortly after.. Say hello to TK-70921 :-) .... I will be submitting on this forum later today and then start work on some fixes for EIB :-)... A big shout out to all of you for your help and feedback , still more work to do but at least got my basic out of the way!1 point
-
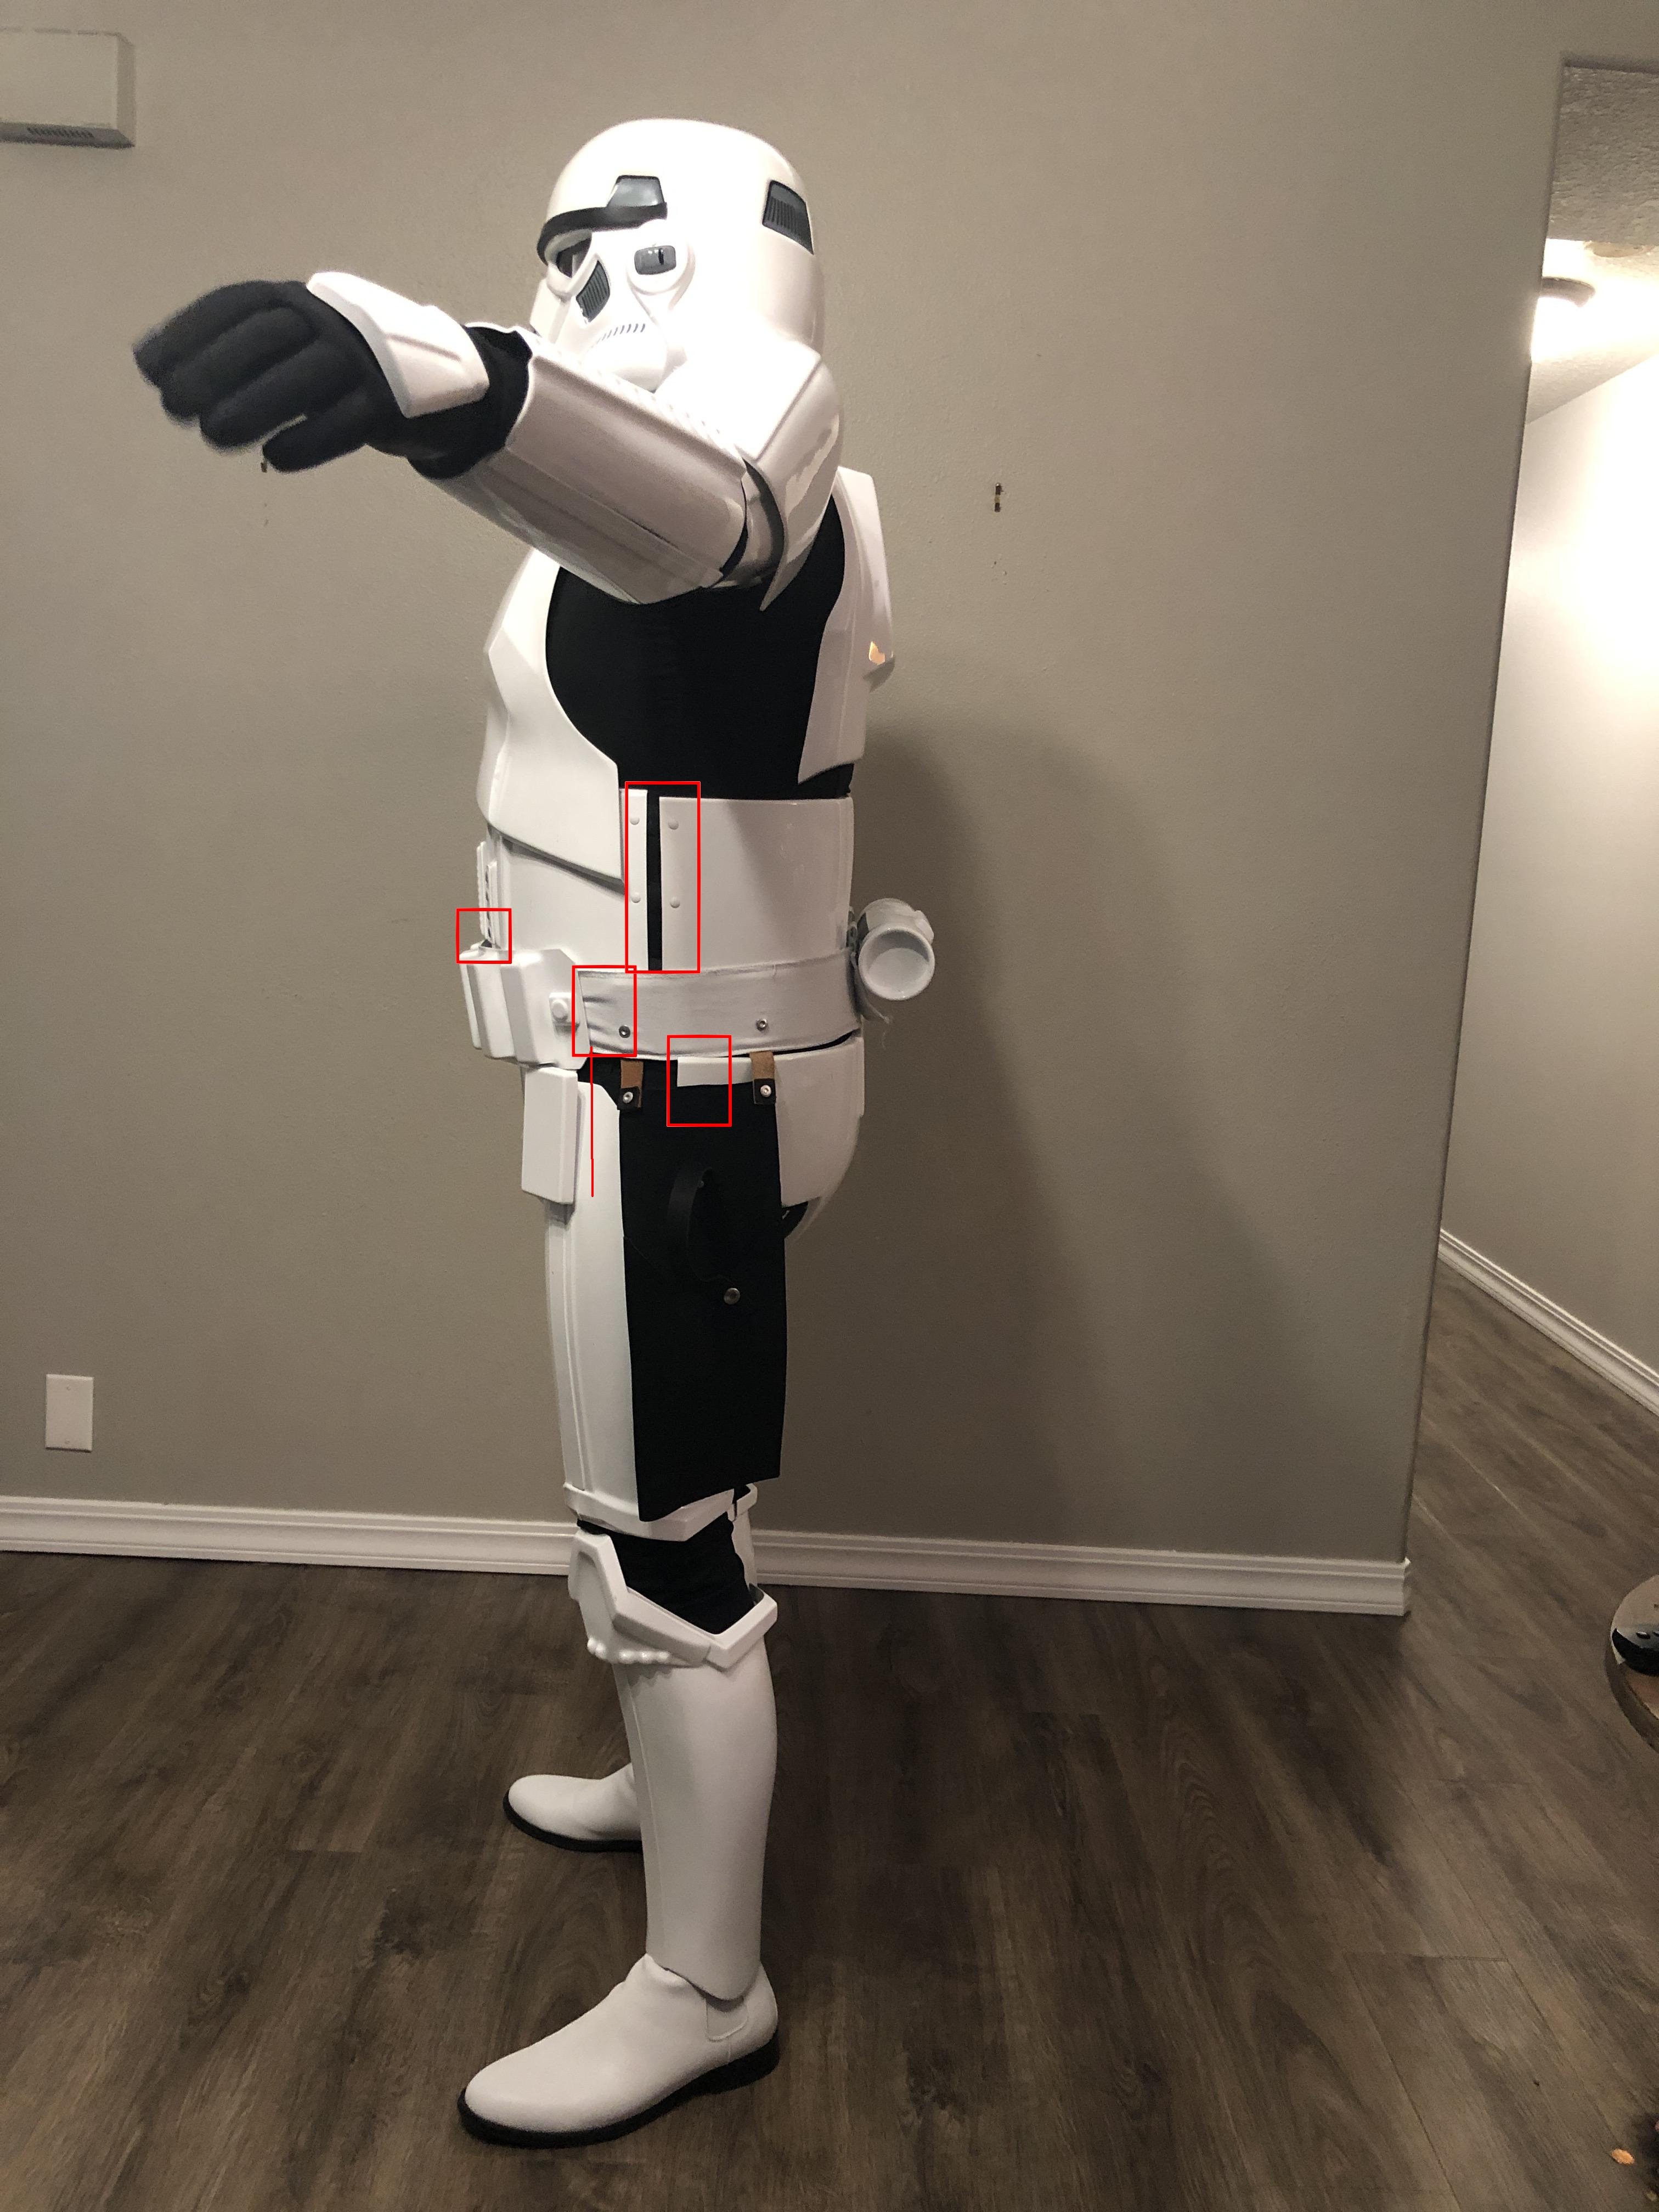
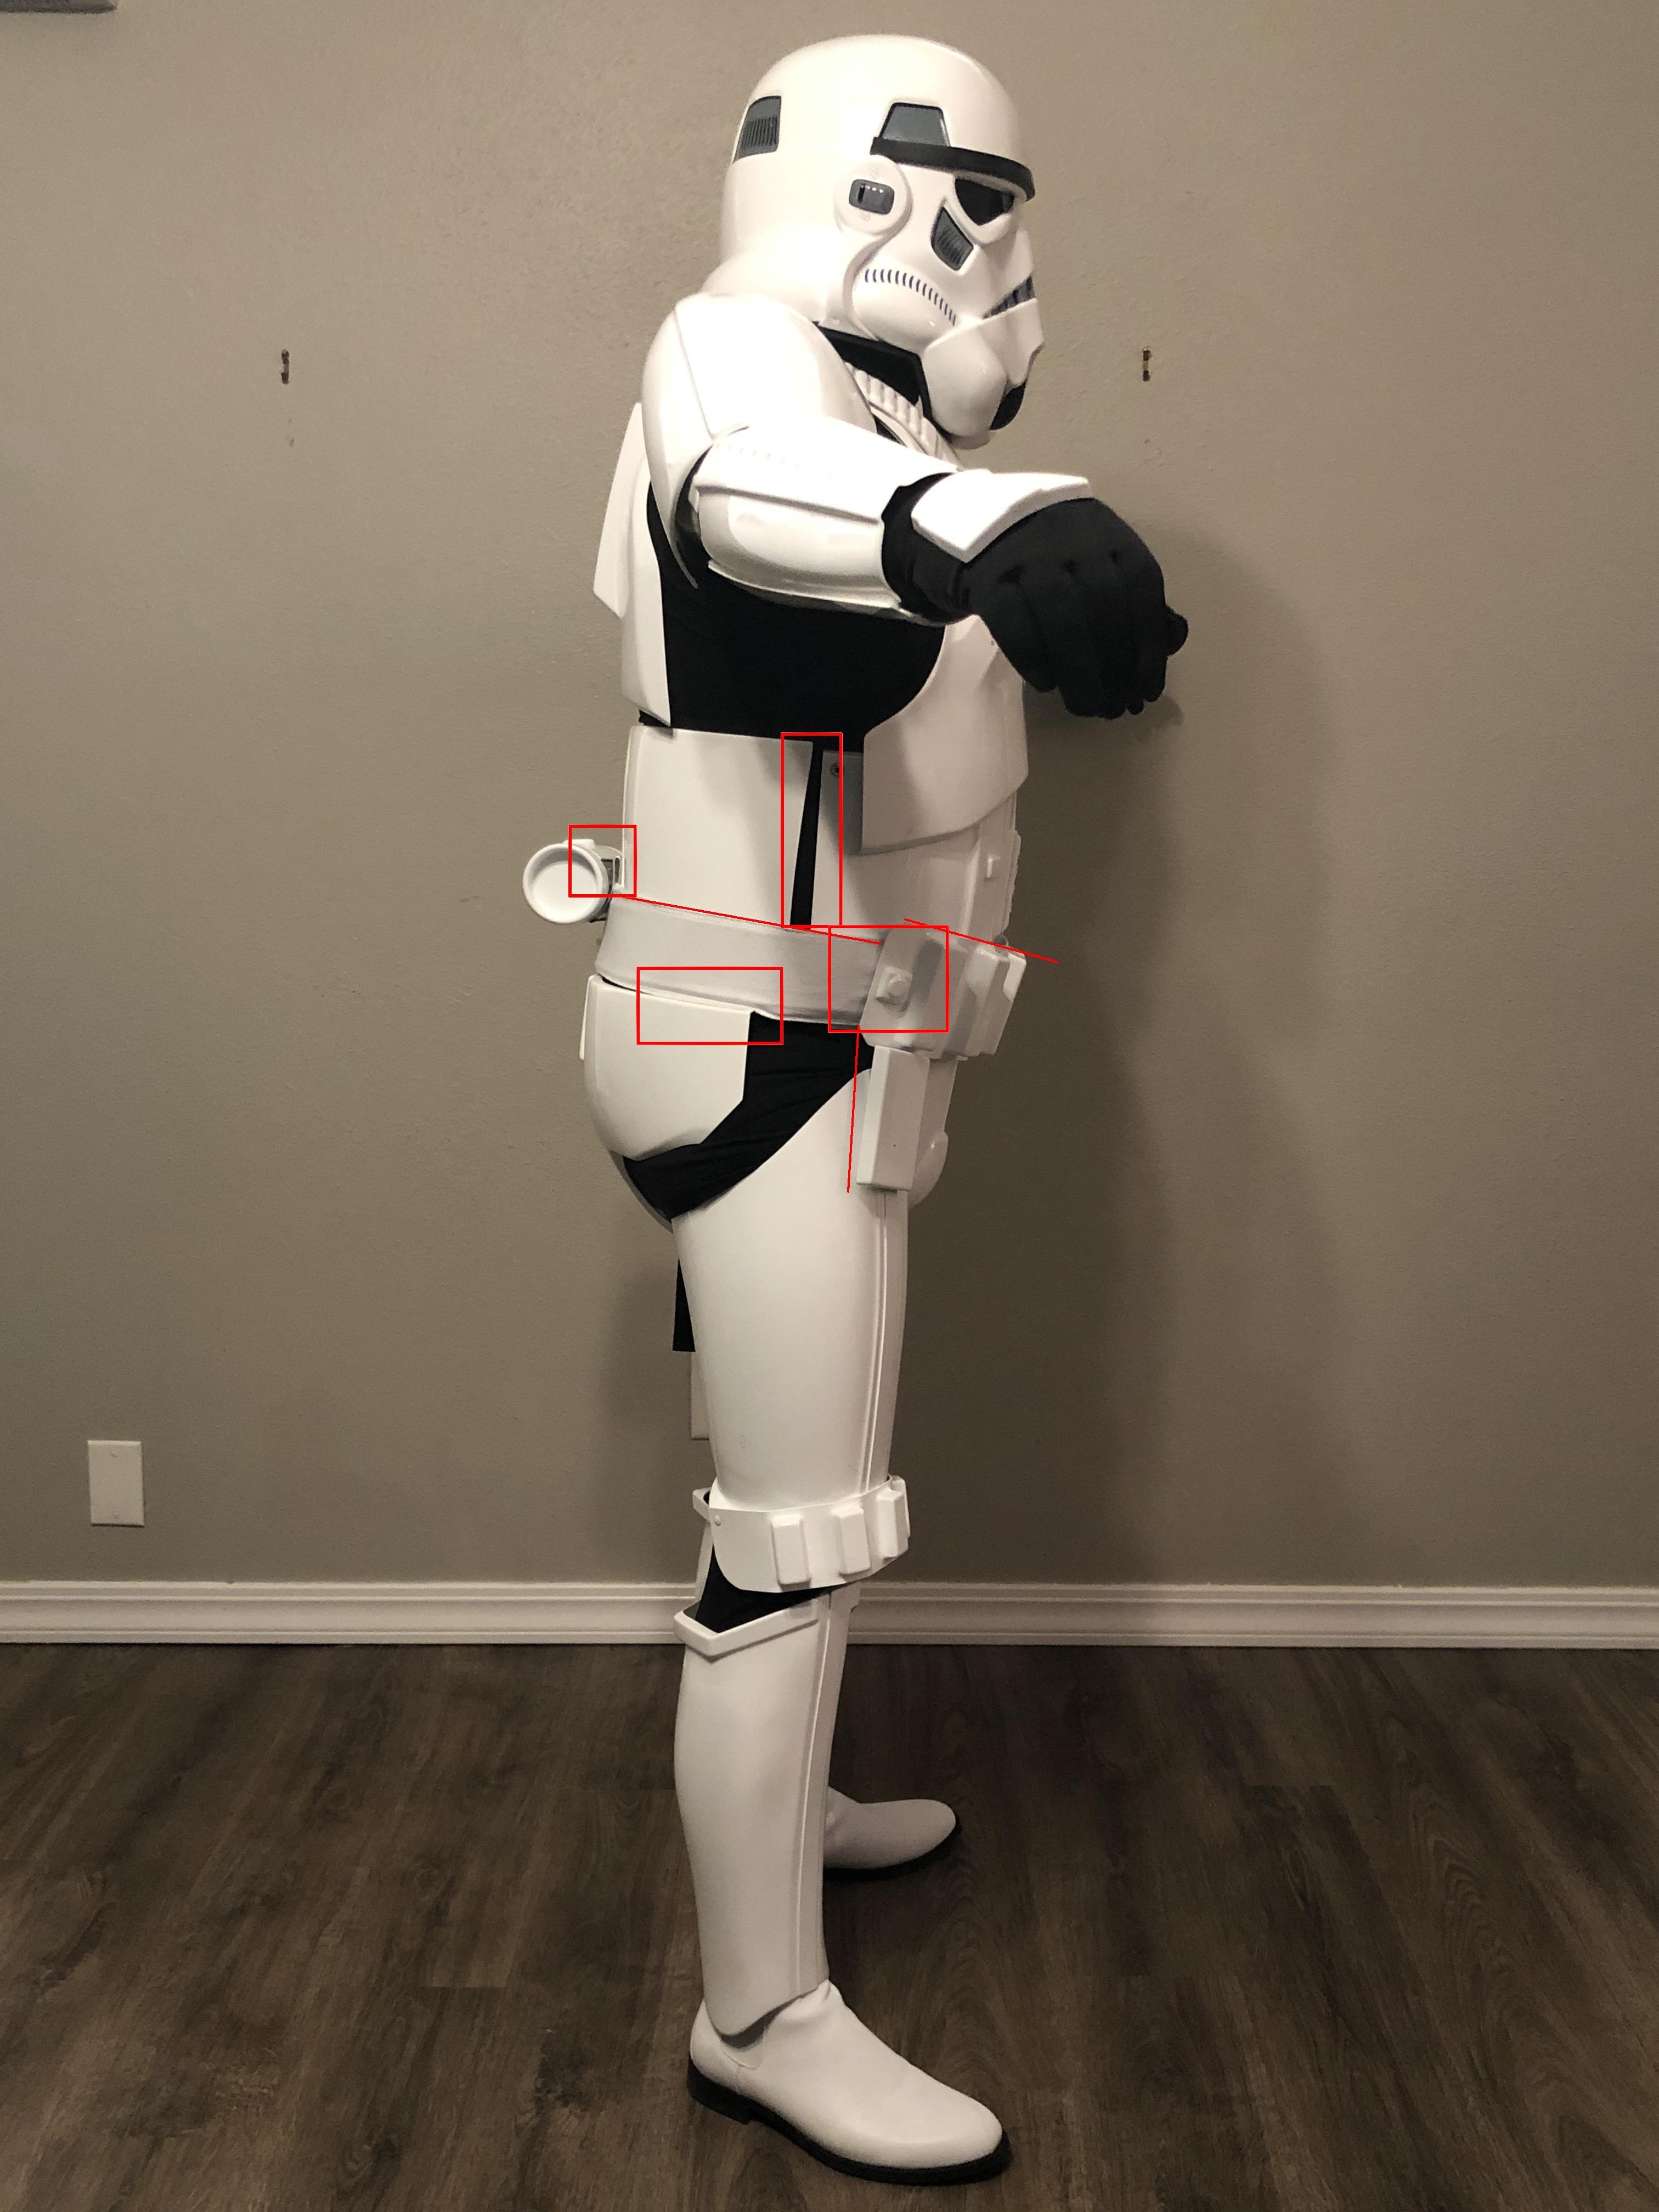
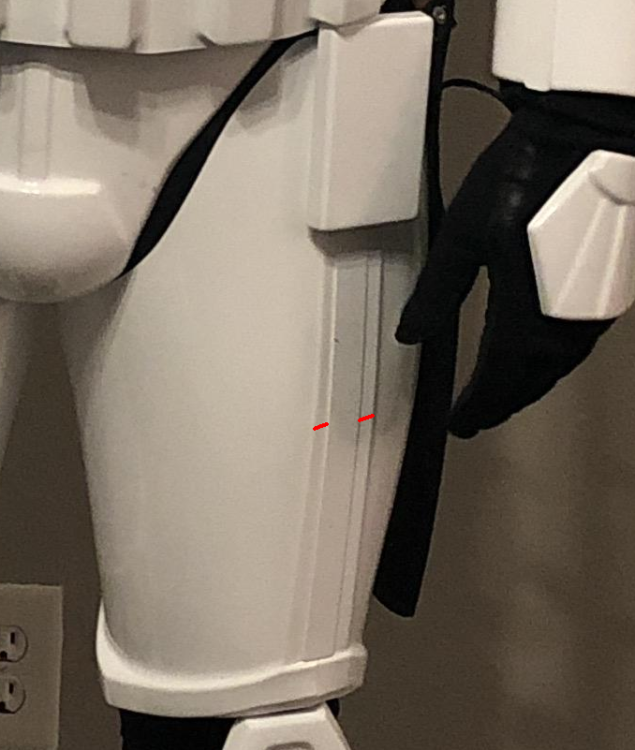
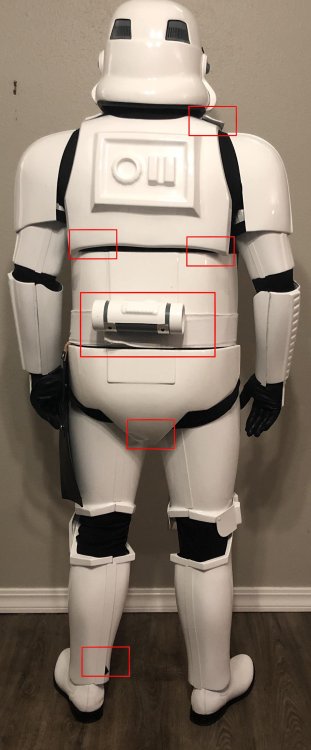
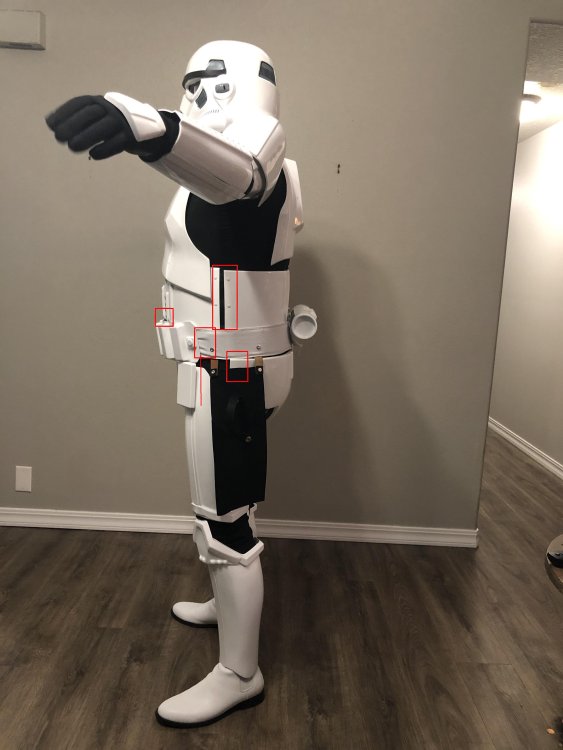
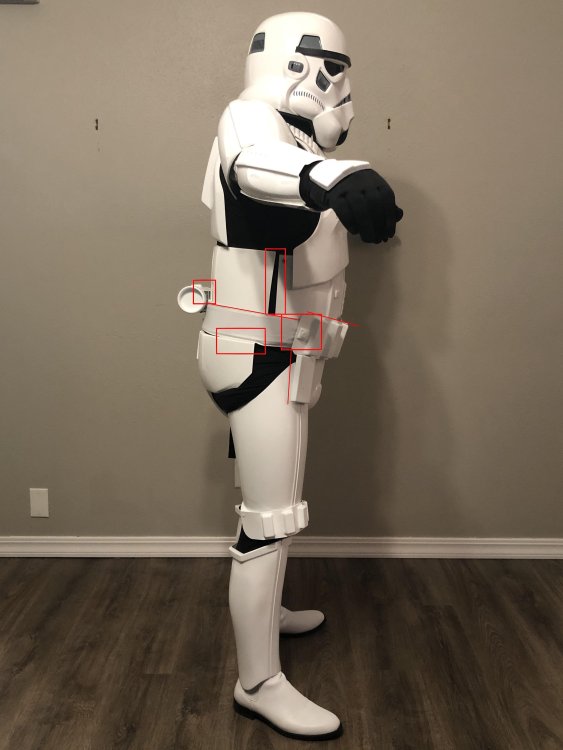
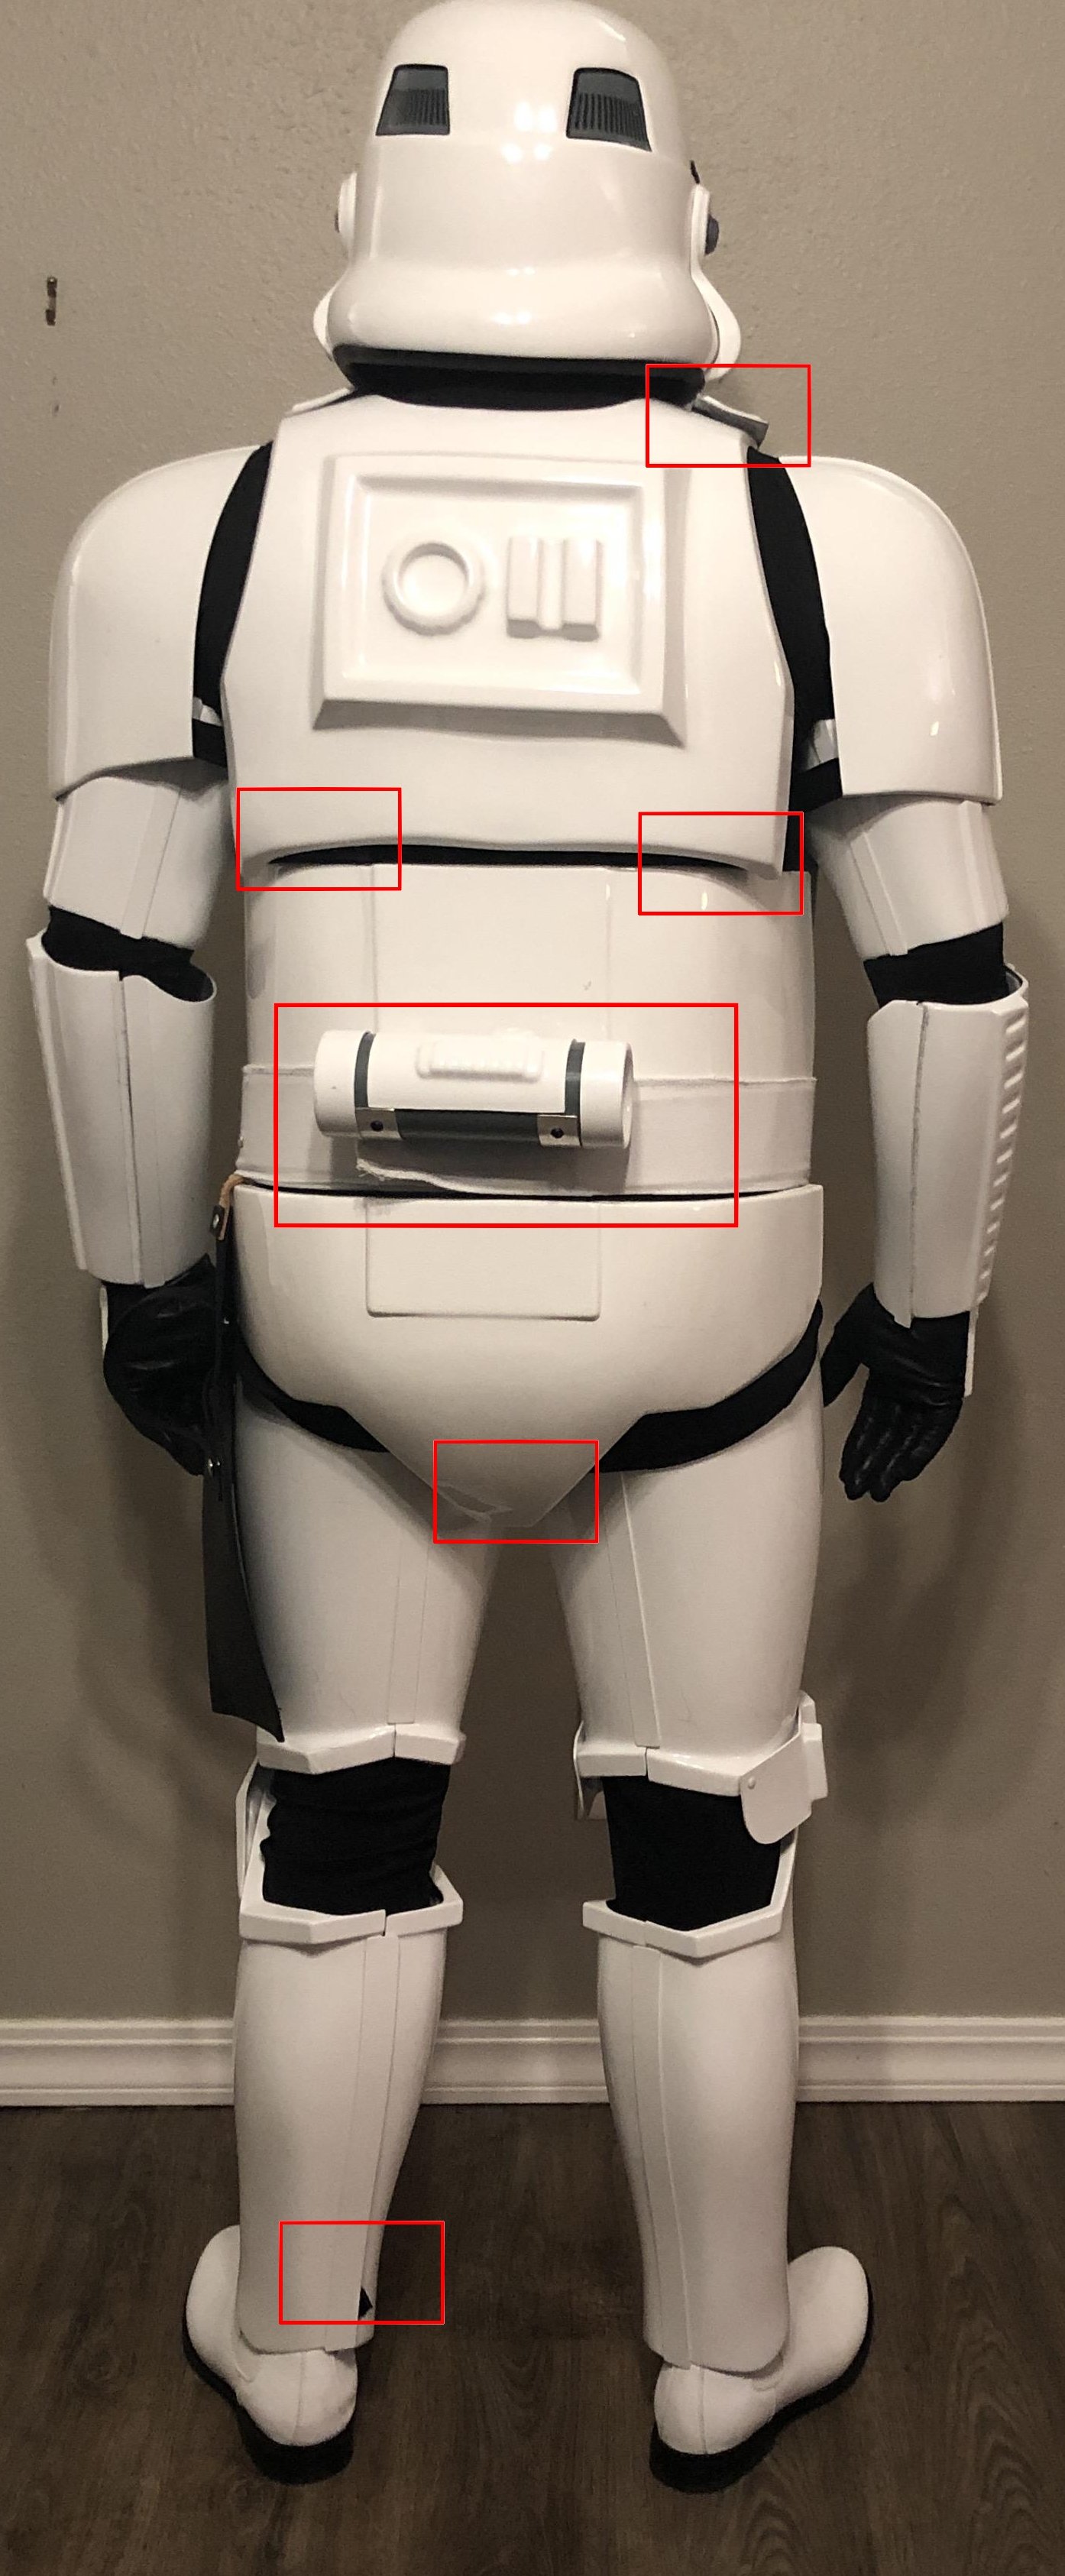
Looking good, just a couple of minor dressing/fitment issues, also a few things for higher levels you may want to adjust but should be ok for base approval: I would drop your forearms a little, they are touching your biceps and you also have a large gap at the wrists. Belt could come up a little, should either touch or be just under the last button on your larger ab plate. Thigh is hitting your sniper plate, adjust the gap or add some foam behind the sniper plate to help push it away from the thigh. It also looks like you have more gap on your shoulder bells on the left side to the right, could even these out Ideally with cover strips we try to cover all the raised section, yours stop short on the thighs, may not be an issue for base approval but may be mentioned at higher levels Plastic belt section is on a lower angle than the fabric belt. Also noticed your belt button covers are a little thick. Ideally there should be no gap between your ab and kidney but shouldn't be an issue for base approval Drop boxes aren't quite in line with the end of the plastic belt. Noticed your butt plate is just sticking up over the belt, using tighter strapping or adding V tabs may help You have some bunching/wrinkling on the belt at the end of the plastic section. Detonator isn't sitting central, also a bit high and could be rotated to see more of the O detail. Also check the dimensions as there doesn't seem to be enough gap between the endcaps and control panel Backplate being pushed away, may need tighter strapping. Could also get the rear of the shoulder straps to sit against the backplate. Butt plate is sitting very low, you may need tighter strapping between the butt and cod, as is you may hit your thighs when moving. There is also some undersuit showing bottom of your shin closure The vocoder center rise is a little higher than the others. Also double check there is not paint on the gums, a couple look very close Bottom ear screw head on an angle, not flush with ear End of brow trim on helmet is sticking upwards, not so bad on the right but left is a lot. May be the hear is sitting too high. Also when taking photos try to rotate your legs straight so your coverstrips are centered Normally a gloss or satin black is used on the blaster, shouldn't be a problem for basic Henglster is sitting too low Once again great work and good luck with approval
.thumb.jpg.1cb432626d44ae0325d1b815fb45b6e5.jpg)
 1 point


.jpg.f0eb47852d4cf2743e47e0da32563b32.jpg)