Leaderboard


Popular Content
Showing content with the highest reputation on 10/07/2021 in Posts
-
Tried the under suits on (3 came with the purchase). I was surprised that I had to go with the XL size! The sizing in the UK is obviously different than the USA. Here is the obligatory pic of me in it. Tactical vest and the upper gaskets3 points
-
Hi guys and thanks for the suggestion, I finally managed to add them2 points
-
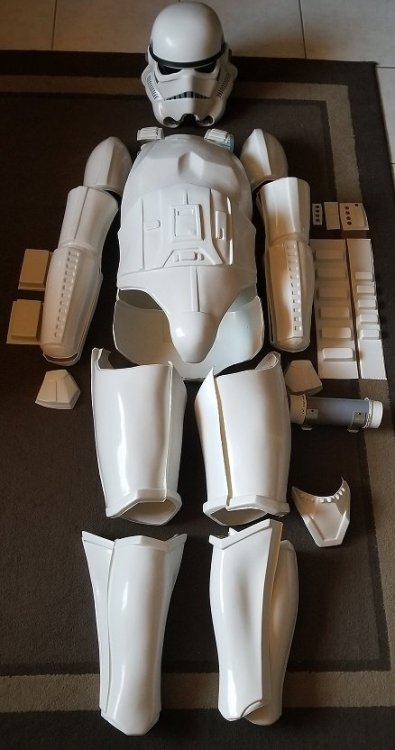
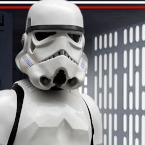
I've been reading and learning about TK builds and how the ISD helps along the way. The amount of info available here is amazing. Thank you for what you do here. This is my second 501st costume build. My First is ROTJ Boba Fett Hero that I built after being laid off in 2020 due to COVID. I've been trooping as Boba with the 501st and loving every minute of it for almost a year. The 501st will not allow more than 1 of the same character to troop at the same time. (Ex: not allowed to have 2 Vaders or Bobas or you get the idea.) You can have as many TK's as you like though. So, I decided to build a TK allowing me to go to more troops. I've got a good start on my build. All of the parts are in hand except the E-11 which is being built by Quest Designs and the belt since I won't know which size to buy until the armor is assembled. I commissioned my helmet build from Trooper Master and he did an amazing job. I am adding the fans, sound system, upgraded lenses & padding. I also painted the inside black with Plastidip. I've trimmed all of the armor and am ready to start gluing it together with E6000. A good friend of mine built 2 TK's to Centurion Level, one is a sand trooper. He is guiding me through my build. My goal is to get Centurion approval. After building a Boba Fett this should be fairly straight forward. (I hope)
.thumb.jpg.6b027198eeb5507e40dc5a6b30cdb907.jpg)
 1 point
 -
This update is based on this thread: I've spent some time this evening editing the @The5thHorseman files to update them to TLJ specs. I've used Fusion 360 to do this with the new mesh workspace updates. This wasn't too bad, having access to the source objects or STEP files would be better but the new space is pretty good. Previously I used Meshmixer for things like this but it's now discontinued and the features are being added to Fusion. This actually makes things a lot easier as I have access to the normal modelling tools to make the objects to amend the mesh's with in the same workspace. It also seems to crash less. Some edits are basically invisible and you won't notice any of them as edits, others required me "fudging" things a little so there are small flaws but I doubt they will even show on a print. Time will tell on that. First up 2 extra holes in the front barrel, I have already drilled mine out so I may or may not actually print this one out as I'll also need to reprint the fins. Next the end cap. The TLJ version has the recessed section top completely removed. There are a few flaws to this one but they don't seem to show up in the slicer. The end clip is squared off. I'm not sure I have this correct as this change has the worst visibility in the reference. The biggest change is the rear barrel. The cocking slide has moved from the left to the right, the handle is not needed anymore, the "ring" around the barrel is also removed. This was the most fiddly and required making a few shapes to fill the old slide and ring, and also cut out the new slide in the right place. I also removed the internal feature from the old cocking slide and added it to the right for the new one. There are also some, but not all, the holes needed for my electronics, 1 hole I'll need to drill still as lining it up is awkward. The flaws on this one also seem to not be showing in there slicer. I'll start printing tomorrow if time allows.1 point
-
Hi Ultimately it comes down to your GML, however you are correct and a 2”+ coverstrip is not a good look so I would go the extra mile and shim regardles if your GML allows it or not. On a sidenote, I”m a GML and I would not allow it. Sounds harsh perhaps but that’s the hard fact, then I would of course assist the member untill the armor is approvable.1 point
-
Just been through all the brilliant images Glen posted to try and break down to a "final" list of differences that need to be applied to a TFA Standard F-11D to make it closer to a TLJ/TROS(?). I've not looked at the Heavy variant, but there looks like less/no real changes there. Changes to be made to a TFA F-11D to make it TLJ. D ring mount painted white not silver (metal) Rectangular D ring ( TFA not present) No cocking lever Cocking lever channel has swapped sides, now on right (same side as Hengstler) End cap full cut out on top front edge, not just a recess. Additional holes on top of front barrel at front and rear ~11mm diameter Picatinny rail and mount bracket on front barrel right side approx. half way down. "Dipped" ring into rear barrel just behind Hengstler removed. End cap clip squared off at end cap end. Edit: front sight is painted black not silver I believe that is everything spotted above. Looking at the image with the title "TROS No holes in top of barrel" I wonder if these are TFA style blasters as the cocking lever is back on the left, and there are no additional barrel holes. The only other "easy" to see tell would be the D ring boss and that's not visible. I've started on updating the Standard variant Horseman files as needed for this already (will post in my WIP when done)1 point
-
The thighs are the problem, even with gaping the front 3/4” so I can cover with a 1” cover strip, I still have a 2” gap in the back. I don’t think a 2”+ cover strip will be acceptable or look good. Would I be better off shining the distance instead?1 point
-
You can also gain some extra space (up to 3/4" or so) if needed on the biceps, forearms and tops of the thighs by removing all the return edges. Doing this is acceptable at all levels of approval and is screen accurate. Screen used armor examples One more trick is to add an extra wide interior cover strip first, leaving a gap that can be filled with a scrap ABS strip before gluing the outside cover strip on. This is just an example, but you get the idea. Always feel free to ask any more questions you have... we are here to help!1 point
-
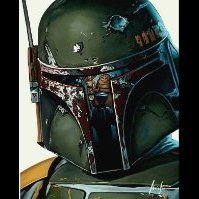
Also here are all my E-11s in various stages. Top: Kassaraptor, which will be the model I use for approval once finished. I’ve dismantled it here to cover with glitter then spray black as I can’t buy Hammerite or Krylon wrinkle paint here in Hong Kong. I hope to install BlasterFX in here eventually. Second: Premier Props 3D print that I’ve used mostly to wet-mould my holster. Third: A repainted Disney Parks Stormtrooper blaster from Tokyo Disneyland. It has light & sound including a blue Stun mode. Need to repaint it as too much silver is starting to show through. Bottom: A Doopydoo’s one configured as a Luke blaster so the scope is M-19 (Kassaraptor again and hasn’t been painted yet) and no Hengstler.1 point
-
Hi Mike, As a rule of thumb, front leg cover strips are 20mm wide approximately, you usually go a bit wider on the calves for the enclosure, say 25mm. Now in saying this, if you can keep the front cover strips close to this , you can go wider on the back to try and cater for a wider girth. I know plenty of troopers who went with 30mm on the rear of the thighs because they needed a bit more. at basic i would be surprised if a GML pulled you up on something like that. On the arms again try and keep the front close to or around 16mm which is very close to accurate, and again if you really need to slightly wider on the back.1 point
-
I can also recommend the Super glue 2 part kits. many troopers have used it with great success, myself included. My Plates are still attached to the rubber gloves now for the last 7 years.1 point
-
Your armour bags are a cool and quite novel idea, well done John. PS, love your videos mate.1 point
-
Where was this when I started? This is awesome!1 point
-
Very nice, love the labels, I only hand wrote mine, I may need an upgrade In case you haven't tried/tested just be careful using black material, sometimes it can bleed into the paint,, I found this with my first set of armor protectors, luckily it polished out with some auto compound polish, could have been humidity or slightly sweaty armor.1 point
-
Wow this looks nice l! I’m going to have to see about getting one of these. still waiting on my Hellhounds I ordered several months back, having another E-11 I can put electronics in would get great. -- UPDATE: Ordered one!1 point
-
And If you wan’t to take a look how I do it on my builds, look at page two I followed a great Troopermaster-tutorial.1 point
-
No worries, it was just a general suggestion1 point
-
Gorilla glue should work too, never used it myself though. Just remember to use tiny drops, that’s more important than any sanding. It’s always good to clean the glove Have you watched any building videos on youtube? Here’s one I watched ALOT before my first armor arrived. https://youtube.com/c/ArmorBuildingwithTK16361 point
-
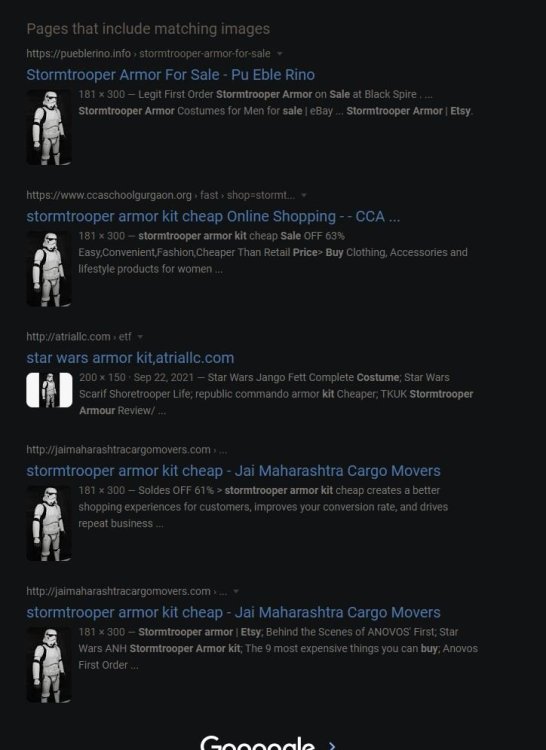
Wouldn't trust it, reverse image search shows it on several questionable sites, so its possibly not original or captured by the actual seller/owner.
 1 point
 -
I used this stuff and it worked great. You can find it at Canadian Tire.1 point
-
I'm currently waiting on an e11 I ordered back in March. The guy seems nice and I know quiility isn't an issue. It's just communications. At this point I just hope he's ok. I urge anyone that knows him or has his number to give him a call and just check in on him.1 point
-
FWIW the5thhorseman 3d file from here are TFA. to make it TLJ I drilled out the extra 2 holes and made a picatinny rail attachment. I hadn't noticed the lack of cocking handle but that will save me some painting.1 point
.jpg.f1bde59f619163301eb21351cc056138.jpg)