Leaderboard


Popular Content
Showing content with the highest reputation on 10/04/2021 in all areas
-
Hello everyone from Ukraine! We decided to take a couple of photos, I hope it's not bad.3 points
-
Hey joseph made one or 2 mods. Currently getting married so will post soon as wedding planning taken over Sent from my SM-G986B using Tapatalk2 points
-
Okay thanks I’ve made those changes, anything else?? Sent from my iPhone using Tapatalk2 points
-
well, it's been about 2 years since I put this armor project down and focused on other aspects of life and the 501st. After a squad mate sold his kit to another Vermonter I have some reinvigorated interest in finishing this project. Looking back through my parts I remembered that I need to replace the yoke and TD as well as my shoulder bells and possibly back plate. With two of us working on these kits again in VT I'm hoping to find a vendor to provide us both the parts at the same time. Time to start messaging vendors I guess. If anyone has suggestions as to who can ship parts fastest, I'd love to hear them.2 points
-
Oh, wow, these came out really great, good job!1 point
-
nice set of photos , looks cool !!1 point
-
[emoji56] Sent from my iPhone using Tapatalk1 point
-
I'm currently waiting on an e11 I ordered back in March. The guy seems nice and I know quiility isn't an issue. It's just communications. At this point I just hope he's ok. I urge anyone that knows him or has his number to give him a call and just check in on him.1 point
-
Hello Paul. You are doing a great job!!! As Glen says, lowering your forearms a little will improve your overall look a lot. You could also try to reduce the gap between the tops of the shoulder bells and the shoulder bridges. Reference images Again, congratulations , your armor looks great !!!!
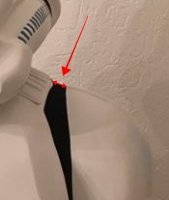 1 point
 -
That is a game changer! Keep up the good work. Rounding off would be good, just have to keep within the overhang limit of printer. I wonder if a little pre-bend might help for mobility as well.1 point
-
Great work! I just found your post as I was investigating battery solutions for the blaster. I tried 18650 cell and it fits well in the raise section and powers 3.3v arduino well. I was looking at using this, https://www.thingiverse.com/thing:2847497, before I saw your solution. I like your idea of the endcap magnet to connect to the main blaster. One suggestion on the magnets/screws, if you use non-stainless screws, you can align the magnets to attach directly to the screws instead of having magnets on both sides. Paint should cover the resin, might need a couple coats of black to remove the see through nature of the resin. I am using resin and tested with just adhesion promotor and 1 coat paint/clear and seemed good enough. I am currently working on modifying E11 blaster electronics to add F11 sounds and options for light and stuff.1 point
-
We can use my build for the TLJ blaster, just need feedback on what to fix as I go along. I will also have the separate tube for the TD.1 point
-
Confidence and ability come from a big pile of mistakes in my experience. You should see my "failures" pile in my work room!1 point
-
Thank you everyone I have been offline for a bit but I am back and have some dedicated time to continue my research. I am sure I will have plenty of questions along the way appreciate all the love and support already1 point
-
Requesting EIB Certificate Mark Gambino TK84212 A4 Mario (Can't believe I haven't done this sooner! Thank you!) No problem! https://www.whitearmor.net/eib/certificates/84212-eib.png1 point
-
Definitely having luck going one layer at a time, just going very slowly! Trying to finish up house stuff this weekend so my garage can be (relatively) dust free again.1 point
-
Requesting EIB Certificate (EIB 905) 1. First Name: Maria Katrina 2. Last name: Maloom 3. 501st ID (TK number) : TK18112 4. Paper size: Letter size 5. The name of the DO that did your final approval. : Daniel (March 2019) Thanks! My pleasure, Trina! https://www.whitearmor.net/eib/certificates/18112-eib.png1 point
-
Looks amazing Dan. Very impressive. Have you made any videos specifically about weathering? I've recently received my SE-14R from rdr, and it's amazing, but looks far too clean (If you consider in person workshops I'm keen and will bring snacks )1 point
-
Hi folks, I’ve reworked the weathering a little and added the white lettering to the M38 scope. With that in mind, I just HAD to take some new, swanky photos and share them with you all. For anyone that wants to learn a little more about the processes involved, and to see more photos of the finished blaster, here’s a new video: Thanks for stopping by. Any questions, don’t hesitate to ask. :-) Dan1 point
-
My current stage. Just waiting on my Blaster from sheartech. Sent from my iPhone using Tapatalk1 point
-
Congratulations, and can't wait to see the pics from your first troop1 point
-
Regarding the holes in the ABS paste: When I was filling up the thigh gaps it helped me to press down on the paste. You can find how I applied ABS paste on my build thread here: I hope this might be helpful!1 point
-
Well for the most part the 501st is an amazing group of people, you should at least reach out and get to know them. The good thing about a helmet is the fact that nobody can see you. Where are you from? Sent from my iPhone using Tapatalk1 point
-
Hey folks, I’m calling this JMC E-11 kit FINISHED.... (well, for now, at least) [emoji6] Yes, there are a few areas where I could go to town on parts, replace this, change that, however, this project was initially to see how the JMC E-11 kit (now known as “Kit 1”) was on delivery, how the parts went together, any feedback on how the production models of these could be improved. The only real additional part I’ve added is the scope rail (which I had already). I’ll do a summary video soon, covering various parts that I haven’t yet documented, however, my conclusion about this kit is that it is TRULY EXCELLENT!!! As I’ve said throughout, easy to work with, very well made and supplied by Marc at TroopaCoola, and an excellent final product with impeccable service. Get your order in today... [emoji6] Thanks for following the build. :-) Dan1 point