Leaderboard


Popular Content
Showing content with the highest reputation on 08/31/2021 in Posts
-
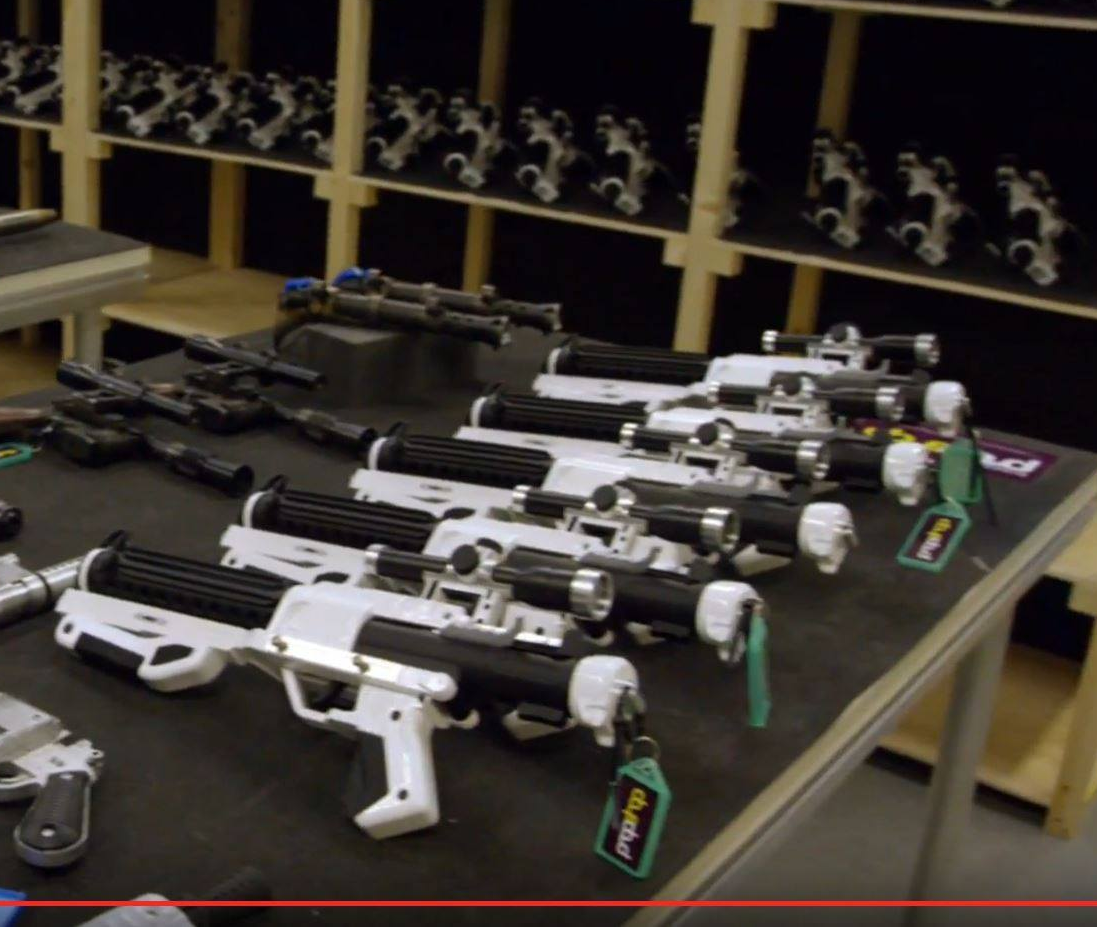
Oops. Forgot a couple pics... This is on of the magnets I am thinking of using to secure the top cover. The top cover just touches the tab with the drawn circle. I will drill a hole the size of the magnet, then glue the magnet on the lid. I will then glue another magnet under this tab. When I close the lid its magnet will slip through the hole and secure itself to the tab magnet. Should work: Blastech subsidiary contractor workshop:4 points
-
Yes ANH for the win! Although my fave movie is ESB, I had to go with the original that made me love star wars. I was really really pleased with how the RS Props kit turned out. They did an amazing job and made the months and months of saving up worth it. I am excited to make some friends in my local squad to learn about actually making some stuff from scratch. I'm not too handy, but I did used to make model cars and planes as a kid so I'm sure I can learn. I may just start with a helmet kit for display in my office to get my feet wet. I'd love to learn how to paint and weather things to make them look used and battle damaged. What skill!3 points
-
Last minute submission was PM'ed to me just after I locked the thread. I will be posting those images here my time tomorrow. Please note this is now closed so we can start the next steps3 points
-
Thank you to everyone who has posted photos for this project. I must say, we are blown away by many of the images submitted, there are some stunning photos and fantastic memories across these 5 pages. We will be moving into the second phase of the project over the next couple of weeks. That will be sorting through over 300 photos, and working out how best we can use what we have. As mentioned in the first post , if your photo/s is/are chosen, you will be contacted via PM by myself or one of the staff to confirm use and grab any other details we may need. Ultimately it would be great to use them all I just cant guarantee we can at this stage. As we get closer to realising the end result, the project shall revealed to all, so keep a lookout for updates. Thanks again everyone3 points
-
I hate my OCD and attention to detail... I'm doing some of the finer fit and detail work, and having to think of ways to fit the BlastFX kit in the DLT. Sooooo... I repaired and repainted the bipod legs and receiver body where cracks had formed at mating points. One bipod leg had actually split in half at the joint. This time I used super strong crazy glue. If you look close you may see a faint join line. I will now have to weather these areas again to match the rest of the blaster. Those oval openings on the legs overlap and fit over a conical bolt on the bottom of the barrel shroud (see below): You can see the hole I drilled in bottom of receiver to accept the fire selector switch (just down and rear of green tape): Fire selector switch: The BlastFX kit has two ways to switch between fire modes, a rotary dial and a push button. I like the rotary dial as I can use it to mimic a real fire selector on a gun. The little push button will be mounted on bottom of blaster forward of trigger grip as a backup. The only problem is the preset electronics for the DLT don't allow a stun setting. Well, they technically do, but to adjust the settings I have to cut open the heat shrink surrounding the main logic board, pull out a micro card, install in my computer, and toggle a setting. I learned this when contacted the maker about some wiring issues I was having. I had set stun previously, but when I sent my kit back for repairs, he upgraded the software and the Stun went away. If you know what you are doing, you can get on the files and make your DLT sound like any blaster in the SW universe. They are all installed on the chip! I may or may not open the circuit board up. I'm hesitant to open everything up as I have been having dramatic moments with broken soldering connections on some of the kit components. Slot cut in grip to hold rotary switch. Switch installed (for the pic). The mass of wires will feed up through a hole that I drilled in the receiver support tube. This is in a later pic. There is a small rounded indent in the receiver, just underneath this selector switch. Through this indent you could see the main structural tube of the gun. I just drilled through it. The selector switch will be glued to the rotary switch, then the slotted screw you see will be covered with epoxy and sanded / painted. Wires fed into the receiver. You can see the outer receiver wall, and the inner tube that I drilled through. I also drilled a hole for the trigger micro switch to feed into: For months I couldn't figure out what a little oval piece was. I then found a very good image of a MG34 bipod retaining bolt. It is on the bottom of the barrel shroud and holds the bipod up when it is folded and stowed. This plate is part of that assembly. The real gun uses a unique conical bolt that holds onto the bipod legs. The kit comes with a plain screw for this function. I ended up using a Dremel grinding bit. I originally sanded it down, but it wasn't the right shape and ended up too small. I have now shrouded it in epoxy and will sand it to shape. I also want to source some type of tensioned metal to fit into the bipod so that when I unlock the bipod it snaps open. Real MG34 bipod securing device (bottom left of picture): Better Pic:. Conical bolt to the right: Mystery oval that is not shown in instructions... Glued on. Paint touch-ups to be done...: My conical bolt version before epoxy: I popped out the large slotted bolt head I had installed in the buttpad. There were lots of loose and rough fibers along the edge: I filled with epoxy, sanded smooth and then painted the whole butt again. I'll get a finished pic later. T-Tracks: As I mentioned before, I am replacing the T-tracks with Wannawanga ones. WELL WORTH IT!!! You get 6 short (front) and 6 long rear). I have to trim the front ones as they are about 1/2" too long. Rears are just about perfect, but have to be cut to fit forward and rear of bipod attachment point. The barrel shroud is divided into 3 sections: a short section just forward of receiver. (don't really count this) a long section that goes past midpoint, and ends under the anti-aircraft site mount (rear section) forward section The next big project will be sorting out the barrel PEW-PEW lighting issue. If you remember from last weeks episode, the LED strip does not fit between the barrel and barrel shroud. Now same may say 'Leave the barrel out!" But then how are those blaster bolts supposed to maintain integrity as they leave the gun? I digress... I like the look of the barrel through some of the holes and it adds heft and structural strength. The barrel fits snugly into the front flash cone and gas block, through the mid A/A site mount ring, and into the forward receiver. It is supported very snuggly at three points. About 1/2 of the forward and rear the barrel shroud holes are covered by the T-tracks, but there are some that allow the barrel to show through. The LED strip is the exact length of the rear shroud, and there is not enough wire to move it forward. The lighting effects will only be present at the rear of barrel. So, I test fitted the T-tracks to see how much of the holes I would see by placing little balls of poster putty and tacking them in place: Diagram from the DLT main forum page: Rear tracks in place. You can see most of holes at 12, 10 and 2 o'clock positions.: Bottom of rear section, just behind bipod securing device. The long tracks for the rear still have to be cut in half to fit forward and behind the bipod device. You can see the bottom holes (5 and 6 o'clock positions) are almost totally covered up, The 3 and 9 o'clock are completely covered. : I made note of which holes I will hopefully see lights through, removed the tracks and circled onto the barrel with a Sharpie: Barrel removed and all the circles I will drill out: This is the bottom of the barrel. The long rectangle is the length and with of the LED strip. I will cut it out and the lights will shine upwards into the barrel and hopefully out the holes. There are lots of different programmable lighting options. The one I will use has the LED's lighting up sequentially, so it looks like a blaster bolt moving to the barrel tip: Well, that is it for now. If feels good making at least some progress on this beast. I really want to get this done so I can actually be Han on the Death Star in my Hero TK...3 points
-
Hi All- Charles here from StL, MO. I just submitted my armor (RS Propmasters ANH Stunt) to my GMLs for review. Till I get word back I thought I'd stop in and say hello. This has been a dream of mine for the last almost 20 years or so, since I first stumbled across the 501st and realized I could one day be an actual stormtrooper. Back in those days there wasn't much online to reference how to build. Plus to be honest I didn't have much money back in my 20s lol. Now in my mid 40's and my kids are grown I'm finally ready to jump in to your awesome world. I purchased a full commission set for RS and my profile photo is it. I currently have it on a mannequin in my home office and can not stop staring at it. I truly haven't smiled this much or been this excited since I was six years old and got a Kenner Death Star playset from Santa Claus! I'm looking forward to getting to know you all and learning how to put a second kit together - this time from scratch. Just glad to be here finally Charles2 points
-
Well with a pack, pauldron and pouches and some dirt which isn't included in that PDF2 points
-
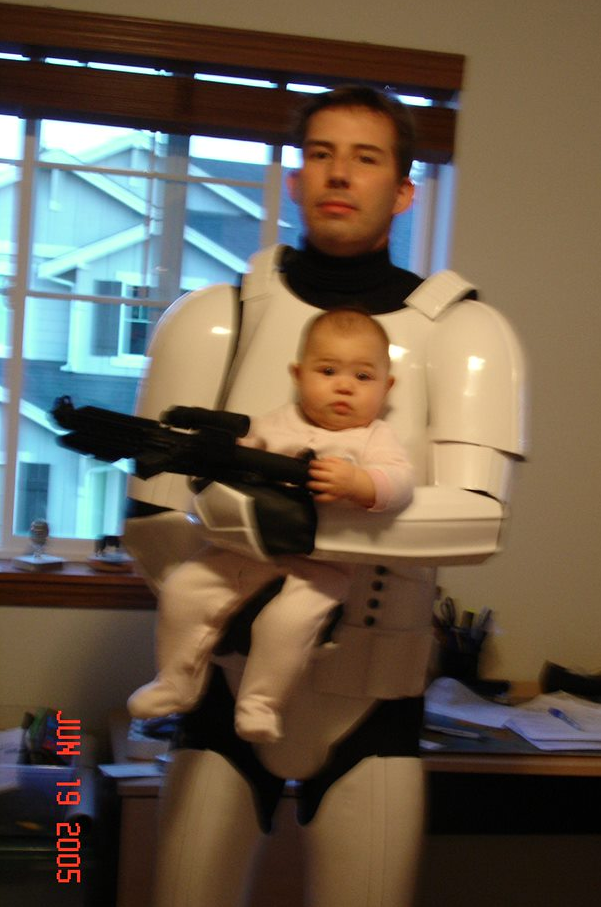
That is a pretty poignant photo, Rich. It shows that being a trooper is not always about bringing smiles, but showing respect on more solemn occasions as well.2 points
-
Gets pretty hot down under
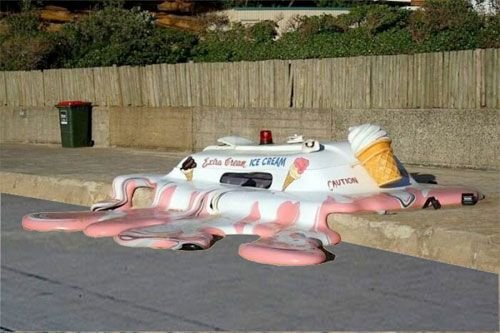 2 points
 -
Hey everyone, After getting our BBB several weeks ago, we've finally started! James isn't much of an online guy, so I'm posting for both of us. Day 1 has been pretty productive. We are roughing all the arms and legs to start. Still on the hunt for a good AM 4.5 build thread to follow as we are finding it slow to start and we are piecing it together of different build videos (Panda Trooper, Troope Bay, etc) even though they are slightly different armour types. Anyway, I was going to post some pics as a Google Photos links as I haven't' figured out a way to shrink photos on my Chromebook yet. If my posted etiquette sucks, please do let me know. Here are pictures of my biceps armor Here is James biceps armor We were also able to get our forearms figured out. This took a while to figure out which forearms piece when where, as they are clearly angled differently on the back of the forearms, and we weren't sure why or where the one arm piece with the groove went. We decided to put it on our right so that when we hold a blaster, it will be a bit more comfortable. Our forearm measurements were the same, so we could always swap if we want. We figured we could cut the other arm to match, but seems like it may not be worth the effort. We are aiming for centurion standards and have cut the wrist return edge completely. Here are my forearm pictures. I will upload James's tomorrow. Pretty happy with how it's going, but wanted to post these pics and see if we should change anything before glueing the cover strips.1 point
-
Hello Everyone I've been a huge fan of all things star wars since I was a kid, now in my late 40's with kids getting older I can start having more fun myself. I got into 3d printing making helmets about 6 months ago. Now i'm ready to make a full suit and hopefully get approved and join a community of great people with same passion Just trying to decide on storm trooper or clone trooper, both look amazing. I look forward to getting to know you all and making a cool suit to wear and enjoy
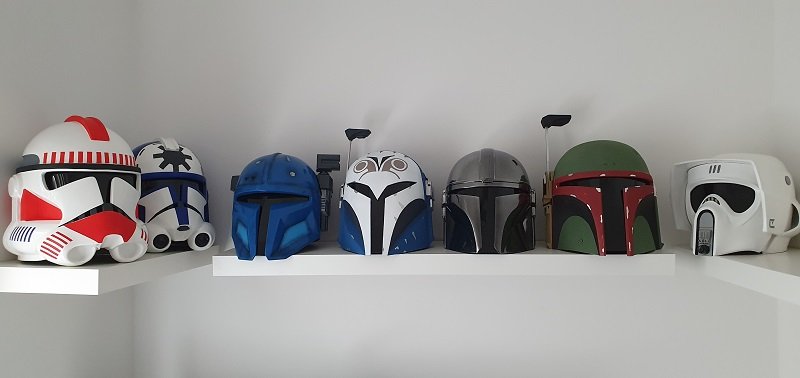 1 point
 -
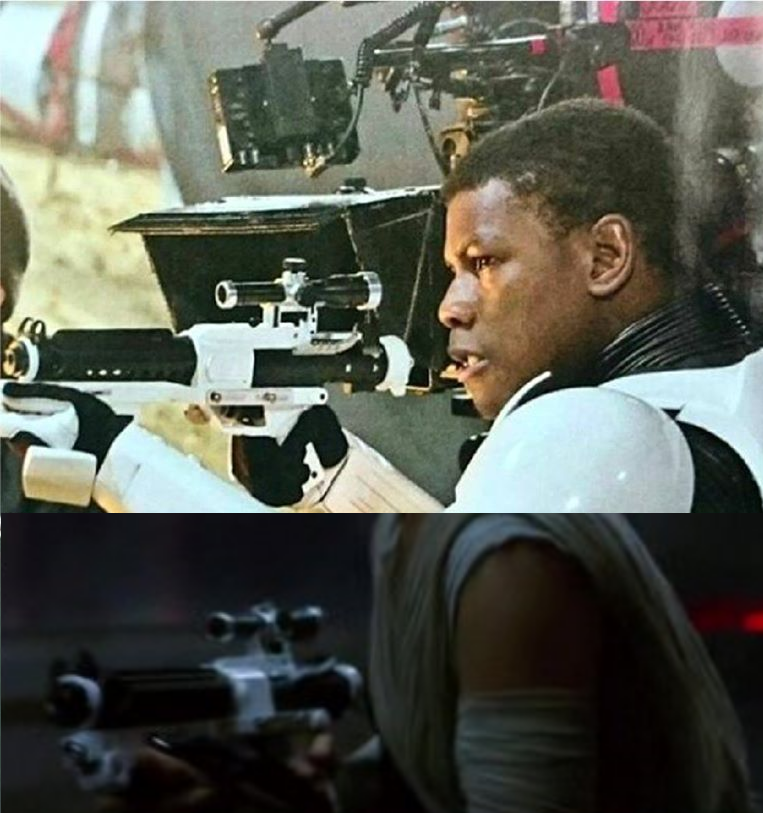
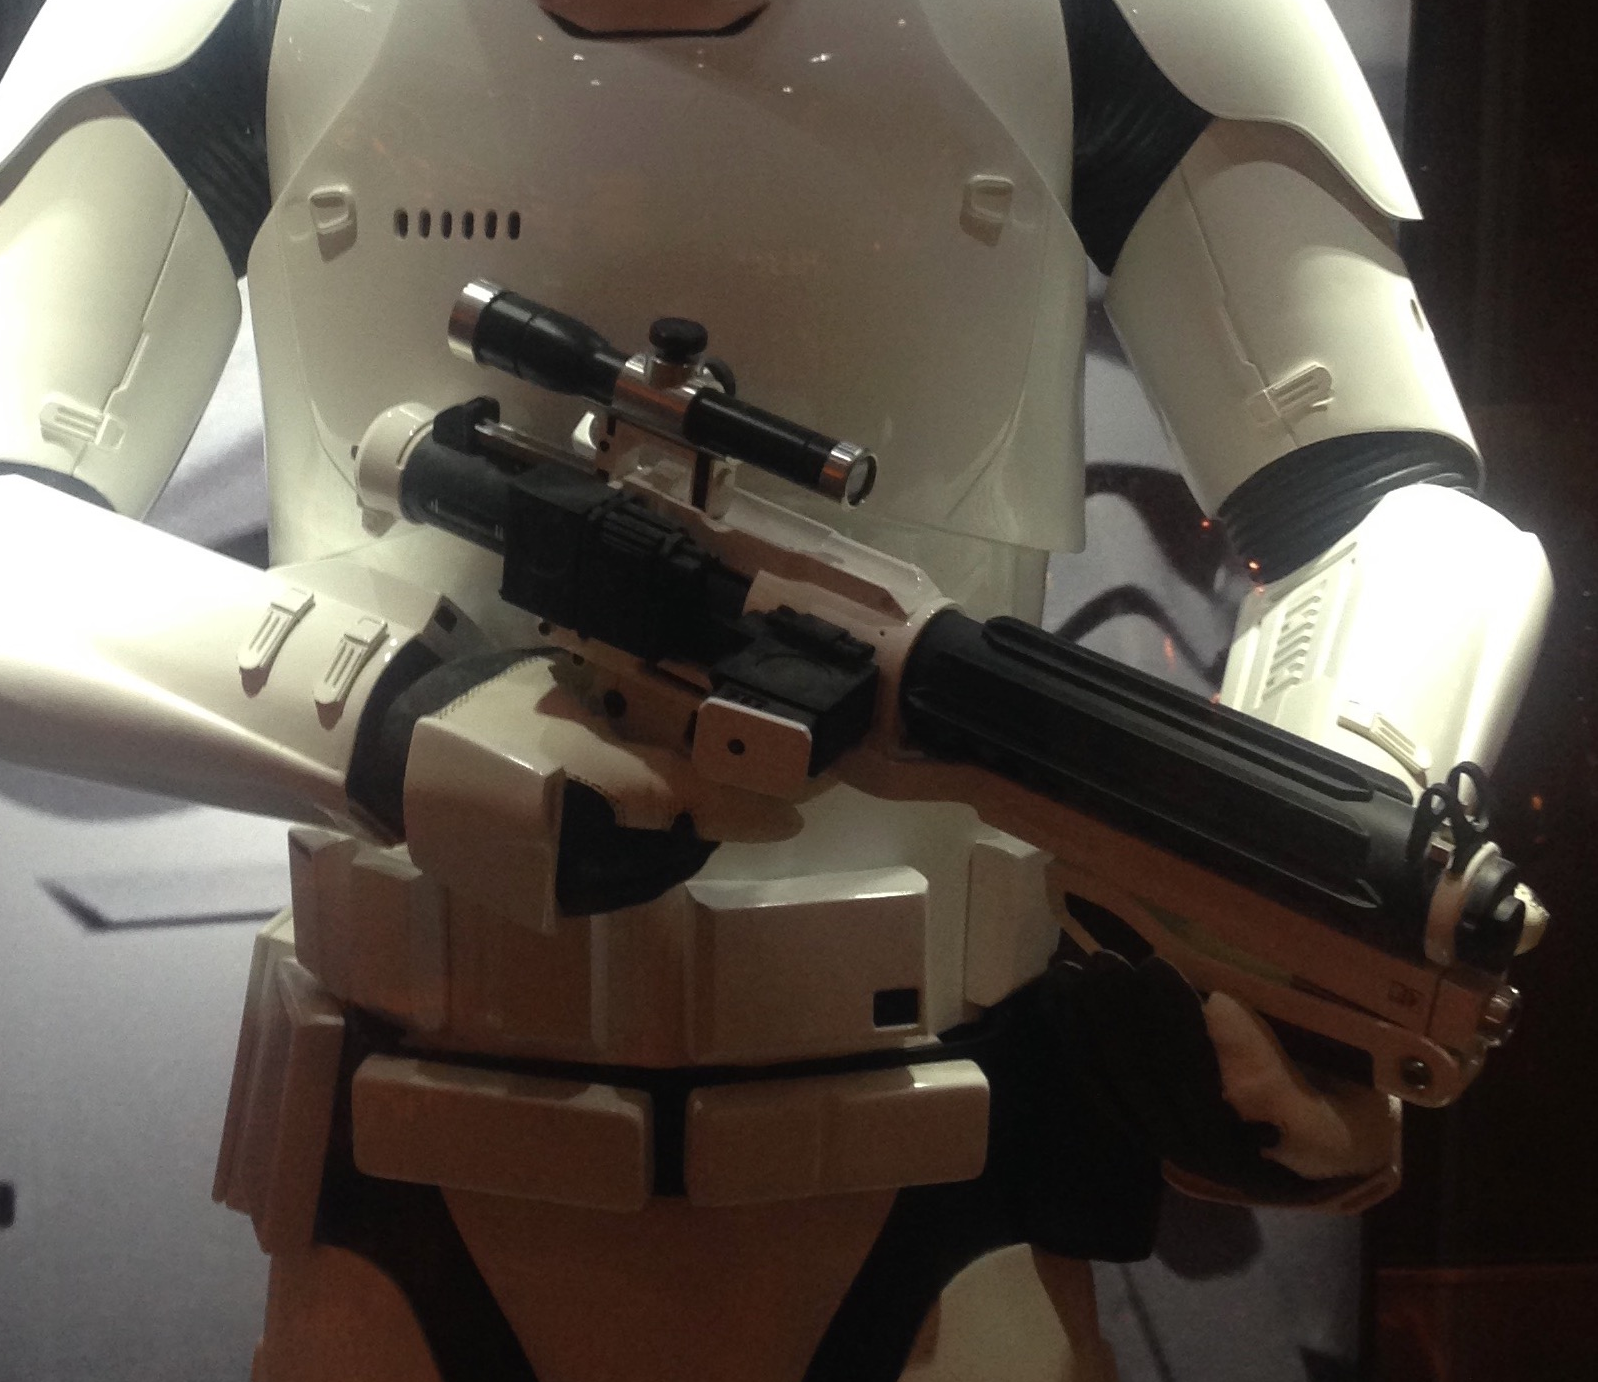
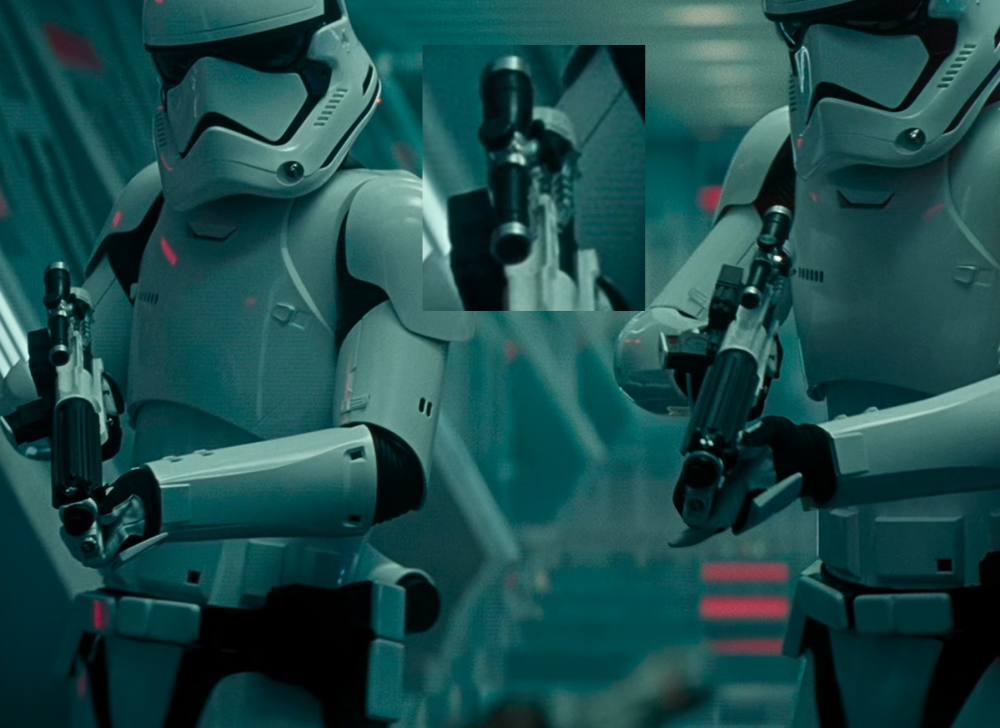
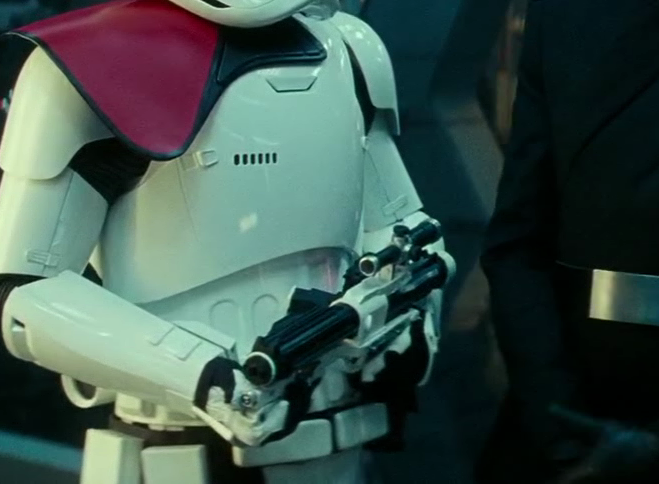
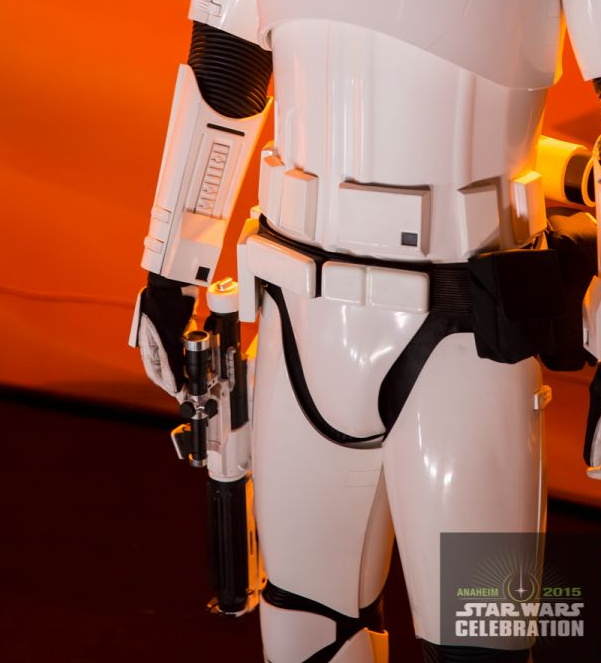
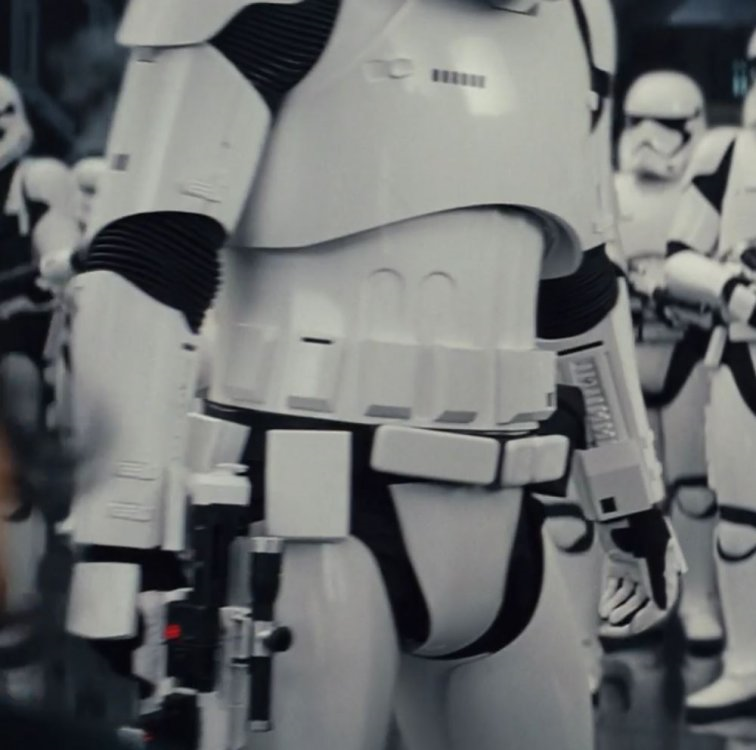
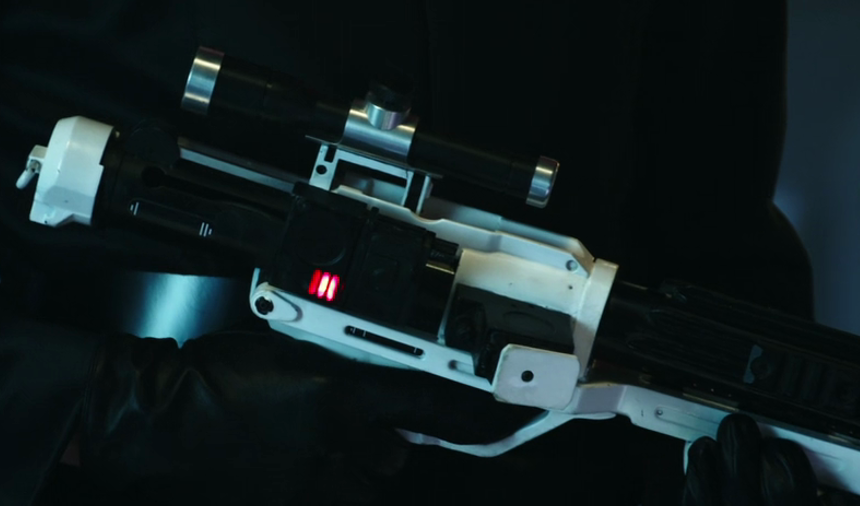
Still working on these but so far. TFA cocking lever on left, channel also on left side Silver D ring mount but no D ring TLJ no cocking lever, channel on right side, white D ring and white mount TROS no cocking lever, channel on right side, white D ring and white mount TROS cocking lever on left, channel on right side TFA no holes in top of barrel TLJ 2 holes in top of barrel, one front one back TROS holes in top of barrel one front one back TROS No holes in top of barrel


 1 point
 -
You’ll enjoy building a kit. I built my whole suit from a kit. Although I’ve already got experience from costume making before it was nothing like this. It’s the best feeling when you get that thumbs up for clearance. The armourers are brilliant and your going to get loads of support. Excited for you. Sent from my iPhone using Tapatalk1 point
-
POST 100 Images supplied by Bobafett75 TK-50501 Even Ellingsen 1. Nordic Garrison - Desucon 2013 - Lillestroem Norway 2. Nordic Garrison - SpillExpo 2018 Lillestroem Norway 3. Nordic Garrison - Help for Philippines 2014 4. Nordic Garrison - SpillExpo 2014 - Lillestroem Norway 5. Nordic Garrison - SSFC Gothenburg 2015 6. Nordic Garrison - Visit Hoth 2017 - Finse Norway 7. Nordic Garrison - Visit Hoth 2017 - Finse Norway Nr1: Single TK in black&white: Nicky Mezzina - TK54321 Nr2: Single First Order TK black&white: Daniel Andersen - TK61514 Nr3: Two TK with sign for helping the Philippines: Awei Su - TK6523, Dennis Evander - TK15136 Nr4: 4 troopers in front of an empire wall: Sverre Nilsen - TK13421, Ludvik Nilsen - TK11577, Fredrik Voisey - TK3843, Dennis Evander - TK15136 Nr5: Visit-Hoth with two troopers and Vader: Even Ellingsen - TK50501, Dennis Evander - TK15136 Nr6: Two troopers and 1 Snowtrooper: Even Ellingsen - TK50501, Dennis Evander - TK151361 point
-
4, if you include HWT1 point
-
Also note it's very easy to swap between the versions with another helmet or two and a few other pieces, here is a comparison, ANH Stunt, ESB or ANH Hero, you can end up with 3 costumes out of the one1 point
-
For Level 3, all ear screws must be "..slotted, flat-topped, countersunk and painted white". Note: The recommended screw head size is #6/32 (7mm), with a length between 3/4" to 1" (17 to 25mm). You will find you also need to trim the length when fitted so they don't take your ears off every time you put your helmet on and off1 point
-
Thank you Mr Tribbles, giskard8, T-Jay, Sly11 and Csefton. Hope I didnt miss anyone lol. You all sure are a welcoming bunch1 point
-
Congratulations Trooper, Welcome to the ranks.1 point
-
Bits and bobs Pouches from Trooper Bay and filled with rigid foam 3d printed shoulder tabs (thanks to whomever uploaded them here) Hot glued in and straps ready for shoulders1 point
-
Looks like you nailed it! (Figuratively, not literally, lol). Nice job!!!1 point
-
1 point
-
Hello everyone. Been a little MIA due to work. Here is my TLJ submission. This is the same suit that is EIB approved already. That TFA is being submitted for Centurion, then this one and the Executioner as well. I am submitting with two of my helmets, Noseplate and clips have been converted on helmet. One Fiberglass helmet and One Plastic Helmet. Name: Ardeshir Radpour Username: equuspolo TK-42128 Southern California Garrison Los Angeles Squadron Height = 5'10 Weight = 165 Armor Maker = KB Armor - Trimmed to fit like Anovos Helmet Maker = Anovos Premium Fiberglass and Anovos Plastic Helmet Boot Maker = Imperial Boots Gloves = Endor Finders Belt = Trooperbay Belt Pouches = Trooperbay Pauldron = Trooperbay Neck Seal = Imperial Seamstress Holster Maker = Dan Sczudlik Gaskets = production made silicon rubber gaskets F-11 = Branfuhr Studios Resin Kit- Custom built by me with custom light system. SE-44C = 3DPrintMerchant Electronics = Wireless Microphone with Acker Amp Custom Parts = Chest yoke and Backplate welded together with ABS Slurry. Chest Pills and Chest cut out backed with Textured Fabric, TD slurry welded. Entire armor painted with Rustoleum 2x Glossy White. Belt, Cod, Butt Plate attached to armer with Anovos leather waist tassets EIB Approval for SAME TFA Suit TLJ Plastic Helmet TLJ Premium Fiberglass Helmet UPDATED TLJ COD PIECE Updated Gray Painted Rail Button1 point
-
It’s an amazing country you have. I got to visit for a week a couple years back and I work remotely with a couple software engineers from CR now. They are awesome.1 point
-
Thank you for the warm welcome TK6682, gmrhodes. And magni, if I could just find a life sized card backed blister pack to sleep in I might! Lol1 point
-
Arizona, where everything melts1 point
-
Not painted yet, but hopefully more in proportion1 point
-
I made some adjustments and these are the new pictures:1 point
-
Sorry for the late congratulations. Beautiful work1 point
-
Chemi, thank you very much my friend for all of the feedback and help and guidance. I will get on the changes asap. As for some of the changes, My thermal detonator is two pieces. This is a whole new one I made. Two new ones for the Centurion that was approved and for the TLJ and Executioner and I made sure I kept them in two pieces. And as for the Angle that was just a dressing issue. I had no idea about the Rail on the gun. Easy peasy. Thighs and butt plate I have been contemplating making that adjustment and I will get on that right away. The ring on the blaster I had no idea, will add that asap. Cod piece is done. Shorts no big deal As for the Neck Seal. This is all I can say. There is a reason for some being zipper forward and some being backwards. Most are Zipped behind. I can guarantee you that first hand. I just need to leave it at that for now (hahaha) But what I can tell you from other conversations with friends that were on TFA, TLJ and ROSW that the zippers are in the back. Some people had them on the front. But wardrobe puts it on in the back and zips it up and they use clothing tags to actually tag the neckseal to the undresuit. That is all I can say for now. Forearms, I will make the change for sure, thank you. I didn't know about that. It will be a little bit before I can submit this and Executioner for Centurion, once Executioner is approved. It has to do with my work schedule and filming schedule. Usually I am pretty quick about making the changes and getting it done. but I will be at least two weeks out. Apologize for that. Thank you and the entire DO team and appreciate all of the help and guidance. From everyone on FISD as well. Thank you everyone.1 point
-
Strange, I see them. I wonder if it's a permissions issue. Trying again...


 1 point
 -
Unless I've miscounted, won't this be your 6th EIB award?1 point