Leaderboard


Popular Content
Showing content with the highest reputation on 12/31/2019 in Posts
-
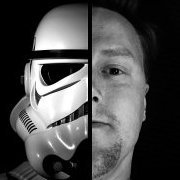
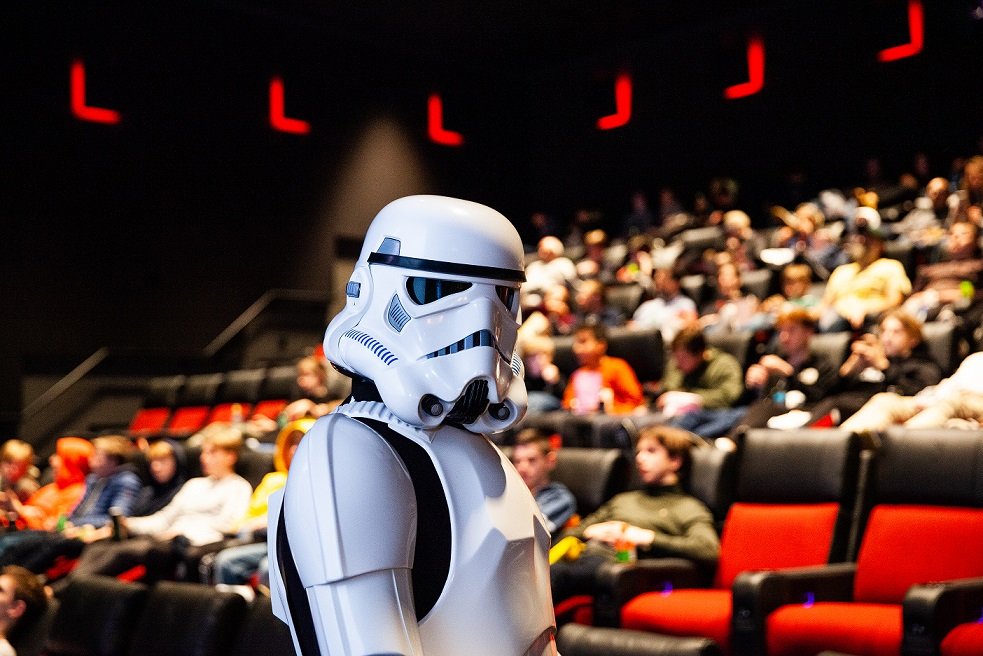
TK-92019 Reporting for duty. So proud to finaly reach this goal and be part of this awesome organization. Having a busy life, it has taken me 2,5 years working on my TK to get it finalized. The dream of joining is a lot older then that, so the road has been long. I am in the Outer Rim of Norway, and the foothold for the Empire here is fragile. In my city we are only 4, me included, to uphold the order in this region. Working hard to increase our numbers - in this part of the Nordic Garrison - the great city of Bergen. My wish TK ID was a risk - but i asked for 92019 becuase i had the Episode 9, 2019 premiere as my goal to finish. I made it with just a few days left, and the premiere being my first troop. We had great fun and my armor held up, didnt pinch too much and looked great. Photo of yours truly included. Btw: I have perfect aim!!
 2 points
 -
Locally (down under) I found an automotive shop standard white acrylic matched the Anovos helmet spot on and they always have sales I like using acrylic automotive paint as it dries very quick between coats unlike a lot of cheaper enamels, some taking up to 24 hours so keep that in mind when thinking of price1 point
-
I went with the professional paint job route. Let me know if you're interested in the paint code1 point
-
TC-10 was the paint used for touch up jobs1 point
-
Got an email last night that my Kylo Ren helmet shipped yesterday. Hopefully they are actually starting to ship things for a change.1 point
-
Welcome from Garrison Tyranus and Inferno Squad (i.e. Northern Virginia) territory! Here in NOVA we troop often and have a wide variety of trooping activities, and we encourage new members to gain experience as handlers before diving into their costume builds. We also host armor parties on a regular basis. We have 3 active FOTKs (out of 6 total in the garrison) here in NOVA, along with a ton of OT stormtroopers. Please be sure to sign up for an account on our forums. http://www.garrisontyranus.com For more real time interaction, join our Facebook group: https://www.facebook.com/groups/1014990031897377/1 point
-
Thanks to some help from TK Andrew H (who happens to be stationed near me IRL), the armor is starting to be built with cuts AND glue. Biceps started: EDIT -- Deleted photos as attachments. Spending a few hours on your build with an experienced trooper, who can help you test fit, tape, cut, glue, advise, share best practices, etc., probably saved me weeks of time planning, fretting, avoiding, correcting, etc.1 point
-
Your photobucket pics aren’t working anymore. any chance you could fix it?1 point
-
My armour is completed and approved as of 1 December 2019.1 point
-
Some minor improvements...... As i said it quickly became apparent that after my first outing there were some changes required..... I had too many connections via velcro, I knew this would be an issue from building other TK's in the past- hate the stuff (velcro that is) but I just wanted to get this build over the line, it had been over a year to get to this stage mainly due to me losing interest at one point and putting it all in a box out of the way until i found my trooping mojo again and then breaking my shoulder (now almost fully recovered) meant months of nothing happening - however all of these velcro connections were all swapped out where possible for actual snaps.... The shoulder bells were sitting too low against the yoke so this is when i glued in place some abs supports. The yoke to bell connection was all velcro so i replaced part of the velcro with snaps on the bells, the velcro was left in place on the yoke end as this then gives me the option to change the size of the elastic piece - pulling in the bell if needed. You can see where the velcro used to connect in the pic below but now ive snaps in place, the small elastic then connects to the bicep pice - this then stops the bell moving to much and makes it stay in place better, it was all over the place before this!! Bell with velcro...... I also glued a snap onto the inside of the bicep and the other part of the snap was connected to my gasket fabric, again the biceps now sit in place perfectly dont spin and are set at the correct height- cant find a pic at the moment of the gasket snap but ill take some and post up later.... Knee caps were also improved as they are held on by velcro - was awful so have added magnets to gaskets and knee caps as well as velcro, both now very sturdy and do not move. The belt support again was not sufficient to hold the whole weight of the belt, boxes and pouches so as well as magnets ive also added a lot of velcro to the backside of the belt and also the belt support pieces on the abdomen section, again belt is now very secure. This is how it looked after a few of the upgrades and is the most recent image I currently have.....so we are pretty much up to date My next post will be about upgrades i plan on doing over the coming winter months to further improve things...... stay tuned.....1 point
-
Thanks that looks great I’m working on the money hopefully it’s still available when I get it. if not I will probably just order a kit from KB props. ✌️1 point
-
Hi Jacob and welcome to the FISD! If you are looking for armor parties then I would suggest you sign up on the Garrison Tyranus forums. They will be your home garrison once you are approved. Then they may also give you assistance hands on. Since you live in Stafford I'm assuming you will be near many members south of DC. If you are looking for First Order armor then you should look into KB Props or Jimmiroquai. They seem to be the two reliable first order vendors as of right now. I believe you have to contact them both on facebook. Good luck!1 point
-
Perfect, Dana! Smart move not gluing them on yet, as they are MUCH easier to paint when not attached to the ab plate. When painting them I suggest using either a template or a Filbert style brush (rounded tip) which will give you more control.1 point
-
The tops of the shoulder bells should be barely touching the outer edge of the shoulder bridge/strap but should not overlap it. Once you bring down the shoulder bells they should cover more of the bicep, as it looks like you have quite a bit of it showing. I realize this is a test-fitting, but the cover strip should face the front. You may also want to raise them a bit, as it looks like the return edge at the bottom will cut into you when you bend your arm. (Green arrow).1 point
-
I got the same thing. Closing-out follow-ups that weren't needed, in my case, as I'd resolved it all over chat months ago. Meanwhile, I've seen two more folks mention they'd gotten the shipping notifications for their TFA Han jackets. The FOTK is in the same shipping window. I'm trying not to get my hopes up, but it's hard not to...1 point
-
Thank you Sir.... The pics above are from my first outing / troop in this armour....before any mods to the strapping were made and before I had added the abs supports..... It was pretty clear from that troop and my second troop that a few adjustments were required, not just in those areas, and your observations above are spot on....[emoji106] I'll post an update later today on the changes I made and see if I can find some more pictures of these... For now I'd like to wish you all a Happy New Year.... Sent from my CLT-L09 using Tapatalk1 point
-
Thanks buddy...funny you mention amigos....there was a small build group around the same time and they called themselves the 3 Amigos...I was not part of that build group though....however I did help them kit up etc at a troop which was invaluable getting some insight into the same kit... Sent from my CLT-L09 using Tapatalk1 point
-
I got excited I got an email from them but it was just them closing all my other emails asking questions:/ geesh they are mean Sent from my iPhone using Tapatalk1 point
-
Thank you Sir for clarifying, then that is why I didn't see report about them here. The are good!!!!! I didn't want this new person to get burnt and just trying to protect them Sent from my SM-G965U using Tapatalk1 point
-
I have a question: Are there ways to fill a seam in the armor without a full part repaint?1 point
-
There's a link to a pdf in the first post, right above the " Sections, Navigation & Check List: " part...1 point
-
Hey everyone! Trimming has begun! I've decided to start with the arms first, so here they are! Forearms Still need to trim some more off the wrist to be able to fit my arm in there. Biceps Shoulders Untrimmed Trimmed Here are the resin parts as well. So much plastic already! And that's pretty much it. Until next time1 point
-
Nice work trooper, looks great. You may want to adjust your ABS tabs just to bring the shoulders in line with the armor. Also if you use slightly shorter front straps on the shoulders it helps to rotate them forwards when you have been moving. Once again great work1 point
-
There is still progress! Slow and uninteresting progress, but progress. I'll take it. As we inch towards the finish line, here's what's been accomplished so far: Glued Velcro onto the inside edges of the chest plate, and corresponding to the outsides of the back plate. Because that top connection is tiny, and there's no way it's going to hold, even with lightweight ABS. (Totally forget about it with Jimmi's fiberlglass set, fyi) As well as the snap plate to the top of the yoke for the shoulder bell connections. I also made the connections. I just used Nylon webbing, rather than elastic for this one, because unlike the OT TK bells, these won't be taken on and off, therefore need the stretch to be connected. They'll basically be stationary and semi-permanently attached. I ended up not MacGuyvering my suspender attachments, which is probably for the better. I used D ring picture hangers. They were a bit narrow at the top for my large suspender grips, so I just mounted them sideways so they fit perfectly. They do make larger D-ring connections, but on a timeline I wasn't going to go on the hunt. But if you have the time and plan ahead, that would probably be advisable. For inquiring minds, my MacGuyver plan involved straight picture hangers, spacers from a TV wall mount kit (cut in half because otherwise they were too tall), and ABS scraps. The D-ring way has way less glued together pieces and is therefore more stable, but the MacGuyver way was pretty ingenuous for stuff found around the house. The bases are sandwiched between two pieces of ABS for extra strength and connection. This is what I was talking about with my extra piece of ABS to reinforce the elastic connections: So that's done on the knees and boot spat pieces. Helmet liner is in: Fans installed: Lens installed: I will probably trim the lens at a later date, when I have more time- cut out the nose area so there's not excess material there. Luckily the lens is easy to remove and replace for cleaning as well. I got started on the ab/kidney closure. I'm hoping these magnets are strong enough to keep it shut. I had a moment of crisis when I test-fitted it and it was a snug fit. This is a female thing- it's contending with both a bust and hips. It sits right at the top of my hips, so that will help, but it's just at the bust line. I thought about snaps, but I didn't want to go that route because I didn't want to put repeated stress on that area. My OT TK has some stress cracks there that I need to reinforce, granted after 4 years of heavy trooping (90+ troops), but still, due to the paint job Phasma will not be as easy of a patch up at the white ABS OT TK, so I want to avoid any known potential issues in the future if I possibly can. I'm going to trial run the magnets, see what happens. Maybe do a second magnet set if needed, and then if that still doesn't work, then I'll switch to snaps. Velcro seems like more trouble than it'd be worth, though it would hold if you could get it into place. Also didn't want to go that route as first choice because it would involve a handler getting up close and personal every time to get it attached and I try to not put handlers in awkward situations if I can help it. I mocked up a rough pattern for my design: Now, since my handwriting is akin to a doctor's handwriting, here's the key: 4x Magnets (mags) 2x cut out - 1x half and 1x full 2x solid - 1x half and 1x full (Original idea- now known two sets of these are needed, so the new numbers are: 8x magnets, 4x cut outs (2x half and 2x full), 4x solid (2x half and 2x full.) Glue the cut out pieces on top of the corresponding solid pieces so the magnets are set in. These are the magnets I'm using: https://amazon.com/gp/product/B07S6GJXCZ/ They are stupidly fragile and I shattered one by knocking it off the table onto the floor (granted it was the garage floor, so concrete, but still, only a height of maybe 4''). They seem to not shatter themselves when connecting in the plates because of the inset, but this is a concern. I'd recommend some nice N52 ones from KJMagnetics, like these: https://www.kjmagnetics.com/proddetail.asp?prod=BX882-N52. They still have the ability to shatter on direct contact (and slightly more so being a stronger pull force), so make sure you inset them. I'm using the Amazon ones because I got them cheaply and with free One Day Shipping on my timeline. Maybe they'll hold up, we'll see. Then time to make the ABS connectors: I used my dremel with a cutting wheel to cut them out and it made quick work of it. Sand them down and trim the edges so they're not sharp and pointy. Remember this is internal, so you don't want it catching on your under suit or poking through to skin. Next I glued the magnets into place: The circle magnets are just there for gluing purposes- they're not attached. I'm using my washing machine (since the magnets stick to it) as a way to keep pressure on the pieces to glue together. I decided to let these cure for 24 hours, then I'll stick them into the suit, and glue, and wait for those to get the full 48 hour cure. Too many moving parts trying to glue at once would just be a challenge to try and clamp in place. The more I look at it the more I think I need to do a second set of these for closure. I should be able to knock that out tonight and get it gluing. That half scrap sheet of ABS I got at a local plastics place has been amazing. It's not smooth/smooth ABS, because I guess that's special order, but it's been working great as scraps and unseen stuff. Well worth the $20 I paid for it. To Do: Glue in first magnet closure set Make and glue second magnet closure Add foam or padding in front of helmet in middle of forehead to keep it from falling back into my nose. (Probably a Mr. Clean Magic Eraser, since I have those on hand). Cut Magic Erasers for padding on top of foot to keep boot from lifting when walking Figure out butt plate attachment to belt - why is this so hard? It's simple, yet alluding me because of placement. I think I should wear the ab/kidney and belt to get the placement right. Kind hard to do on yourself. Maybe I'll just wear it backwards for fitting, since it will be basically the same placement. Test fit!1 point
-
The final push............... So after months of surface prep work, adjustments to various pieces and decals added I finally got to a position where I could get fully kitted up to see where / what I needed to adjust before putting in for clearance.... this is how it looked Few minor dressing issues noticed that were easily fixed but apparently this was good for clearance so I requested through my local garrison.... That was it I was finally cleared with a note to paint out the screws on my belt and to make sure the dressing issues were sorted.... Now it was time to get out and troop, pics below are a couple form my first outing.... So i was now cleared but there is more yet to come......I will update the thread next with improvements i made after getting a few troops under my belt in this kit as well as some improvements I am yet to make but have planned......1 point
-
based on ep 6..star wars :A NEW HOPE That would be the first clue to run far far away...1 point