Leaderboard


Popular Content
Showing content with the highest reputation on 08/10/2019 in Posts
-
Absolutely, Ian, and congrats on your TLJ basic approval! As long as it meets the guideline set forth in the CRL for level 2 http://databank.501st.com/databank/Costuming:TK_TLJ you can submit it whenever you like! Here is a link to the thread, just follow the format for the title: https://www.whitearmor.net/forum/forum/19-request-expert-infantryman-status/ You may want to look over Q's (gmphodes) outstanding TLJ EI submission thread here to give an idea of what will be required: https://www.whitearmor.net/forum/topic/43842-tk85421-requesting-tlj-eib-status-anovos-approved/ Having clear, concise photos will be a huge help. Once you submit, the D.O.s will review your application and make the final approval. Please note that they are volunteers, so this can a few weeks. If you have any questions, feel free to ask! Side note: Work will begin on updating this particular CRL soon. If you get your application in before the new guidelines take effect, you will be "grandfathered in" with the ones that are in place now. BUT.... note that if you (hopefully) choose to submit for Centurion level, you will need to adhere to the requirements in the updated version.2 points
-
Hey Dave For Centurion the stencils/decals are to emulate hand painted. Looking at the stencils they appear to emulate hand painted so you seem to be all good there2 points
-
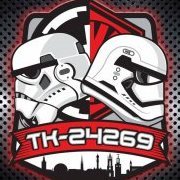
I am 190 cm (so 6’3”) and have a Troopermaster kit with the XL shins. I have no gap in the back as you can see in my Centurion thread. https://www.whitearmor.net/forum/topic/44243-tk-24269-requesting-anh-stund-centurion-status-tm-381/ I do have the cod pulled up as far as I can though and I straightened the top of the back slightly in hot water to allow it to slide down a bit further and still sit tight.2 points
-
My first attempt at EIB for my new FOTK TLJ. Armour information Armour maker- Jim Tripon Helmet maker- Jim Tripon Blaster/s - F-11D Branfuhr props ( it’s a converted Captain Phasma blaster) Se-44c- unknown 3d print( re detailed using plasticard by myself) Gaskets- Geeky Pink Neck seal- Geeky pink Gloves- Endor finders Boots- Imperial Boots Belt- Belts of the First Order Holster- R2Dan ( working and screen accurate) Personal info Name-Ian Rickhuss Height- 190cm Weight-106kg 501st ID- TK23650 Garrison- UK Garrison Just a note for the photos, you will notice my knee plates don’t sit quite right, this is down to my legs being a bit messed up after knee operations! This is as straight as they get. I’d welcome any feedback from your good selves and fingers crossed!! Many thanks Ian Sent from my iPhone using Tapatalk1 point
-
Hi, this is my first attempt of applying for EIB, if I have missed any information please let me know. I do not have a SE-44C blaster pistol currently however this is something I will be adding to at a later date. Armour: Armour maker: Jim Tripon Helmet: Jim Tripon F-11 D: JJ industries Gaskets: Sheev’s Emporium Neck seal: Sheev’s Emporium Gloves: Endor Finders Boots: Imperial Boots Belt: Belts of the First Order Belt pouches: Jim Tripon Holster: Jim Tripon Personal Info: Name: Jodi Hook Height: 155cm (dekit) / 173cm (in kit) 501st ID: TK 25409 Garrison: UK Garrison Sent from my iPhone using Tapatalk1 point
-
Did you build it some time ago? The CRL model is actually waering the incorrect TFA TD and that´s unfortunate but if you scroll down the correct TD is shown, maybe that was throwing you off as well. The CRLs are going through updates and new models are in progress but it takes time I´m afraid. Now, on the specific TD I think people use the cap of a spray can to modify it as it´s supposed to extend much further then the TFA one, hope that helps1 point
-
Hi Ian and thank you for your TLJ EIB application. You have a nice looking set of armor there With that said there a few things needed before we can proceed. 1# Your TD seem to be of a TFA style and not the TLJ. 2# I need a close up of your forearms to confirm that the third retaining button (the one closest to the elbow) is grey, painted or a decal. 3# Some missing photos: Full body - Left/right arms raised. Left/right side detail, arms raised. Helmet - front/left/right/back. Neckseal. Interior strapping. Thanks1 point
-
They don’t need to match but shouldn’t deviate to the point that it’s obvious that there are more stripes on one side1 point
-
Good luck trooper...great job Sent from my CLT-L09 using Tapatalk1 point
-
Quality build there trooper...good luck Sent from my CLT-L09 using Tapatalk1 point
-
Looks ace Jodi, good luck trooper! Sent from my iPhone using Tapatalk1 point
-
It looks fantastic, good luck trooper!1 point
-
It is not a requirement at any level for HWT, Derek. Yes, they were pictured the game (which this costume is based on) but they were sort of semi-circular in shape. Requiring one like that is impractical, just as wearing one is with the pack as you mentioned. There are a few HWTs who can wear one (mostly taller troopers), but I would omit it.1 point
-
Forgive me if this has been asked and answered before but can I submit my TLJ FO to see if I can get my EIB? Just had it cleared by the UKG . Thanks all. Ian Sent from my iPhone using Tapatalk1 point
-
What ^^ said1 point
-
Just watch you don't go on to the gums, CRL: Frown is painted gray and does not leave the teeth area. A couple of tips: If you have excess paint you can remove with tooth picks, works really well. If you paint the tube stripes and use a template use white paint first, will fill any gaps in case of bleeding. For black lines if they aren't very straight a cheat is to use a permanent black marker Looking forward to the progress.1 point
-
If you had seen the Legion TK profiles back in they day, it was not uncommon for older Legion members to have their official 501st profile photo with a pauldron. Thankfully FISD played a very big part in getting that changed.1 point
-
Great build and Basic is a given Not too sure about EIB/Centurion though, the DO.s are quite picky….1 point
-
Even worse is when regular TK's wear one1 point
-
I ordered the full R1TK that HSP said would ship back in April. I've been very patient with them not trying to spam them or rush their art, but I haven't seen any updates in months and HSP is really bad about responding to any questions. For that reason I'm politely asking him to cancel my order and refund me. The whole experience with them has kind of left a bad taste in my mouth.1 point
-
Hey Justin and welcome to FISD As to the wrist end of the forearm my advise would be to make it as snug as possible, just barely getting your hand through. At the elbow I would start by removing all return on the inner half and then remove gradually from the outer if needs be1 point
-
MY FM Hengstler and scope.1 point
-
Facing the face plate from the outside, the left side decal on photo goes left, basically the decals are positioned properly on the sheet Also make sure to use the water/soap technique to apply the grey decals to avoid any air bubbles, just put a very tiny drop of dish washing soap in a bowl of water, wet surface of helmet I actually dip decals in the water apply on helmet then gently with your finger squeegee out water from center to extremities. For the round circles for the AB buttons apply with pressing down heat up with blow dryer then press down, they will perfectly comform to bump will look like paint.1 point
-
https://www.ebay.com/itm/1235556814171 point