Leaderboard


Popular Content
Showing content with the highest reputation on 12/27/2018 in Posts
-
Pretty nice interview with FISD former DL, former LMO and current LMW, Eric Brager aka @Darth Aloha https://www.dailydot.com/parsec/stormtrooper-costume-uniform-design-politics/2 points
-
cheers it is coming apart with aid of a butter knife, glue is rubbery so I guess it E60002 points
-
Oh, oh, oh! I think I know this one!!! (waving hand wildly) Offsetting the snap in the white elastic is a good thing because it provides more stability/strength for the connection. In the pic below, you're looking at the white elastic as seen from under the plastic shoulder strap from the back. This is the right shoulder, BTW. My elastics are more narrow than most TKs, and that's because I had to narrow the chest/neck and shoulder areas. The wider elastic would have been visible if I'd gone with the usual stuff. Anyhow, you want to keep your snaps in as close to the inside (towards your neck) as possible. This will help prevent your elastics at the shoulders from sagging due to the pulling of the arms. Did I get that right, Tony?2 points
-
ok pipe build e11 guys made you a few tubes2 points
-
Some good news for ya', Dave... E-11s are not a requirement for basic approval, only for EI and above. (See bottom of this post). Besides the wire/item on the side it is connected to, the charging handle, end cap itself and perhaps the bolt opening you are actually in pretty good overall shape for level 2! Resin builds have come quite a long way, and there are replacement parts available that can be 3D printed. Don't worry if you don't actually have a 3D printer, though, there are services online that can to it inexpensively, and many folks here offer the files for free, like this: https://www.whitearmor.net/forum/topic/45065-anh-e-11-blaster-files/ If there are any you can't find, just ask. You can also have them made in cast aluminum, but those are pricier: (I used this eBay seller to replace a ton of parts on my resin build). ------------ I hope this helps, and here is a thread that should give you some more details/guidance: FISD Blaster reference guide- https://www.whitearmor.net/forum/topic/32111-fisd-e-11-blaster-reference/ E-11 requirements as needed for EI and Centurion: OPTIONAL Level two certification (if applicable): Folding stock (does not need to function). A real or replica ammo counter - based off of a Hengstler counter - shall be present. D-ring mounted on the rear. Sterling based blasters have the correct M-38 or M-19 style scope. Two power cylinders on the magazine housing. Scratch-built or cast blasters shall have a total of 6 T-tracks on blaster (leaving the lowest row on the magazine housing side uncovered). If using the Hasbro E11 toy blaster, it is modified to have the correct number of T-tracks (6 total), with a lower row of open vent holes on the magazine housing side. This is accomplished by covering the pre-existing rows of holes with T-tracks, then grinding off the lower integrated T-track on the magazine housing side, and drilling a new row of holes in its place. No ESB/ROTJ greeblies are allowed on the blaster. OPTIONAL Level three certification (if applicable): Hasbro and Rubies blasters are not allowed, even conversions.2 points
-
Hello! I'm undertaking a helmet electronics project what I'd consider mostly from scratch (no components pre-wired together). I'm near-novice level; it's not that I've never wielded a soldering iron, it's just that the last time I did I was 12. Fortunately a good friend is an electrical engineer working in the field who can both explain things five times in a row AND lend a hand with stringing everything together. Phew. THE CURRENT (lol, electrical jokes already) PLAN: My voice changer will be a Teensy 3.2 coupled with the audio adapter shield and Bluetooth module as per TK Talkie's delightfully detailed V3 directions. A PJRC prop shield LC will act as amplifier for the little speakers which I'll be setting in my hovi mic tips. I'll have [many] helmet fans ('cause I'm here for a good time, not a sweaty time) on an independent circuit to cut down on electrical noise within my audio system, most likely powered by a rechargeable USB battery. I'll experiment with lavalier microphones behind my neck seal, and will probably integrate a hearing assist system down the road. Disclaimer: this project is in between invention and re-inventing the wheel. People sell similar pre-built components and systems! I've just been spoiling for an electronics project so I want to do it all myself. This promises to be quite the adventure for my ANH stunt bucket Smudge and me. Come along, if you dare.1 point
-
If you could post some photos of the pieces in question (and how they currently fit you) that would help tremendously. You may be able to get away with minimal effort, but since they are very large you have the advantage of trimming them. Shimming (making them larger) is a whole different matter. The tops of the thighs can be trimmed to where they fit comfortably, and there should be a gap between them and the cod area. What I would suggest at this point is to suit up (wearing and undersuit) and take photos (they really do speak a thousand words) from as many different angles as possible. This will give us a much better idea of what adjustments/alterations will be needed. We are here to help, Phil, so don't be shy about asking questions!1 point
-
And taken from Tony's amazing build thread: Screen used: His own pic:1 point
-
A few days before Christmas, my blaster arrived from Praetorian and it looks and feels fantastic! Submission photos coming!!1 point
-
Congrats on your officer approval and welcome to Cloud City Garrison! Make sure to check our event schedule on the forums and I hope to see you at a troop in the near future.1 point
-
You do, but it's a whole Detachment!1 point
-
Yes the #10 are big but you'll never see them if installed correctly, so do forget to off set them Merry Christmas to you as well.1 point
-
That Tandy snap setting tool is complete crud. I went through so many failed snaps using that thing! Once I picked up the cheap-o General Tools 1265 Snap Fastener Kit, setting snaps was a breeze. That said, hammering snaps into submission is loud and requires some... enthusiasm... and I don't always have it in me to beat up those snaps. That snap press looks really sweet... and it's on sale right now! Hm... I will be building another TK in about two weeks. And other upcoming costume builds certainly will be in need of some snaps. I think I can certainly justify acquisition of this snap press at this point.1 point
-
Oof. Good to know, Tony. I thought maybe if they were right on either side of the seam that would cause problems of its own. Hopefully my armor will be so well shaped and fitted to me that it will have no desire to slide about, but if it does now I know how to fix it. Thanks! Speaking of strapping, I finally got the sew-in snaps for the shoulder-nylon to shoulder-bell-elastic connection just now. I did NOT expect #10 snaps to be as ungodly huge as they are! Guess they'll keep flat well enough. Boy. I have yet to revisit the chestplate positioning issue so I can't sew them in just yet, but I think (peering into empty wallet with hand drawn moths comically fluttering out of it) I have actually purchased all I need for my TK now. ...minus further helmet electronics. Though I've already got a bunch of those. But that's a song for another time. Merry belated Christmas, y'all, now go eat those leftover cookies!1 point
-
Hi there, took a brief look at this website: http://databank.501st.com/databank/Template:CRLgeneric-e11 I think you're mostly good, so long as you replace the coat hanger one with one that is the same of a d-ring. I didn't read on any requirement for front sight block and pin or muzzle screws. I didn't see these on your picture. You may be good here. Oh, and exposed bolt is required too on the other profile of the blastef, which you likely have being a resin build. Sent from my SM-G390W using Tapatalk1 point
-
Actually I’ve been working on the BF2 version for a bit now. It’s still a WIP.
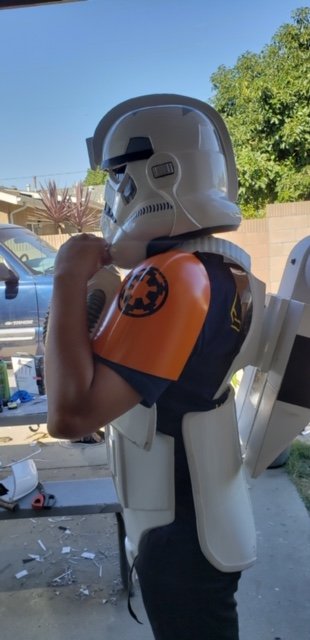
 1 point
 -
1 point