Leaderboard


Popular Content
Showing content with the highest reputation on 07/27/2018 in Posts
-
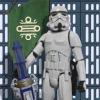
Approved! (Only about 8 hour wait from submission to approval!) TK-18131 reporting for duty!! Sent from my iPhone using Tapatalk3 points
-
laser cut and bent !!!!2 points
-
Hehe. Yes, you have the Daniels here to help. [emoji1][emoji1][emoji1]2 points
-
Nice video as well! In the previous video, he uses white gloves as a precursor to the black, I'm guessing it provides the same purpose as the balaclava, to protect your body (absorption) as well as the suit. I better get me some of those2 points
-
You could also watch this, the man himself2 points
-
Big Deal, the mouth mesh was cut about ½” larger than the mouth then hot glued in place. The chest and back are supported by the shoulder straps and side plates. Think of them at the 4 supports that connect the back and chest. This assembly then hovers over the abdomen although, hover is not really the best word. It fits snugly over the abdomen. See if these pictures helps any. Darthcue, thank you for pointing out the two end teeth. I should be able to correct that this weekend. Ok guys, I need your input… Other than the two outer teeth need paint on the helmet, please look over these pics and let me know if I am ready for EIB and Centurion approval. I think I have met all the requirement for both categories. Pending your input here, I will paint the two teeth Darthcue noted and re-shoot pics of the helmet and submit my applications for EIB then Centurion. I await your comments. Thanks for the interest.2 points
-
Also, so your aware, you must make the corrections asked of you, and then retake photos in full kit to achieve the rank of Centurion, you can not just "fix" them and post the photo of the fix, must be shown in full kit. THANKS!2 points
-
So...I have been asked by someone to assemble and paint their new TLJ armor kit to become a FO Executioner. I have built a variety of other kits but anything from the First Order is brand new to me. I have really only worked with ABS plastic kits and various resin helmets. Upon receiving this kit yesterday from the owner, it appears to be a "Jimmi" set of armor (not sure which version this is). It's got amazing detail but the way it's made seems to be some sort of fiberglass that flexes. Really awesome stuff. Looks like a great kit. I'm not sure where the gaskets came from but they were in the box when I received the kit. I'm not sure which vendor made them. I have been studying a few builds and have learned that some people get a few Executioner pieces to upgrade their kits. One piece in question is the yolk. In looking at the CRL images and looking at the yolk that came with this kit, is it possible for me to cut the yolk as needed or with the yolk armor I have on hand, will it work since the pieces in the center will not be seen anyhow. I'm thinking since you won't see the part hidden under the chest armor, why would I need to cut it? Just curious if I need to mod this part of the armor. This armor kit seems as though there is not much modifying to do. As I said before, I'm very familiar with many OT armor and Clonetroopers and how it all assembles but this type of material is new to me. The few "TLJ / Executioner" build threads on here don't have many progress photos so it's hard to see exactly what some folks are doing. Any advice would help....thanks. I guess for now I'll have to browse other FOTK builds on the other forum threads. Also, for those with a "Jimmi" kit...how are you fastening everything together? Heavy duty snaps? Velcro? Magnets?1 point
-
I have to tell on myself— those are the AP supplied decals. I didn’t trust myself. Sent from my iPhone using Tapatalk1 point
-
You look great in that armor so it deserves viewings Yeah those are great when you wear rubber gloves, so if you plan on going all out Centurion when you troop I can`t recommend them enough1 point
-
lol i was super confused, TheSwede Daniel posting a video by Cableguy Dan. I had to do a double take.1 point
-
Haha. Thanks buddy. [emoji6][emoji1303]1 point
-
Hiya, I wouldn’t worry about reaching them - just leave the whole arm as one piece. Here’s the method I follow for construction and kitting up. This saves on lots of “snapping” when kitting up. [emoji16]1 point
-
Goooosh! Those buttons are immaculate! Nice job!1 point
-
I guess I was not too fond of using the bicep hooks as they were too short, and I made 6 of them and finally got fed up. They weren't uniform, the bends, length and look weren't identical, which triggered my OCD, so I figured I'd just substitute for snaps and elastic, plus the black material blends in well to the underlayer. The outside poppers you posted had crossed my mind, but I figured since I'm having some trouble reaching across my chest to snap the bells to shoulder already, snapping the bicep to Bell on the out side would be more difficult. Snapping from the inside shortens the distance my arm would have to reach. I didn't think about keeping it as one piece and wearing it like a sleeve however, that might have worked... But my arm has to take a nice 90 degree bend to even get inside the shoulder bell to avoid triggering the inner elastic, so I'm not sure.1 point
-
What @justjoseph63 said! If you can afford it, definitely buy more than you think you'll need - nothing more frustrating than having to pause your build because you don't have the right tools.1 point
-
I did the same thing, glad I did it though1 point
-
Hiya, Just be careful of the corners. TKUK have been known to overcut the corners of the main belt. Here’s an example of how they should be. Note the 45 degree corners, approx 1cm. It can be made closer to the originals by reducing the overall length of the ammo belt. If you have a picture of yours we can see how it’s been supplied. :-)1 point
-
Hello! I just about done with my TKUK kit. To get around the molded belt buttons, I used snaps that I attached to little squares or nylon and glued into the negative spaces of the molded buttons on the back side of the belt. I put snaps in all three button spaces and then put the male snaps through the canvas belt. They just snap together. You may want to consider using a dap of glue to make the snaps a little more secure, or use the heavy duty snaps that hold a little better. Hope this helps! Sent from my iPhone using Tapatalk1 point
-
Congratulations! Great job sticking through the build and welcome to the ranks!!1 point
-
Oh, ok - I've never made the full set of snaps. For all of my inside snapping, I put just the one half of the female end on a plastic square, and glued that on. This makes sense. Thanks!1 point
-
It just makes things kinda hard after having an issue. Got followed around for about a year. It's not a hard set "show your face and you're fired", but rather "please don't make it easy for someone to track you". Once I officially become a member, I can explain it to them as a "I'm in a non-profit" so I'll get more leeway. But even then, I don 't have any social media, and I try to be hard to recognize on anything I do post. Believe me, its a huge pain. If I could, I wouldn't bother. Yup, I followed the page my garrison has, and they said to fill out the form and immediately send the pictures to the GML email address they had posted. I did both of those 12 days ago, so I was just wondering if any else had to wait a similarly long time. On the site it says that it can take up to three weeks, so I guess I'll wait until that time before emailing them again.1 point
-
More pictures = more progress. So here we go. I took the lid of a Plastidip can and cut it down in size to match TLJ TD end cap. I used some CA glue to glue it into place on the end of the TD before I sand down and prime again. Not shown in this picture. I also used some spot putty to close the seams from the cap and the TD so it's a continuous piece. Then it was on to more paint: The wind did actually lift the box and throw a lot of the armor while wet, so I had to wet sand down to smooth again and then do it over again. These pictures are after that happened. Finally I applied the jim kit decals I got from trooperbay onto the hand plates now that they are fully cured with the enamel. Get some time off tomorrow so I will do some more work. Can't wait to enamel what I have done next Monday.1 point
-
Where are you based? Have you tried RWA Creations? (UK). He makes almost any colour under the sun. :-)1 point
-
As long as you look good on the outside what is not seen will not impact approval. I know some individuals have done an ABS like "hook" on the right side to prevent things from popping out, and keeping the ab armor close together.1 point
-
One of the awesome parts about being in a small garrison? Besides essentially knowing all your fellow troopers?? Submitting your approval photos, getting GML approval, and 501st approval in the same day! TK-18131 reporting for duty! A pic with the other TK I built (now 9 months old) while building my armor. Sent from my iPhone using Tapatalk1 point
-
Hi Martijn, Tube stripes should be painted approx a pencil width from the cheek. Some recommend applying the template, then a light coat of white paint (to reduce paint bleed from the blue), then the top blue coat. Tube stripes can vary from 9 to 16 stripes per side. They don’t have to be even. Mine, for example, has one less on one side due to the positioning of the ears. Regarding how far forward to come, here’s a reference pic. This is the “Dave M” helmet. If you are concerned about the size of those templates, I’d highly recommend the TrooperBay “Dave M” style from TrooperBay. Here’s a thread I posted a while back about the Dave M templates: https://www.whitearmor.net/forum/topic/44755-tube-stripes-anh-stunt-dave-m/ This might help a little, too. This is TK4510, AKA TrooperBay, applying and painting the tube stripes. Best wishes Dan1 point
-
Nothing in the works as yet, although I did bring it up again in a recent command discussion.1 point
-
Put on the first "coat" of abs paste on the back pack and as it dries/hardens I turned my attention to the belt. The rubber part of it was too wide so time to cut again…..used the fabric part that was included as guide (2") could just as easily used a ruler...the belt kit was a 2 part so I got the sponge (closed cell foam) from ebay. Started cutting and....hmmm...that smaller rubber band reminds me of something…. Liquorice!!!! After a well deserved treat it was time to cut the sponge and had it laid out for marking when it hit me Why not peel the adhesive and secure it, surely that`s gotta be easier and faster?! and---so I did, made a little rubber roll and placed it on the sponge and...well...rolled it on cut it and that`s that. And with all three layers (not cut to size yet though)1 point
-
Good luck trooper. some simple fixes and you will be among the greats! I would also add one other thing to the list of easy corrections. The Hovi Tips, I believe they should be white interior and black exterior, with the white extending to the rim, to simulate wear. But this may just be a minor detail.1 point
-
First pull. Coming along faster than we thought!!!!1 point
-
Hi Freddy! Look forward to following your build! Any questions, post 'em up! TK was my first build ever and it is very commonly the first and there are many who have made it just fine! I consulted TK-1636 and Trooper Bay videos a lot when I did my build, along with a few build threads on the FISD. Try to find a thread that is well-documented and is the same vendor as well!1 point