Leaderboard


Popular Content
Showing content with the highest reputation on 09/03/2017 in all areas
-
APPROVED2 points
-
Chris your blaster parts are by far the best out there. I can not wait until all your parts are in production. Keep up the good work. It it is a lot of fun combining different kits to build a blaster that will fit easy to find electronics.1 point
-
Looks really good,,,, thanks for showing some of my parts.. Keep up the progress on all your builds1 point
-
Hello, I would like to get my status updated (and be granted Detachment access): https://www.501st.com/members/displaymemberdetails.php?userID=24123 Thanks!1 point
-
Keep up the good work! No worries on the biceps - they're the same piece on the AP kit. As for the shaping, I've actually found I was able to shape the pieces manually by just gradually massaging them. I've only used the hot water bath to tweak the sniper knee plate.1 point
-
Great job so far! but you really don't need to precurve the ammo knee and belt since they are pretty flexible and will hold their curved shape percfectly once attached.1 point
-
TK11710 requesting access https://www.501st.com/members/displaymemberdetails.php?userID=245971 point
-
Congratulations trooper and welcome to the ranks1 point
-
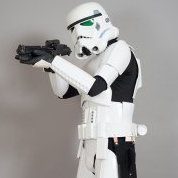
Hey Michael Thank you for your EI application lets see what we have. CRL and EIB Application Requirements: All submission photos have been posted. Your armor displays all the necessary elements to qualify for Expert Infantry. Welcome to the rank trooper! Other-Armor Fit/Assembly: In this section we review observations made by your fellow troopers and ourselves. Some observations may lead to suggestions to improve the overall look of your armor. If any suggestion affects any application, it will be listed separately in the above or below sections. Thank you for persevering with us and making the correction to have your side shims sit flush, great job We understand that PVC armour is a little different to work with compared to ABS, but there are products that can be used to fill gaps in PVC and plenty of info on the net, if you do decide to go for Centurion. The photos I posted above showing another members armour and side shim creation, is not done with ABS paste but a filler product which he then sands down and paints to match his armour. This is just one example. Overall your armour looks very nice and well built, awesome paint job on that helmet too. The shoulder bells could possibly come in just a touch more at the tops by shortening the elastic that attaches them to the shoulder bridges. Reference image Maybe if it is also possible tighten up the straps at the ends of the butt plate so they don't pop out as much. Centurion Suggestions: In this section we prepare you for Centurion. If there are any areas of concern they will be discussed here. The only thing for you my friend will be filling those seam lines on the kidney shims to meet the current CRL, plus a few extra photos that are needed in a level 3 application. Congratulations on a well deserved Expert Infantry badge1 point
-
Congrats Dana! Looking sharp!1 point
-
I think technically most resins are plastic, and not all resins are all that fragile. Some more normal plastics will be just as brittle as a resin if they pick the wrong one, would be insterested to know what he's using on these parts. I have been wanting to build one for display but there's always something else in line first.1 point
-
Me too - this blaster is definitely going down as one of the greats.1 point
-
Your build is coming along beautifully! I am so envious of your electronics.1 point
-
Wow! Nicely done! Convincingly weathered and gritty looking, I like it.1 point
-
This morning I started on the power cylinders. I used parts from Phoenix props, Tino kits and metalmite cylinders from Fieldmarshall. i sanded the bottom flush, trimmed off the resin screws and dremelled the cylinders out. I removed the center pieces the rear section of Phoenix props kit. Leaving only the "fuses" I took the red wire from Tjays kit and placed between the fuses. Drilled small holes in the fuse to have a spot to glue the wire. I added a little solder to the red wire. Here is a pic next to Fieldmarshalls power cylinder. now I just need to paint1 point
-
I next started on routing the power to the sounds boards and lights. I made another cast of the barrel chamber and started carving. I made space for two 3 wire junction boxes. Ones is power in from the pistol grip and the other is power out. I also installed a RGB LED next I poured resin on top of it to sealed and secure the components. Make sure you cover the bulb and connections with mold making compound. Otherwise you have a solid brick attached to 10mm aluminium "barrel" and connect to wires from pistol grip.1 point
-
I worked on the sounds for the blaster. I used the ICD1820 sound board with PAM8403 amp chip to push sounds through CVS 3108 speaker i had to trim the boards to fit into the barrel. I also removed the momentary buttons and mic after recording the sound. After removing items I cut the board. These boards come with two jumpers. Remove them. They slide off. Put one jumper one the last two pins as shown. This lets the blaster sounds repeat when the trigger is held back. Power is connected here. I then cut the remaking pins and pushed the jumper pins over. Then covered with hot glue to protect the contact pins from touching. Works like a charm. Need one board for each sound: blaster and stun.1 point
-
I finished wiring the rotary switch. coveres the hole with green stuff. Barely see any of the repairs.1 point
-
Hi all, first post here for me sonI will apologize in advance if it's in the wrong place. <br> Just got my suit of armor from RS Propmasters, and like anything else, it needs alterations before I even think of trooping in it much less approval to Troop. <br><br> The thing that stands out most are the "Lenses". Or to be more precise, basically a thin piece of acetate stretching across from one side to the other that my nose hits. <br> Being used to being in a Tie Bucket, I'll have to get used to my face being so close. <br><br> At any rate, I absolutely need new lenses. <br> If anyone knows of a supplier that makes nice hard Lenses I coukd throw in there, I'd be most appreciative. Best case scenario would be if I coukd get a large one piece that fits close to the eye rims and screws right into the protruding ear screw assembly. If not that, I can always break out Velcro. <br><br> Thanks!1 point