Leaderboard


Popular Content
Showing content with the highest reputation on 07/05/2017 in Posts
-
They've started offering international shipping under some conditions. Talk to them.2 points
-
It really does!!! Thank you!!1 point
-
I don't think this is the last service to want to start charging, though I'd wager the next will be a lot more organised in how they go about it.1 point
-
Cover strip specs: Arms 15mm Legs (except calf) 20mm Calf 25mm Calf velcro install - If you've installed a 25mm cover strip, using mineral spirits or similar remove any oil or dirt by cleaning the cover strip extending from the shin, and the inside shin half, roughly 1/2" from the edge. Using 3/8" to 1/2" wide strips install velcro the entire length of the calf or 2" long sections in three separate locations (upper, center, lower), similar to where hooks would have been installed. Hope this helps1 point
-
Back of thigh is 20 mm. Back of the shin is 25 mm to allow more flex without showing undersuit. Unless you're of a bigger framed person and needs more width on all your cover strips - in which case you adjust proportionally on all areas.1 point
-
Have you considered contacting Rob over at RS for a replacement shin? I had several pieces replaced due to major cutting mistakes I made... and they didn't charge me for them- not even to ship. Just something to consider because he's so close to you. They've always come through to help me out when I needed it. Looking forward to seeing your work! Remember that hot water baths are friendly to your plastic. I boiled up two HUGE pots of water and dumped them in my kitchen sink in order to reshape my kidney and butt plates (same for bringing in the sides of the chest, and reshaping all the limb pieces, too). The boiling water will stay hot enough to soften your plastic for about 5 minutes or so, and a kitchen sink usually is big enough for the job. I know this question was directed at Frank, but I'll chime in anyhow. So, yes, strapping the torso together first is a very good idea before doing any more cuts/trims. You'll get a good sense about what's not fitting right when it's strapped together. I think I strapped and unstrapped my torso almost a dozen times during my fitting phase. It's a hassle, but well worth it. I had the same kind of question about the greaves. Addertime advised me that, "On my shins, the return edge on the top of the shin sits right at the base of the patella when my knee is locked." And I confirmed with him that the tops of the shins should rest just at the bottom of the knee caps (because I don't do fancy anatomy-speak). Does that help? And about uploading your pics... where do you have them hosted? The new forums allow 'smart' photo link pasting. You paste the link of your hosted image in the post, and it automatically converts it into an image on the page. Sweet!1 point
-
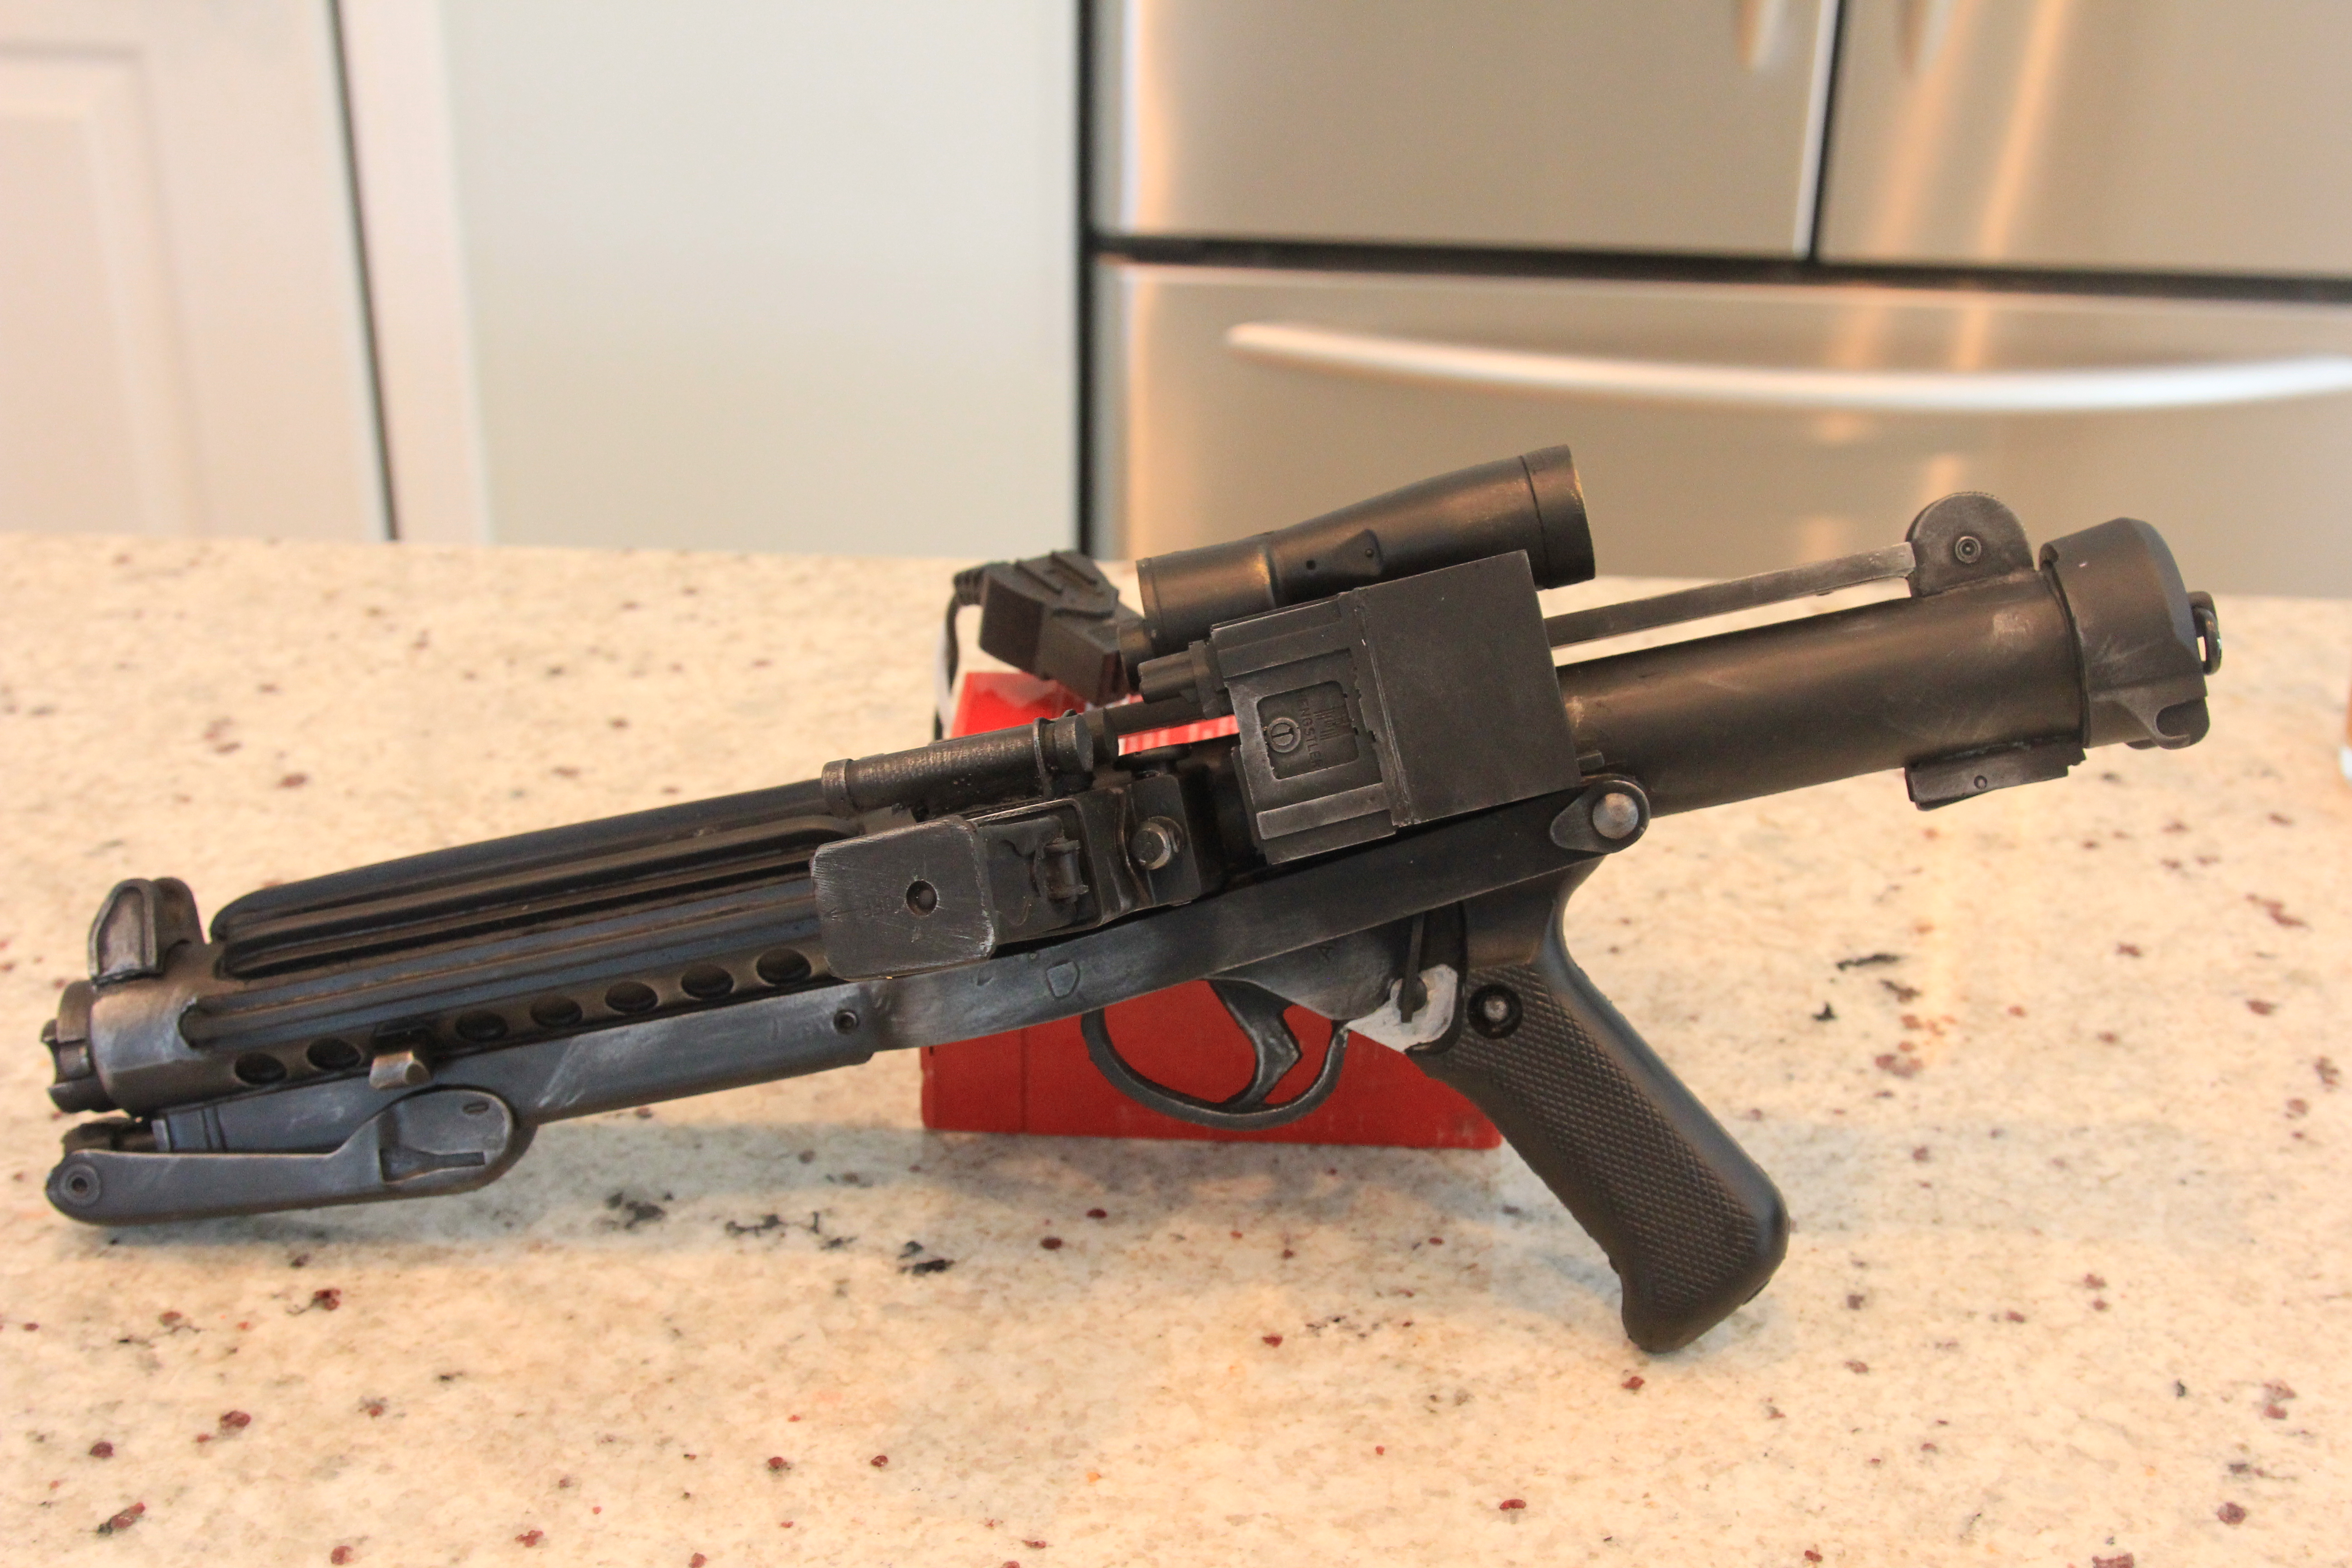
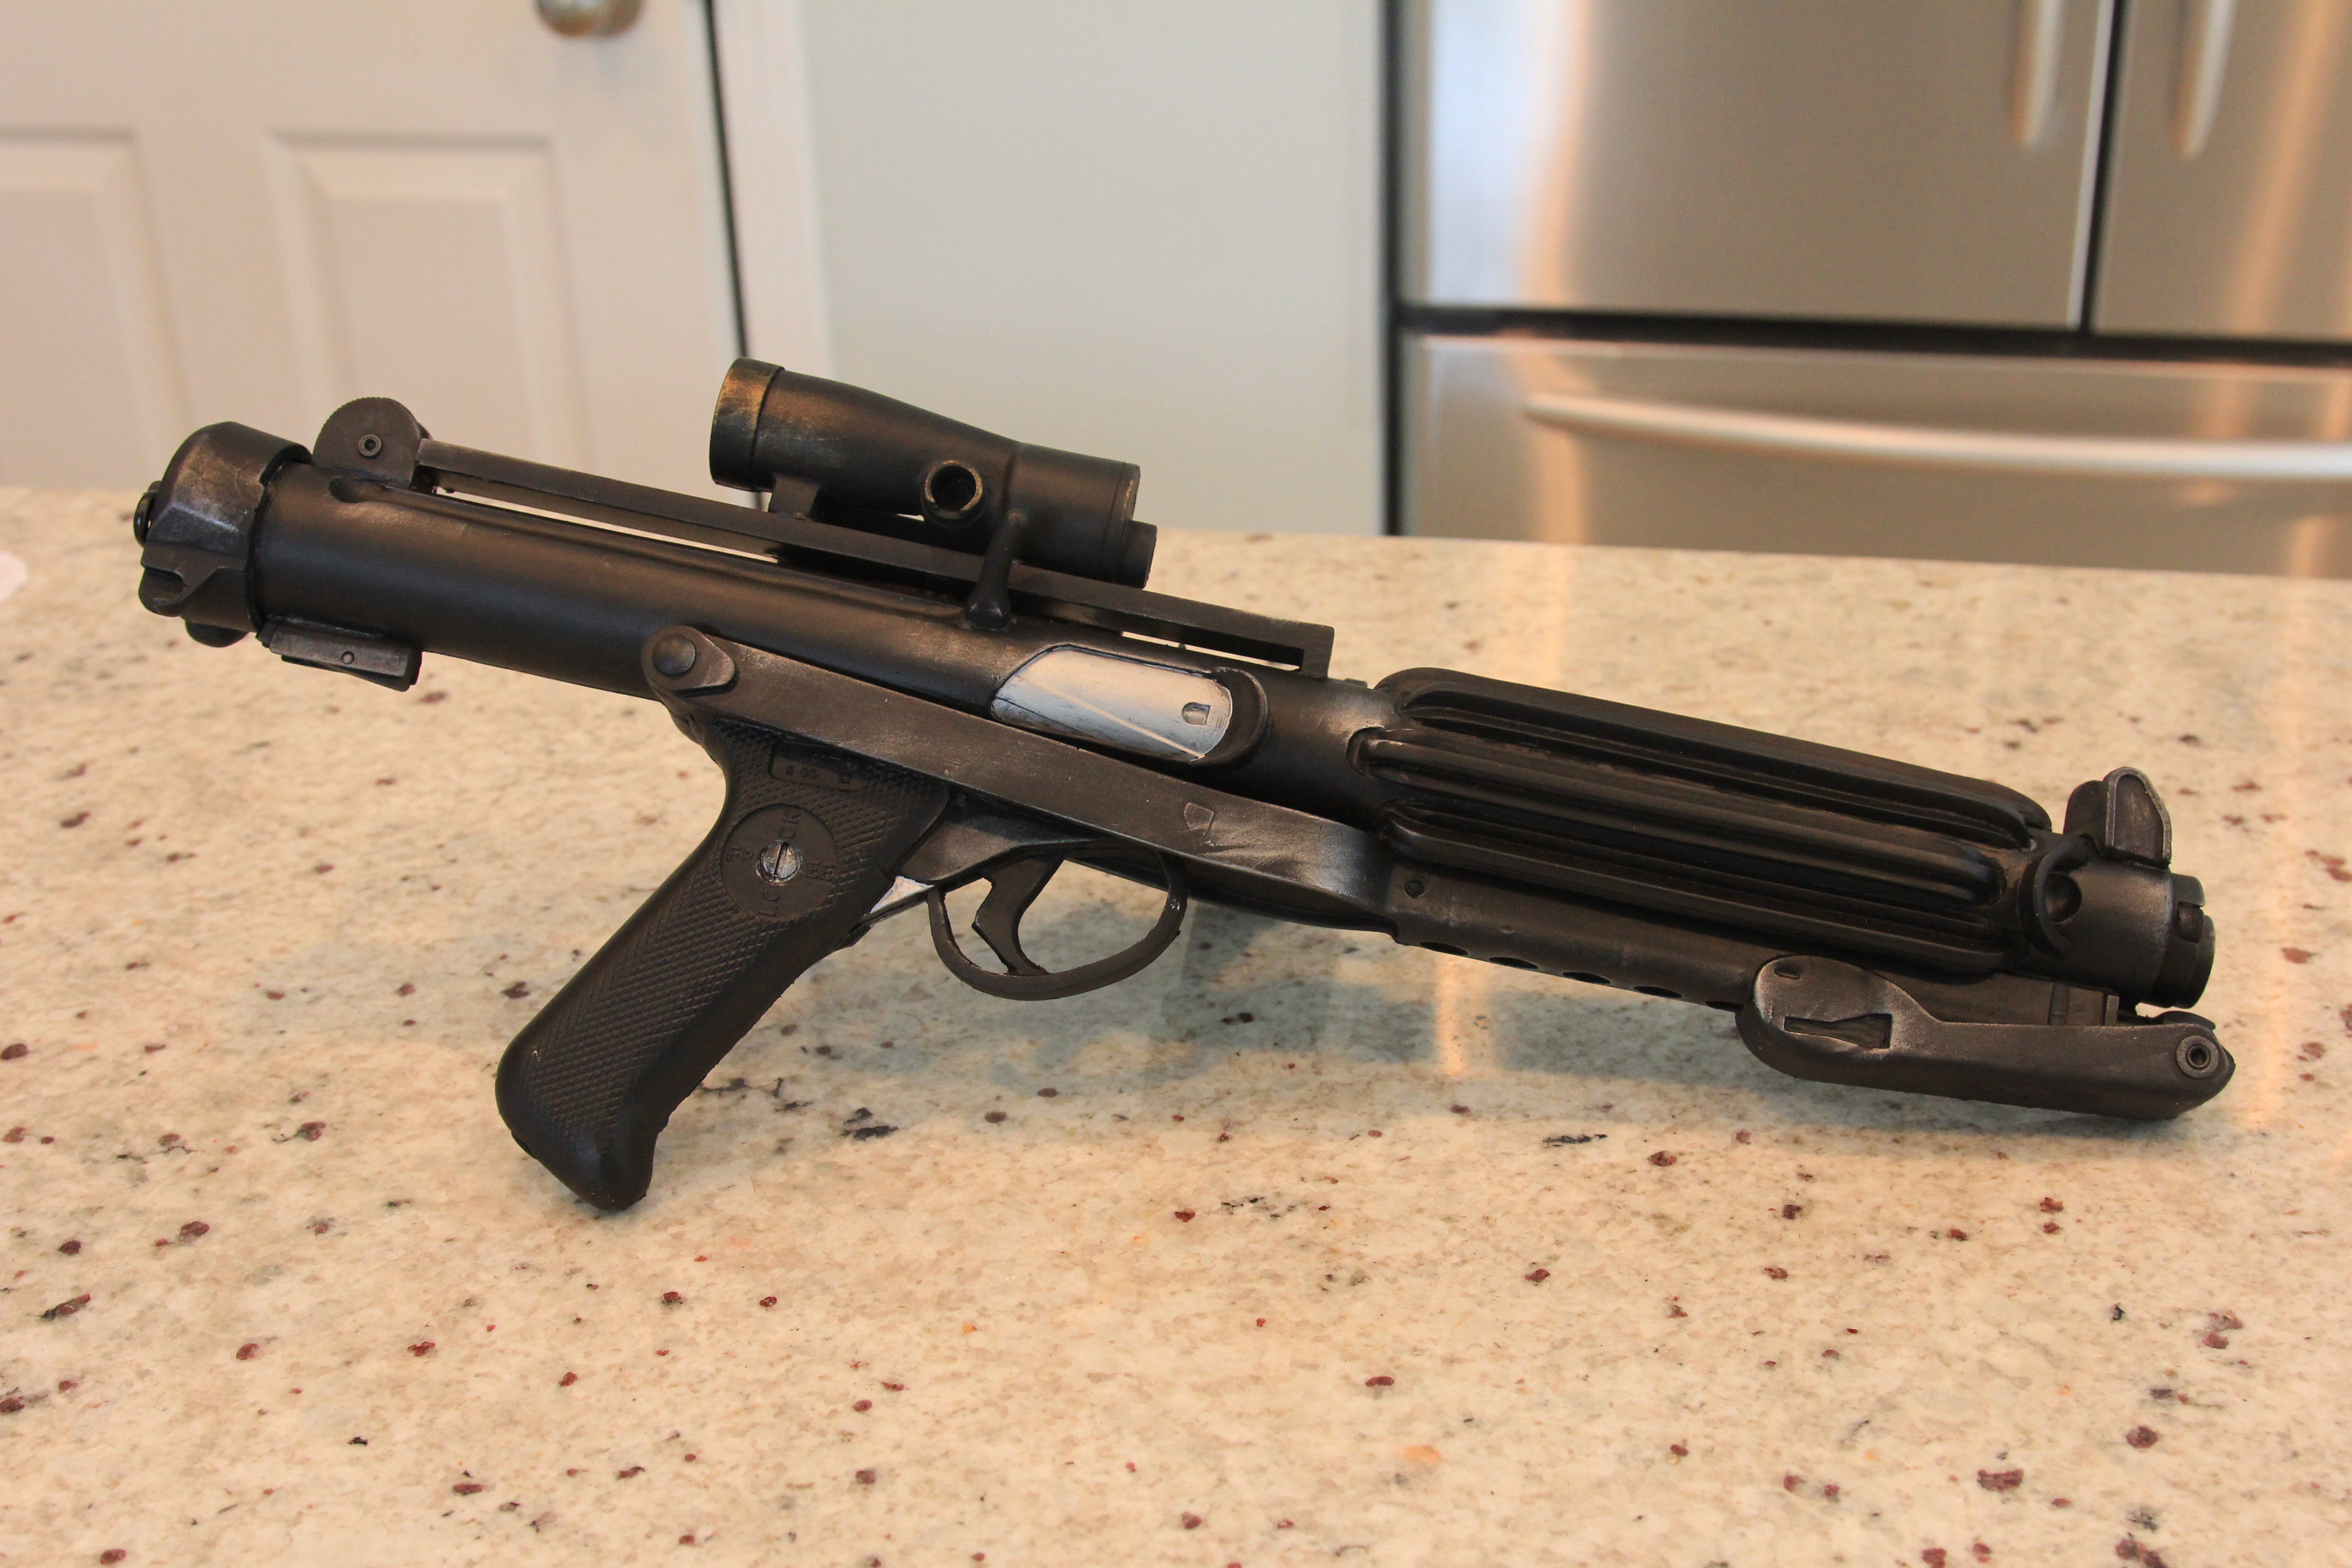
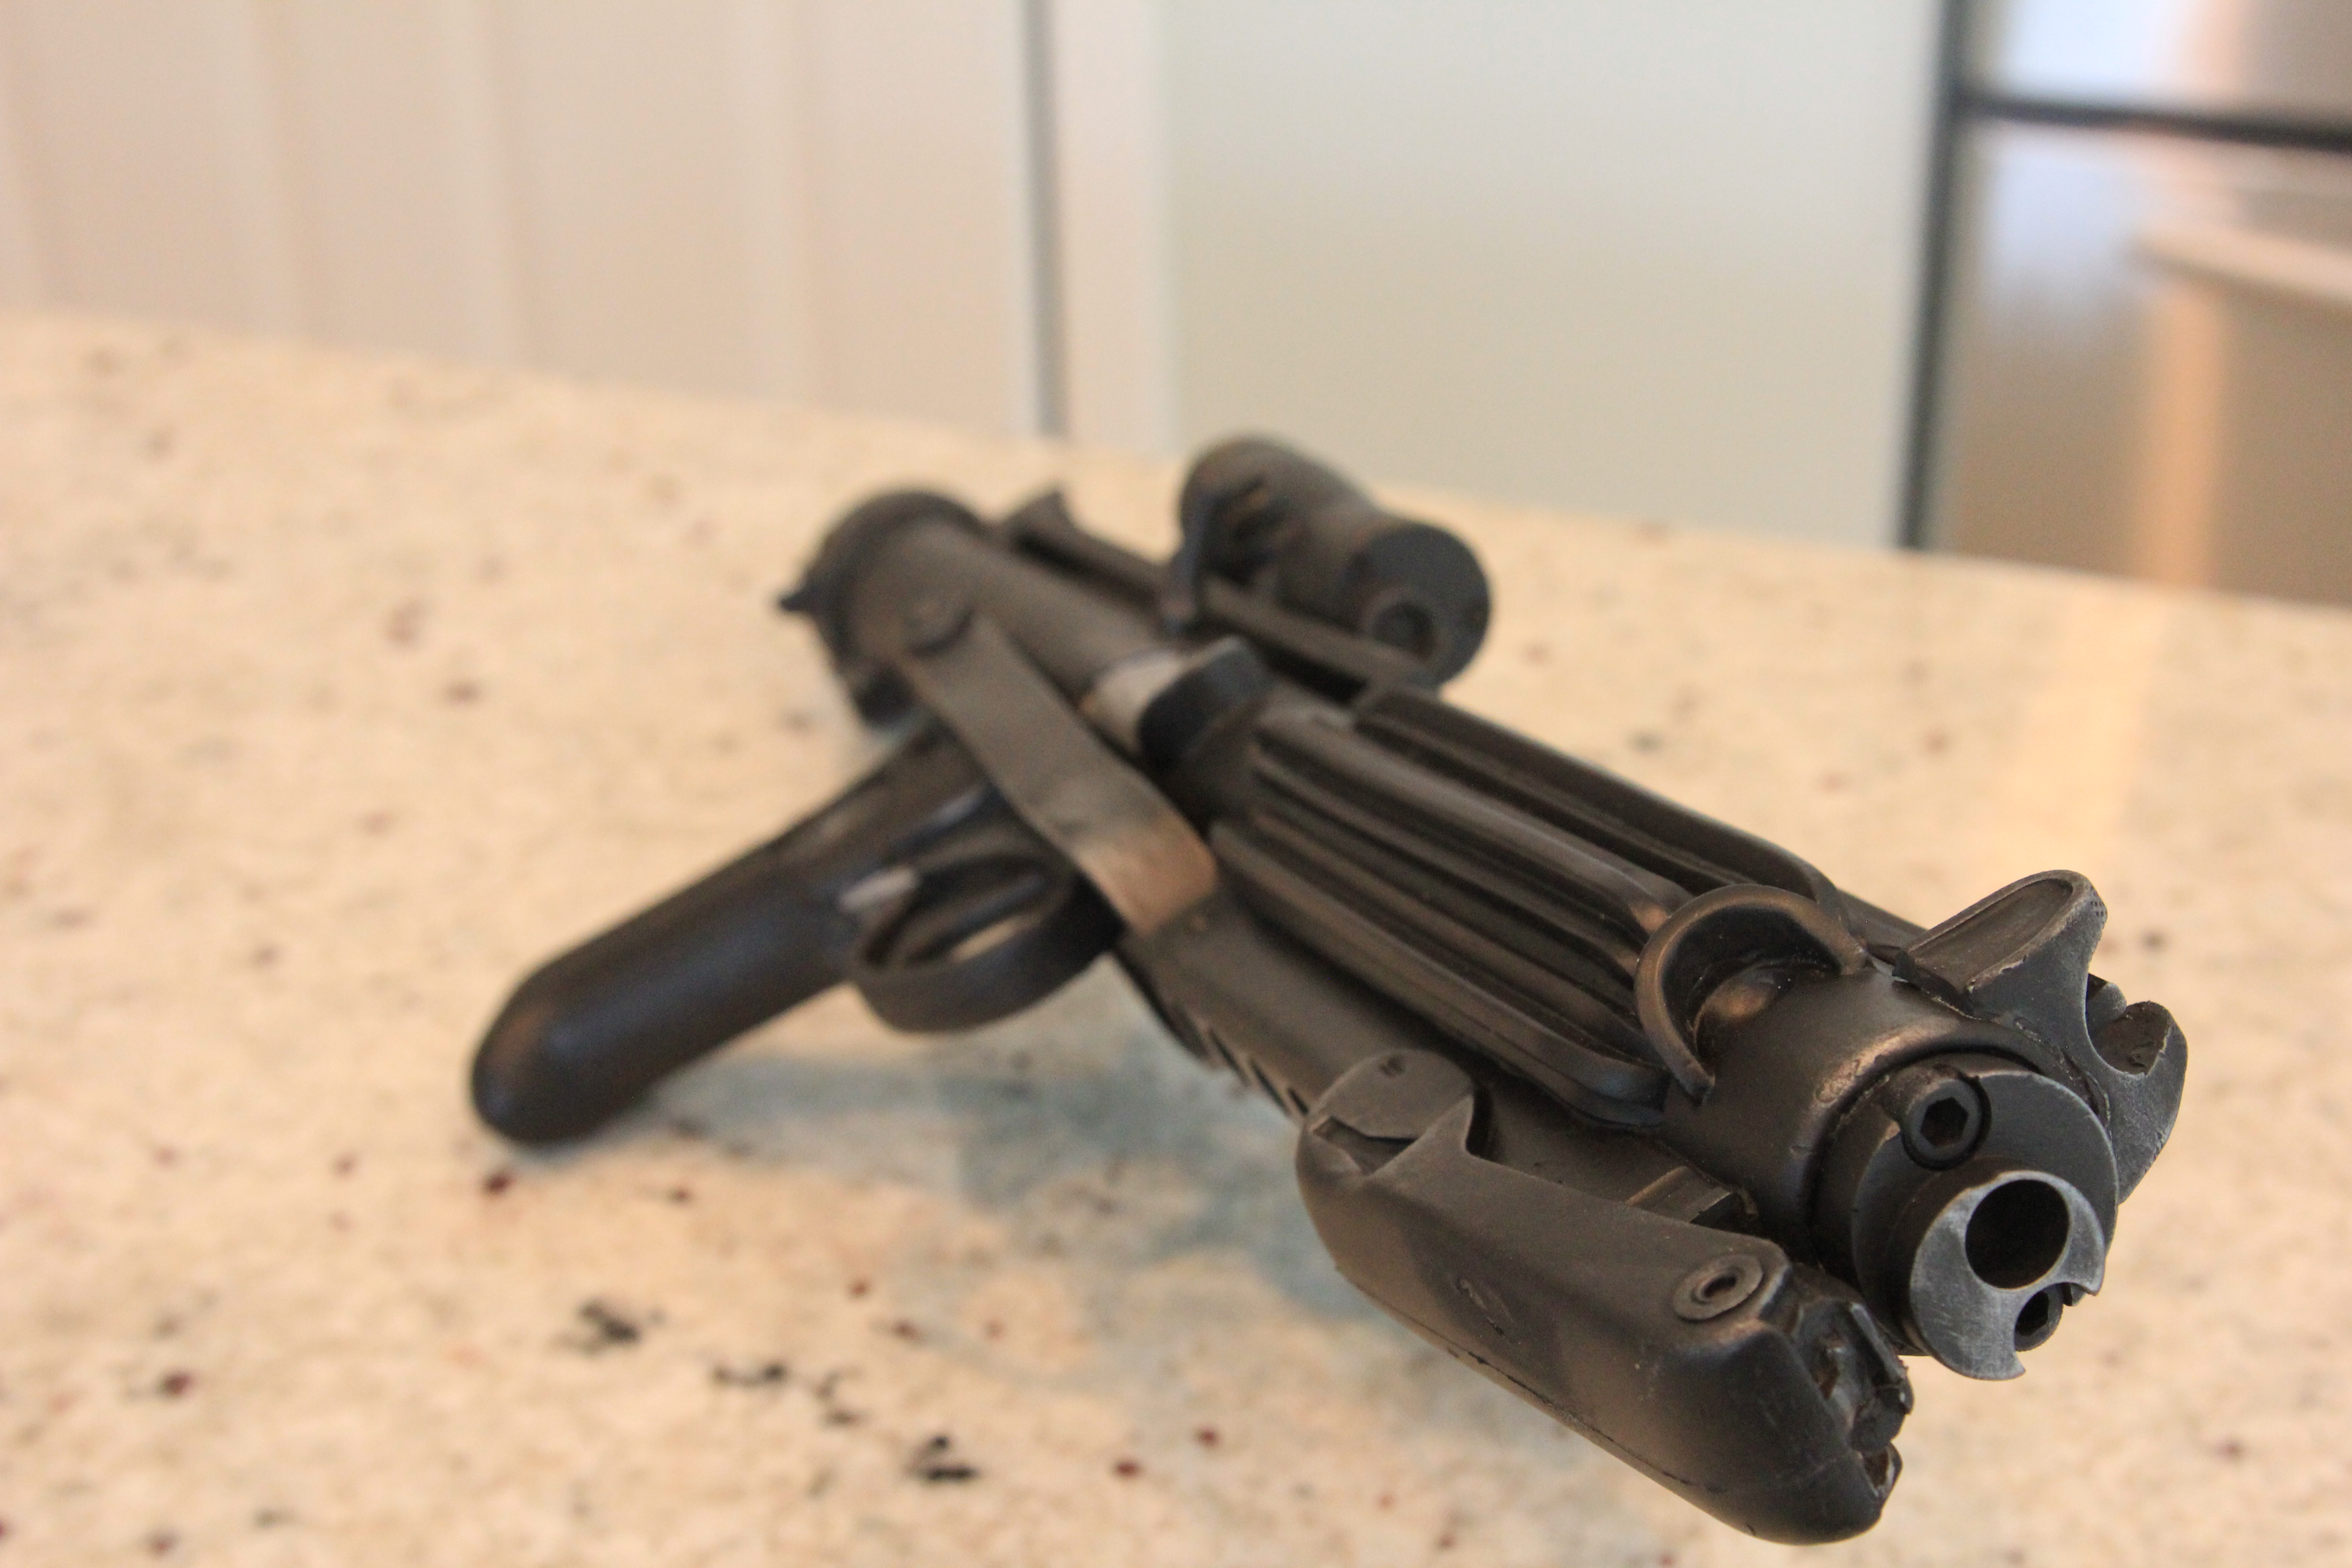
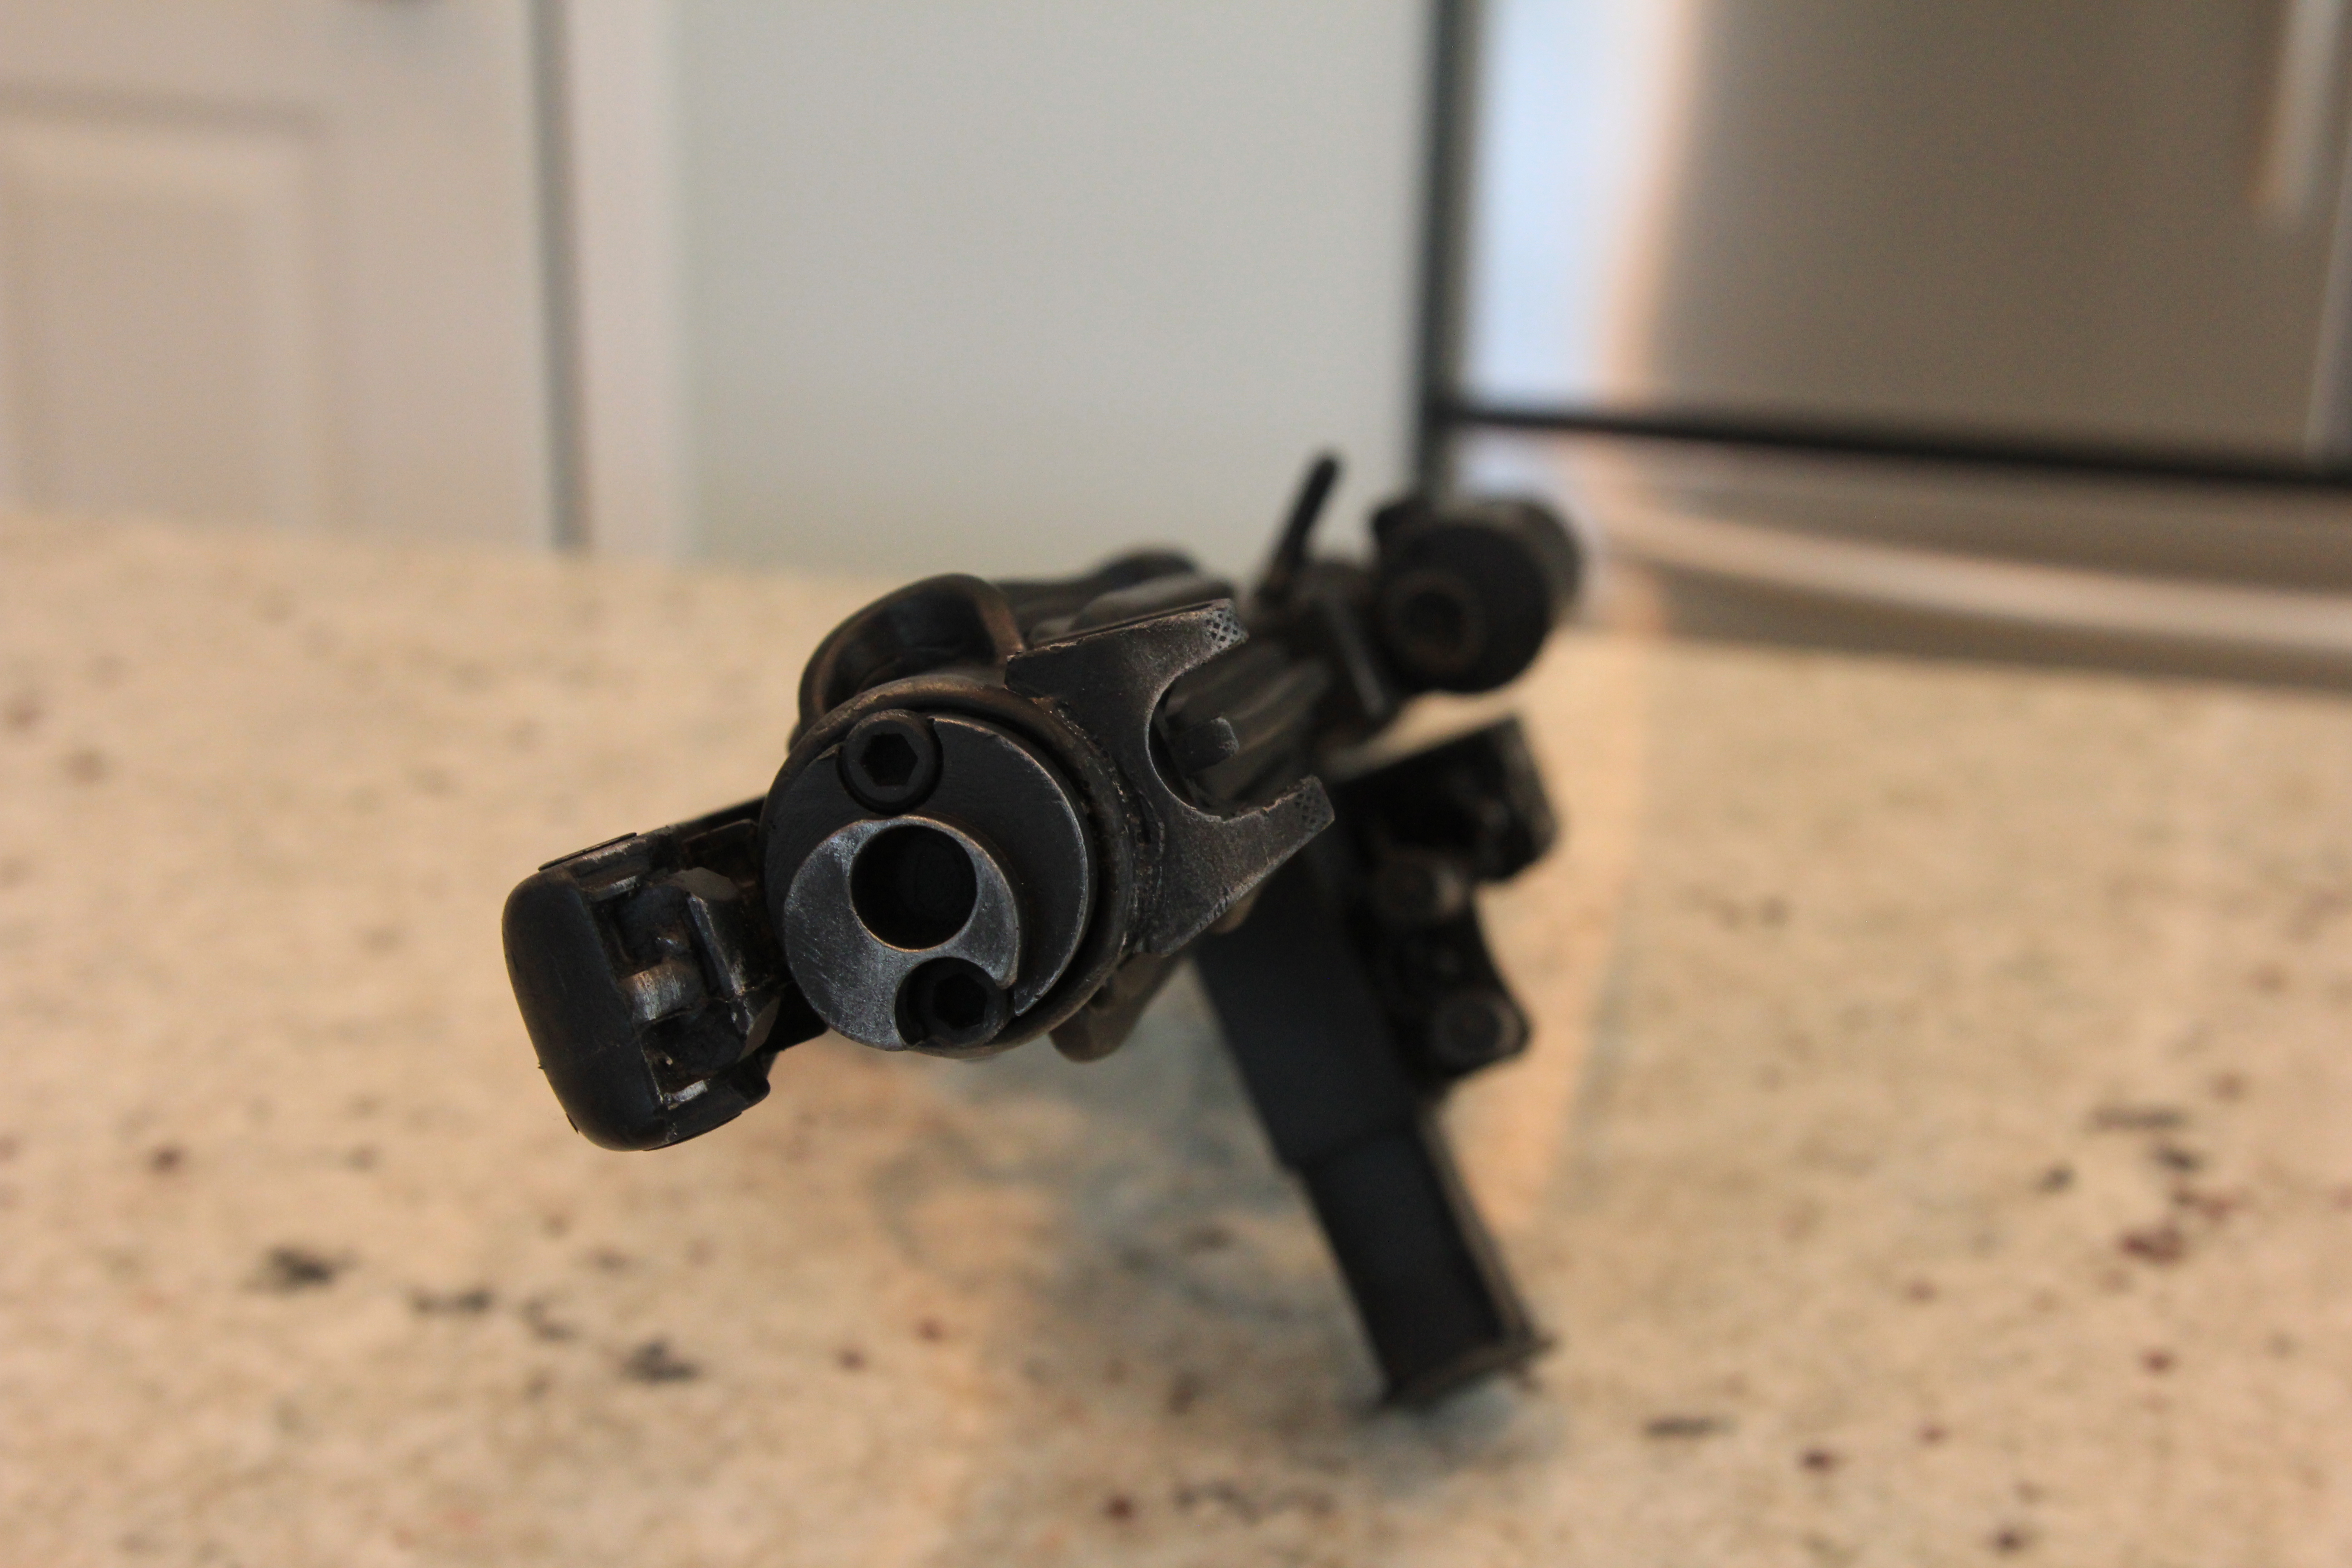
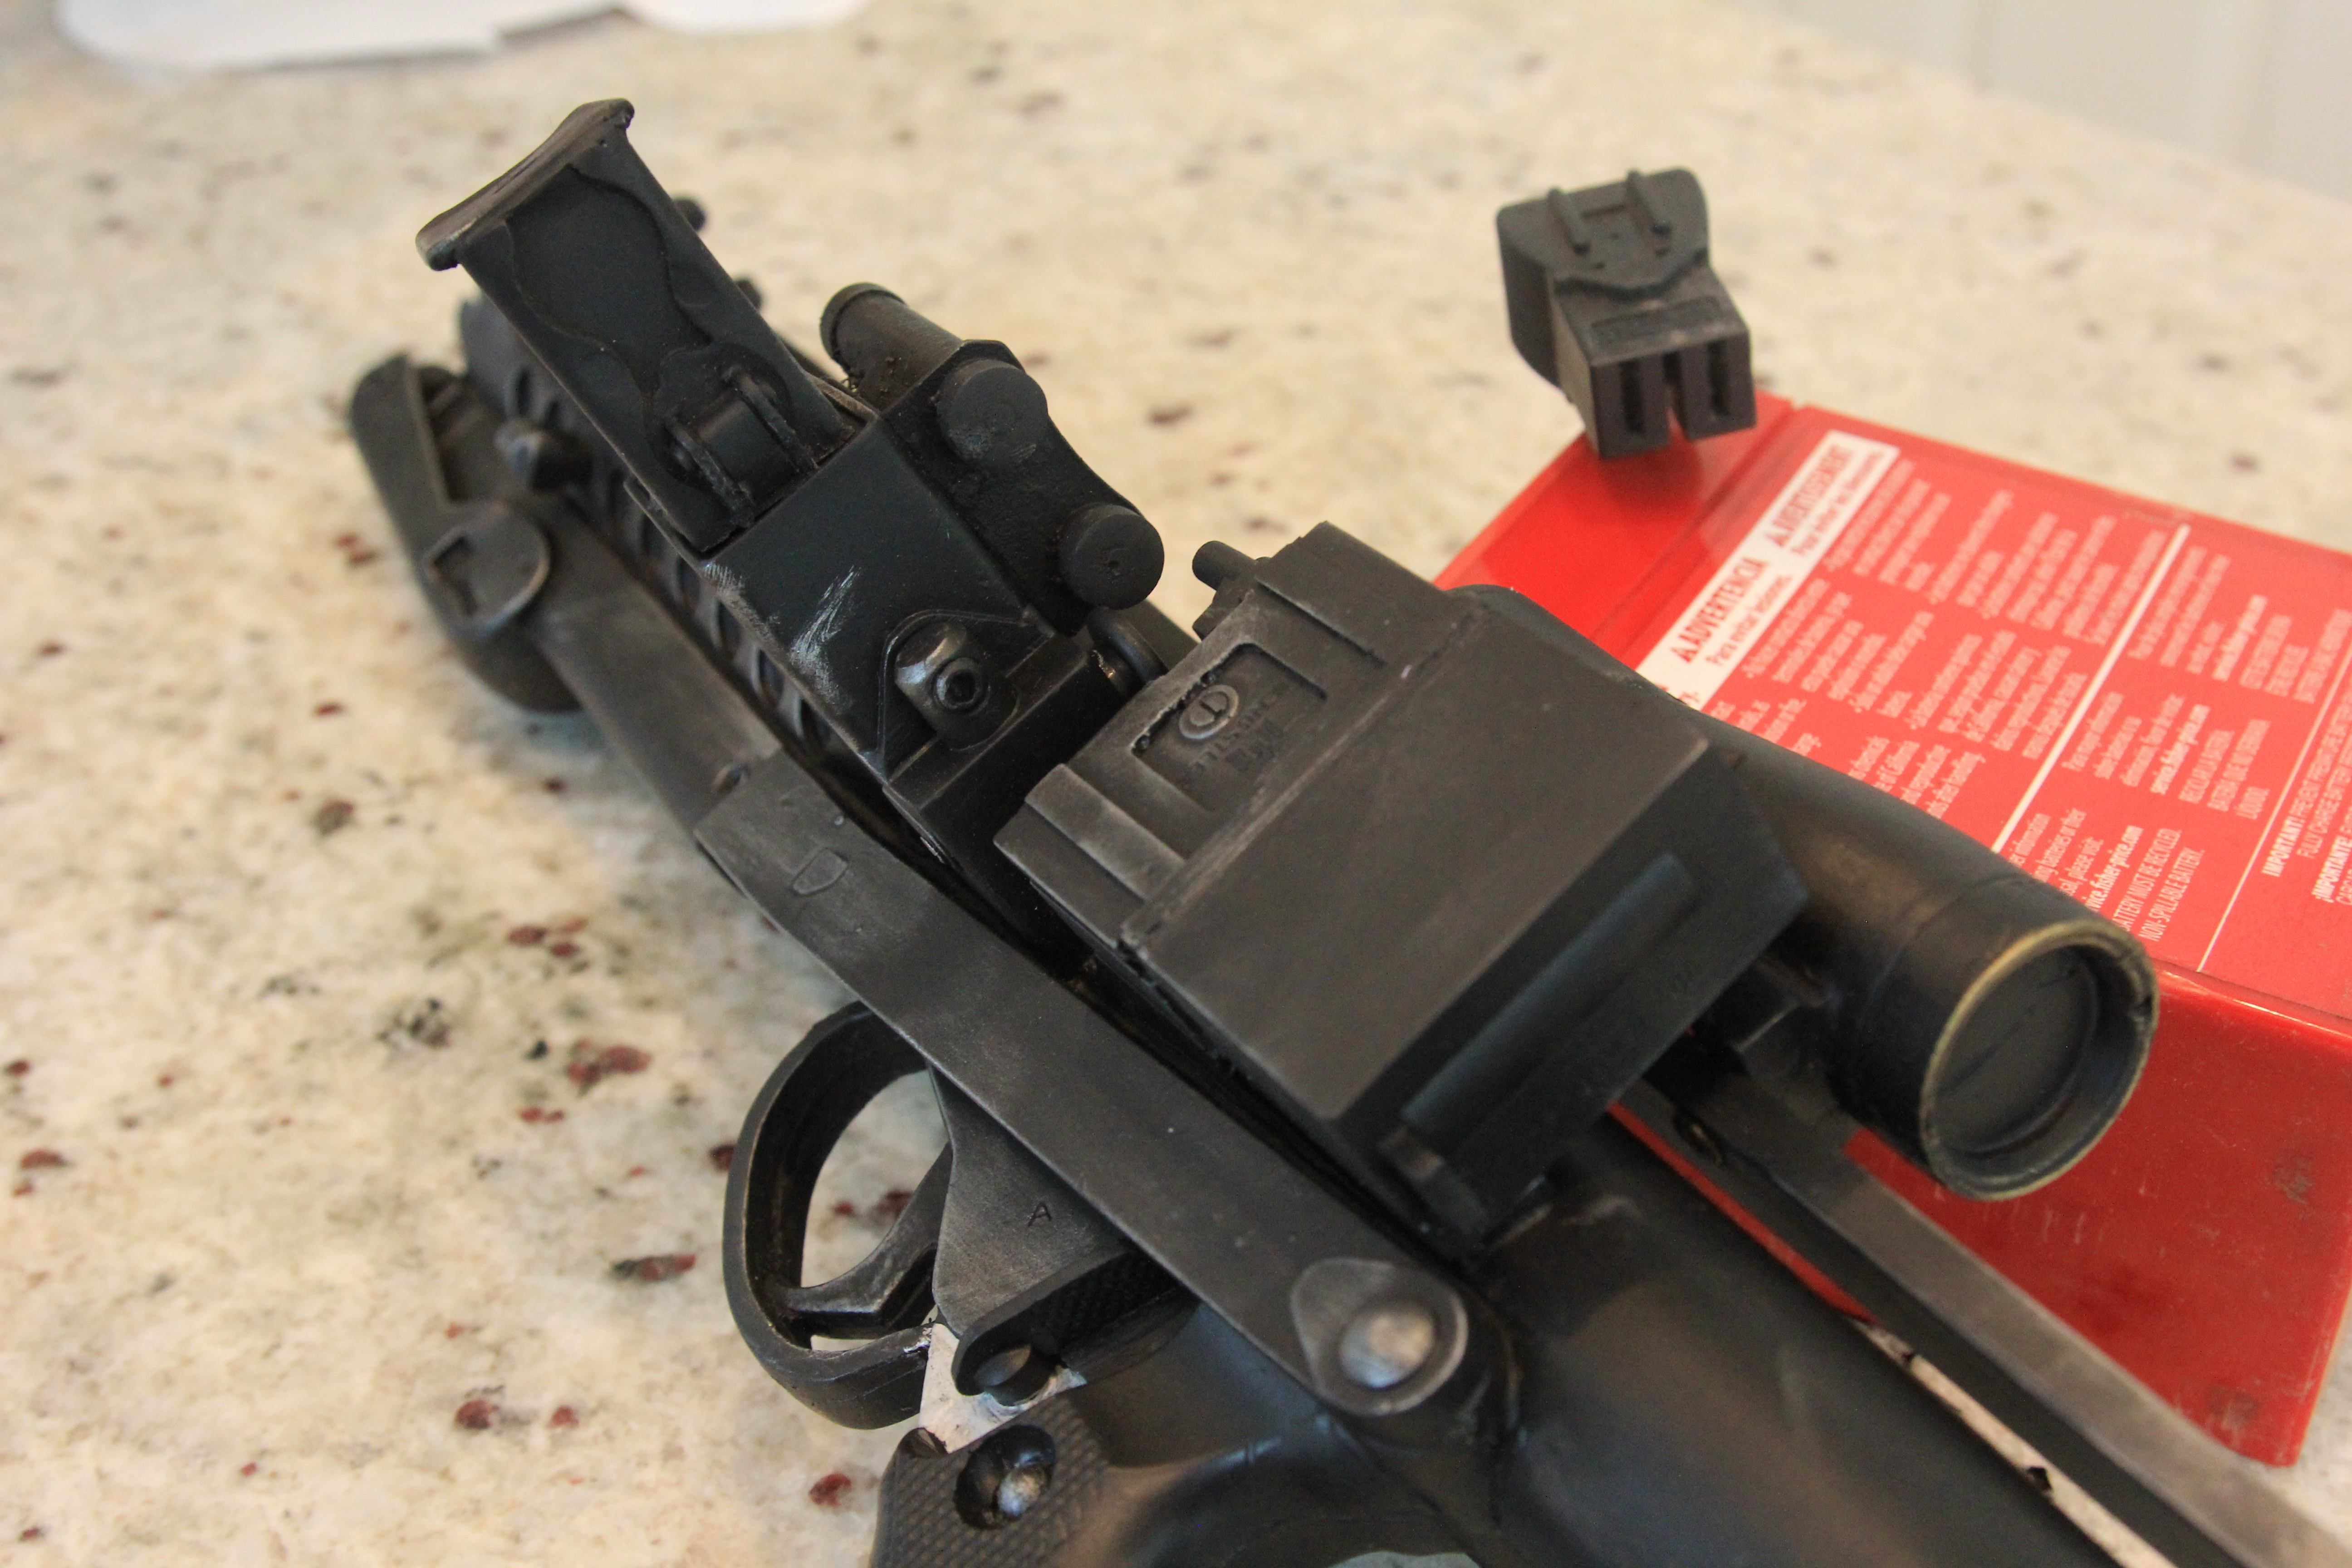
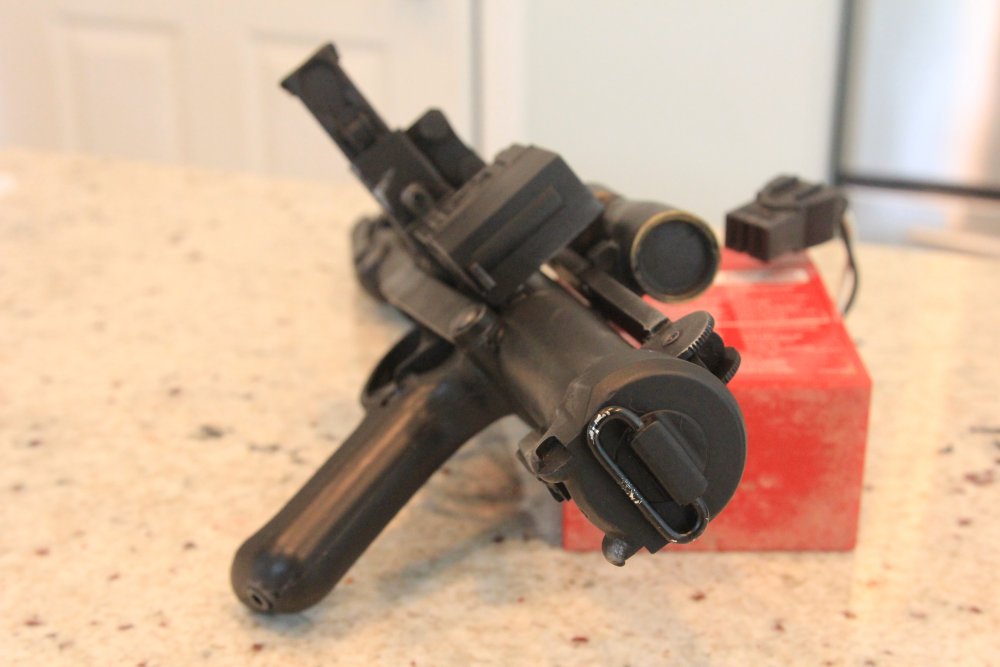
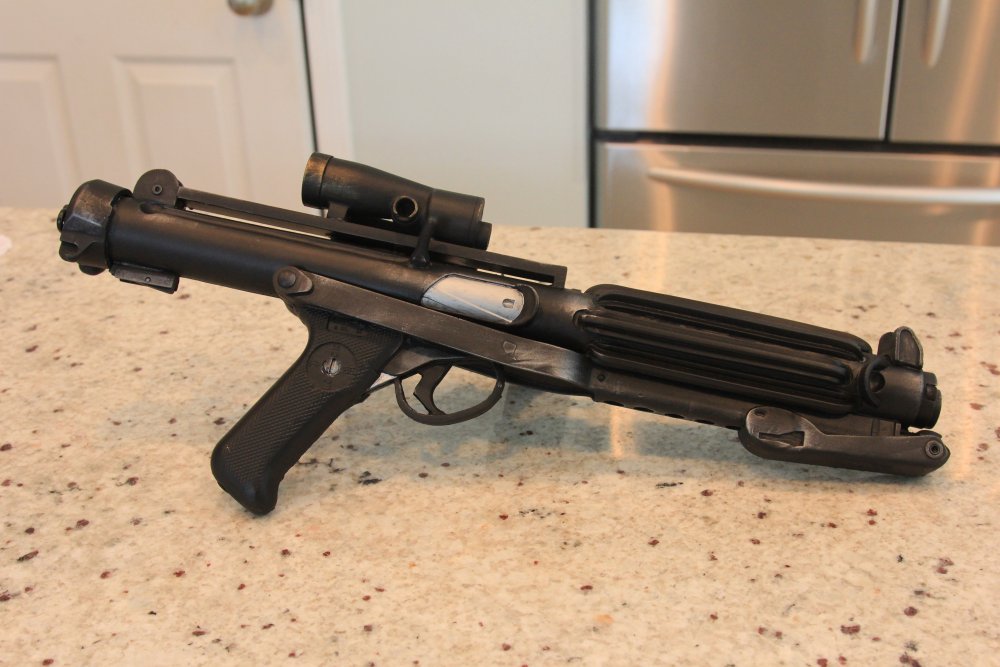
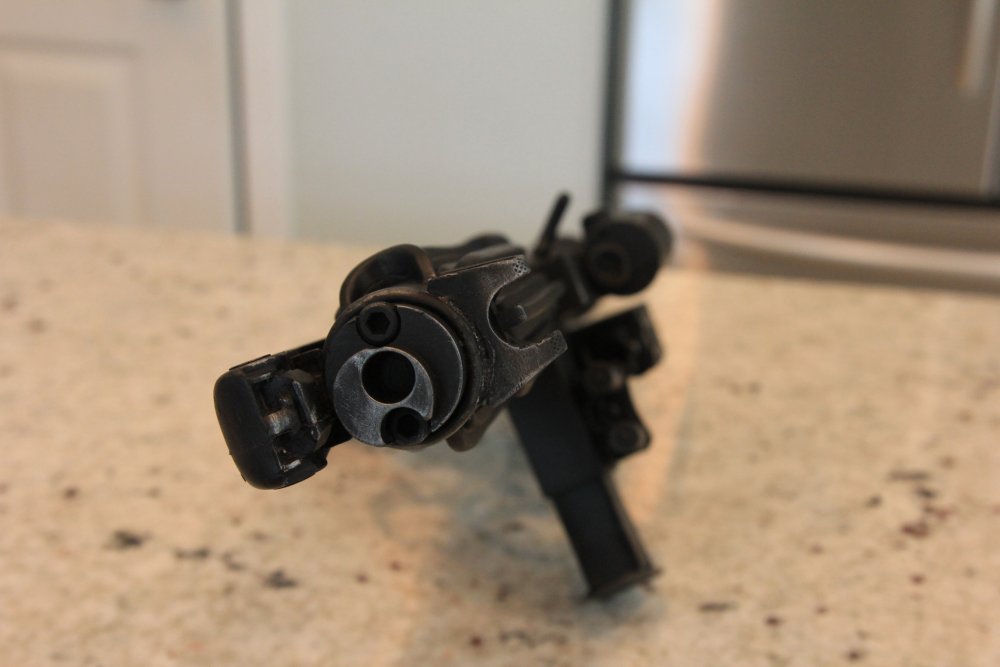
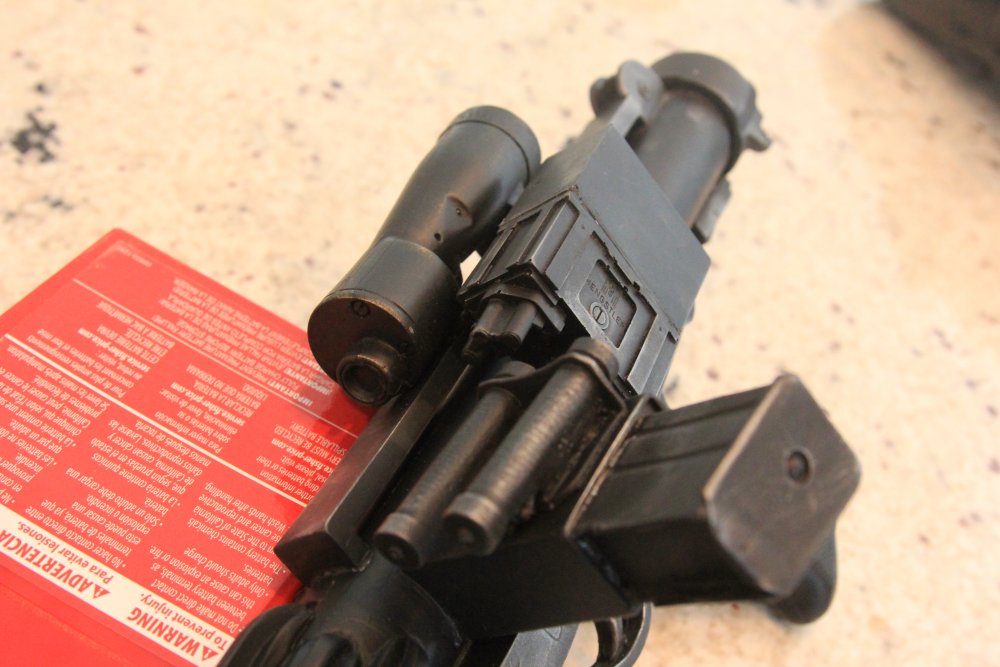
Hi everyone. So I was just fortunate enough to get my hands on one of the new Hyperfirm Elites from Lewis. I'm really excited about it so I just wanted to make a post about just how awesome this blaster is. In my opinion the Hyperfirm is one of the best trooping blasters out there. I used to have one of the older Hyperfirms and I thought that was one of the coolest blasters and never ever had to hesitate taking it out on a troop and letting an attendee touch it or hold it. The kids would love it when you hand them your blaster for photos. Well with his new changes done to the elite it makes it even more nicer. The details are a lot sharper on the elite then the old model. There is now a defined hole in the muzzle where the old one did not really have too much of a hole. Even the greeblies are there and more defined. One of the more interesting aspects of his new blaster is that you can choose which scope you like (M32 or M38) and which size magazine you want. You may also choose not to have either scope put on and ultimately use your own. However, these are all decisions you would need to make before you receive your blaster. That is a cool added extra touch. It also comes with a D Ring so you can go Centurion with it. Take a look for yourselves. Here are some photos:


 1 point
 -
Looking good Steve.1 point
-
Looks good. I recently started thinking about a rubber blaster in the future. This Hyperfirm Elite would do the job. Just need to find ways for shipping to Europe... Congratulations on this beauty, Steve. You will surely have a lot of fun with it.1 point
-
This looks eerily familiar. How does the WTF kit compare to the RS? Just curious if you've noticed any differences...good or bad. I'm sure it will turn out great!1 point
-
Great job1 point
-
You are making great progress and in a short amount of time. Regarding the thighs, before trimming the tops I suggest you get the torso dialed in. Specifically get the cod as close to the final position as possible. You don't want to cut down the thigh tops and then realize you need to raise the cod up a bit and then you'll be left with too much of a gap between the thighs and cod. This process takes patience as you'll be in a cycle of trimming the cod and the but pieces then test fitting. Then trimming the thighs and test fitting again. I think I did this process 4 or 5 times before coming to the conclusion that I needed to trim the cod/raise it up for better proportions and fit. Don't worry about a larger gap at the top of the thighs. Like yours, mine are relatively tight at the knees and I have a lot of room at the tops. You can reduce this down a bit, especially if you're thigh pieces rub together on the inseams but you want to keep them in proportion to the rest of your armor and overall size. Not too big and not too small. The back of your right grieve doesn't look too bad. I bet you can still get a nice vertical cover strip. The left one does look a bit angled. You could try another water bath and try to twist the seam but I don't really know if that would do enough. Is your outer cover strip perfectly centered on the joint? What if you leave your inner cover strip following the angle of the seam but place your outer cover strip more vertical? You'd just need enough material on one side to glue to. Also keep in mind that the cover strip can be wider on the back if needed to help hide the angle. Nice job fixing the heat gun damage. Looks good.1 point
-
They are screen-accurate.1 point
-
Thanks Tony! I cleaned her up this morning, then went ahead and tackled my son's and then my brother's since I was on a roll and he left his bucket here after our initial build session on Sunday. While we've got a lot of hard work ahead of us with the body armor, at least now at this point, I am pretty confident about putting a bucket together!1 point
-
Muchas gracias compañero Thank you very much1 point
-
I'm currently building my TK so I don't feel qualified to post here, but what I would like to say, and I hope you don't mind, is that the help and support I have received with my TK build has been amazing and that's down to all of you. There are are times when I feel it's one step forward and two back as I progress through the build, or like now I seem to have hit a brick wall, when I see a fellow TK has liked one of my posts it makes me think "yes I am doing something right" and it gives me the encouragement to continue. Without the encouragenebt and support I have received on here and the UKG I think I would have fallen at the first hurdle . The new new look is awesome and I appreciate all the hard work you guys n gals put into this, thank you oh also looking forward for Tapatalk to start working again1 point
-
I too think the R1 TK's look best. and its because they are just that, "idealized". It is how you remember it, or at least think it would look, and has the maneuverability that the OT don't.1 point
-
From my experience, you can ship parts as long as there are no pieces of the firing mechanism involved. I've ordered pistol grips, scopes, scope mounts, etc. from the US to EU with no problem. Complete replicas are a different story. According to a TSA agent I spoke with, they are treated like real firearms for the purposes of shipping and travel. But even with parts and kits, things are not always cut and dry. Here's a little situation I had recently... I work at the USG facility overseas. Ordering firearms or replicas through our diplomatic/military mail system is a no go as they would be stopped Stateside but local mail is fair game because local (EU and German) laws are in effect. So, I ordered a DoopyDoos DL-44 kit ("kit", as in solid, cream colored resin... in pieces, is the operative word here) and had it shipped from England to Germany. There were no customs issues as it was within the EU but our own security had a conniption fit when it arrived at Post. A buddy of mine in the mailroom called me and said, "You need to get out to the mail screening room NOW. You got a package and security is flipping out." I, of course, knew exactly what it was so I wasn't the slightest bit concerned. I walk into the room and there are two armed local guards and a federal agent, all looking very nervous and waiting to question me about the package. Undaunted, I said, "So, I hear I have a package?" At that moment I saw it and walked over to examine it. One of the guards stammers, "Do you know what's in this?" "I do indeed. It's a resin replica kit of a blaster prop used in Star Wars." I noticed by this point that the package is open, so they've not only x-rayed it, but opened and examined it as well. I'm grinning and trying not to laugh. I open the box and pull the ziplock bags containing the resin parts out of the box. "The pieces are SOLID resin. See? No moving parts." The guard says, "But... but... it has a firing pin." "Nope. No firing pin. No springs. No bolt. No ammunition. Solid plastic. The metal parts are just screws and couple of decorative pieces." They looked at the pieces carefully and became very apologetic. I scooped up my box and was on my way. The point of this story is that these are people who carry weapons all day, every day and yet they couldn't determine that these were hunks of plastic after examining them so it's easy to see that postal workers or customs officials may also err on the side of caution and reject the package.1 point
-
Hey Richard, glad to be of assistance. First off rough belt measurements, see below. The holster straps should have two sets of Chicago screws, two for the cloth belt and two for the holster itself.1 point
-
The new site upgrade is looking great! - and I've more progress to put up! (Double win ) Moving on to gluing the shoulder straps to the chest plate: Looking good! The onto fitting the internal strapping to the chest plate: ....and then fitting the snaps to the ab plate:1 point
-
I just returned from Legoland Germany (as a TR), where I had a grrrreat time, and was going to update this thread, but then I found out the glue I used for the yoke/back has eaten the yoke's details. Great fun. "Learn from my mistakes" wasn't meant this literally, but stay away from "Tangit PVC-U" if you're building a KB kit. This is how the yoke looks now. I glued it three weeks ago, and it was looking fine last weekend. I have no idea what happened, but all the details are gone. I don't blame the glue, I shouldn't have used it I guess. Before this happened, I made some small progress on the arms and legs. I still need to cut the proper curve into the thigh, which was planned for tonight, and I still need to figure out how to curve the shin closure. The plan was to glue industrial strength velcro into the shins. Also, I did some work on the arms. I've already prepared to follow Ukswrath's bicep detail upgrade, but haven't finished all the details yet. There's some leftover E-6000 I still need to clean up too. All The holes aren't up to the proper sizes yet; I had a close look at some existing / approved FO TKs and their holes were much bigger than mine. Well, better than cutting too much away intitially, I guess. I also glued the ab/back parts together. I cannot figure out how to do the thermal detonator; some cut lines would be incredibly helpful here. I envy smaller guys that can fit into Anovos stuff.1 point
-
Forearms. Installing Decals and Greeblies. Install Decals. Remove tape and install Greeblie buckles.1 point
-
So before we can move forward we need to deal with the flat greeblie issue. Greeblie By now you've discovered the greeblies (resin buckles) are flat yet the armor they are mounted to is curved. To solve this issue you'll need to CAREFULLY soften the greeblie so that it can be formed to the contour of the armor. To heat it you can give it a hot water bath previously discussed, or with a heat gun. In this section I will discuss use the heat gun technique. I'm going to start with the spats because that's where we left off. As mentioned before my spats are being converted to incorporate snaps instead velcro. Either mounting option you choose to use you will still need to heat and shape the buckle. So here we have a nice flat buckle and the curved spat it will need to be mounted to. Do you see the problem here? lol Spat Greeblie In this tutorial I will use mixing bowls to shape the buckles. For the spat buckle I'll be using a 5-1/4" mixing bowl. 1) Start by putting on some gloves. Heat resistant is better but leather would be best, I'll be using my cut resistant gloves because they work perfect for me. 2) Place the resin buckle on heat resistant material smooth side up. 3) Evenly heat with gun for 20-30 seconds or until you start the plastic slightly discolor. 4) Place heater buckle onto bowl for 15-20 seconds. I rotated it around the bold finding a cooler spot as to cool the resin quicker. 5) Check fit Shin Greeblie For the Shins I used a 7-3/4" bowl. Before After Thigh Greeblies I used a 9-1/2" bowl. After Finished1 point
-
Trimming cont.... Belt boxes1 point
-
As everyone has said, there are a number of task-specific options available, and they all have their pros (amplification, static bursts) and cons (price, availability, preset sensitivity levels). At the end of the day, you've got to do what works for you at the time, even if that's being the strong, silent type until you can order the device that you really want to use. In the meantime, you've found a way to bridge the gap, so to speak, and I think that the ingenuity is pretty cool. I do wonder if you'll have feedback issues though, as walkies are prone to that in close proximity. I am a big fan of the Rom/FX personally, but as you've seen, there are multiple options available for this purpose. I'd love to see something like that, Eric. This community has no shortage of creativity or skill sets, that is for certain!1 point
-
I think I'll stick with my rom/FX. After all, it is purpose built for the task.1 point