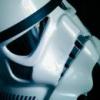
Dmian Posted August 7, 2009 Report Share Posted August 7, 2009 So... Today my AP arrived! I'm so happy! I'm sure most of you know how it feels to get your first armor. So yes, I'm very, very happy. It took only a week for the box to arrive from its origin. That's faster than I expected! And I had no problems whatsoever with customs or the mail (it was delivered to my door, something not so common in Madrid ) So now my journey begins. Here you have some pictures. I'll add more as I progress in the assembly. Cheers! AP, with its "cousin", the SDS helmet (I cut the green star foam, the one that comes with the armor is different.) A box of happyness Tools of the trade (Humbrol paints are under the decals) #13 Quote Link to comment Share on other sites More sharing options...
firebladejedi[TK] Posted August 7, 2009 Report Share Posted August 7, 2009 Awesome news Damian, the best of luck with your build and remember to have fun with it Quote Link to comment Share on other sites More sharing options...
TK-6044[TK] Posted August 7, 2009 Report Share Posted August 7, 2009 The Best set of AP armor I have even seen made is: TK-4261 AKA: Curtis. If you ever need help or get stuck ask Curtis. Good Luck Dave So...Today my AP arrived! I'm so happy! I'm sure most of you know how it feels to get your first armor. So yes, I'm very, very happy. It took only a week for the box to arrive from its origin. That's faster than I expected! And I had no problems whatsoever with customs or the mail (it was delivered to my door, something not so common in Madrid ) So now my journey begins. Here you have some pictures. I'll add more as I progress in the assembly. Cheers! AP, with its "cousin", the SDS helmet (I cut the green star foam, the one that comes with the armor is different.) A box of happyness Tools of the trade (Humbrol paints are under the decals) #13 Quote Link to comment Share on other sites More sharing options...
Irishtrooper Posted August 7, 2009 Report Share Posted August 7, 2009 D that is one awesome lookin kit you got there man! Enjoy building bud!!! Quote Link to comment Share on other sites More sharing options...
james007bond[TK] Posted August 7, 2009 Report Share Posted August 7, 2009 Congrats dude, take your time, don't rush it.... and aim for that Elite Status..... Quote Link to comment Share on other sites More sharing options...
TK-2126_MD[TK] Posted August 7, 2009 Report Share Posted August 7, 2009 Hahaahh Pero que bien!!!!! AP toma su tiempo pero siempre llega! Como dijieron los jovenes, con calma, diviertete,y toma 10 mil photos!!!! Estare este thread detalladamente!!!! Quote Link to comment Share on other sites More sharing options...
TK-7980 Posted August 8, 2009 Report Share Posted August 8, 2009 Wow, did AP change his set up or something? These pulls look SHARP. Quote Link to comment Share on other sites More sharing options...
Trooperman Posted August 8, 2009 Report Share Posted August 8, 2009 Yeh, these pulls do look super sharp are they using HIPS now ? Quote Link to comment Share on other sites More sharing options...
Dmian Posted August 8, 2009 Author Report Share Posted August 8, 2009 Thanks all of you! Yes, I know I'm going to enjoy building this armor. I'm going to put pictures of the cutting process, something you don't see often. Members of my garrison are terrified at that part. I can recall TrooperTim's thread, that has the cutting part. The pulls are great. AP did a fantastic job. I'll try a couple of pictures more of the pulls. It looks fantastic and I'm very pleased with it. It's all ABS. No HIPS here. And yes, I'm aiming for Elite. I have several parts from different forum members and I'm waiting for other parts to make my AP as screen accurate as I can. I'll be using Stukatrooper's tutorial as a reference, as well as other build threads on this forum and lots of screen captures. Quote Link to comment Share on other sites More sharing options...
Daetrin[Admin] Posted August 8, 2009 Report Share Posted August 8, 2009 Looks like a lot of fun - that sure is a nice kit Quote Link to comment Share on other sites More sharing options...
Dargas[501st] Posted August 9, 2009 Report Share Posted August 9, 2009 those are the most crisp pics of an out of the box AP set I've seen to date! I'm getting in love with this kit... damn! I guess I'll have to start saving!! I'm really looking forward on this build. If you can keep a WIP as detailed as these ics please do so, it'll help a lot of newbies on how to work a set like this! thanks for sharing mate! Quote Link to comment Share on other sites More sharing options...
FIVE[501st] Posted August 9, 2009 Report Share Posted August 9, 2009 Congrats man! It's so great getting a really accurate suit, I know. And while I've got a TE2, I know the AP is AMAZING!! Have fun putting it together, and please — as everyone says — take plenty of pictures! We wanna know the whole process... every cut, clamp, and "crap!" (hopefully not many of the last one) haha Quote Link to comment Share on other sites More sharing options...
Dmian Posted August 10, 2009 Author Report Share Posted August 10, 2009 OK, here we start. This is the workshop where I'll be working. My brother is starting as a guitar luthier (guitar maker) and I wanted a place to build my props, so we worked for the last 3-4 weeks to build our workshop. The place was abandoned. We made the concrete floor (we had no previous experience) and put all the wiring. We painted it and also built 2 workbenches. Mine's the one on the right. The tools needed: cutter, gloves and instructions. Very important: to have some snacks at hand (I like pistachios) and a caffeinated soft-drink (I drink Guaraná Antartica, but you can drink anything you want). Any inexperienced trooper should start by cutting the smaller pieces first, to gain some practice. So let's start with the hand-guards and the TD/O2 Everything cut If you have the appropriate pipe you can assemble the Thermal detonator/O2 canister. It'll give you a sense of accomplishment with little effort and your first piece of prop you can grab. Unluckily I need a grey pipe and not the black that comes with the AP. Now, let's follow with the pouches, ab buttons and the shoulder straps. You can mark the cutting line with a pencil first, to make it easy to follow. Once marked it's ready to cut. Pouch cut. Do the same with the other one. I'm leaving the rest of the sheet for later, but I'll pre-cut the parts, leaving enough margin, specially for the ab buttons. I finished with the small parts, so I can start with bigger parts. I decided to start with the calves. The lines are clear and any mistake will not be too visible. You can clearly see the cutting lines, so no need to mark it with a pencil. But you can mask the line with painter masking tape, in case you miss the line with the cutter. And that's it for today. I finished the right leg calf, but I'll take a picture of that tomorrow. Cheers. Quote Link to comment Share on other sites More sharing options...
rapstertee Posted August 10, 2009 Report Share Posted August 10, 2009 You realise the black Thermal Detonator Pipe can be painted with grey primer or even humbrol grey to make it accurate? Quote Link to comment Share on other sites More sharing options...
Dmian Posted August 10, 2009 Author Report Share Posted August 10, 2009 You realise the black Thermal Detonator Pipe can be painted with grey primer or even humbrol grey to make it accurate? Yes, but most pipes in Spain are grey, so it's easy to get one of the correct color (and I'm a bit lazy ) Quote Link to comment Share on other sites More sharing options...
TK-2126_MD[TK] Posted August 11, 2009 Report Share Posted August 11, 2009 WOW Very nice work shop!!!! Guitar luthier very cool, i bet u will both learn one or two tricks from each other!!!! More pics man we want more!!!!!!! Bien muy bien!!!!! Quote Link to comment Share on other sites More sharing options...
nothingrecorded Posted August 11, 2009 Report Share Posted August 11, 2009 This is wonderful! I love the kit and I love the crisp photo progress. A must for everyone. Keep up the good work, I will be watching this thread closely. Quote Link to comment Share on other sites More sharing options...
ThayNerd[TK] Posted August 11, 2009 Report Share Posted August 11, 2009 Very cool, good luck with your build. Quote Link to comment Share on other sites More sharing options...
Dmian Posted August 11, 2009 Author Report Share Posted August 11, 2009 Thanks for your comments! Now, on to the second day... I wasn't going to talk about drinks today, but the color of this one was pretty curious, so I wanted you to see it. It's called Burn Day. OK, as I told you yesterday, I finished cutting the right calf parts. I found a crease on a corner of one of the left calf parts, but it wasn't too important. Once I finished cutting the calves I was worried because I've read on several places that parts tend not to align properly, but the front of the calves are aligned... ...and the back, once you manually correct the warp, is aligned too... ...on both legs! DANGER! Will Robinson, DANGER! The sniper plate is a delicate part, so you must have care with it. AP pre-cuts this part (I guess to get if off the mold) so I believe it's better to do most of the work from the inside. I marked the lines and started cutting from the inside. A clean cut! (view from the inside.) And from the outside. I decided that the next part should be the biceps part. The lines on these parts are very faint, so it's better to mark it with a pencil. I decided to give it a small return on the top. I also separated the front from the back, to handle it better. This part came out pretty well, to be honest. And both parts of one bicep finished. I'll finish the other one next time. And that's it for the second day. I'll probably take one or two days off and continue with the assembly after that. Cheers. Quote Link to comment Share on other sites More sharing options...
Dmian Posted August 14, 2009 Author Report Share Posted August 14, 2009 Day 3 of my assembly. I finished the left bicep parts first (no pictures of that, sorry) and decided that the next part would be the shoulders. DANGER Will Robinson DANGER! The shoulders are a very visible part. If you go wrong with them, it will show. You should think about masking the parts, in case your cutter gets loose. As I'm feeling pretty confident right now I didn't mask the shoulders... As with the biceps, I separated the parts for better handling. Look mom! Without masking! A nice cut. OK, next another visible part: forearms. I marked the lines, leaving a small return. The front (outer) part of the forearms cut. If the return is too big I can make it smaller. I'll see when I assemble the whole piece. I cut both back (inner) forearm parts. This part has no return in the bigger opening because that is just in your joint, and it would just be uncomfortable. As you see my confidence is growing and I'm getting slowly better at the cutting. I finished all the small parts. Tomorrow: legs! Cheers. Quote Link to comment Share on other sites More sharing options...
TK-2126_MD[TK] Posted August 14, 2009 Report Share Posted August 14, 2009 Dude!!!! this is very cool!!! I wish that i had this 2-3 yr ago when i started on my FX.... . with this even a ewok can make a suit!!!! Very good, i have a feeling that this will get a sticky award..... Bien muy bien!!! Quote Link to comment Share on other sites More sharing options...
Dmian Posted August 17, 2009 Author Report Share Posted August 17, 2009 Thanks Joey! OK, the cutting part is coming to an end. Probably in the next session I'll finish this part and then, the assembly! So, I started with the big parts. Legs first. The lines on the legs are visible, but if you wish (just to be sure) mark them with a pencil. So, I cut the front of the legs... ...And then, the backs. Here a full piece, just cut. I made a test assembly using tape. Here the front of the legs. And here the backs. You can make yourself an idea of how it may end by looking at it. Here the inside. And a detail on one of the legs. I'll use the ANH strip method to join the legs. Now to another important part: the abs/cod piece. You have to be careful here. And cut! By now your experience should kick in and this part might come out clean. A view from the top part. And from the inside. And that's it for today. There are just a few parts left now (leaving the helmet out.) I'm not going to assemble the helmet right now, as I have the SDS, so I'll start with the assembly of the armor as I finish cutting the armor parts. I'm going to use the ANH method, using strips. So keep tuned! Quote Link to comment Share on other sites More sharing options...
TK-2126_MD[TK] Posted August 18, 2009 Report Share Posted August 18, 2009 Very nice!!! But u did forget to show us waht u had for snacks and u could add one or 2 pics of your brothers work here as a interlude..... just a thought Quote Link to comment Share on other sites More sharing options...
NoVATie[Admin] Posted August 18, 2009 Report Share Posted August 18, 2009 Looks great so far, keep up the good work! Quote Link to comment Share on other sites More sharing options...
Irishtrooper Posted August 18, 2009 Report Share Posted August 18, 2009 D awesome build so far buddy, can't believe how sharp everything is on that AP kit - it seems to be making it easy. As i first time trimmer myself i would fell extremely confident at doing that set. Keep up the great work! Quote Link to comment Share on other sites More sharing options...

Recommended Posts
Join the conversation
You can post now and register later. If you have an account, sign in now to post with your account.