Search the Community
Showing results for 'chelsea'.
-
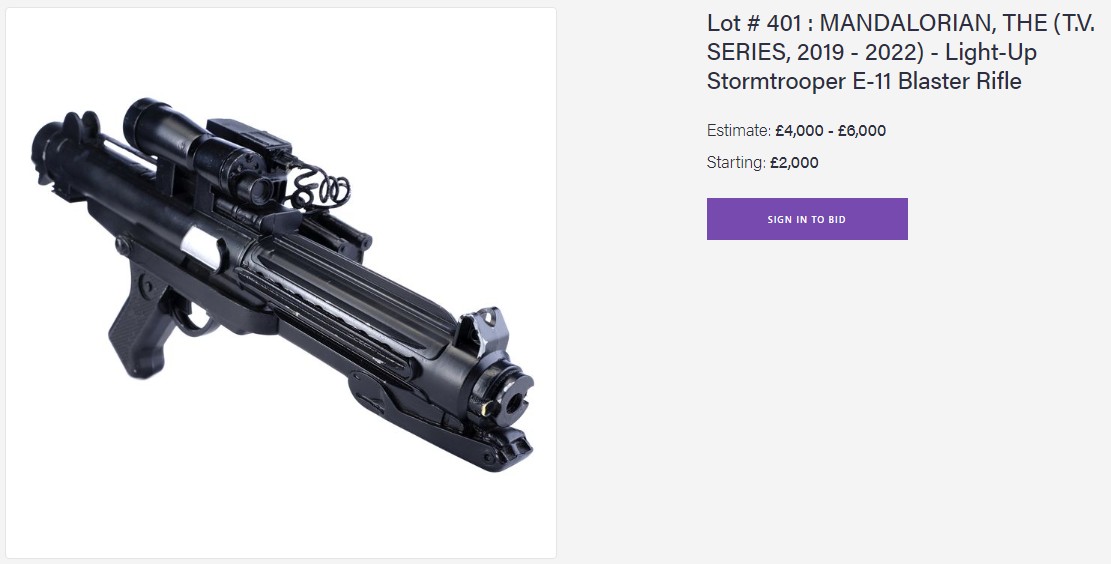
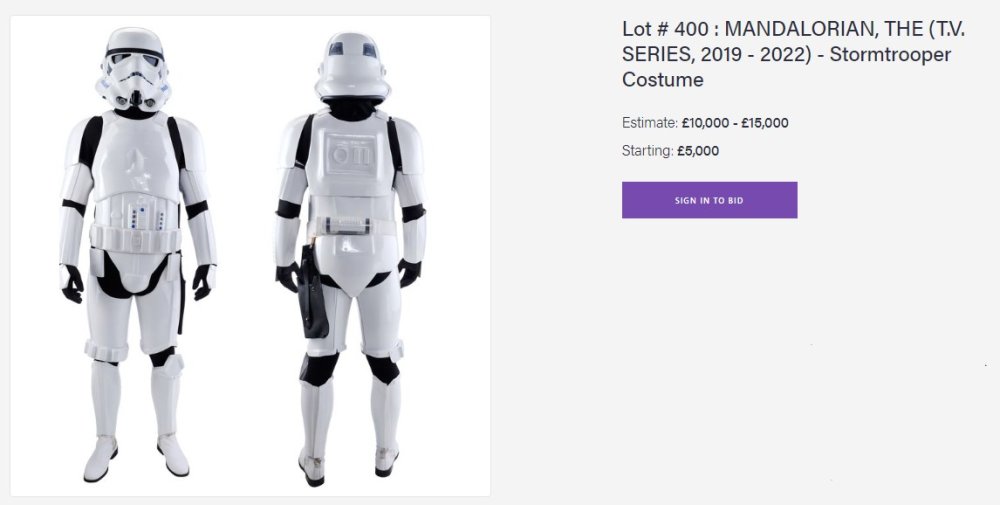
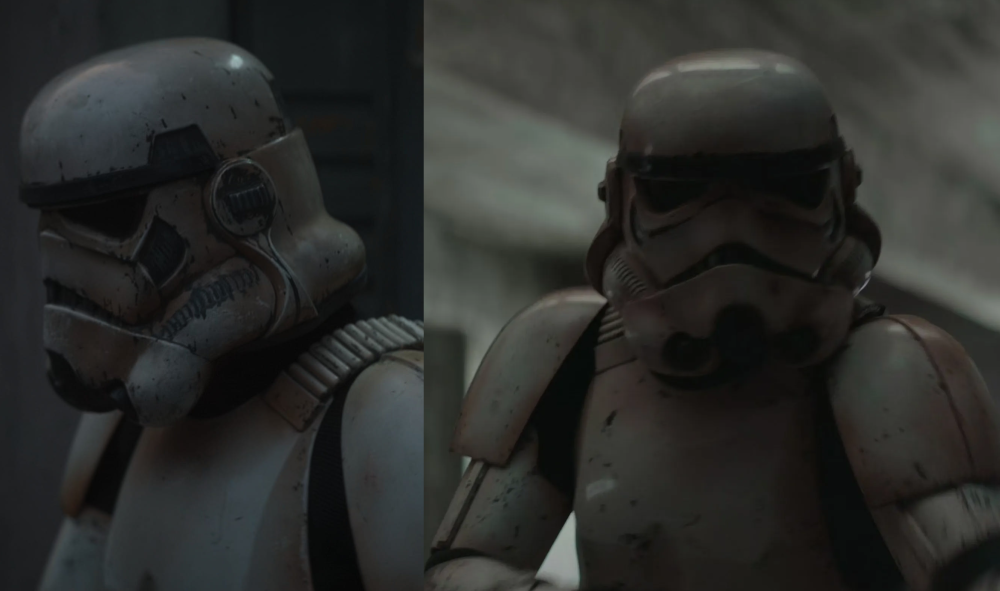
Propstore Auction - Another TK Up For Sale https://propstoreauction.com/lot-details/index/catalog/318/lot/95253?url=%2Fauctions%2Fcatalog%2Fid%2F318%3Fpage%3D2%26view%3Dgrid%26catm%3Dany%26order%3Dorder_num%26xclosed%3Dno%26featured%3Dno%26key%3Dstar%2Bwars Regular TK, shins overlap inside over outside too. Nice price for a Hasbro blaster as well OUR EXPERT’S NOTES This lot will be auctioned on Thursday, November 3rd. The auction will begin at 3:00PM GMT and lots are sold sequentially via live auctioneer; tune in to the live streaming broadcast on auction day to follow the pace. Note other lots in the auction may close on Friday, November 4th; Saturday, November 5th; or Sunday, November 6th. A stormtrooper costume from Jon Favreau's Star Wars television series The Mandalorian. Stormtroopers appeared throughout the series in costumes created by the 501st Legion, a fan group dedicated to creating screen-accurate Stormtrooper suits. This particular suit was worn in the Season 1 episodes "The Reckoning" and "Redemption." Consisting of white, vacuum-formed plastic components, this costume includes a hand-painted helmet with a green-tinted visor; a chest and abdominal plate featuring decorative grey and blue buttons; three segmented back plates connected by black straps; a pair of plated pauldrons with connected elastic straps labelled for "R" and "L"; forearm, leg, hand, and thigh armour; leg armour plates; a belt with dropboxes and a black holster; a removable thermal detonator; and a pair of white leather Chelsea boots. The underlayer of the costume consists of a black ribbed neck polyester dickey; black long-sleeved polyester Under Armour shirt; black polyester/nylon belt with a plastic buckle; black polyester trousers; and black polyester gloves with silicone grip texture. This costume exhibits scuffing, minor marks on several armour components, and discolouration on the boots. Estimate: £10,000 - 15,000 Ω https://propstoreauction.com/lot-details/index/catalog/318/lot/95254?url=%2Fauctions%2Fcatalog%2Fid%2F318%3Fpage%3D2%26view%3Dgrid%26catm%3Dany%26order%3Dorder_num%26xclosed%3Dno%26featured%3Dno%26key%3Dstar%2Bwars

-
I found a potential source of (black) chelsea boots, they look good from the pictures. Pricing seems fairly OK, and they are supposedly custom made to order. Could be a good source if you're in the UK or Europe and want to dye your own boots for the genuine look. -----------
-
 Name: Jim Munro Height: 5'10" Weight: 170 lbs. Garrison: Mountain Garrison Armor Maker: Far Away Creations (assembled by me) Helmet: Far Away Creations (assembled by me) Blaster: 3d printed E-11 mod Neck Seal: ImperialSeamstress (Etsy) Holster: Darmans Props (Etsy) Boots: DIY painted Chelsea boot Posing w Blaster Helmet At ease
 -
Does anyone have another supplier that we can contact to try and get the tall heeled, chunky soled Chelsea style boots? We just checked NewLook and they are out of stock. Thanks so much!!!
-
 While out at the Shopping Mall today, I came across these Men's Chelsea Boots at "Forever 21" for $39.90. ------------ The plus is that you could try them on. The price is reasonable for a replacement. It is within driving distance.Saving on shipping. The con is that they are faux leather. Has anyone came across and used them for trooping? Andy
 -
Hello everyone male, female and all in between. My very first post. I've been in the process of wanting a Stormtrooper outfit since 1978, yes 1978 as Angels costume hire actually hired out original Stormtrooper outfits back them..how the world has changed. £300 deposit was the fee and £30 per weekend if my mem...or..memory serves me correctly. One thing I do know and it's why I'm here, the boots are CHELSEA BOOTS NOT JODHPURS. Argument over. Also known at least in London 'Spock Boots' let the barrage of disagreement begin.
-

Remnant Stormtrooper CRL Discussion Thread
gmrhodes13 replied to BigJasoni's topic in Anthology/Remnant
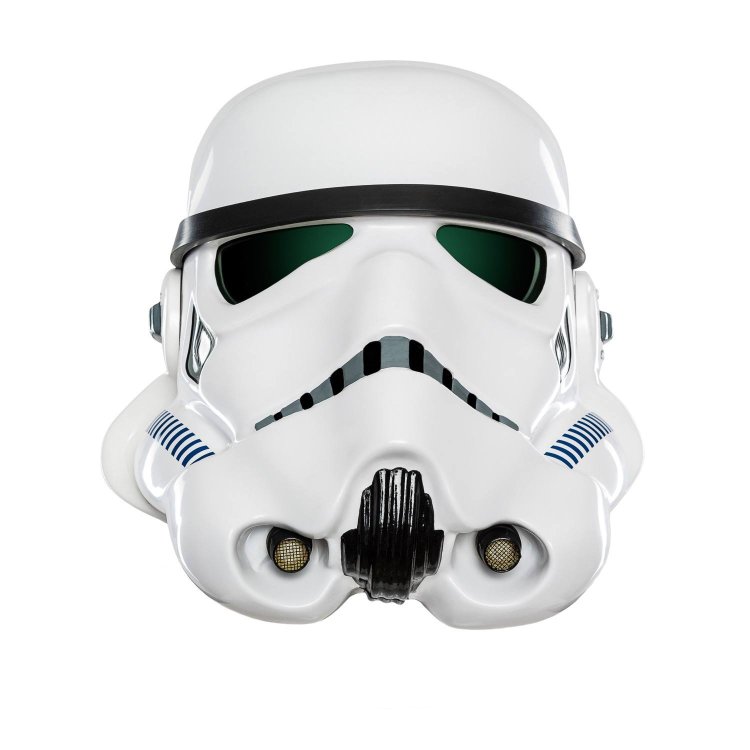
Some suggestions, wording may not be correct as I'm not a wordsmith, references added were possible due to lack of some remnant references. Why I added the brownish hue to the weathering is the weathering is very dark in a lot of areas but can be clearly seen that it has a wash of brown. Added a few changes to the helmet as we know this is a Anovos ANH helmet so details will be specific to that helmet - perhaps Denuo Novo will produce one if they purchased the molds/plans, entirely up to the DO and LMO's if they allow other ANH era helmets and not just Anovos Note there I've found two versions of the Anovos OT ANH helmet, I believe this one was the later 2017 onwards Prior to 2017 differences, fuller teeth paint, inside hovis all white Helmet Moderate to heavily weathered with a brownish hue Traps (trapezoids on dome of helmet) and tears (area beneath the corners of eye lenses) are gray. Rear traps and tears have vertical black lines. Lenses are flat material, green in color, sufficiently dark enough to obscure the costumer's eyes. The “ear” bars have three or four bumps and are gray or painted gray, with a black outline. Painting the bumps with rank stripes (highlighted) in black is optional. Frown is painted gray and does not leave the teeth area. A total of 8 cut outs in the teeth area of the frown are present. Tube stripes are medium blue, numbering between 9 and 16 15 per side with the curve bends extending backwards. Vocoder (vertically ribbed chin detail) is painted black. Aerators/Hovi-MIX tips (cylinders on either side of the vocoder) are black or painted black. Tears, traps, and tube stripes may be hand painted, decals, or decals that replicate hand painted. Mesh may be used behind the frown to obscure the face of the wearer. Note: The helmet is accurate in detail and proportion to official references. Many commercially available helmets or those considered disproportionate in size or shape are ineligible. OPTIONAL Level two certification (if applicable): Ears shall have three screws per side, one above and one below the ear bar and one at the base of the helmet. Ear bars have four bumps only. Not three. Traps/tears and tube stripes shall have the correct ANH TK details. Ideally, the tube stripes are positioned approximately a pencil width from the side of the cheek. Fall of tube stripe tops ideally lean toward the front. Correct Aerators/Hovi-MIX tips are present. Screens used shall be of a wide type mesh, with the rim of the mic and the inside nipple white or painted white. OPTIONAL Level three certification (if applicable): Ear bars shall have only one bump painted in black (rank stripes). Ideally, placement of ears (and screws) should closely follow the rear angle of the trap above them Neck trim shall be of an s-type profile rather than a u-type profile. Tears/traps shall be hand painted or use decals that emulate hand painted (with correct ANH TK details). Ear screws shall be slotted, flat topped, countersunk and painted white. The vocoder must be integrated into the helmet, and not a separate piece. Neck Seal Moderate to heavily weathered with a brownish hue Black with horizontal ribs, fitted to the wearer, and extending from the base of the neck to conceal the entire neck No thigh ribs Under Suit Moderate to heavily weathered with a brownish hue Black non-textured material, either one-piece or two-piece construction with no visible zippers or logos/designs. OPTIONAL Level two certification (if applicable): Top, where visible shall be fully ribbed with all horizontal ribbing on the arms, chest, and back. The centre of chest and back may be mesh as long as it is covered by armor. Pants shall be black non-textured material and have horizontal ribbing at the knees only. Knee gaskets are allowed as long as they correctly match top ribbing material, spacing and color. The hip section shall not have ribs. OPTIONAL Level three certification (if applicable): All ribbing on knees, arms, chest, and back must be stitched between each rib in detail and proportion to official references. The armpit area shall have the correct hexagonal mesh detail Shoulder Straps Moderate to heavily weathered with a brownish hue These shall be inserted behind the chest tabs and into slots of the backplate. They may be affixed with Velcro or adhesive. OPTIONAL Level two certification (if applicable): OPTIONAL Level three certification (if applicable): These shall be inserted behind the chest tabs and into slots of the backplate. Shall be made of latex or latex like material Shoulder Armor Moderate to heavily weathered with a brownish hue One on each shoulder. The shoulders are considered effectively symmetrical; they may be worn interchangeably on the left and right shoulders and may have a black elastic strap that wraps around the inside of the bicep. OPTIONAL Level two certification (if applicable): OPTIONAL Level three certification (if applicable): There is no swoop on the shoulder bell raised area. There is no elastic strap that wraps around the inside of the bicep. Upper Arm Armor Moderate to heavily weathered with a brownish hue Both biceps are symmetrical and interchangeable. The front strip is bevelled and approximately 1/8" thick that does not extend beyond the bicep, and has a smaller cover strip layered thereon. OPTIONAL Level two certification (if applicable): OPTIONAL Level three certification (if applicable): Cover strips will cover both the front and back joints. Biceps are loosely held closed in the back with elastic, shock cord (bungee cord) or white Velcro and are designed to remain flexible. Forearm Armor Moderate to heavily weathered with a brownish hue The front strip is bevelled and approximately 1/8" thick that does not extend beyond the bicep, and has a smaller cover strip layered thereon. OPTIONAL Level two certification (if applicable): OPTIONAL Level three certification (if applicable): Forearms are loosely held closed in the back with elastic, shock cord (bungee cord) or white Velcro and are designed to remain flexible. Cover strips will cover both the top and bottom joints. Hand Plates Moderate to heavily weathered with a brownish hue Roughly pentagonal in shape, the hand plates are mounted securely over the back of the glove. As an alternative to plastic, these may be made out of latex or latex-like material. OPTIONAL Level two certification (if applicable): Hand guards shall be made of plastic. OPTIONAL Level three certification (if applicable): Hand guards should follow the correct RO shape, ANH hand guards are not acceptable. A small indent in the front of the hand plate shall be present. Gloves Moderate to heavily weathered with a brownish hue Black in color, made of either rubber, Nomex, leather, or leather-like material, with no visible straps or logos/designs. The fingers are enclosed, non-textured. OPTIONAL Level two certification (if applicable): Gloves shall not be made of rubber. OPTIONAL Level three certification (if applicable): The base material of the gloves will be a black synthetic material similar to Lycra, Spandex, Elastane, or Nylon. Palms of gloves shall be shiny black fabric or leather or leather-like material. On the index finger shall be a stitched piece of fabric made from the same material as the hand's underside that while stitched to the finger has one cutout towards the end of the finger that reveals the netted material underneath. Gloves shall have the correct leather pattern along the fingers/palm. Chest Armor Moderate to heavily weathered with a brownish hue Chest plate overlaps the abdominal plate OPTIONAL Level two certification (if applicable): There are raised trapezoids at the top of the shoulder section beneath which the straps insert. The chest and back sides shall be connected by black extensions pieces. OPTIONAL Level three certification (if applicable): Top pectoral out lines swoop correctly outward. Bottom of ribcage flares correctly outward. Back Armor Moderate to heavily weathered with a brownish hue Back plate contains an "O II" design. There are raised trapezoids at the top of the backplate section beneath which the shoulder straps insert. The backplate continues past these trapezoids towards the top of the shoulder OPTIONAL Level two certification (if applicable): There are raised trapezoids at the top of the backplate section beneath which the shoulder straps insert. The backplate continues past these trapezoids towards the top of the shoulder Top of box wall has a trapezoidal indentation. There is a roughly 8mm circular indent near the right top corner of the backplate. OPTIONAL Level three certification (if applicable): Bottom of backplate is curved and extends past abdominal back cover plate. The O cog shall have 16 spines. The 11 bars have 5 horizontal evenly spaced raised bars on the bottom of the face. There is a rectangular tab protruding from the bottom of each of the two raised trapezoids at the top of the backplate. Abdomen Armor Moderate to heavily weathered with a brownish hue The abdominal armor consists of a one-piece corset design with a vertical opening centred on the back. The back opening is covered by a rectangular cover plate that is worn under the back armor. There are 3 vertical ribs centered on the front of the abdomen and two (one left and one right) ribs further spaced to each side of the center. There are two (one left and one right) angled (approximately 70 degrees) ribs on each side of the abdominal armor. There are two (one left and one right) angled (approximately 70 degrees) recessed ribs on each side of the abdominal armor behind the raised angled ribs that are black Any side shims added are to be added to the white areas of the armor. The center front detail consists of a raised rectangular panel. On the right half of the panel, there is a vertical column of 4 buttons approximately 7/16” (11mm) in diameter. The bottom button is blue while the other three are grey. On the left half of the panel, there is a vertical column of raised evenly spaced horizontal gear teeth with a recessed trapezoid at the top of the column. The rectangular inside bottom of the trapezoid is black. The left front detail consists of a raised rectangular panel with an angled top. There is a vertical column of 4 buttons approximately 7/16” (11mm) in diameter. The bottom button is blue while the other three are grey. The right front detail consists of a primary raised rectangular panel with an additional secondary raised rectangular panel covering the top 1/3 of the primary panel. There is a column of three thin horizontal evenly spaced raised lines across the top ½ of the secondary panel. The abdominal armor is accurate in detail and proportion to official references. OPTIONAL Level two certification (if applicable): The cod armor is separate from the abdominal armour. The right front detail panel is centered between the two outer vertical right ribs. The left front detail panel is centered between the two outer vertical left ribs. OPTIONAL Level three certification (if applicable): The abdomen armor has two horizontal recessed rectangles centred above the center front detail panel and on each side of the center rib. All 8 Button details are recessed and bordered with a thin edge, only the recessed portion is painted. The center front panel column of raised gear teeth has only 9 teeth. There is a recessed edge (approximately 1/8” 3mm wide) along all four sides around the face of the center front panel The right front detail panel is centered between the two outer vertical right ribs. The left front detail panel is centered between the two outer vertical left ribs. There is a recessed edge (approximately 1/8” 3mm wide) along the sides and top around the face of the left front detail pane The abdominal armor back cover plate has two protruding tabs along the bottom that rest inside the back hard belt. Cod Armor Moderate to heavily weathered with a brownish hue The cod armor consists of a body shape formed triangular plate with a raised center rib and raised lower portion and is accurate in detail and proportion to official references. OPTIONAL Level two certification (if applicable): The cod shall be a separate piece from the abdominal plate. OPTIONAL Level two certification (if applicable): There is no strap between the cod and butt plate Kidney Armor Moderate to heavily weathered with a brownish hue The kidney armor is separated in the back and covered by a rectangular plate. The rectangular plate is separate from the posterior armor. OPTIONAL Level two certification (if applicable): OPTIONAL Level three certification (if applicable): Posterior Armor Moderate to heavily weathered with a brownish hue The posterior armor shall be a separate piece from the abdominal armor OPTIONAL Level two certification (if applicable): OPTIONAL Level two certification (if applicable): There is no strap between the cod and butt plate Belt Moderate to heavily weathered with a brownish hue The Ammunition belt consists of a hard belt made of the same or similar material as the armor in two separate parts front and back, they can be either butted together or overlapped (with overlap). The back belt overlaps the front belt on the sides. There are 6 ammunition boxes mounted to the belt. There are 2 (one left and one right) drop boxes suspended by black webbing approximately 2" (50mm) wide. Drop boxes must be accurate in detail and proportion to official references. The ammunition belt is accurate in detail and proportion to official references. Bottom of belt may be completely straight or trimmed angular from the sides of the cod up to the drop boxes. OPTIONAL Level two certification (if applicable): The only detail visible on the front belt is the mounted ammunition boxes unlike the squares present on ANH belts. The top edge of the front belt has protruding teeth that nest inside gaps between the ribs and detail panels of the abdominal armor. The two center ammunition boxes are thinner than the other mounted ammunition boxes. The second and fifth mounted ammunition boxes are slightly wider than the two center ammunition boxes. The two outermost ammunition boxes are almost square. The two drop boxes are rectangular and as wide as the mounted square boxes. OPTIONAL Level three certification (if applicable): The ammo boxes across the front are all made separately from the main belt and are secured to it The two drop boxes hang no more than 1” 25mm below the front belt and the black strap is visible. The second and fifth mounted ammunition boxes have trapezoid detail on the top of each ammunition box. The front belt protrudes past all mounted ammunition boxes above and below by approximately 1/8”-1/4” 3-6mm. All ammunition boxes have slightly bevelled edges on the face of each box. Thermal Detonator Moderate to heavily weathered with a brownish hue The thermal detonator consists of a grey tube approximately 3” 76mm in diameter and 8” 203mm long approximately. There are two white endcaps and a white control panel. The white control panel has a horizontal row of white rectangles along the bottom of the control panel and a grey “D” shaped recessed on the left side of the horizontal row. There is an oval greeble that protrudes from the control near the top right side. The thermal detonator is mounted to the rear hard belt and there are no visible screws or clips and is accurate in detail and proportion to official references. OPTIONAL Level two certification (if applicable): The thermal detonator mount should be fully enclosed with solid walls on all four sides. The center of both end caps is gray. OPTIONAL Level three certification (if applicable): The control panel bottom detail is a raised panel with 7 raised rectangles, all are evenly spaced except the right most rectangle. There is a panel line approximately ¼” 6mm from the edge around the control panel. There is a panel line approximately 1/8” 3mm from the edge of each endcap. The inside edge of both endcaps is bevelled. The oval greeble consists of an oval tube protrusion with the top edge slightly extending past the tube wall thickness and is visually similar to the Deathtrooper chin greeble. Thigh Armor Moderate to heavily weathered with a brownish hue The thigh armor is mirrored for each leg and not interchangeable. The cover strips are bevelled and approximately 1/8" thick that does not extend beyond the thigh and has a smaller cover strip layered thereon. The top edge of the thigh armor is unadorned, and the bottom edge has a raised detail that fallows the bottom edge contour. The small ammo belt consists of 5 evenly spaced rectangle ammunition boxes and is installed on the bottom of the right thigh, there are no visible screws or rivets. OPTIONAL Level two certification (if applicable): Thighs are loosely held closed in the back with elastic, shock cord (bungee cord) or white Velcro and are designed to remain flexible. Cover strips will cover both the front and rear joints. OPTIONAL Level three certification (if applicable): The bottom outside edges of the small ammunition belt are angled at approximately 45 degrees. Thigh armor is suspended by a black strap 2 black straps approximately 1” 25mm in width with a plastic side release buckle that is covered by black webbing or elastic material that runs down the side seam of the leg. Lower Leg Armor Moderate to heavily weathered with a brownish hue The greaves are mirrored for each leg and are not interchangeable. The top edge of the greaves has a raised detail that fallows the top edge contour. The bottom edge of the greaves flairs out to cover the top of the ankle and boots. The cover strips are bevelled and approximately 1/8" thick that does not extend beyond the greave and has a smaller cover strip layered thereon. Greaves are loosely held closed in the back with elastic, shock cord (bungee cord) or white Velcro and are designed to remain flexible. Cover strips will cover both the front and rear joints. The trapezoid knee plate (sniper knee plate) is affixed to the top of the left greave and there are no visible screws or rivets. Sniper knee plate must be aligned with the vertical cover strip and the top raised edge detail on the greave and is accurate in detail and proportion to official reference. OPTIONAL Level two certification (if applicable): The sniper knee plate has raised detail that fallows the top edge contour. The sniper knee plate has 3 trapezoidal lugs on each side and 2 on the center bottom edge (totalling 8) of the knee plate. OPTIONAL Level three certification (if applicable): Boots Moderate to heavily weathered with a brownish hue Boots are above ankle height and the same style as the First Order TK. Jodhpur / Chelsea type boots in the style of OT TK are not acceptable. or an equivalent style is acceptable Boots are all white, ankle height and made of leather or leather-like material Flat black soles without a heel. Patent leather or high gloss is not permitted. Small U-shaped elastic sections on both sides of the ankle. Flat sole with a short heel. No buckles or laces. Elvis or Mariachi boots are not allowed. OPTIONAL Level two certification (if applicable): There is no seam present on the front of the boot. The wearer's inner side of the boots have zippers and no side elastic. Boots have a black sole OPTIONAL Level three certification (if applicable): Boots have rear tabs/loops


-
Matt and James's TK build thread - AM 4.5
gmrhodes13 replied to Sawanator's topic in ANH Build Threads
Imperial boots only opens up at certain times each month, you can still navigate their site. Next wave 2nd Sept - 9th Sept https://www.imperialboots.com/product/stormtrooper_tk_boots/ You could try to find some black chelsea boots of the correct size then whiten as many have done in the past. -
Hey All! I'm officially starting my build thread, hopefully you find it useful, and maybe I can have some questions answered while i'm at it! I want to use this first (top) post to keep running notes as to where i'm at in my build, including full imgur albums (for easy viewing). Build List: Bucket: Shawn Thorsson resin cast Armor: KB Props Kit Boots: Amazon Chelsea boots Gloves: Carhartt Men's The Dex II High Dexterity Glove Neck Seal & Gaskets: Sewed this myself Under Suit: Compression Shirt Dry Fit Long Sleeve Running Athletic T-Shirt Cape: Sewed this myself Weapon: Plan on 3D printing the Quicksilver Baton Here's the full unboxing & parts album Updated as I go, parts and cutting Thanks for stopping by! Very Excited
-
Are these Trooper shoes approvable?
gmrhodes13 replied to Dubfunkstar's topic in ANH (Stunt and Hero)
This is entirely up to your GML (garrison membership liaison) some are stricter than others, they should be fine for basic approval but will not meet the higher levels. Nothing mentioned about the stitching until L2 Boots Boots are above ankle height and made of white leather or leather-like material. Small U-shaped elastic sections on both sides of the ankle. Flat sole with a short heel. No buckles or laces. Jodhpur/ Chelsea-type boots or an equivalent style is acceptable. Elvis or Mariachi boots are not allowed. OPTIONAL Level two certification (if applicable): There is no seam present on the front of the boot. Boots have a black sole -
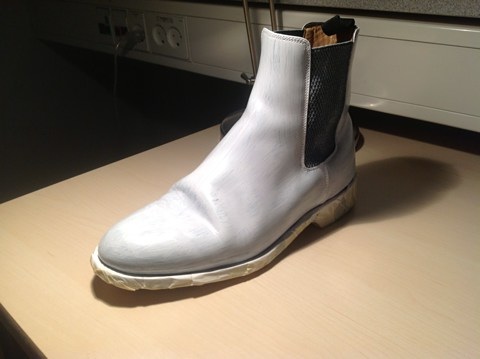
 My vacation become true, and I started with painting my chelsea boots which I bought on e-bay for about 40$. Warming up with the SorenM topics about boots painting I decided to paint using airbrush. I have cheap chinese JAS airbrush with 0.3mm nozzle. The one thing I was not sure if the Angelus paint enough thin for the airbrush. But when the paint arrived I define that it is need a thinner anyway. Made preparation of boots by acetone wearing through three times. Also use 3M waterproof masking tape. Mixing the paint with rubbing alcohol 1:2 proportion I get the proper viscosity for airbrush. The first run of painting: Need to say that paint is not need to wait a long time to cover with a new layer while you are painting with airbrush. Yes, airbrushing take much more time then simple brushing. When you airbrushing there are very very thin layer appears, but it's dried quickly and you just painting continiously. This is not the final view. I want to paint more white to get rid of the semi-tones.
 -
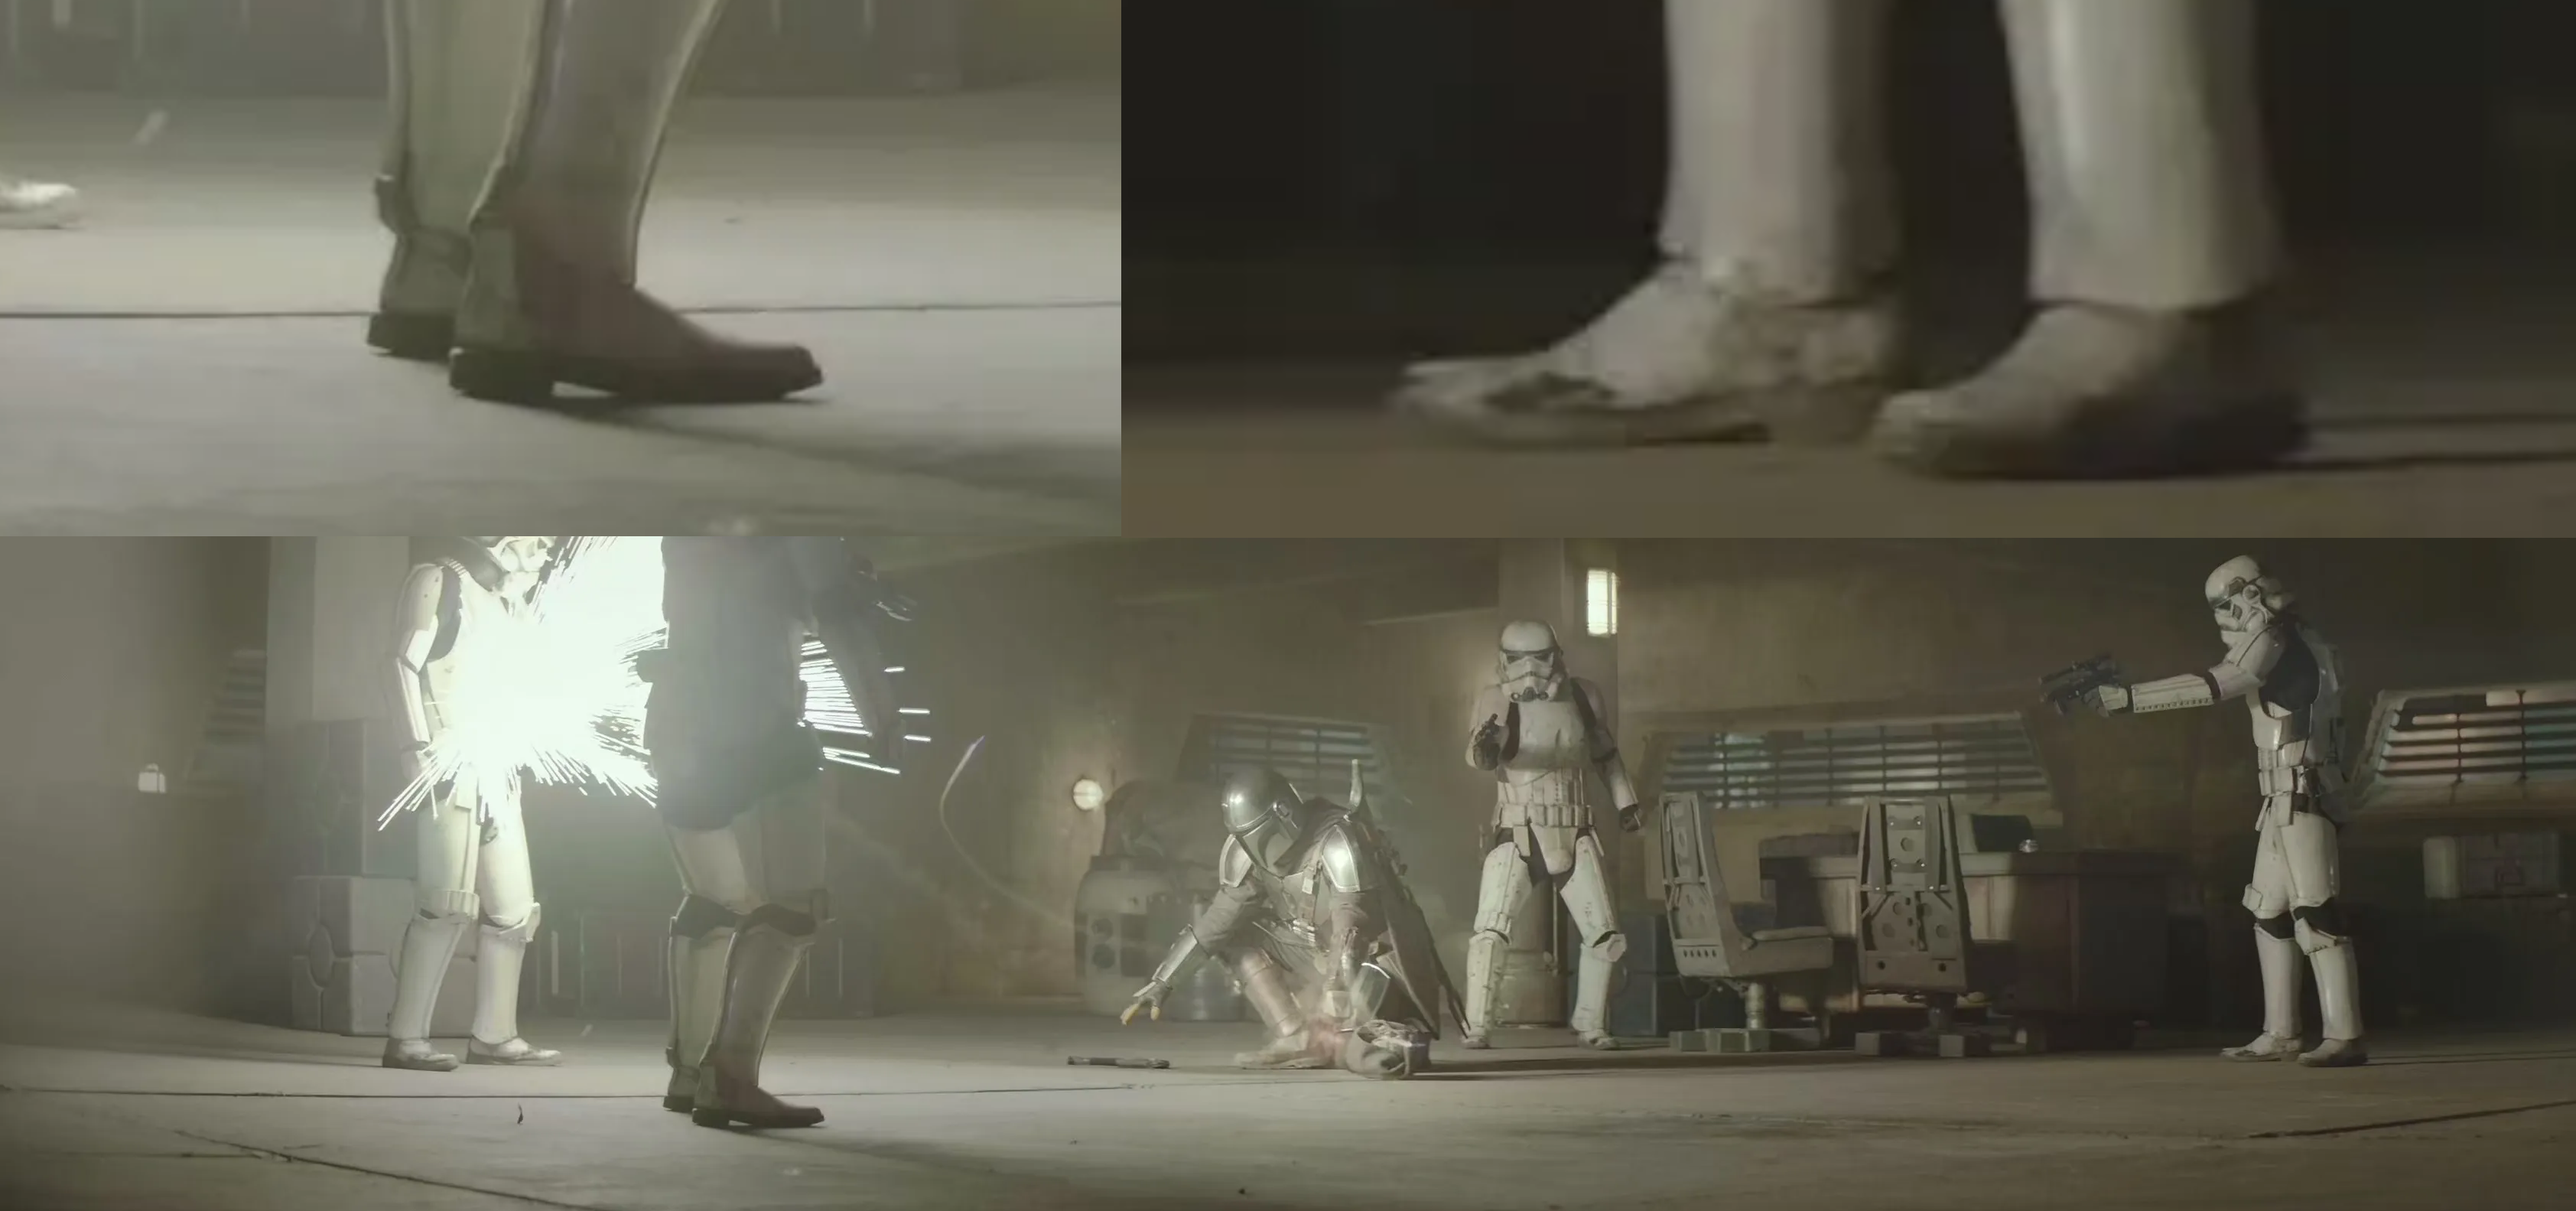
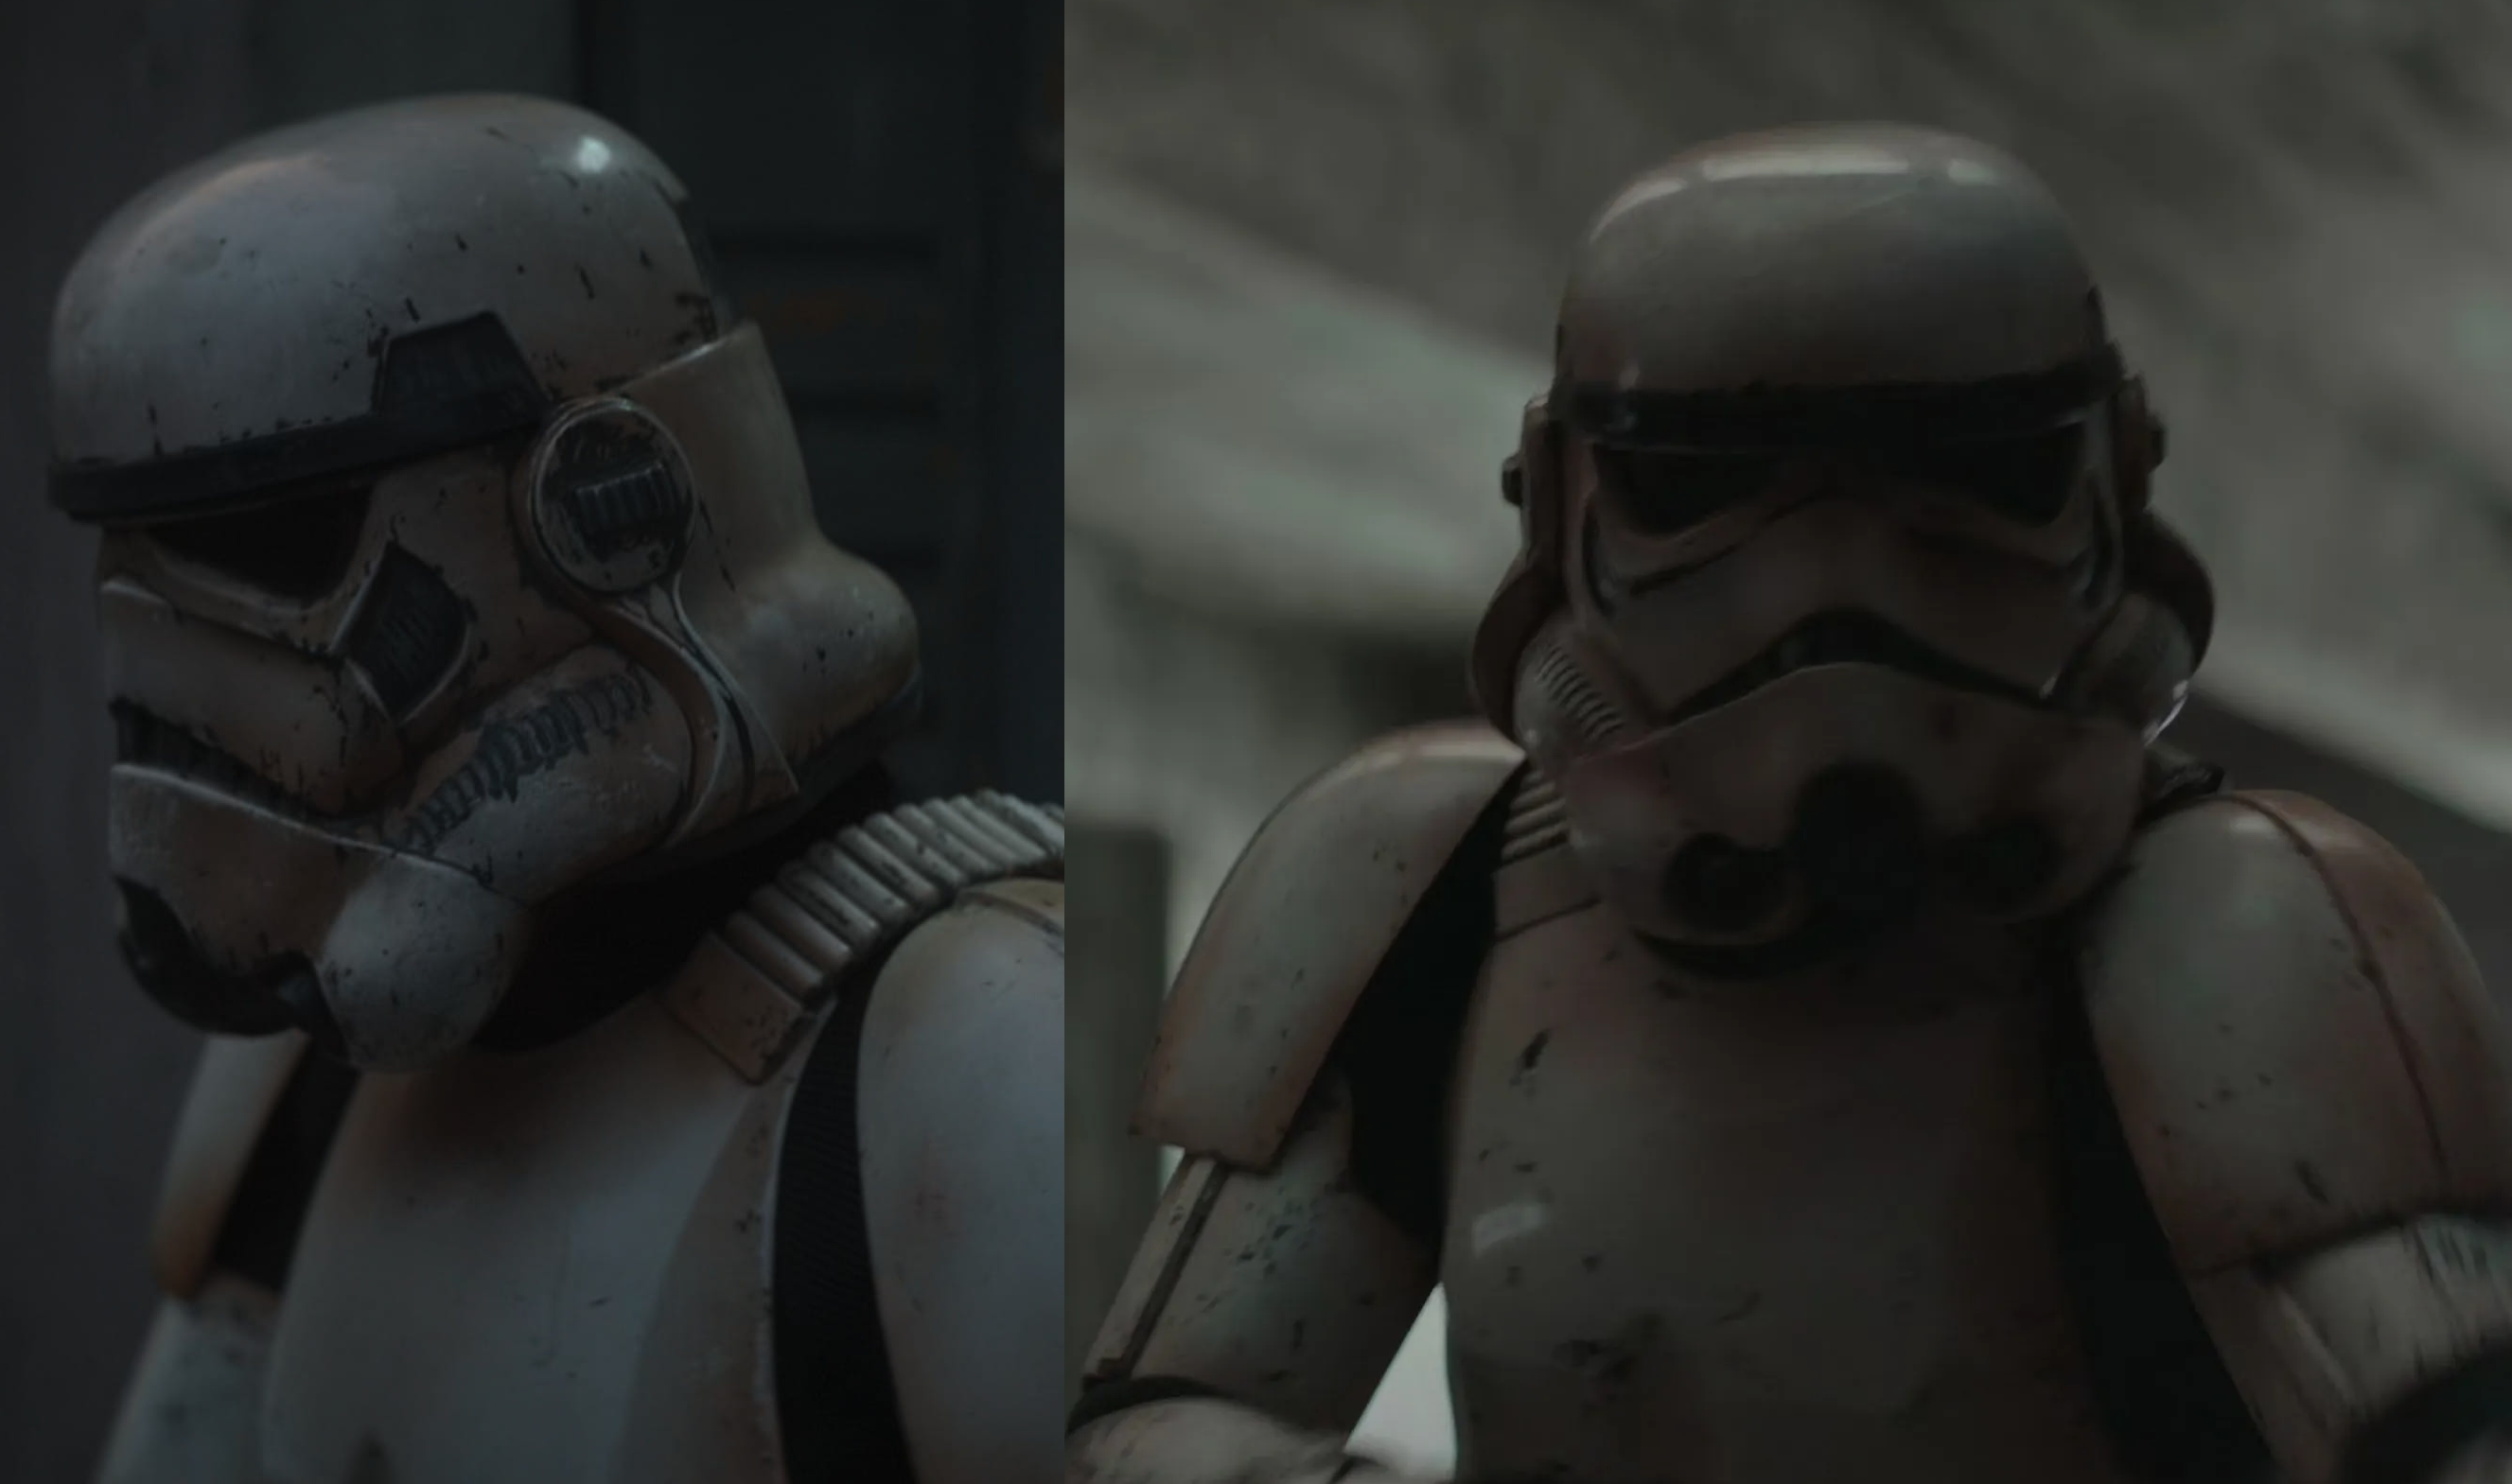
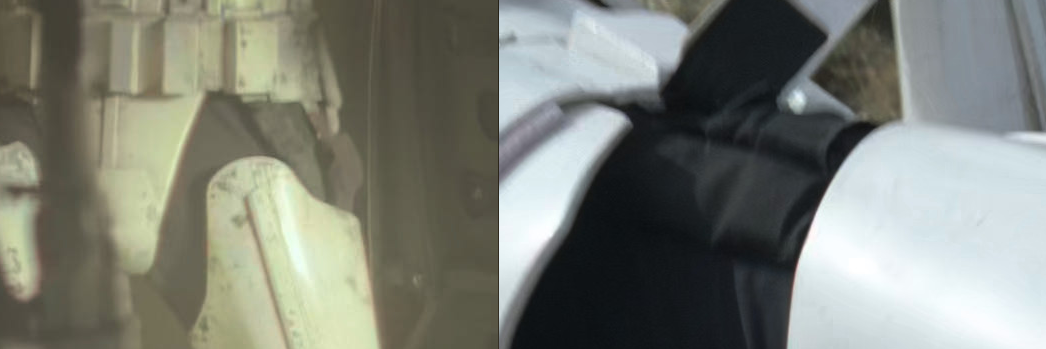
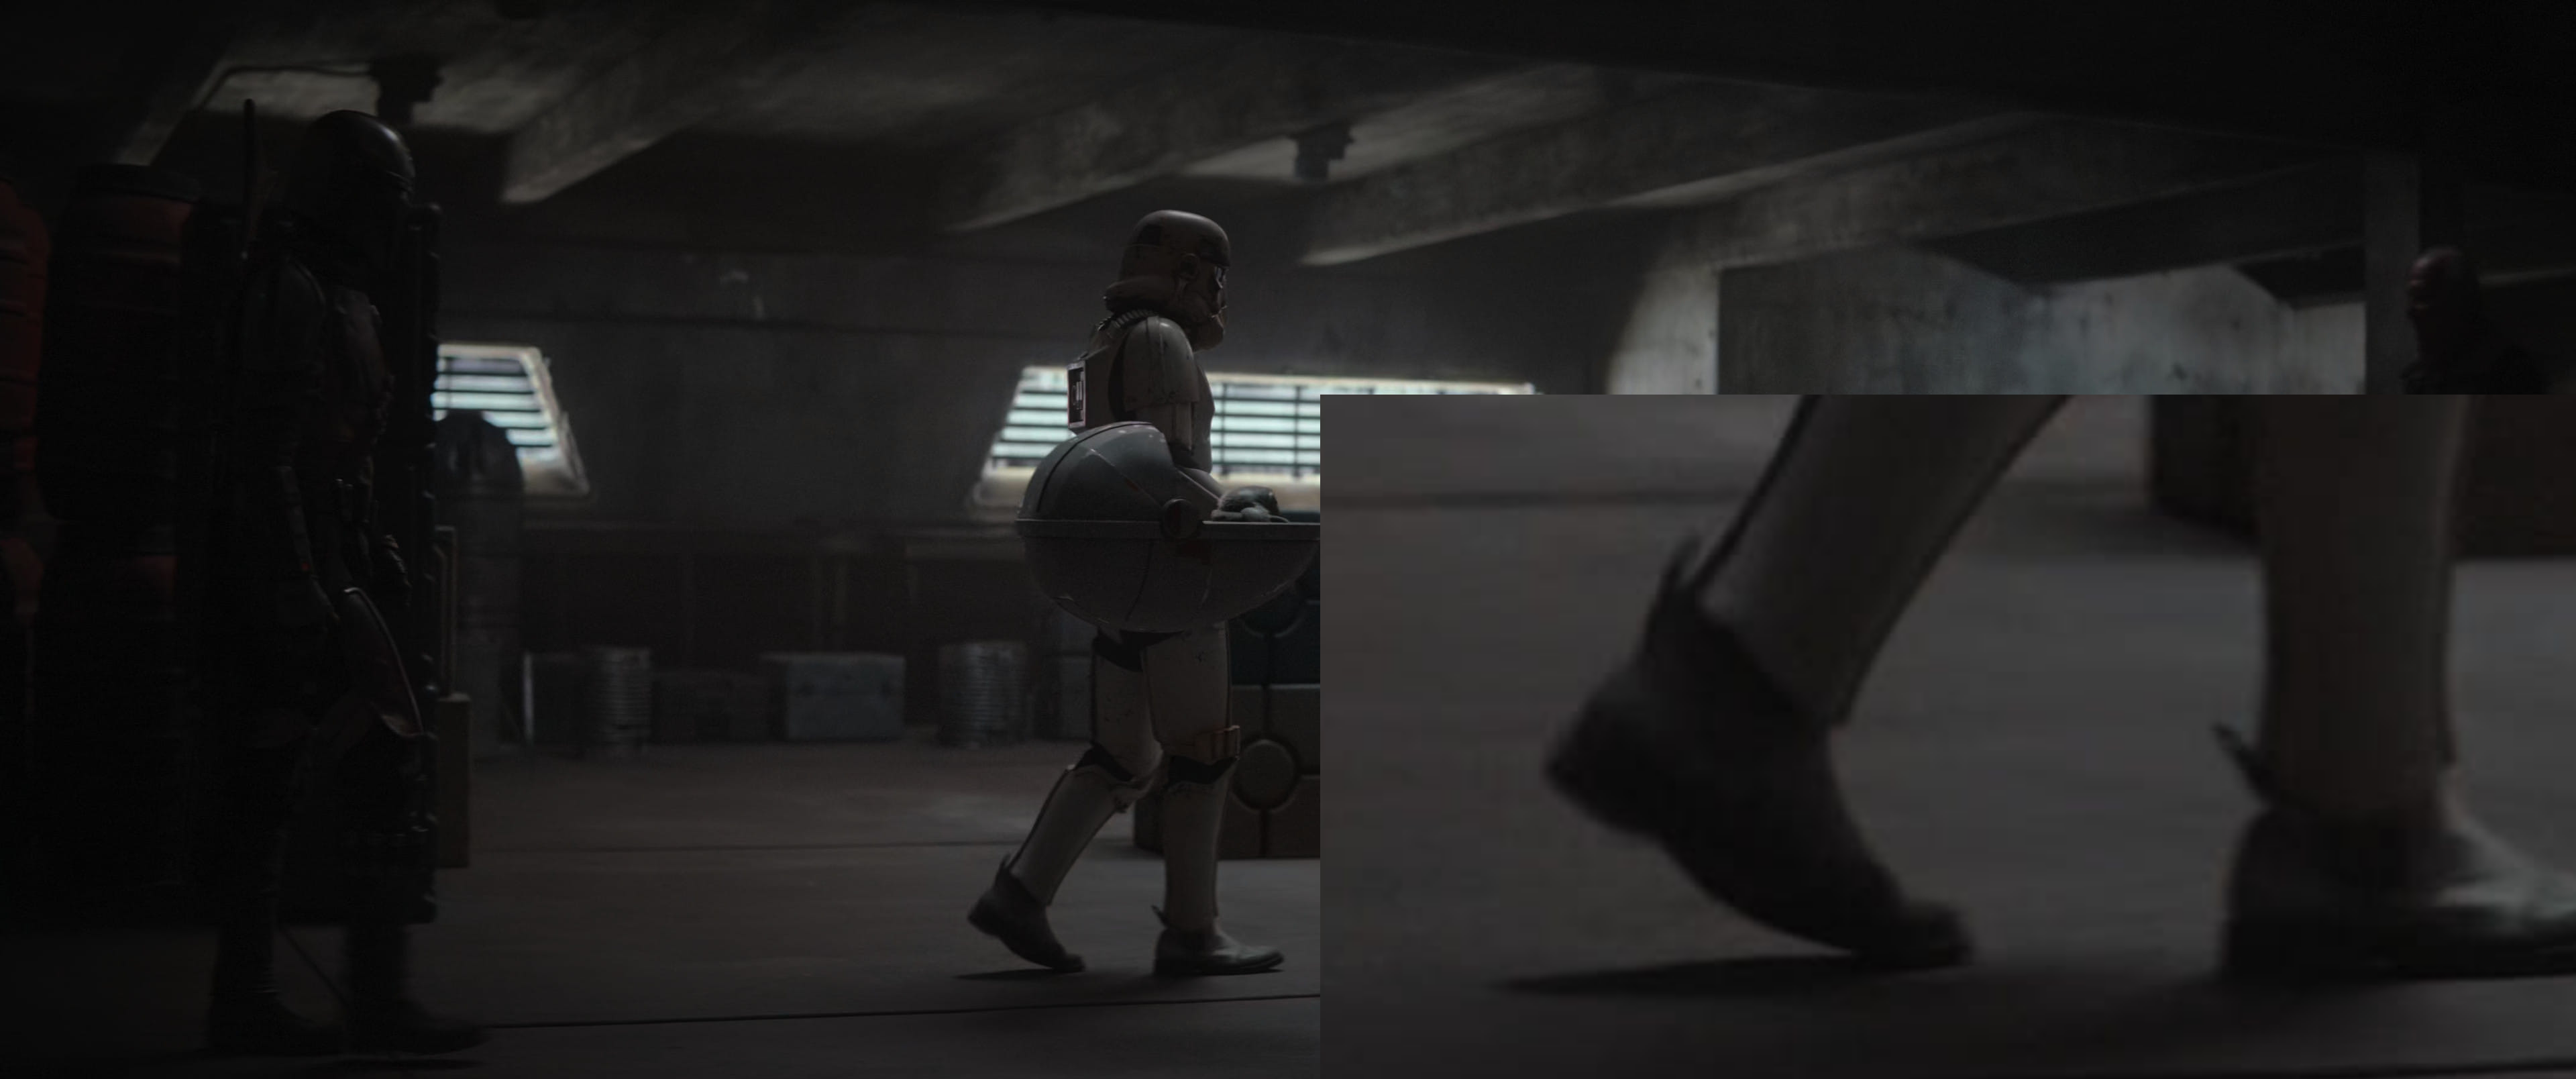
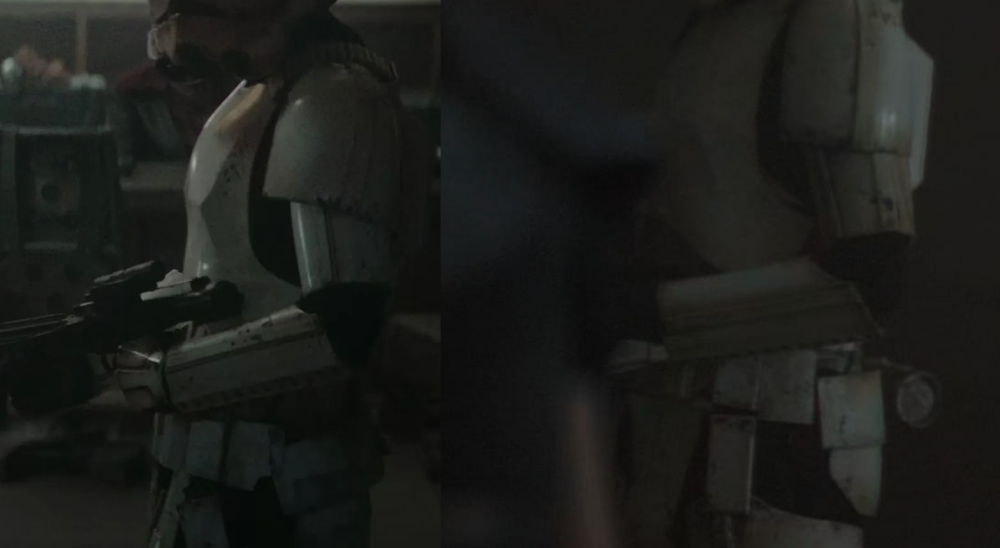
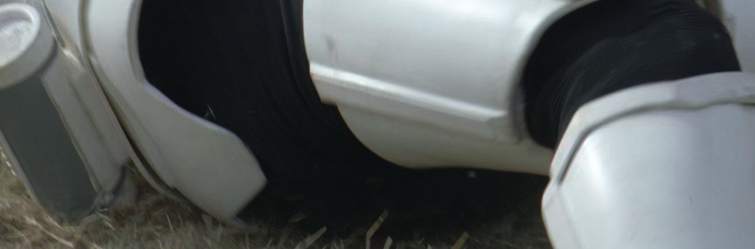
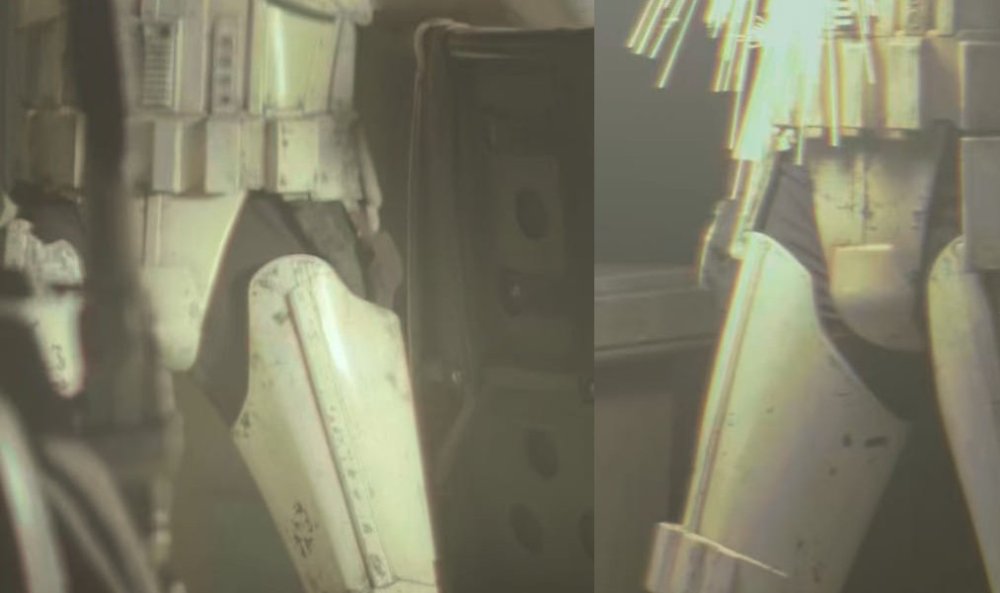
I think it's fair to recap the discussion before I jump straight in to the good stuff. @Parquetteinitiated this conversation back in November 2019 with a simple idea: "I would like to propose a new CRL specifically for the Mandalorian TK." Reese did a good job in the initial post of pointing out the new series' use of both the ROTK costume, or "Anthology" as it's sometimes referred to, as well as a hybrid version consisting of ROTK armor and the OT helmet. This character, we have since learned, is referred to in the series and Disney marketing as the "Remnant Stormtrooper." Additionally, Reese drew comparisons to the FISD's use of multiple CRLs for OT costumes which have seemingly few differences. This initial post appeared to gain adequate interest early on, likely throughout the run of the first season, then lost a little steam. I attempted to resurrect the thread in September 2020, but like several other posts, it went off the rails a little and then fizzled out. Last week, @TheRascalKingasked a fun little question on the FISD FB page about "getting the SE-14R added as an optional blaster" for the ROTK costume. Justin prefaced this question by stating the popular opinion is that the costume presumably "isn't different enough from the Rogue One CRL to warrant its own," but then questioned that thought. We carried the discussion back over here in order to facilitate a back-and-forth in the appropriate forum, but after @Sly11 suggested providing side-by-side comparisons of the costumes, I felt it was about time to start busting out the screen shots I've been collecting and "hoarding" for the last year. Here we go... First, I want to preface everything with the understanding that costume designers probably don't expect people to look at things frame-by-frame and pic their work apart. That's not the intent here. Yes, it's possible that a lot of these things i.e. TKs in gray boots (Chapter 15), were thrown on the actors because it was what the department had on hand. Hence the terms stunt and hero. Many of these things were likely items that were expected to remain in the background; that's why I only try to point out things that are either "front and center" or used multiple times. Andrew laid out a few criterion for the costume to receive a closer look: 1. They should be different in several ways from the R1 TK, not just in carry. 2. If the SE-14R wasn't seen on screen in Rogue One, then it shouldn't be added to the CRL (which can be presumed for any weapon). 3. Add side-by-side images to help the staff make a determination. With those ideas laid out, I would like to officially second @Parquette's 'motion' to add a CRL for the Remnant Stormtrooper, but also introduce the idea of either renaming the ROTK costume to reflect its greater usage in the Star Wars universe, or add an additional CRL for the New Generation Stormtrooper. In this post, I intend to show how the Remnant is an entirely different costume than the ROTK. I will cover the New Generation/ Anthology at another time. I used the Pathfinder Detachment's inclusion of the Scout Trooper: The Mandalorian CRL, as justification for the addition of the Remnant Stormtrooper CRL. I would like to point out all the differences they discovered to show the similarities in what we're doing, but this post will be long enough without that. If anyone wants to look at this, I encourage you to view their CRL drafting thread found here: http://forum.501stpathfinders.com/index.php?/topic/21087-tb-scout-trooper-the-mandalorian-crl-drafting/ Yes, there are differences, but most are details such as weathering and wear, or the inclusion/ exclusion of parts such as a neck seal, different flight suit, vest and boots. The Remnant TK is very similar in that regard. I will point out the major differences, but since this should be a "crowd sourced" effort, I would like to ask others to join in as they identify other nuances. Remnant Stormtrooper: Let's identify what a Remnant Stormtrooper is. This will help to distinguish between the heavily weathered Remnants seen in service of The Client through season 1, those found on planet Morak in Chapter 15, "The Believer" and the clean shiny white TKs scattered throughout the two seasons working with Moff Gideon, and those potentially in the service of Grand Admiral Thrawn. One could argue this last point since canon has shown us the oft rocky relationship Thrawn has with his political peers. Whether Moff Gideon and Thrawn are allies remains to be seen, but I digress. However, Ahsoka name-dropping Thrawn in Chapter 13 "The Jedi" leads us down this path. The show has presented a distinct difference between the rag-tag Remnants and the more organized forces, but regardless, they're all Remnant Stormtroopers. Wookiepeedia breaks down several Remnant elements presented in both canon and legends. This info can be found here: https://starwars.fandom.com/wiki/Imperial_remnants Since all TKs remaining after the Battle of Endor are essentially Remnants, a new CRL would have to delineate which ones we're specifically talking about. But since the term remnant has been used both in the show, and in licensed products, the term Remnant Stormtrooper should be easy to distinguish. I've mentioned it previously, but toys are typically a good indication of LFL motives. To understand this, one should browse through the Lucasfilm/ Hasbro license which is neatly outlined here: https://www.jeditemplearchives.com/2018-09-16-the-cost-of-hasbros-star-wars-license/ Of particular note, one requirement for Hasbro prior to releasing toys, is that Disney/ Lucasfilm needs to approve everything. So, when Hasbro released BOTH an Imperial Stormtrooper and a Remnant Stormtrooper as part of their Mandalorian Black Series line, this followed Disney/ Lucasfilm approval of the characters and naming. FOR THE REMAINDER OF THIS POST, THE TERM REMNANT OR REMNANT STORMTROOPER ONLY REFERS TO THE HEAVILY WEATHERED VERSION AS SEEN IN THE BELOW PICTURES. First the toys: As a reminder, we've seen CRLs approved off of less: So, with it established that Remnant Stormtroopers are a real thing, we have to turn our attention to the differences not only as they appear on the approved figures, but more importantly, in their on screen usage. Again, as was the case in developing the Scout Trooper: Mandalorian CRL, there's likely several other pieces that aren't immediately noticeable and we need the community's assistance in finding the finer details. These are some of the bigger items that immediately jump out. Credit for these pictures go to their respective photographer. Overall Appearance & Weathering. ROTK and Remnant: The Helmet: First, for safe measure, please refer to @11b30b4's post for a OT vs. ROTK comparison: https://www.whitearmor.net/forum/topic/48617-rogue-one-tk-vs-ot-tk-comparison/ Here's a few pics from Jeff's analysis of the two costumes: Now for the remnant comparison: Missing/ Broken Parts: Of course, there's scenes in Rogue One where the Stormtrooper's TD came off, but the Mandalorian was the first Star Wars production that clearly showed a TK using thermal detonators as a weapon. Additionally, there's multiple TKs with the same parts missing: Look at the wear on the rear belt. Unless this trooper sustained additional damage following the previous picture, this is a different TK with the same part missing. Drop Boxes, a major element of every TK belt. Missing Drop Boxes were seen on multiple troopers in season 1. Boots: Again, the costume designers likely used what they had on hand, but basic approval for ROTK states: "Boots are above ankle height and the same style as the First Order TK. Chelsea type boots in the style of OT TK are not acceptable." If not for the portion in bold, I would overlook this scene, however, the heeled Chelsea boots worn by the Remnant in the above picture stands as a big element. Accessories: The Mandalorian has shown the Remnant in possession of several weapons unused by TKs in the past. Most notably are the SE-14R and the E-22 blaster: As I stated in a previous post, I agree that if the weapon was not used by the trooper in production, then it shouldn't be carried as an optional costume accessory. But, if this is deemed to not warrant a separate CRL, we now have examples of the ROTK carrying these weapons on screen. I desperately want to carry a SE-14R and E-22 in my ROTK costume, but won't until it's approved to do so. However, that may come with a renaming of the New Generation costume. I'll cover that in my next post. I did this post just to get the ball rolling. These are some of the major items I've noticed, but when others jump in, I'm sure we'll start finding more.
-
What do you think of this one --------------- with the code that shows at the top of the screen - you get $20 off and free shipping. makes the total $59.90 shipped to me in the US. Is the rounded toe acceptable for EIB? Centurion? it looks much more rounded toe than the Bass http://www.amazon.com/Bass-Mens-Amsterdam-Ankle-Boot/dp/B003TFEVN0
-
Hey Guys, excuse the cross-posting if you've seen this elsewhere, been looking at loads of threads and just wanted some clarification before i buy any boots. Do they need the pull loops on the front and back of each boot like the ones in this link; ------------- Or can they just have the one at the back, like these? ------------- I plan on building the armour for 501st centurion from the start, so i'd like to avoid any unnecessary expense down the line by needing different boots. Im waiting to collect my armour from RS prop masters as we speak! Thanks
-
 I wiped the boots lightly with some paint thinner and a cloth, not much, just to take off some of the shoepolish (they had been buffed to a parade shine). I am using a semi fine brush that fits right into the opening of the Angelus paint bottle. This is the result after two thin layers.
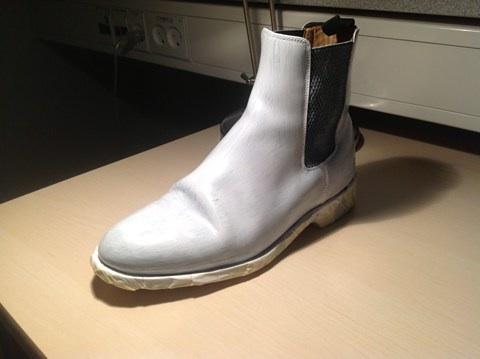
-
 This is my current stash of supplies 1. Black Chelsea boots from Clifford James £19.99 2. Can of Brillo leather spray dye 3. Bottle of white spirits 4. Green Brillo pad 5. Rags I'm still waiting on my fabric dylon dye for the elastic part of the boot. Okay first part to rub the boot down with a cloth soaked in white spirits Wow that's a lot of junk off a new boot!. Make sure you clean everywhere. The preparation is more important than the spraying Now it's time for the green pad with the white spirits to take the shine off and create a better adhesive for the spray dye. One boot done. You can clearly see the shine on the boot on the left and the newly prepared boot on the right. Well I did the same to the other boot. Rinsed them down with water and I'm giving them 24 hours to dry. Tomorrow I shall be applying the first coat of the Brillo spray dye. Stay tuned.
 -
 Does someone know the brand of the original screenused boots? I found it some weeks ago here but I am unable to refind it Thanks for help. Greetings Alex
 -

Advice for TK armor airsoft compatibility
TheRascalKing replied to Nameless_TK's topic in Hard Armor (General Discussion)
Okay, glad that you're already aware that everything about this is a bad idea, except that it will definitely look cool... so with that being stated clearly: If you were going to go with any armor maker to do this, AM is the way to go, as they are one of the thicker and stronger kits available. Since they utilize metal molds and industrial machines when pulling their plastic, they can go a little thicker than most and still capture excellent detail. Definitely more accurate than a Rubies kit. As far as damage to the suit, if you do anything other than stand around and take photos in it, you're probably going to damage the armor. The original armor was literally thrown in the trash after stunt filming, so usually we take great care NOT to be doing the exact type of running/dodging/etc typically found in airsoft or stunt work. Be aware it is very difficult to lean, kneel, or crouch, and sitting is usually off limits as well except under certain conditions. The 'correct' chelsea boots are also not terribly comfortable and don't have good grip for running. Heck, if someone bumps into you hard enough or you fall down, you're going to have a bad time. Repairs are possible for small cracks, but a large crack could destroy a piece. I can't see this being a regular thing, but it'd be a fun $1500 gimmick for a few rounds. You'll undoubtedly want to make some mods to increase mobility (almost more akin to those Boogie Storm clowns), but I'm sure the kit could be cut to some type of compromise between some level of comfort and still looking like a stormtrooper. As far as the impact resistance... There ARE thinner spots that might not take a direct hit from close range, but in general, BBs should bounce off and be fine with some scuffs or dents at close range (there ARE still several gaps in the suit under which a thin compression suit is typically worn, so that might still hurt). The BBs aren't going to be your problem, it's going to be the terrain you're interacting with and your mobility/vision. EVA foam could be a good alternative for comfort, but wouldn't look as good. That's been done before with interesting results... So idk, there are some thoughts on that and I guess an endorsement for Dave, but yea... I would never invest the money to do this, but would love to see you do it if you're dead set! Post pics/video hahaha -
Still trying to find a retailer that sells Loakes here in Pgh on in the U.S.A. I came across these Chelsea Boots online at Sax Fifth Ave. -------- A bit pricy, if they are comfortable might be a shot. I have TKBoots and they fit loose. Besides the price how are these? Andy
-
Discount supermarket " Aldi " have chelsea boots in at the moment , at £ 14.99. (as of 11/11/2011) Theyre in black or brown , all adult sizes. They are a little broad in the toe area to be good Starwars replicas , but theyre cheap and available and better than the ones you cant buy Usually Aldi only keep a product on their shelves untill stock rums out , a couple of weeks at the most , so if you want a pair , be quick. Lets face it , at £14.99 theyre cheap enough just to practice painting white . -------
-
 HI, Was rereading a thread where one of the members claimed to have found out the brand of the boots that was used, but he never wanted to tell ( as far as i understand ) the brand of the boots. did anyone found out? many people said they were on to something but the thread just died and no one really got an answer... not from what i understood anyways. whats funny is that my father used to wear something that looked similar to those chelsea boots but with a zipper on the side rather than elastics ( probably a real common thing ) ...i thought they were not really comfortable when i tried them when he had them...he had those for the longest time too... peace....
 -
 Name: Chris Tosh 501st ID: TK - 43118 FISD forum name: Shinyarmour1 Garrison: Knightfall Garrison Armor: AP Helmet: AP Blaster: Premier Props (Etsy) Boots: Chelsea (hand painted) Canvas Belt: AP Holster: AP Hand Plates: AP Neck Seal: Handmade
 -
TK - new hope Chelsea boots PU Leather ?
gmrhodes13 replied to Tedi67's topic in Boots, Soft Parts, and other Accessories
Jedi Robe boots are not 501st acceptable, even their FOTK. Imperial Boots do a nice pair of OT boots https://www.imperialboots.com/product/421/ For other boots use the search function and type CHELSEA, there will be a lot of threads https://www.whitearmor.net/forum/search/?q=chelsea&quick=1 -
Any idea, tuturial? What i should use? Which paint? Need i to sand down the shoes first? Look i many other forum found nothing Thanks for all your help. Edit: sorry for spam, found a topic after search again. ----------
-
TKC Request for CRL Updates Thread crl here I have recently been contacted by a recruit who has supplied some images which differ with some in the CRL. With my OCD I decided to do some of my own research into the costume and I too have picked up a few oddities, some of these may want to be added as options. The recruit is disputing the cover strip method and has supplied one of the reference images of the arm, in it you can see the bicep which appears to be butt joined with a cover strip and there is also a gap underneath. Overlap is required for L3 which is what he is disputing and asks the CRL be changed to allow either as there isn't enough proof. Also in this image it looks as if it has cover strips stops above the bottom ridge with no line going through the ridge like a overlap would. Very few images can be seen of the overlap method, one was posted in an earlier CRL thread by Mike "SolidsSkrafty" but in that photo the overlap goes outwards on the thighs and inwards on the calves, which is a little odd. I did find the following image and after Tony "ukswrath" had enlarged it you can see there is an overlap So due to proof of both styles (overlay or cover strip) should they both be allowable and if so for all levels? Another thing the recruit pointed out was the position of the knee ammo belt, it can be clearly seen in a higher position than on OTTK's and does not appear to have the curve on the bottom of it nor does it appear to have a rivet in the corners. *ADDED this was brought up previously in this thread A member already did the mod to be more screen accurate back in 2011 I will also add a few things Randy "magni" has brought up earlier as well as going over some of my findings. Rivets on the sides of the Ab section which is not mentioned in the CRL. ESB hand plates used on some screen grabs. (mods not included) ESB style holster on the left side, with loops over belt *Note third image is a sideshow fig. Only 4 buttons on smaller ab plate on some not 5. (mods not included) Grey on front of drop boxes on some. (mods not included) Rivet on ends of belt, no cover squares on some. Also no cut off angle on corners of belt. . (mods not included) Shoulder straps not fixed at backplate on all versions Unlike ROTJ the kidney does not have rounded top corners There are also a few difference in the some of the blue lines but I think that would be a little hard to show every variance of those. So the question is should some of these other inconsistencies be added as options? I will number the points so it's easier to track comments. 1 Either overlap or butt join and cover strip method can be used 2 Either overlap or butt join and cover strip method can be used for all levels 3 Knee ammo belt should be positioned higher on the knee than OTTK with no rivets in top corners. 4 There are two rivets on the sides of ab section matching the back plate rivets 5 Either 4 or 5 buttons on smaller ab plate 6 Either white or grey belt box fronts 7 Either rivets or cover squares can be used on ends of belts (depending on whether the belt is straight or corners cut at angle) 8 Straight or angled cut corners can be used on end of belt (depending on the use of rivets or cover squares). 9 ANH or ESB hand plates can be used 10 Holster can be worn, it should be ESB style with loops over the belt and it is placed on the left of the wearer *ADDED 11 5 button smaller ab plate is longer and first button is higher than the larger ab plate 12 Stripe on the helmet is stepped to the side once it goes over the brow trim and is angled. Blue paint on brow trim. The blue stripe also goes halfway through two of the grey teeth. *ADDED 13 shoulder straps not fixed at backplate 14 unlike ROTJ the kidney does not have rounded top corners 15 not all have curved corners on butt plate Please discuss and also include anything that may have been missed. Screen grabs are preferred over images of figures, packaging or general artwork To sum up: 1 Either overlap or butt join and cover strip method can be used - References for both methods provided 2 Either overlap or butt join and cover strip method can be used for all levels - References for both methods provided 3 Knee ammo belt should be positioned higher on the knee than OTTK with no rivets in top corners. - References provided 4 There are two rivets on the sides of ab section matching the back plate rivets - References provided 5 (mod reference) 6 (mod reference) 7 (mod reference) provided 8 (mod reference) 9 (mod reference) 10 Holster can be worn, it should be ESB style with loops over the belt and it is placed on the left of the wearer- References provided 11 5 button smaller ab plate is longer and first button is higher than the larger ab plate - References provided 12 Stripe on the helmet is stepped to the side once it goes over the brow trim and is angled. Blue paint on brow trim. The blue stripe also goes halfway through two of the grey teeth. - References provided 13 shoulder straps not fixed on all versions at backplate - References provided 14 unlike ROTJ the kidney does not have rounded top corners - References provided 15 not all have curved corners on butt plate - References provided Suggested changes are in green. Alternative changes are in purple Helmet Traps (trapezoids on dome of helmet) and tears (area beneath the corners of eye lenses) are grey. Rear traps and tears have vertical black lines. Lenses are flat material, green in color, sufficiently dark enough to obscure the costumer's eyes. The “ear” bars have three or four bumps and are grey or painted grey, with a black outline. Painting the bumps with rank stripes (highlighted) in black is optional. Ears shall have a black horizontal anchor-like detail on each side of the ear bar. Frown is painted grey and does not leave the teeth area. Eight total teeth on the frown are cut out. Tube stripes are medium blue, numbering between 9 and 16 per side with the curve bends extending backwards. Vocoder (vertically ribbed chin detail) is painted black. Aerators/Hovi mix tips (cylinders on either side of the vocoder) are black or painted black. Tears, traps, and tube stripes may be hand painted, decals, or decals that replicate hand painted. Blue stripe detail shall be present on the right side of the helmet, starting from the back of the helmet, and continued on to the bottom of the face (stripe tapers to a point as it goes down the face). Mesh may be used behind the frown to obscure the face of the wearer. Note: The helmet is accurate in detail and proportion to official references. Many commercially available helmets or those considered disproportionate in size or shape are ineligible. OPTIONAL Level two certification (if applicable): Ears shall have three screws per side, one above and one below the ear bar and one at the base of the helmet. Ear bars have four bumps only. Not three. Traps/tears and tube stripes shall have the correct ANH TK details Correct 'Hovi mic' aerator tips. Helmet and details/paint is lightly scuffed (battle worn), but not weathered like a Sandtrooper (TD). OPTIONAL Level three certification (if applicable): Ear bars shall have only one or two bumps painted in black (rank stripes). Neck trim shall be of an s-type profile rather than a u-type profile. Tears/traps shall be hand painted or use decals that emulate hand painted (with correct ANH TK details). Blue stripe continues over brow trim Ear screws shall be slotted, flat topped, countersunk and painted white. Shoulder Straps These shall be securely mounted in front and may free float in back. They may be affixed with rivets, Velcro, or adhesive. REMOVE OPTIONAL Level two certification (if applicable): No visible rivets are allowed. Shoulder straps shall not have a flat end at the ends of them. They shall be ribbed 100%. Shoulder straps are lightly scuffed (battle worn), but not weathered like a Sandtrooper (TD). OPTIONAL Level three certification (if applicable): These shall be affixed in the front (no snaps, rivets or brads shall be visible). These shall be affixed in the back (no snaps, rivets or brads shall be visible). REMOVE Upper Arm Armor Biceps are fully closed. Two blue vertical stripes shall be present on both biceps (one to the front and one on the side). OPTIONAL Level two certification (if applicable): No shoulder bell straps across the biceps. Biceps/blue Commander details are lightly scuffed (battle worn), but not weathered like a Sandtrooper (TD). Forearm Armor Forearms are fully closed. Two blue vertical stripes shall be present on both Forearms (one to the front and one on the side). OPTIONAL Level two certification (if applicable): Forearms/blue Commander details are lightly scuffed (battle worn), but not weathered like a Sandtrooper (TD). OPTIONAL Level three certification (if applicable): No return edge on the inside of the front of the forearm is allowed. Forearms use the overlap construction method. Using the butt joint and cover strips is not accurate. REMOVE Hand Plates ANH Hand plates are mounted securely of the back of the glove, As an alternative to plastic, these may be made out of latex or latex-like material. OPTIONAL Level two certification (if applicable): Hand plates are lightly scuffed (battle worn), but not weathered like a Sandtrooper (TD). OPTIONAL Level three certification (if applicable): Hand guards shall be latex or latex-like, painted white, and permanently affixed to rubber gloves. Back Armor Back plate contains a "O II" design. A blue detail shall be present in the form of a Y-Shape. The blue Y-Shaped detail will have slanted white stripes, one on each side of the flared upper parts of the Y-shape. A white flexible U shaped gasket or molded lip shall be present around all edges. OPTIONAL Level two certification (if applicable): The Back plate/blue Commander details are lightly scuffed (battle worn), but not weathered like a Sandtrooper (TD). OPTIONAL Level three certification (if applicable): Back plate shall have no, or minimal overlap of the kidney plate. AM back plate is replaced with a more screen accurate version. Abdomen Armor Ab plate buttons shall be all black. Ab plate button detail shall be inverted compared to ANH/ESB. A blue stripe shall be present on the ab section and stops underneath the belt area. The blue stripe is wide at the bottom and narrows toward the top, to match up to the blue Y-Shaped detail of the chest plate. A white flexible U shaped gasket or molded lip shall be present around all edges. OPTIONAL Level two certification (if applicable): Ab plate/blue Commander details are lightly scuffed (battle worn), but not weathered like a Sandtrooper (TD). OPTIONAL Level three certification (if applicable): There shall be no split rivet or brad visible on the crotch tab of the ab plate. Left vertical row of ab plate buttons contain five buttons (fifth button must align one button higher than the top button of the larger button plate) . All buttons are the same size and color and are visible (not covered by the belt). The fifth button is mounted vertically above the standard four buttons. There are 2 rivets on either side of the ab, approximately 5/16"(8mm) diameter, these are lined up with the ones on the kidney, the top rivet is roughly 25mm from the top edge and the bottom is 25mm above the top of the belt and 20mm from the side seam, painted white. OR There shall be no split rivet or brad visible on the crotch tab of the ab plate. REMOVE Left vertical row of ab plate buttons contain five buttons (fifth button must align one button higher than the top button of the larger button plate) . All buttons are the same size and color and are visible (not covered by the belt). The fifth button is mounted vertically above the standard four buttons. There can be either 2 or 3 rivets on either side of the ab, approximately 5/16"(8mm) diameter, these are lined up with the ones on the kidney, the top rivet is roughly 15-25mm from the top edge and the bottom is 15-25mm above the top of the belt and 10-20mm from the side seam, painted white. Kidney & Posterior Armor A separate kidney/butt plate is not allowed - the kidney and butt plate shall be combined/fused to a single plate/one piece. A white flexible U shaped gasket or molded lip shall be present around all edges. The crotch tab of the butt plate area may or may not have visible snaps. OPTIONAL Level two certification (if applicable): The edges of the hip area are rounded/curved (not like the straight lines found on the ANH/ESB posterior armor). Kidney/Posterior Armor is lightly scuffed (battle worn), but not weathered like a Sandtrooper (TD). OPTIONAL Level three certification (if applicable): Two rivets shall be present on each side of the kidney plate, approximately 4mm from the inside edge of the U shaped gasket or molded lip that is adjacent to the ab plate. REMOVE There are 2 rivets on either side of the kidney, these are lined up with the ones on the ab, the top rivet is roughly 25mmfrom the top edge and the bottom is 25mm above the top of the belt and 20mm from the side seam, painted white. Kidney can be either ANH (straight corners) or ROTJ (rounded corners) Posterior can be either ANH (straight corners) or ROTJ (rounded corners) There shall be no visible snaps, rivets or brads on the crotch tab of the butt plate tab. OR Two rivets shall be present on each side of the kidney plate, approximately 4mm from the inside edge of the U shaped gasket or molded lip that is adjacent to the ab plate. REMOVE There can be either 2 or 3 rivets on either side of the ab, these are lined up with the ones on the kidney, the top rivet is roughly 15-25mm from the top edge and the bottom is 15-25mm above the top of the belt and 10-20mm from the side seam, painted white. Kidney can be either ANH (straight corners) or ROTJ (rounded corners) Posterior can be either ANH (straight corners) or ROTJ (rounded corners) There shall be no visible snaps, rivets or brads on the crotch tab of the butt plate tab. Belt Belt face is made of plastic (TK ammo belt). The soft belt proper is tightly woven nylon/cordura like/style material or material with a tightly woven nylon/cordura like/style covering. Size is 2.25" (57mm) to 2.5" (64mm) wide. The color is white to off-white. The drop boxes are either grey or white and dangle from the sides of the plastic front belt (ammo belt) via white straps and are aligned with the end of the ammo belt. OR Belt face is made of plastic (TK ammo belt). The soft belt proper is tightly woven nylon/cordura like/style material or material with a tightly woven nylon/cordura like/style covering. Size is 2.25" (57mm) to 2.5" (64mm) wide. The color is white to off-white. The drop boxes are either grey or white and dangle from the sides of the plastic front belt (ammo belt) via white straps and are aligned with the end of the ammo belt. Belt can be longer than standard ANH/ROTJ with square buttons positioned close to the end of the belt OPTIONAL Level two certification (if applicable): The belt material is lightly aged (battle worn), but not weathered like a Sandtrooper (TD). Leather and vinyl are not accurate. There are two square buttons, one on each end of the plastic ammo belt. The center square button is not accurate. Belt face(TK ammo belt)and drop boxes are lightly scuffed (battle worn), but not weathered like a Sandtrooper (TD). OPTIONAL Level three certification (if applicable): The corners of the plastic ammo belt shall be trimmed at a 45 degree angle. Drop boxes are closed in the back. The belt proper shall have (eight total) white rivets. Two rivets close to each side of the thermal detonator, and two rivets approximately an inch away from the edge of the ammo belt (The rivets form a rectangular pattern) and are painted white. Thermal Detonator ROTJ Or Game (A.K.A. O2 canister) attaches to the center back of the belt. Detonator consists of an all grey cylinder, without silver stickers or silver paint. The cylinder is between 2” (50mm) and 2.68"(68mm) in diameter with white end caps on each end. The white control panel pad faces upwards, with the controls/round washer style detail closest to the right end cap. The total length is approximately 7.50" (190.5mm). The thermal detonator is attached via metal or metallic-appearing clips, approximately 1" (25mm) wide. OPTIONAL Level two certification (if applicable): The thermal detonator is lightly scuffed (battle worn), but not weathered like a Sandtrooper (TD). Thermal detonator belt clips are positioned with little to no gap between the clips and the end caps. OPTIONAL Level three certification (if applicable): The thermal detonator control panel has correct ROTJ details, or the "game style" version. The ANH/ESB style is not allowed. Thigh Armor Thigh armor shall be closed in the back. The ammo belt shall be installed on the bottom of the right thigh, The outside half of the right thigh shall be blue with two white semi-horizontal stripes near the top. OPTIONAL Level two certification (if applicable): Thighs/blue Commander details are lightly scuffed (battle worn), but not weathered like a Sandtrooper (TD). OPTIONAL Level three certification (if applicable): The thigh ammo belt shall be connected by brads/split rivets only - standard rivets are not acceptable. REMOVE The bottom corners of the thigh ammo belt shall be rounded off. REMOVE Thighs use the overlap construction method. Using the butt joint and cover strips is not accurate. REMOVE The thigh ammo belt shall be positioned on top of the lower ridge as seen in official references. The thigh ammo belt is NOT rounded off like ANH. The thigh ammo is glued and has NO rivets. OR The thigh ammo belt shall be connected by brads/split rivets only - standard rivets are not acceptable. REMOVE The bottom corners of the thigh ammo belt shall be rounded off. REMOVE Thighs use the overlap construction method. Using the butt joint and cover strips is not accurate. REMOVE The thigh ammo belt can be positioned on top of the lower ridge as seen in official references or attached to the thigh with a solid head rivet, painted white, in the upper corner and fastened to the lower thigh ridge.. The thigh ammo belt can either be straight or rounded off like ANH. Lower Leg Armor Greaves close in the back. The trapezoid knee plate (sniper knee plate) is affixed to the left greave and may have two visible brads or rivets securing it to the greave. The AM greaves (shins) shall be on the proper legs, with a new cover strip. The cover strip edge shall be facing the inside of the leg. Note: There is a manufacturer defect with the AM greaves (shins) that may cause you to wear the them improperly. Please see the Tutorial titled :"AM armor shins: the proper way to assemble and wear", on the whitearmor.net Only the outside half of the right greave shall be blue. OPTIONAL Level two certification (if applicable): Greaves/blue Commander details are lightly scuffed (battle worn), but not weathered like a Sandtrooper (TD). OPTIONAL Level three certification (if applicable): Lower Legs use the overlap construction method. Using the butt joint and cover strips is not accurate. REMOVE Boots Boots are above ankle height and made of white leather or leather-like material. Small U-shaped elastic sections on both sides of the ankle. Flat sole with a short heel. No buckles or laces. Jodhpur/ Chelsea-type boots or an equivalent style is acceptable. Elvis or Mariachi boots are not allowed. Both boots shall have two blue stripes painted, curving across the top of the foot. OPTIONAL Level two certification (if applicable): There is no seam present on the front of the boot. Boots are lightly scuffed. OPTIONAL Level three certification (if applicable): The two stripes curving over the boots are accurate in proportion to official references. OPTIONAL: Holster Holster is made of black leather or leather-like material Holster is worn on the left of the belt Holster is affixed via two black loops over the belt (no fasteners). OR Holster is made of black leather or leather-like material Holster is worn on the left of the belt Holster can either be affixed by two black loops over the belt or attached via straps behind the belt using fasteners already present