

Scootch
-
Posts
517 -
Joined
-
Last visited
Content Type
Profiles
Forums
Gallery
Articles
Everything posted by Scootch
-

Ouch, this had to hurt...
Scootch replied to bluehickey's topic in Build Threads Requireing Maintenance
Eeeeeeewwwwwwwwwwwww!!!! -
Thermal Detonator appearance
Scootch replied to Dutchtrooper's topic in Assembly, Mods, and Painting
Interesting thread and nice work by all. I'd like to clarify a couple things for anyone interested. First up YES a person with the desired diameter pipe (Tubing) a bench vise, and ball peen hammer can manipulate the aluminum straps in the desired configuration. Just takes holding your mouth right. In my quest for "The Perfect Thermal Detonator" I have made these discoveries........ To get a 6.8cm or 68mm pipe diameter use 2" schedule 40 PVC couplings. Their outer diameter is 68mm The TE ROTJ Thermal Detonator is this size. TE utilized a six pole terminal block with two 3/4" fender washers held in place with a visible screw. The 2" pipe Thermal Detonators work best for Sandtrooper field pack mortar tubes. If you look closely you will notice many of these resemble the Mike Harrison and Crashmann design. This utilizes a six pole terminal block and a stack of two to three fender washers with a visible screw holding them in place. Recently I made my own Thermal Detonator assembly and have only to make a few slight adjustments before I am 100% satisfied with it. The pipe's outside diameter being 7.3CM or 73mm. or 2-7/8". I came up with this while looking at screen grabs and thinking about what I had heard in the past regarding canvas belts being 3" width. I solved my problem by utilizing 2-1/2" schedule 40 PVC and making new forming bucks from this material. I too utilized the six pole terminal block and a stack of 3/8" washers which seem to have the best outer diameter but may require drilling out to 1/2" inner diameter for the best effect. Although I used too narrow a piece of aluminum for my straps, compare the cannister itself to the screen captures: Screen trooper: [Imgur](https://i.imgur.com/eSzoFwC.jpg) Scootch: Screen Dudes: Apologies if this seems like a rude butt in and/or off topic. Just wanted to clarify things a bit, get the basic info out, and hope it helps someone.... -
TIE pilot helmet repair help.
Scootch replied to NewTrooper2's topic in Hard Armor (General Discussion)
Find out what material it actually is, locate an apropriate epoxy or glue, and reinforce from inside with like material. Once you pull it back into shape and make the structural repair you may come back and rework it cosmeticaly. I can tell you E-6000 can react with certain poly products and actually melt them. Whatever material you try out, it's best to do a test on something you can spare to lose if it fails. -
It's not THAT bad, you could just clean it up and keep going. these slight bloopers look bad when it's all you're focusing on but when the whole suit of armor is being worn they are minute.
-
Joker Squad Visual References
Scootch replied to Daetrin's topic in Legacy Stormtrooper (Joker Squad)
Hubba Hubba! That's a cool looking armor. -
New Battle Spec armour from SDS
Scootch replied to Squigs's topic in Hard Armor (General Discussion)
He does look seasick -
Awesome!
-
Yeah!!!!!! Very convincing bro, makes me want to move along............................
-
My RSprops HDPE helmet build
Scootch replied to vecspeed12's topic in Build Threads Requireing Maintenance
Very Nice!!! -
Looks very good! You have a nice armor.
-
Need ideas for mounting the lenses in your lid.......
Scootch replied to Solcar23's topic in Hard Armor (General Discussion)
Yep, I use the strip to ear screw method reinforced by my padding. A cool way to do it also is with velcro. they stay but you can pull em to clean em. The strip which is common to movie guy lore..... My ESB Troopin lid.... Bring the pix peeps!!! -
I cut an ab cod and was bummed afterward.
-
Best to get it assembled before final tweaking. You could wind up taking too much and many of the pro's like to leave a bit of what they call the "mold line" before final tweaking. They do this to achieve their favored "undercut". No rush in building a lid, and excellent question!
-
.......it just doesn't look right....boooooooooo!
Scootch replied to TK9477's topic in Hard Armor (General Discussion)
You look good! Everyone else is too short. -
Congrats on the wear n tear! Hope you are back up soon
-
LOL! freakin' mic tip recaster. So there's a Faucet aerator with the same shape as a microphone tip? cool.
-
Sweet!!!
-
If it were mine I'd leave the eyes alone. Maybe trim the coms down to the buck line and then I'd leave some gap in there too.... Oh and defo scuff it up some. Nice bucket
-
Sskunky The chromed stuff and idols look great. Verne's helmet looks METAL!!! You guys rock!!!
-
-
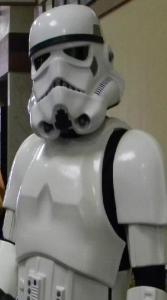
The ears are slightly different, one side has a larger rectangular area than the other.
-
Cool!
-
Thanks guys! Now to work on my blaster and holster combo.....
-
Built this for a troop at our local museum.
-