

Sonnenschein
-
Posts
3,946 -
Joined
-
Last visited
-
Days Won
2
Content Type
Profiles
Forums
Gallery
Articles
Everything posted by Sonnenschein
-
 except on the belt to close it
 -
I'd say use no velcro at all and use the new, SA strapping system
-
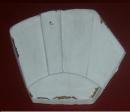
A sneak peek ...
Sonnenschein replied to Sonnenschein's topic in Build Threads Requireing Maintenance
Thanks, Pete. That is quite a compliment coming from you Glad you like them! Just wait for the updated version!' Okay guys, the next step: I'm making a PU resin mold. (I'll explain later why) 3 layers of parting wax, 1 layer of PVA. I know I doesn't look perfect, but it'll do the job Stay tuned! -
Doopydoo's Hasbro Kit - New Pieces!?
Sonnenschein replied to Jorran's topic in General Weapons Discussion
damn! That is putting out of business with my d-rings----------- j/k... Look like they visit our board from time to time. It is a cool update for more accuracy. Maybe they should sell these parts as an add-on. Karin -
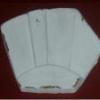
A sneak peek ...
Sonnenschein replied to Sonnenschein's topic in Build Threads Requireing Maintenance
Thanks, Paul! Actually, this is one of the features I wanted to implement this time. I think I found a way to do this in a open faced plaster mould! I think he could tell you.... but then he must shoot you j/k... (of course) In fact, Paul's knowledge is the result of dedicated reasearch for several years, analyzing every piece of information over and over again. BTW: The indented "knuckels" can be seen on the "promo hero trooper" -
A sneak peek ...
Sonnenschein replied to Sonnenschein's topic in Build Threads Requireing Maintenance
Okay, would this be about right? Any opininon before I proceed with the next step? thanks! -
Happy birthday! Hope you enjoy it Karin
-
I'm using Chrome and I only have "IP Board", "IP Board mobile" and FISD 2010.5
-
ANH Hero and Stunt considerations
Sonnenschein replied to BlackDOG's topic in Getting Started - Read this First!
okay... then maybe at some time in the future, when the hero and stunt EIB requirements get divided, we should change this aswell -
ANH Hero and Stunt considerations
Sonnenschein replied to BlackDOG's topic in Getting Started - Read this First!
yes, indeed And here's a regular trooper wearing the "rare" type 2 How about calling them "standard" and "alternative"? "1" and "2" is a little boring ----------- -
ANH Hero and Stunt considerations
Sonnenschein replied to BlackDOG's topic in Getting Started - Read this First!
That would be me. I used this term to make a differntiation between these 2 stiles, as there one was seen with this "hero" helmet. If we can find another terminology, I'm all for it ----------- -
ANH Hero and Stunt considerations
Sonnenschein replied to BlackDOG's topic in Getting Started - Read this First!
When ATA came out last year, I few troopers made ATA heroes, IIRC. I'll see if I can find the old threads. PS: Glad you like them PPS: Even some "stunt" troopers wore hero guards -
Don't forget to use washers
-
A sneak peek ...
Sonnenschein replied to Sonnenschein's topic in Build Threads Requireing Maintenance
Thanks Paul! After staring at the hand guards all afternoon, I almost came to the same solution... -
A sneak peek ...
Sonnenschein replied to Sonnenschein's topic in Build Threads Requireing Maintenance
Thanks, Pablo. Believe it or not, I really planned on doing that 'So, anyone has an idea how to "easily rectify this minor flaw"? ATM, I don't have a clue. My "building" experience is a little limited.... Karin -
A sneak peek ...
Sonnenschein replied to Sonnenschein's topic in Build Threads Requireing Maintenance
This part? I think now I get it... I always thought that it will be "angled" once it follows the curve of the hand.. -
A sneak peek ...
Sonnenschein replied to Sonnenschein's topic in Build Threads Requireing Maintenance
Paul, I think I can't follow you with my limited english... Could you please explain? Thanks for the contructive critisim! Karin -
A sneak peek ...
Sonnenschein replied to Sonnenschein's topic in Build Threads Requireing Maintenance
Thanks! Exactly THAT, and latex standards guards... The hero will be the samespecs as the non-latex, but I had to upscale them as the latex shrinks a little. Took me some math skills to do it - the upscaling percentage is NOT the same as the shrinking percentage. As for the standrad ones, This is now my 3rd version of it - within 1 year. Did some minor corrections. NOW I'm really happy with them. Karin -
What do you say?
-
thank you, everybody! Karin
-
Thanks!
-
Could anyone of you who has an real scope tell me how long it is? Thanks!
-
Nice armor! now, you'd need a set of latex hero hand guards
-
The left one is a hero helmet, thusn the smaller frown
-
TM's own personal 1 mm ANH weatherd Armour
Sonnenschein replied to SW1's topic in Build Threads Requireing Maintenance
Yeah, owning such a beautiful replica should be illegal