ukswrath
-
Posts
14,622 -
Joined
-
Last visited
-
Days Won
180
Content Type
Profiles
Forums
Gallery
Articles
Everything posted by ukswrath
-
Sha Sha's (Slow) KB/850/3D printed FOTK Build for Short Troopers
ukswrath replied to shashachu's topic in TFA Build Threads
Any updates Sha SHa? -
Wow private build thread section, special
-
RS armor — which parts fit together? And some genaeral questions ...
ukswrath replied to Ego Sum's topic in ANH Build Threads
Hey Elmar do you have a complete photos, always enjoyable to see those. Novos polish #2 is great for scratch & blemish removal -
Looking forward to your build Walter
-
Manbehindthemask's ANH stunt build thread (RS props)
ukswrath replied to Manbehindthemask's topic in ANH Build Threads
-
Ensi's ANH Stunt Build [ATA] With Centurion in mind!
ukswrath replied to Ensi's topic in ANH Build Threads
As for the measurement specs, we don't normally recommend more than an additional 3mm over canon however, uniformity is more important. If they fit I recommend leaving the arms canon sized and scale up just the legs, if you absolutely have to. -
Ensi's ANH Stunt Build [ATA] With Centurion in mind!
ukswrath replied to Ensi's topic in ANH Build Threads
Looking good Daniel -
FN1313's Jimmiroqaui FOTK Armor Build
ukswrath replied to FN1313's topic in Build Threads Requireing Maintenance
I just noticed where this thread is located, it should be over in the FOTK build section, do you mind if I move it? -
FN1313's Jimmiroqaui FOTK Armor Build
ukswrath replied to FN1313's topic in Build Threads Requireing Maintenance
Nice work Kyle -
Anzo's TFA FOTK/TLJ Executioner Builds (KB) aka the Terrible Twofer!
ukswrath replied to Anzo's topic in TFA Build Threads
FANTASTIC! -
Glad to be of assistance.
-
Looking nice Darrell, great job on the free hand paint work Note: remove ALL the return edge on the vertical ab button plate. Edit: 4 button plate to be exact
-
Rogue One Stormtrooper Back Pack part found
ukswrath replied to Sly11's topic in Build Threads Requireing Maintenance
Hey if anyone is interested I'm selling my R1 TK back pack parts over on the 501st. Just don't have time to build it. https://www.501st.com/forum/viewtopic.php?f=28&t=99794 -
1) Assuming you've already have the holes centered and drilled and the 45 degree tapered end cuts are made on the ammo belt, center it on the cloth belt then using a pencil mark the cloth belt through the center hole only. 2) Secure the ammo belt to the cloth belt (center hole only) using cap rivets or whatever you plan on using. 3) Once secured install your Ab and kidney plates, assembled or temporarily assembled but taped. 4) Install the partially assembled belt to the Ab/Kidney assembly. If you need to have someone secure the cloth ends in the back do it. Note: The belt doesn't have to be perfectly centered with the ab or excessively tight. 5) With the waist belt installed fold each end of the ammo belt until rests against the cloth belt. Center the ammo belt to the cloth belt using the 45 degree tapered cuts. 6) have someone mark the cloth belt through the ammo belt holes. Remove belt assembly. 7) Lay belt out on a flat surface. The holes marked on the cloth belt should be offset from the holes in the ammo belt, usually 1/8" or more. This is the difference between the two belt positions when connected to your armor.
-
Looking good. A note and suggestion, most people don't realize that the cloth and ammo belt are in a tug of war with each other when wrapped around the Ab plate. If you take two exact sized pieces of cloth and ammo belt material and place them next to one another then fold them end to end with the cloth belt being the inner section, though the cloth material will touch ends the outer ammo belt will not. This shifting force is what's being exerted on the rivets connecting the cloth and ammo belts as well as the snaps connecting the belt assembly to the Ab plate. Highly flexible cloth belts, those without a plastic center for example are generally pliable and allow flexibility in those stressed areas. Belts like the Kittle, though high quality they're also more rigid. I've found when assembling kittle belts that if you build in a curvature they tend to have less issues than without the curvature. This works really well when working with thicker/stiffer ammo belts also. Just a note
-
Very clean lines, nice work
-
Good choice, and hold off on the gluing. As easy as they to scratch (being a high point on the armor when lying down) the Ab button plates are the very last thing to install, IMHO. Also, make sure they are trimmed correctly before installing. Can't tell you how many applicants are asked to correct the size. Keep up the good work.
-
ANH AM 2.0 build... Finally
ukswrath replied to DBGrip's topic in Build Threads Requireing Maintenance
The top, bottom edge and center (between the top and bottom rivet) measurements are rough guesstimates because canon measurements were all over the place, the only area that is constant is the 10mm to side edge, hence it's the only measurement mentioned in the CRL. -
Well I'm 6' so were not that far off from each other. Drop the bells farther down if you have to.
-
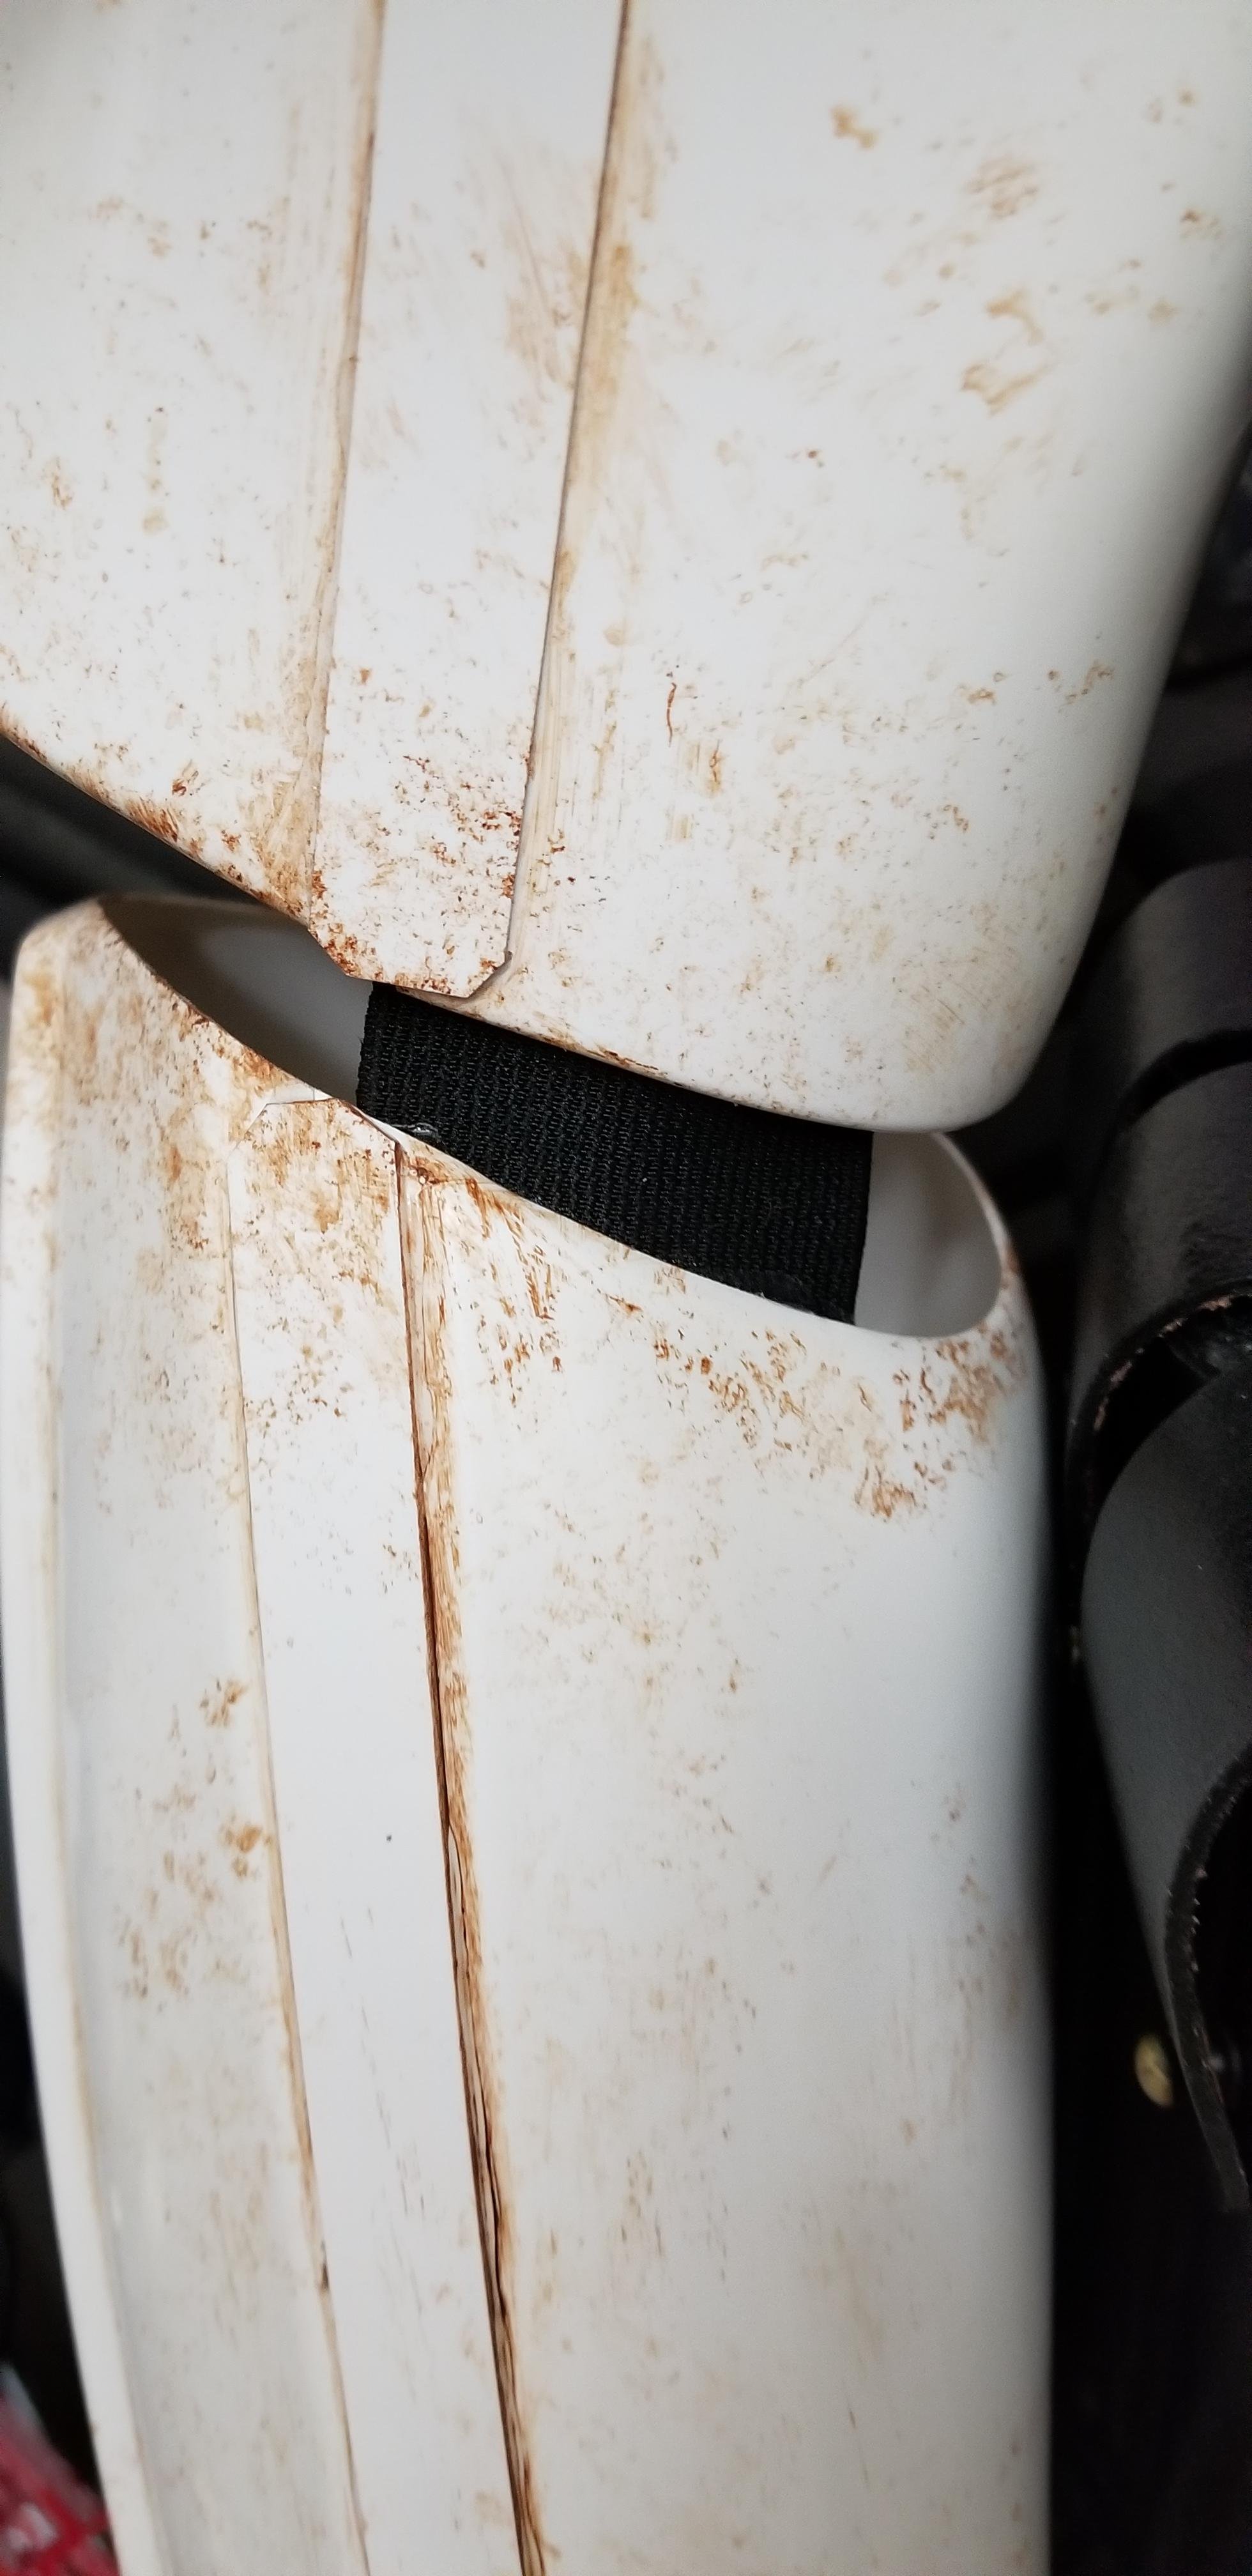
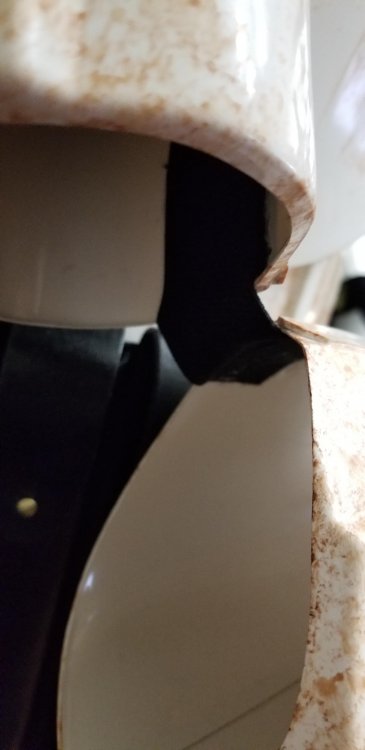
If you install the 2" elastic in the correct location and you have roughly 1/2" or smaller gap between the forearm and bicep you shouldn't have any bunching issues. Here's an Anovos kit I just finished, note the elastic.

-
THT, we're glad to be of service
-
Looking great Martijn, my only suggestion at this point would be to trim the length of the cover strip on the right shin, specifically the upper side. It should not extend past the edge of the armor but stop at the highest point. Also there should be no return edge on the bottom edge on both shins. Keep up the great work.
-
Great question. I just built WTF Sandtrooper for a customer I don't recall the ammo belt being excessively rigid.
-
This is actually a good point. You can assemble the belt in a way that give it a natural curve (without a hot water bath). The Anovos belt is highly flexible, probably more so that the cloth belt itself.
-
Yes E6000 works great and simple